本文主要是介绍Qt实现水平方向(横向)流式布局FlowLayout简单又实用!提供2种最有用的方法!,希望对大家解决编程问题提供一定的参考价值,需要的开发者们随着小编来一起学习吧!
在Qt中实现水平方向(横向)流式布局有两种方法:
方法一:使用QListView或者QListWidget基础控件,这两个控件是可以直接设置水平方向自动换行的流式布局的:

由于QListView是model/view结构,所以在支持流式布局的同时,还可以通过model实现搜索、过滤、排序、拖拽交互两个项等高级功能!数据量大时的增删改查都挺方便,缺点是用起来复杂一些,相对于QLayout消耗大一些。
方法二:使用布局管理器QLayout及其子类,Qt中常见的布局管理器有:
QHBoxLayout:水平布局(常用)
QVBoxLayout:垂直布局(常用)
QFormLayout:表单布局(很少用)
QStackedLayout:堆栈布局(罕见使用)
这些布局管理器都不能设置自动换行的流式布局(FlowLayout)。不过Qt 官方提供了一个流式布局管理器 FlowLayout 的例子,但并没有将其收录进基础模块中(要是收录了,应该叫QFlowLayout),而是以源码.h/.cpp的形式直接给出了可运行测试的Demo程序。该类继承自 QLayout,意味着它可以直接被QWidget及其子类通过setLayout(QLayout *layout)来将其设置为容器的布局管理器,这种流式布局优点是轻巧简单易用,支持根据索引访问和移除,但是不支持指定位置插入,只能在其末尾添加,顺序固定无法改变。
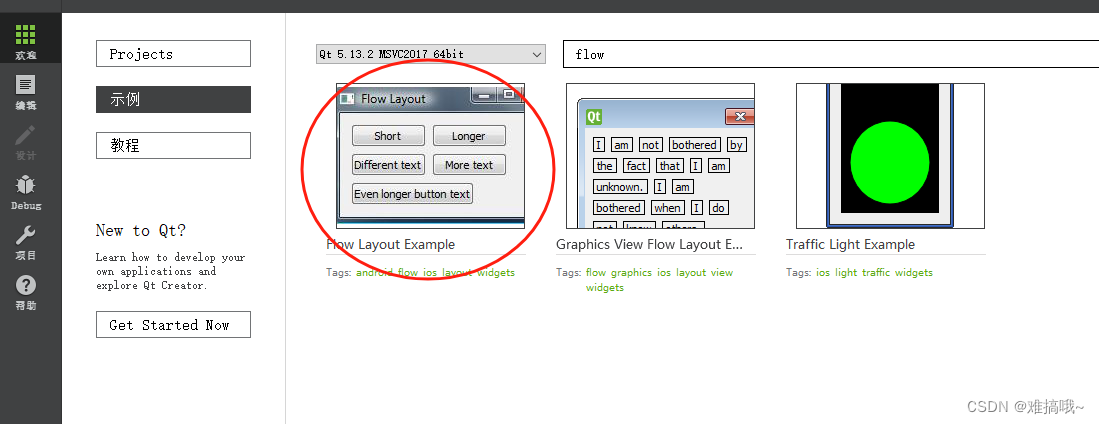
以下是Qt官方提供的例子源码,我在此基础上增加3个接口,使其更加实用!
flowlayout.h
#ifndef FLOWLAYOUT_H
#define FLOWLAYOUT_H#include <QLayout>
#include <QRect>
#include <QStyle>
//! [0]
class FlowLayout : public QLayout
{
public:explicit FlowLayout(QWidget *parent, int margin = -1, int hSpacing = -1, int vSpacing = -1);explicit FlowLayout(int margin = -1, int hSpacing = -1, int vSpacing = -1);~FlowLayout() override;void addItem(QLayoutItem *item) override;int horizontalSpacing() const;int verticalSpacing() const;Qt::Orientations expandingDirections() const override;bool hasHeightForWidth() const override;int heightForWidth(int) const override;int count() const override;QLayoutItem *itemAt(int index) const override;QSize minimumSize() const override;void setGeometry(const QRect &rect) override;QSize sizeHint() const override;QLayoutItem *takeAt(int index) override;// 重新调整水平/垂直方向的间距void setHorizontalSpacing(int hSpacing);void setVerticalSpacing(int vSpacing);// 立即刷新布局(重新设置水平/垂直方向的间距后,如果布局没有变化,可调用此接口显式刷新布局)void refreshLayout();private:int doLayout(const QRect &rect, bool testOnly) const;int smartSpacing(QStyle::PixelMetric pm) const;QList<QLayoutItem *> itemList;int m_hSpace;int m_vSpace;
};
//! [0]#endif // FLOWLAYOUT_H
flowlayout.cpp
#include <QtWidgets>#include "flowlayout.h"
//! [1]
FlowLayout::FlowLayout(QWidget *parent, int margin, int hSpacing, int vSpacing): QLayout(parent), m_hSpace(hSpacing), m_vSpace(vSpacing)
{setContentsMargins(margin, margin, margin, margin);
}FlowLayout::FlowLayout(int margin, int hSpacing, int vSpacing): m_hSpace(hSpacing), m_vSpace(vSpacing)
{setContentsMargins(margin, margin, margin, margin);
}
//! [1]//! [2]
FlowLayout::~FlowLayout()
{QLayoutItem *item;while ((item = takeAt(0)))delete item;
}
//! [2]//! [3]
void FlowLayout::addItem(QLayoutItem *item)
{itemList.append(item);
}
//! [3]//! [4]
int FlowLayout::horizontalSpacing() const
{if (m_hSpace >= 0) {return m_hSpace;} else {return smartSpacing(QStyle::PM_LayoutHorizontalSpacing);}
}int FlowLayout::verticalSpacing() const
{if (m_vSpace >= 0) {return m_vSpace;} else {return smartSpacing(QStyle::PM_LayoutVerticalSpacing);}
}
//! [4]//! [5]
int FlowLayout::count() const
{return itemList.size();
}QLayoutItem *FlowLayout::itemAt(int index) const
{return itemList.value(index);
}QLayoutItem *FlowLayout::takeAt(int index)
{if (index >= 0 && index < itemList.size())return itemList.takeAt(index);return nullptr;
}
//! [5]//! [6]
Qt::Orientations FlowLayout::expandingDirections() const
{return 0;
}
//! [6]//! [7]
bool FlowLayout::hasHeightForWidth() const
{return true;
}int FlowLayout::heightForWidth(int width) const
{int height = doLayout(QRect(0, 0, width, 0), true);return height;
}
//! [7]//! [8]
void FlowLayout::setGeometry(const QRect &rect)
{QLayout::setGeometry(rect);doLayout(rect, false);
}QSize FlowLayout::sizeHint() const
{return minimumSize();
}QSize FlowLayout::minimumSize() const
{QSize size;for (const QLayoutItem *item : qAsConst(itemList))size = size.expandedTo(item->minimumSize());const QMargins margins = contentsMargins();size += QSize(margins.left() + margins.right(), margins.top() + margins.bottom());return size;
}
//! [8]//! [9]
int FlowLayout::doLayout(const QRect &rect, bool testOnly) const
{int left, top, right, bottom;getContentsMargins(&left, &top, &right, &bottom);QRect effectiveRect = rect.adjusted(+left, +top, -right, -bottom);int x = effectiveRect.x();int y = effectiveRect.y();int lineHeight = 0;
//! [9]//! [10]for (QLayoutItem *item : qAsConst(itemList)) {const QWidget *wid = item->widget();int spaceX = horizontalSpacing();if (spaceX == -1)spaceX = wid->style()->layoutSpacing(QSizePolicy::PushButton, QSizePolicy::PushButton, Qt::Horizontal);int spaceY = verticalSpacing();if (spaceY == -1)spaceY = wid->style()->layoutSpacing(QSizePolicy::PushButton, QSizePolicy::PushButton, Qt::Vertical);
//! [10]
//! [11]int nextX = x + item->sizeHint().width() + spaceX;if (nextX - spaceX > effectiveRect.right() && lineHeight > 0) {x = effectiveRect.x();y = y + lineHeight + spaceY;nextX = x + item->sizeHint().width() + spaceX;lineHeight = 0;}if (!testOnly)item->setGeometry(QRect(QPoint(x, y), item->sizeHint()));x = nextX;lineHeight = qMax(lineHeight, item->sizeHint().height());}return y + lineHeight - rect.y() + bottom;
}
//! [11]
//! [12]
int FlowLayout::smartSpacing(QStyle::PixelMetric pm) const
{QObject *parent = this->parent();if (!parent) {return -1;} else if (parent->isWidgetType()) {QWidget *pw = static_cast<QWidget *>(parent);return pw->style()->pixelMetric(pm, nullptr, pw);} else {return static_cast<QLayout *>(parent)->spacing();}
}
//! [12]void FlowLayout::setHorizontalSpacing(int hSpacing)
{m_hSpace = hSpacing;
}void FlowLayout::setVerticalSpacing(int vSpacing)
{m_vSpace = vSpacing;
}void FlowLayout::refreshLayout()
{doLayout(this->geometry(), false);
}
说说我为何新增3个接口:
// 重新调整水平/垂直方向的间距void setHorizontalSpacing(int hSpacing);void setVerticalSpacing(int vSpacing);// 立即刷新布局(重新设置水平/垂直方向的间距后,如果布局没有变化,可调用此接口显式刷新布局)void refreshLayout();官方例子的源码中,水平和垂直方向的间距是在构造函数中设置的,一旦布局完成就无法修改了,如果我们在窗体resize后需要重新调整这些间距就没办法了,所以新增调整水平/垂直方向间距的单独接口。但是这两个接口调整间距后是无法立即生效的,需要手动刷新一下布局,让它按照最新的间距重新布局!
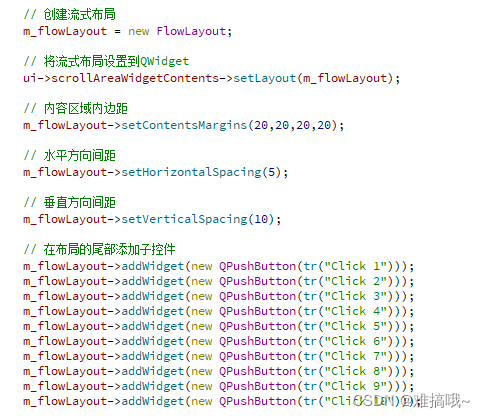
使用事例:
总结:
如果没有搜索过滤,实时排序等高能要求,相对固定的顺序,直接使用轻巧的FlowLayout;
如果需要支持实时的搜索、过滤、指定插入、实时排序、选中、拖拽交互两个项位置、数据量大且要索引访问等高级功能,建议使用QListView或者QListWidget;
这篇关于Qt实现水平方向(横向)流式布局FlowLayout简单又实用!提供2种最有用的方法!的文章就介绍到这儿,希望我们推荐的文章对编程师们有所帮助!


