本文主要是介绍Windows环境下编译 aom 源码详细过程,希望对大家解决编程问题提供一定的参考价值,需要的开发者们随着小编来一起学习吧!
AV1
AV1是一种开源的视频编码格式,由开放媒体联盟(AOMedia Video 1,简称AOMedia或AOM)开发。AV1旨在提供比现有的视频编码格式如H.264和H.265更好的压缩效率,同时保持或提高视频质量。AV1的编码效率显著高于H.264,且与H.265相近,但AV1的解码复杂度较低,这意味着在相同的硬件条件下,AV1可以提供更快的解码速度。
AV1的主要优势包括:
-
开放和免费:AV1是完全开源的,并且不需要支付专利费用,这使得它在商业和非商业应用中都非常有吸引力。
-
高压缩率:AV1提供了比H.264和H.265更高的压缩率,这意味着在相同的视频质量下,AV1的视频文件可以更小。
-
兼容性:AV1支持8K分辨率的视频,这使得它非常适合未来的视频应用,如超高清视频流和虚拟现实。
-
跨平台:AV1可以在各种设备上运行,包括智能手机、平板电脑、PC和游戏机。
-
实时编码:虽然AV1的编码过程比H.264和H.265更复杂,但随着硬件的发展,实时编码AV1视频已经成为可能。
AV1的劣势包括:
-
编码时间:由于AV1的编码过程较为复杂,因此编码时间通常比H.264和H.265更长。
-
解码要求:尽管AV1的解码复杂度低于H.265,但对于一些旧的或性能较低的设备来说,解码AV1视频可能仍然具有挑战性。
-
市场接受度:尽管AV1具有许多优势,但它仍然是一个相对较新的技术,需要时间来获得广泛的市场接受度
aom
AOMedia Video 1视频组开发符合AV1标准的参考源码。
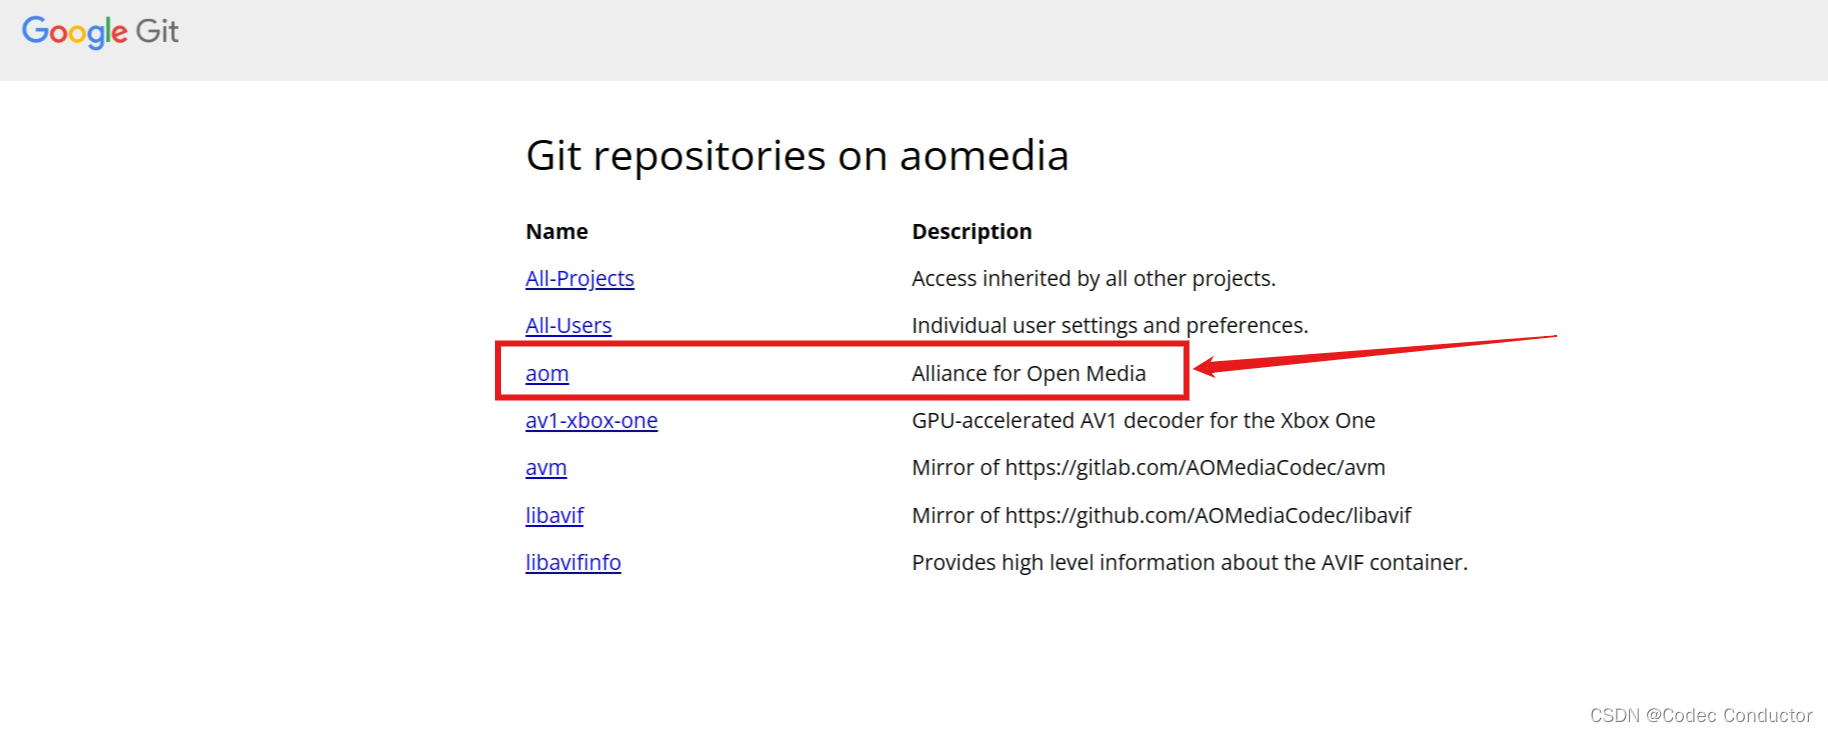
- aom官网:https://aomedia.googlesource.com/?format=HTML
Windows环境编译aom源码详细过程
- 源码下载:
git clone https://aomedia.googlesource.com/aom;源码文件目录如下:
D:\_codec\aom [main ≡]> ls目录: D:\_codec\aomMode                 LastWriteTime         Length Name
----                 -------------         ------ ----
d-----         2024/5/11     23:03                aom
d-----         2024/5/11     23:03                aom_dsp
d-----         2024/5/11     23:03                aom_mem
d-----         2024/5/11     23:03                aom_ports
d-----         2024/5/11     23:03                aom_scale
d-----         2024/5/11     23:03                aom_util
d-----         2024/5/11     23:03                apps
d-----         2024/5/11     23:03                av1
d-----         2024/5/11     23:03                build
d-----         2024/5/11     23:03                common
d-----         2024/5/11     23:03                doc
d-----         2024/5/11     23:03                examples
d-----         2024/5/11     23:03                stats
d-----         2024/5/11     23:03                test
d-----         2024/5/11     23:03                third_party
d-----         2024/5/11     23:03                tools
-a----         2024/5/11     23:03            255 .clang-format
-a----         2024/5/11     23:03           3204 .cmake-format.py
-a----         2024/5/11     23:03            466 .gitattributes
-a----         2024/5/11     23:03             70 .gitignore
-a----         2024/5/11     23:03           5891 .mailmap
-a----         2024/5/11     23:03           7052 aomedia_logo_200.png
-a----         2024/5/11     23:03          12411 AUTHORS
-a----         2024/5/11     23:03          42892 CHANGELOG
-a----         2024/5/11     23:03          43052 CMakeLists.txt
-a----         2024/5/11     23:03            173 codereview.settings
-a----         2024/5/11     23:03          15260 docs.cmake
-a----         2024/5/11     23:03           2183 keywords.dox
-a----         2024/5/11     23:03         107932 libs.doxy_template
-a----         2024/5/11     23:03           1343 LICENSE
-a----         2024/5/11     23:03           1719 mainpage.dox
-a----         2024/5/11     23:03           5809 PATENTS
-a----         2024/5/11     23:03          25188 README.md
-a----         2024/5/11     23:03           2466 Sample.cfg
-a----         2024/5/11     23:03           5327 usage.dox
-a----         2024/5/11     23:03            232 usage_cx.dox
-a---- 2024/5/11 23:03 977 usage_dx.dox- 根据README.md提示下载依赖工具
### Prerequisites {#prerequisites}1. [CMake](https://cmake.org). See CMakeLists.txt for the minimum versionrequired.
2. [Git](https://git-scm.com/).
3. A modern C compiler. gcc 6+, clang 7+, Microsoft Visual Studio 2019+ orthe latest version of MinGW-w64 (clang64 or ucrt toolchains) arerecommended. A C++ compiler is necessary to build the unit tests and somefeatures contained in the examples.
4. [Perl](https://www.perl.org/).
5. For x86 targets, [yasm](http://yasm.tortall.net/) or a recent version (2.14or later) of [nasm](http://www.nasm.us/). (If both yasm and nasm arepresent, yasm will be used by default. Pass -DENABLE_NASM=ON to cmake toselect nasm.) If you download yasm with the intention to work with VisualStudio, please download win32.exe or win64.exe and rename it into yasm.exe.DO NOT download or use vsyasm.exe.
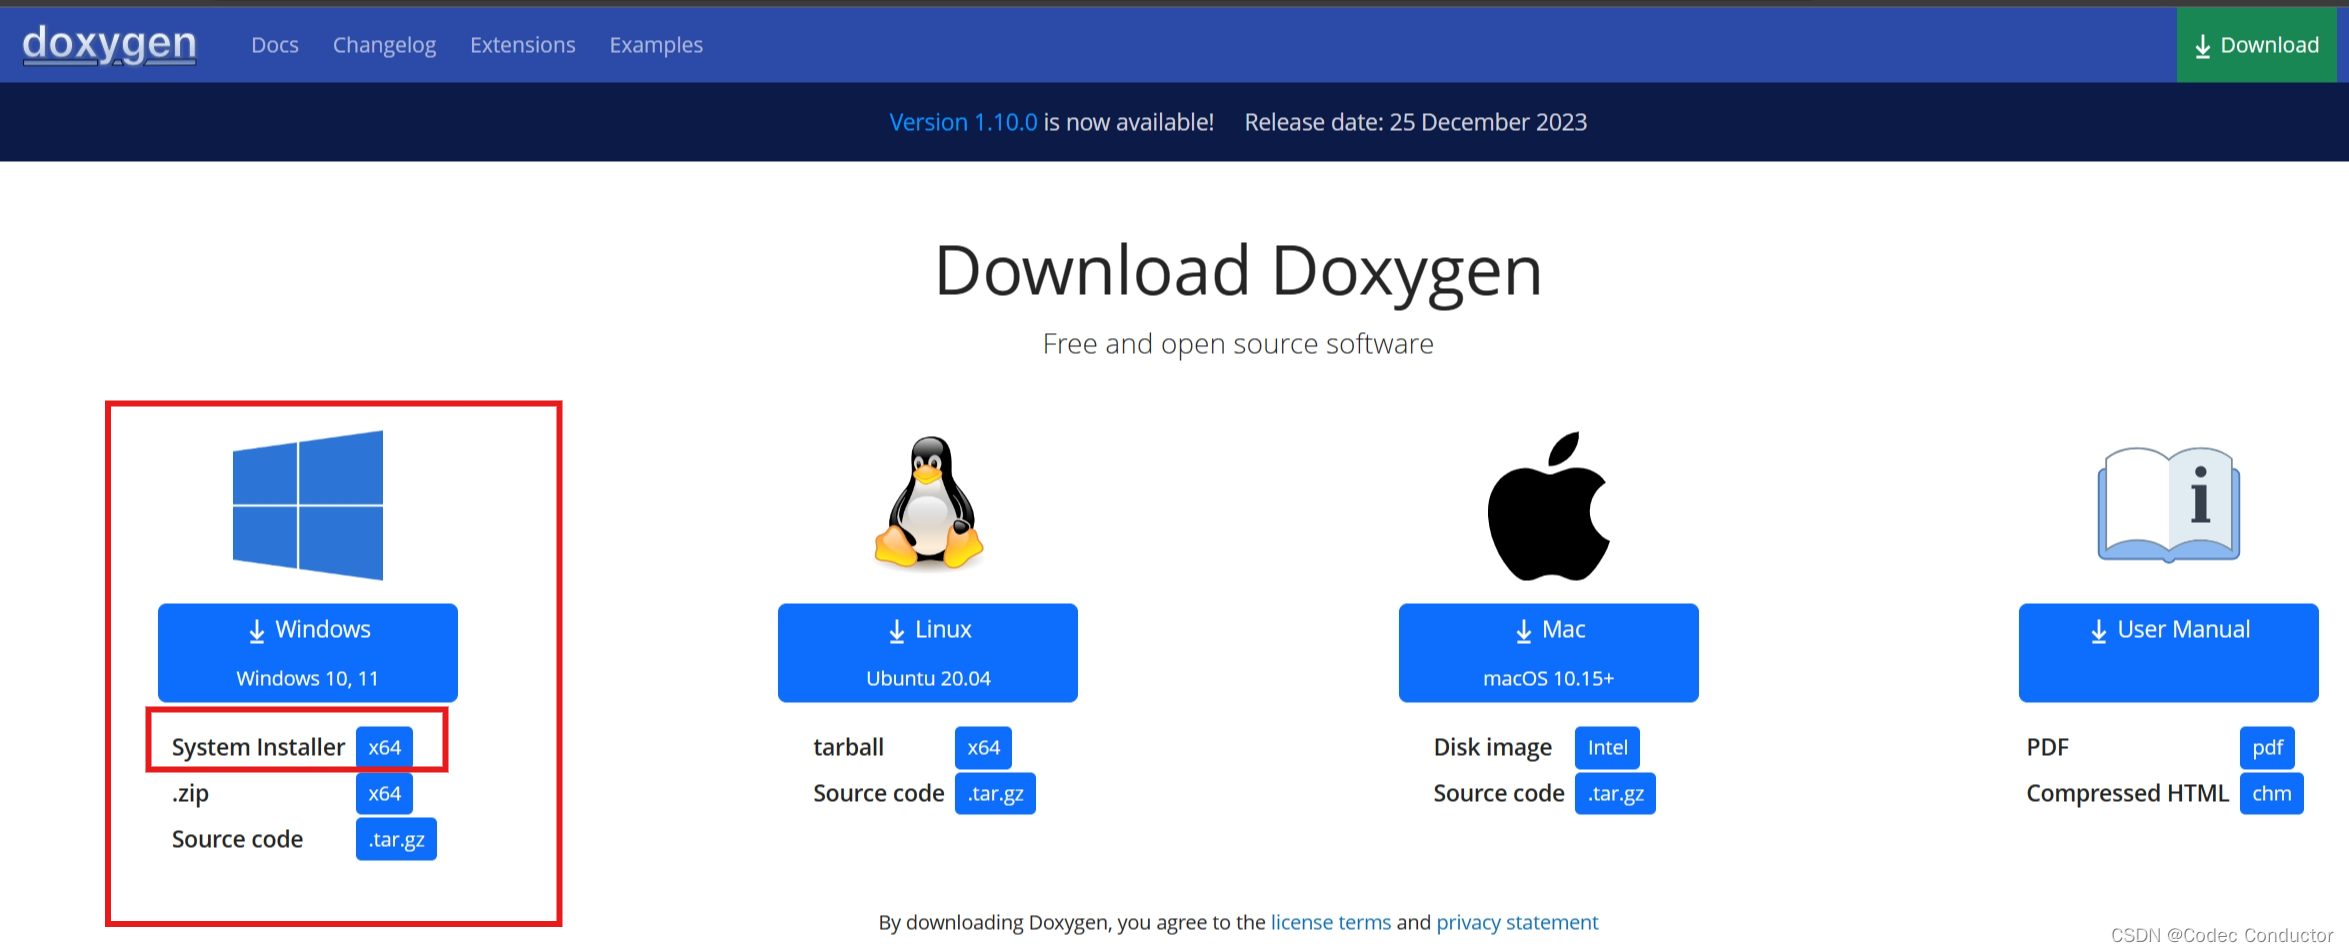
6. Building the documentation requires[doxygen version 1.8.10 or newer](http://doxygen.org).
7. Emscripten builds require the portable[EMSDK](https://kripken.github.io/emscripten-site/index.html).
- 下载CMake工具。
D:\_codec\emsdk [main ≡]> cmake
Usagecmake [options] <path-to-source>cmake [options] <path-to-existing-build>cmake [options] -S <path-to-source> -B <path-to-build>Specify a source directory to (re-)generate a build system for it in the
current working directory.  Specify an existing build directory to
re-generate its build system.Run 'cmake --help' for more information.
- 下载git:https://git-scm.com/
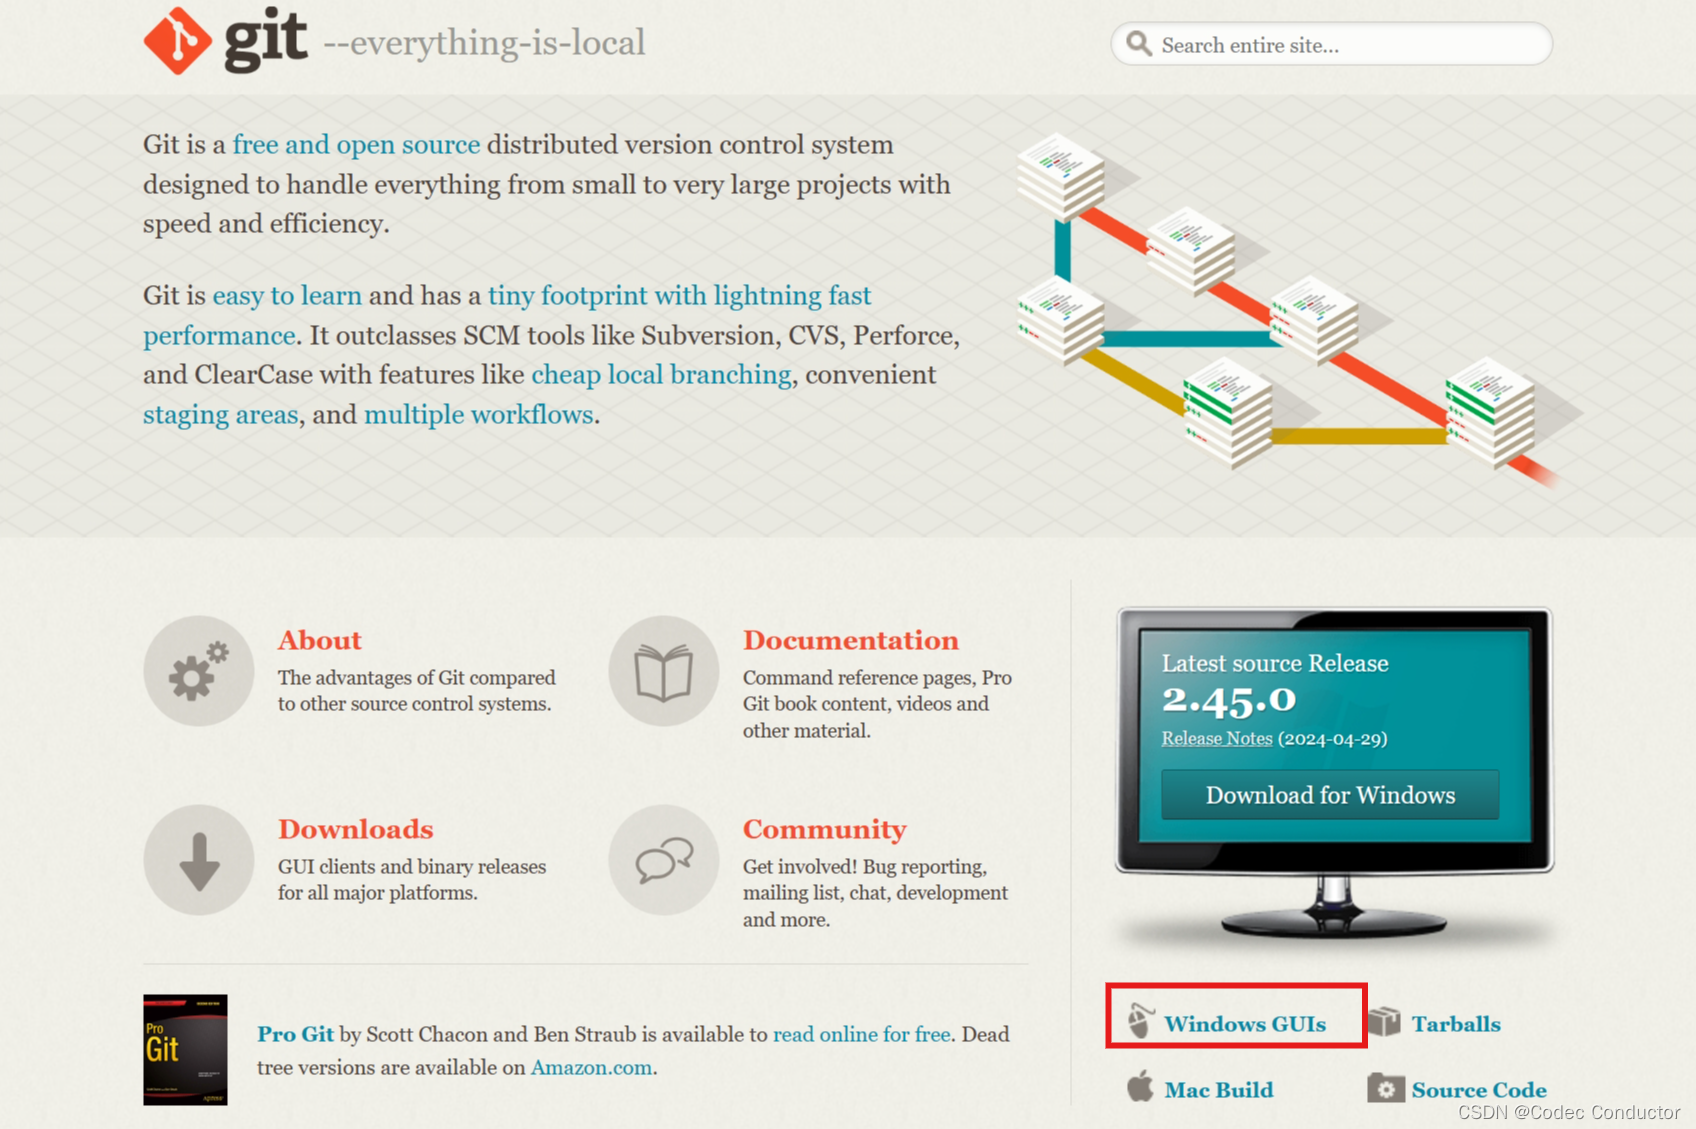
D:\_codec\emsdk [main ≡]> git
usage: git [-v | --version] [-h | --help] [-C <path>] [-c <name>=<value>][--exec-path[=<path>]] [--html-path] [--man-path] [--info-path][-p | --paginate | -P | --no-pager] [--no-replace-objects] [--bare][--git-dir=<path>] [--work-tree=<path>] [--namespace=<name>][--config-env=<name>=<envvar>] <command> [<args>]These are common Git commands used in various situations:start a working area (see also: git help tutorial)clone     Clone a repository into a new directoryinit      Create an empty Git repository or reinitialize an existing onework on the current change (see also: git help everyday)add       Add file contents to the indexmv        Move or rename a file, a directory, or a symlinkrestore   Restore working tree filesrm        Remove files from the working tree and from the indexexamine the history and state (see also: git help revisions)bisect    Use binary search to find the commit that introduced a bugdiff      Show changes between commits, commit and working tree, etcgrep      Print lines matching a patternlog       Show commit logsshow      Show various types of objectsstatus    Show the working tree statusgrow, mark and tweak your common historybranch    List, create, or delete branchescommit    Record changes to the repositorymerge     Join two or more development histories togetherrebase    Reapply commits on top of another base tipreset     Reset current HEAD to the specified stateswitch    Switch branchestag       Create, list, delete or verify a tag object signed with GPGcollaborate (see also: git help workflows)fetch     Download objects and refs from another repositorypull      Fetch from and integrate with another repository or a local branchpush      Update remote refs along with associated objects'git help -a' and 'git help -g' list available subcommands and some
concept guides. See 'git help <command>' or 'git help <concept>'
to read about a specific subcommand or concept.
See 'git help git' for an overview of the system.
- A modern C compiler. gcc 6+, clang 7+, Microsoft Visual Studio 2019+ or the latest version of MinGW-w64 (clang64 or ucrt toolchains)。
- nasm安装
D:\_codec\emsdk [main ≡]> nasm
nasm: fatal: no input file specified
Type C:\Users\yance\AppData\Local\bin\NASM\nasm.exe -h for help.
-
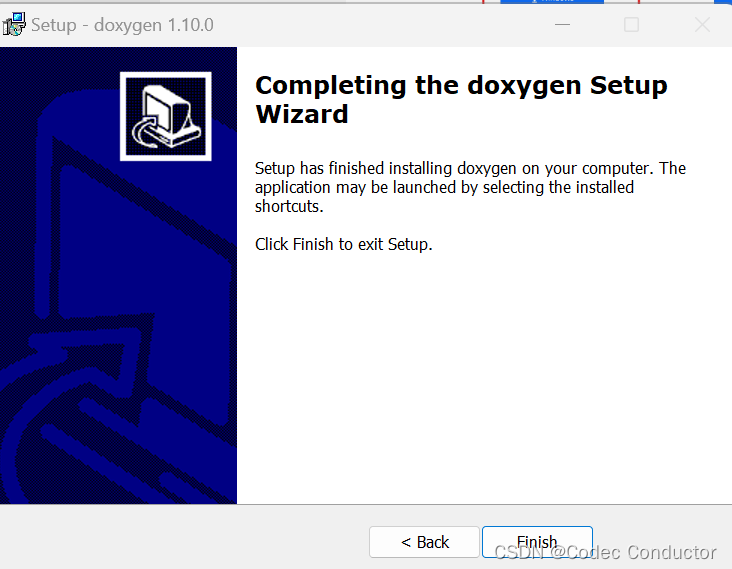
从官网下载Doxygen安装软件。

-
安装Graphviz:https://www.graphviz.org/download/,点击安装即可,注意要勾选到环境变量中。


-
从Perl官网下载安装包,下载MSI后缀的安装包。Perl是一种计算机程序语言。
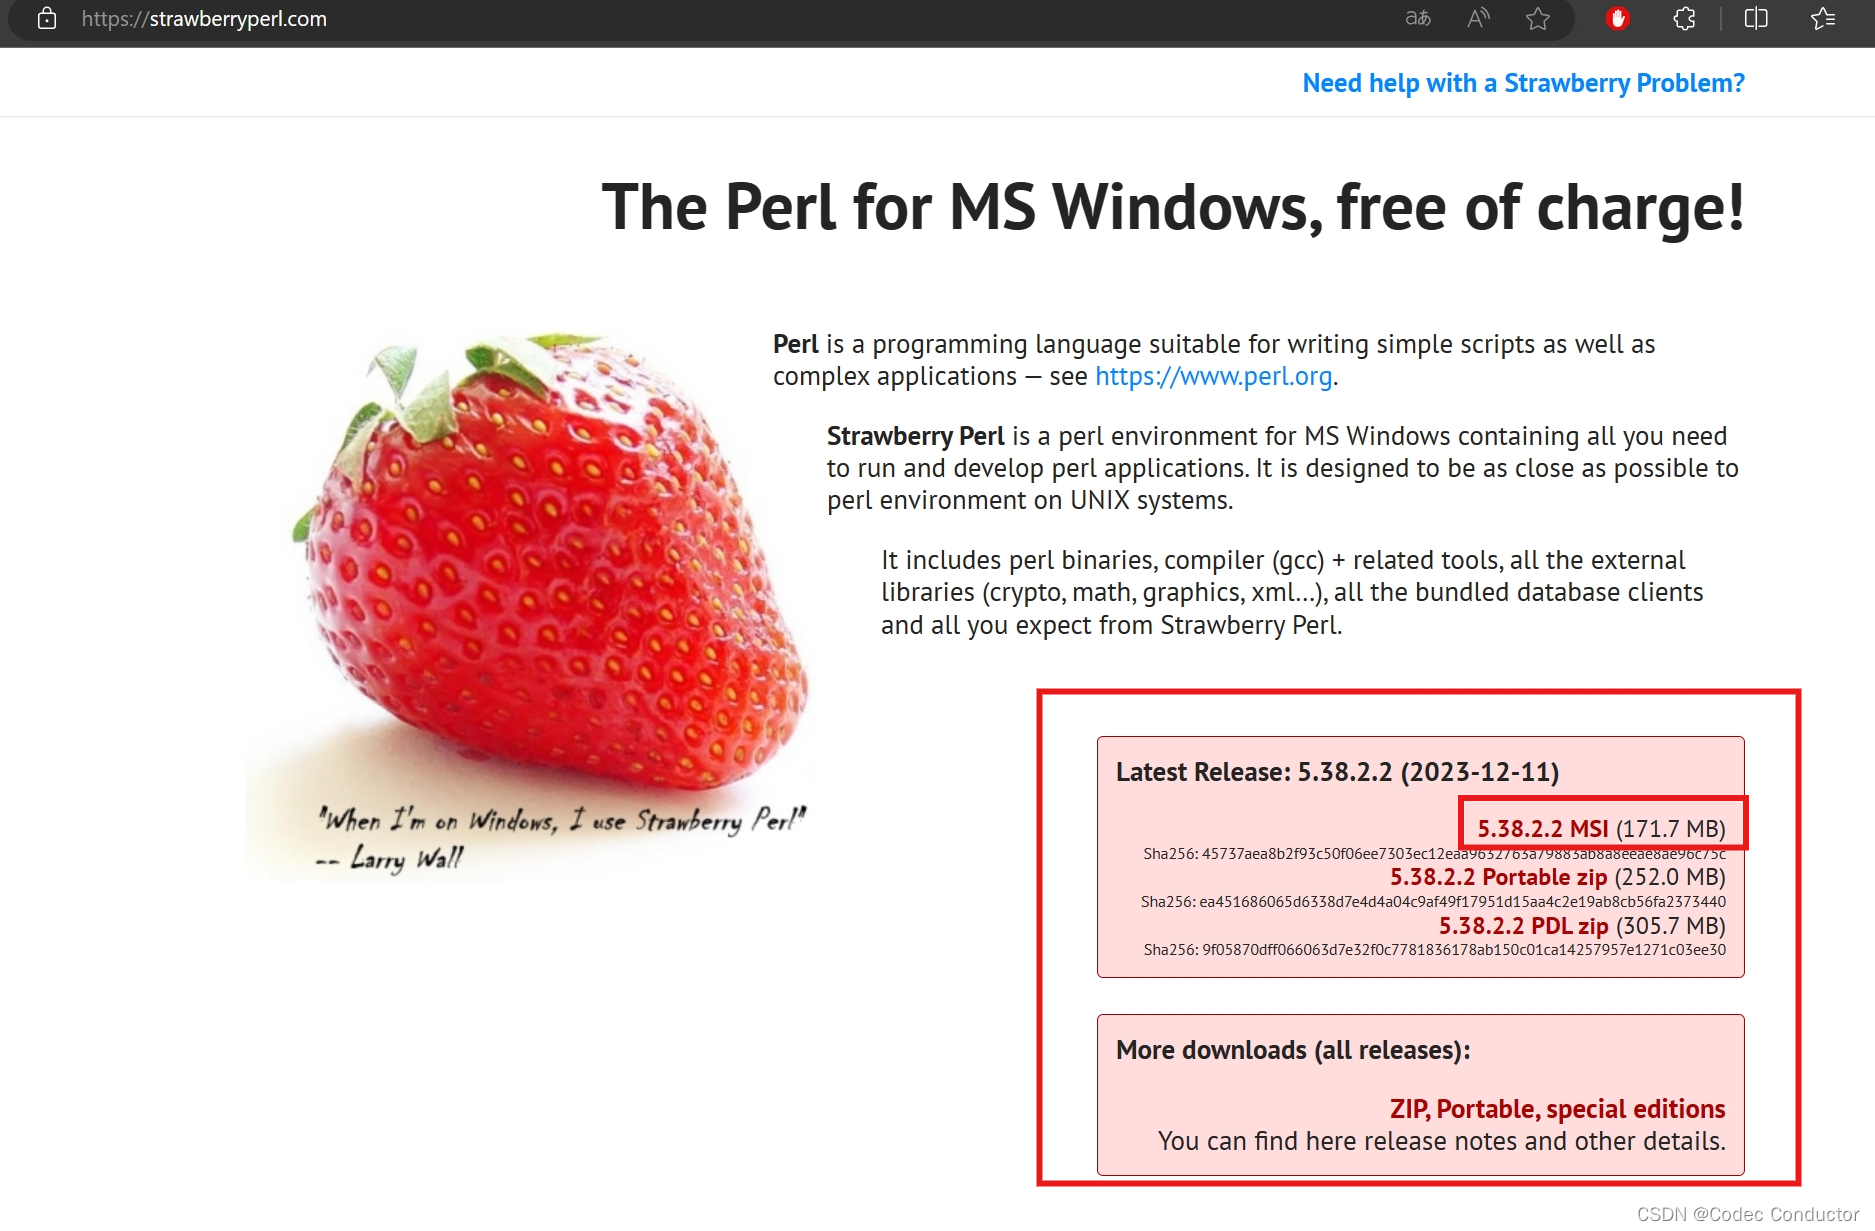
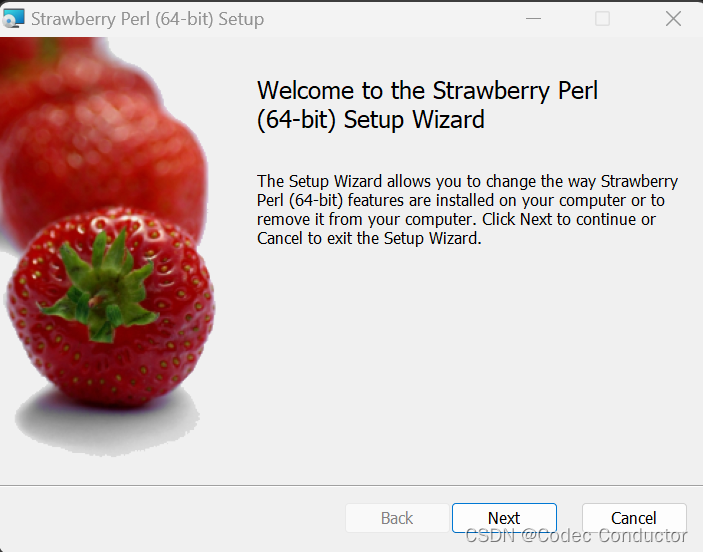
安装配置Perl,点击下载下来的strawberry-perl-5.38.2.2-64bit.msi进行安装,一直next下去即可。

验证Perl:PowerShell中输入命令perl -v,出现如下提示信息即表示安装成功。
C:\Users\yance> perl -v
Locale 'Chinese (Simplified)_China.936' is unsupported, and may crash the interpreter.This is perl 5, version 38, subversion 2 (v5.38.2) built for MSWin32-x64-multi-threadCopyright 1987-2023, Larry WallPerl may be copied only under the terms of either the Artistic License or the
GNU General Public License, which may be found in the Perl 5 source kit.Complete documentation for Perl, including FAQ lists, should be found on
this system using "man perl" or "perldoc perl".  If you have access to the
Internet, point your browser at https://www.perl.org/, the Perl Home Page.
- EMSDK安装,下载:https://github.com/emscripten-core/emsdk,之后cd到源码,输入如下命令
.\emsdk update
git pull
.\emsdk install --global latest
.\emsdk activate latest
.\emsdk_env.bat
EMSDK验证:
D:\_codec\emsdk [main ≡]> emcc -v
emcc (Emscripten gcc/clang-like replacement + linker emulating GNU ld) 3.1.59 (0e4c5994eb5b8defd38367a416d0703fd506ad81)
clang version 19.0.0git (https:/github.com/llvm/llvm-project df762a1643bb5b0b3c907611d118c82d4b68a39d)
Target: wasm32-unknown-emscripten
Thread model: posix
InstalledDir: D:\_codec\emsdk\upstream\bin
- 用CMake-GUI生成sln文件:按照
1-2-3-4-5的过程即可生成sln文件

生成sln文件:
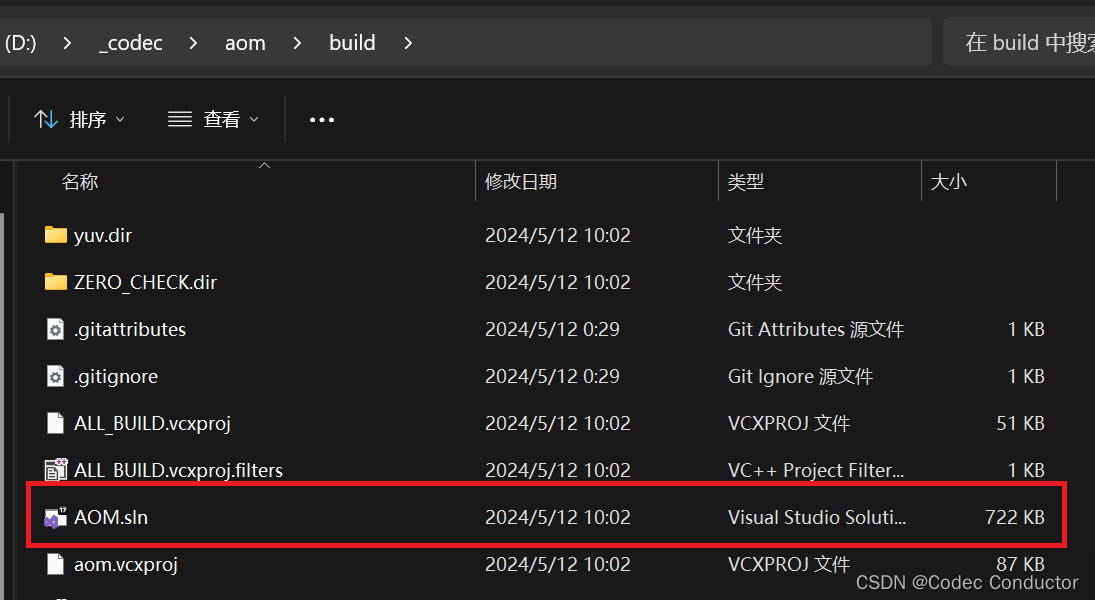
- 用VS2022打开sln文件,点击运行:一段时间等待,完成编译。

在目录可以看到生成的所有库文件和可执行文件,后续可以研究aom源码了。
D:\_codec\aom\build\debug [main ≡ +1963 ~0 -0 !]> ls目录: D:\_codec\aom\build\debugMode                 LastWriteTime         Length Name
----                 -------------         ------ ----
-a----         2024/5/12     10:10       40067812 aom.lib
-a----         2024/5/12     10:10       18613760 aomdec.exe
-a----         2024/5/12     10:10       18788352 aomdec.pdb
-a----         2024/5/12     10:10       18707456 aomenc.exe
-a----         2024/5/12     10:10       18919424 aomenc.pdb
-a----         2024/5/12     10:10         191722 aom_av1_rc.lib
-a----         2024/5/12     10:10         438272 aom_av1_rc.pdb
-a----         2024/5/12     10:10       18641408 aom_cx_set_ref.exe
-a----         2024/5/12     10:10       18845696 aom_cx_set_ref.pdb
-a----         2024/5/12     10:09        2789186 aom_gmock.lib
-a----         2024/5/12     10:09        1404928 aom_gmock.pdb
-a----         2024/5/12     10:09        9564822 aom_gtest.lib
-a----         2024/5/12     10:09        1847296 aom_gtest.pdb
-a----         2024/5/12     10:09           2112 aom_pc.lib
-a----         2024/5/12     10:09          69632 aom_pc.pdb
-a----         2024/5/12     10:03           2206 aom_version.lib
-a----         2024/5/12     10:03          69632 aom_version.pdb
-a----         2024/5/12     10:10       18588160 decode_to_md5.exe
-a----         2024/5/12     10:10       18755584 decode_to_md5.pdb
-a----         2024/5/12     10:10       18588672 decode_with_drops.exe
-a----         2024/5/12     10:10       18755584 decode_with_drops.pdb
-a----         2024/5/12     10:10       18592256 dump_obu.exe
-a----         2024/5/12     10:10       18796544 dump_obu.pdb
-a----         2024/5/12     10:10       18661888 lightfield_bitstream_parsing.exe
-a----         2024/5/12     10:10       18894848 lightfield_bitstream_parsing.pdb
-a----         2024/5/12     10:10       18597376 lightfield_decoder.exe
-a----         2024/5/12     10:10       18771968 lightfield_decoder.pdb
-a----         2024/5/12     10:10       18705408 lightfield_encoder.exe
-a----         2024/5/12     10:10       18886656 lightfield_encoder.pdb
-a----         2024/5/12     10:10       18593280 lightfield_tile_list_decoder.exe
-a----         2024/5/12     10:10       18763776 lightfield_tile_list_decoder.pdb
-a----         2024/5/12     10:10       18634240 lossless_encoder.exe
-a----         2024/5/12     10:10       18837504 lossless_encoder.pdb
-a----         2024/5/12     10:10       18644480 noise_model.exe
-a----         2024/5/12     10:10       18837504 noise_model.pdb
-a----         2024/5/12     10:10       18638336 photon_noise_table.exe
-a----         2024/5/12     10:10       18837504 photon_noise_table.pdb
-a----         2024/5/12     10:10       18589696 scalable_decoder.exe
-a----         2024/5/12     10:10       18755584 scalable_decoder.pdb
-a----         2024/5/12     10:10       18637312 scalable_encoder.exe
-a----         2024/5/12     10:10       18837504 scalable_encoder.pdb
-a----         2024/5/12     10:10       18635776 set_maps.exe
-a----         2024/5/12     10:10       18829312 set_maps.pdb
-a----         2024/5/12     10:10       18588160 simple_decoder.exe
-a----         2024/5/12     10:10       18739200 simple_decoder.pdb
-a----         2024/5/12     10:10       18635264 simple_encoder.exe
-a----         2024/5/12     10:10       18837504 simple_encoder.pdb
-a----         2024/5/12     10:10       18756096 svc_encoder_rtc.exe
-a----         2024/5/12     10:10       18993152 svc_encoder_rtc.pdb
-a----         2024/5/12     10:10       19226112 test_aom_rc.exe
-a----         2024/5/12     10:10       23744512 test_aom_rc.pdb
-a----         2024/5/12     10:10       19263488 test_intra_pred_speed.exe
-a----         2024/5/12     10:10       23531520 test_intra_pred_speed.pdb
-a----         2024/5/12     10:11       50193408 test_libaom.exe
-a----         2024/5/12     10:11      203837440 test_libaom.pdb
-a----         2024/5/12     10:10       18637312 twopass_encoder.exe
-a----         2024/5/12     10:10       18829312 twopass_encoder.pdb
这篇关于Windows环境下编译 aom 源码详细过程的文章就介绍到这儿,希望我们推荐的文章对编程师们有所帮助!


