本文主要是介绍LagentAgentLego智能体工具使用,希望对大家解决编程问题提供一定的参考价值,需要的开发者们随着小编来一起学习吧!
1. lagent
参考文档
https://github.com/InternLM/Tutorial/blob/camp2/agent/lagent.md
- 使用 LMDeploy 部署
conda activate agent
lmdeploy serve api_server /root/share/new_models/Shanghai_AI_Laboratory/internlm2-chat-7b \--server-name 127.0.0.1 \--model-name internlm2-chat-7b \--cache-max-entry-count 0.1
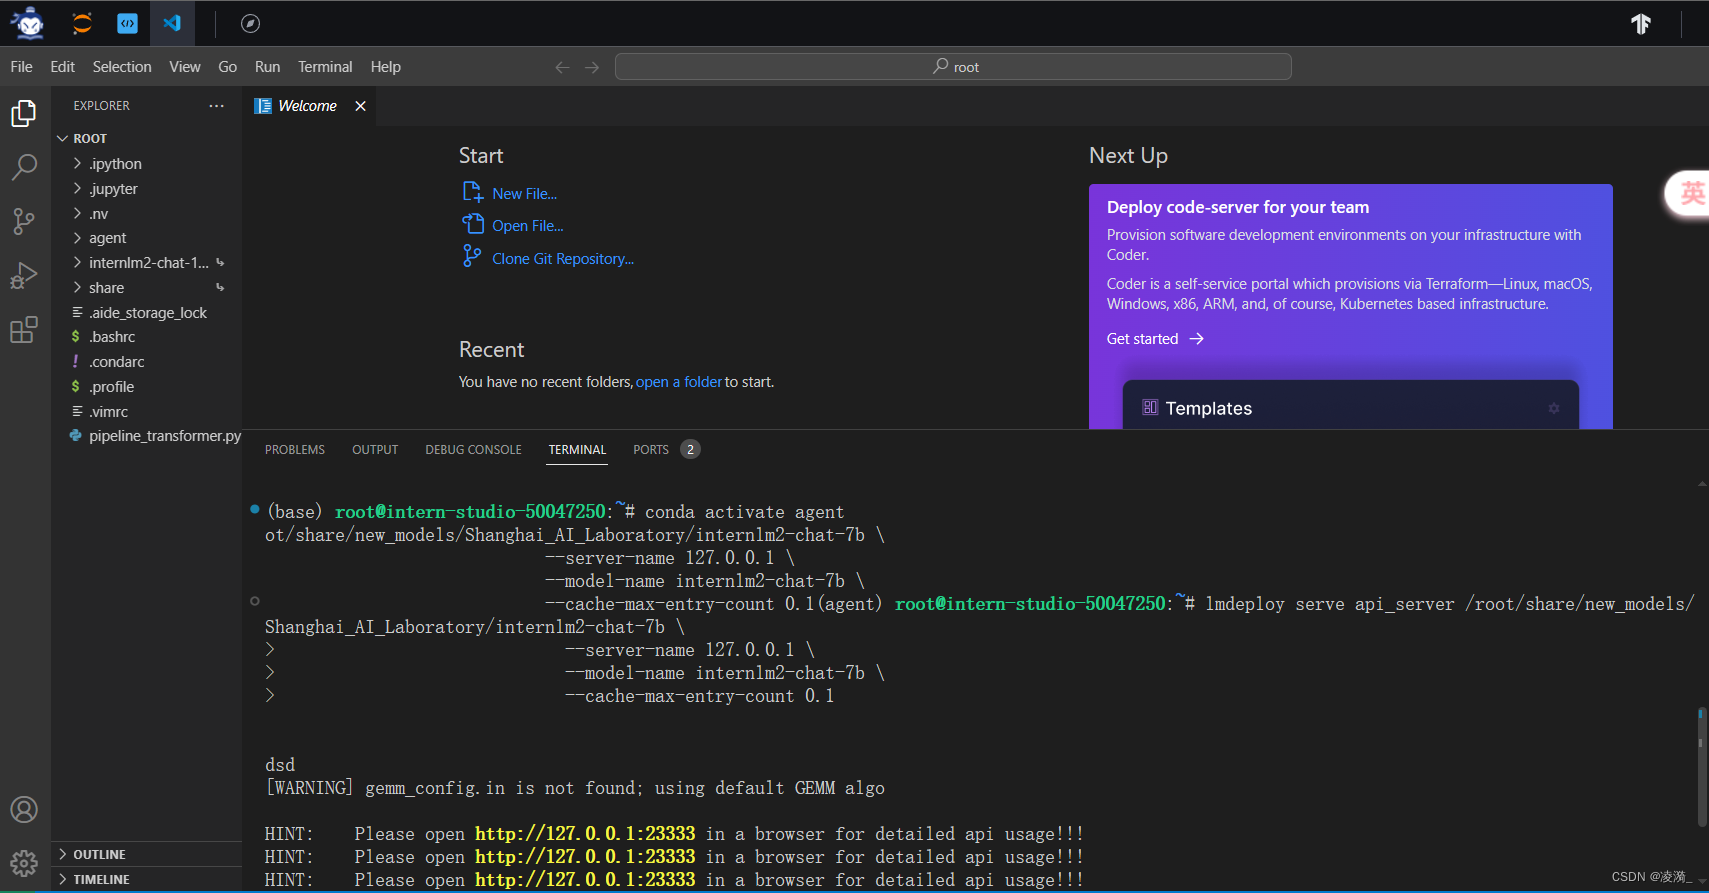
2.启动并使用 Lagent Web Demo
conda activate agent
cd /root/agent/lagent/examples
streamlit run internlm2_agent_web_demo.py --server.address 127.0.0.1 --server.port 7860
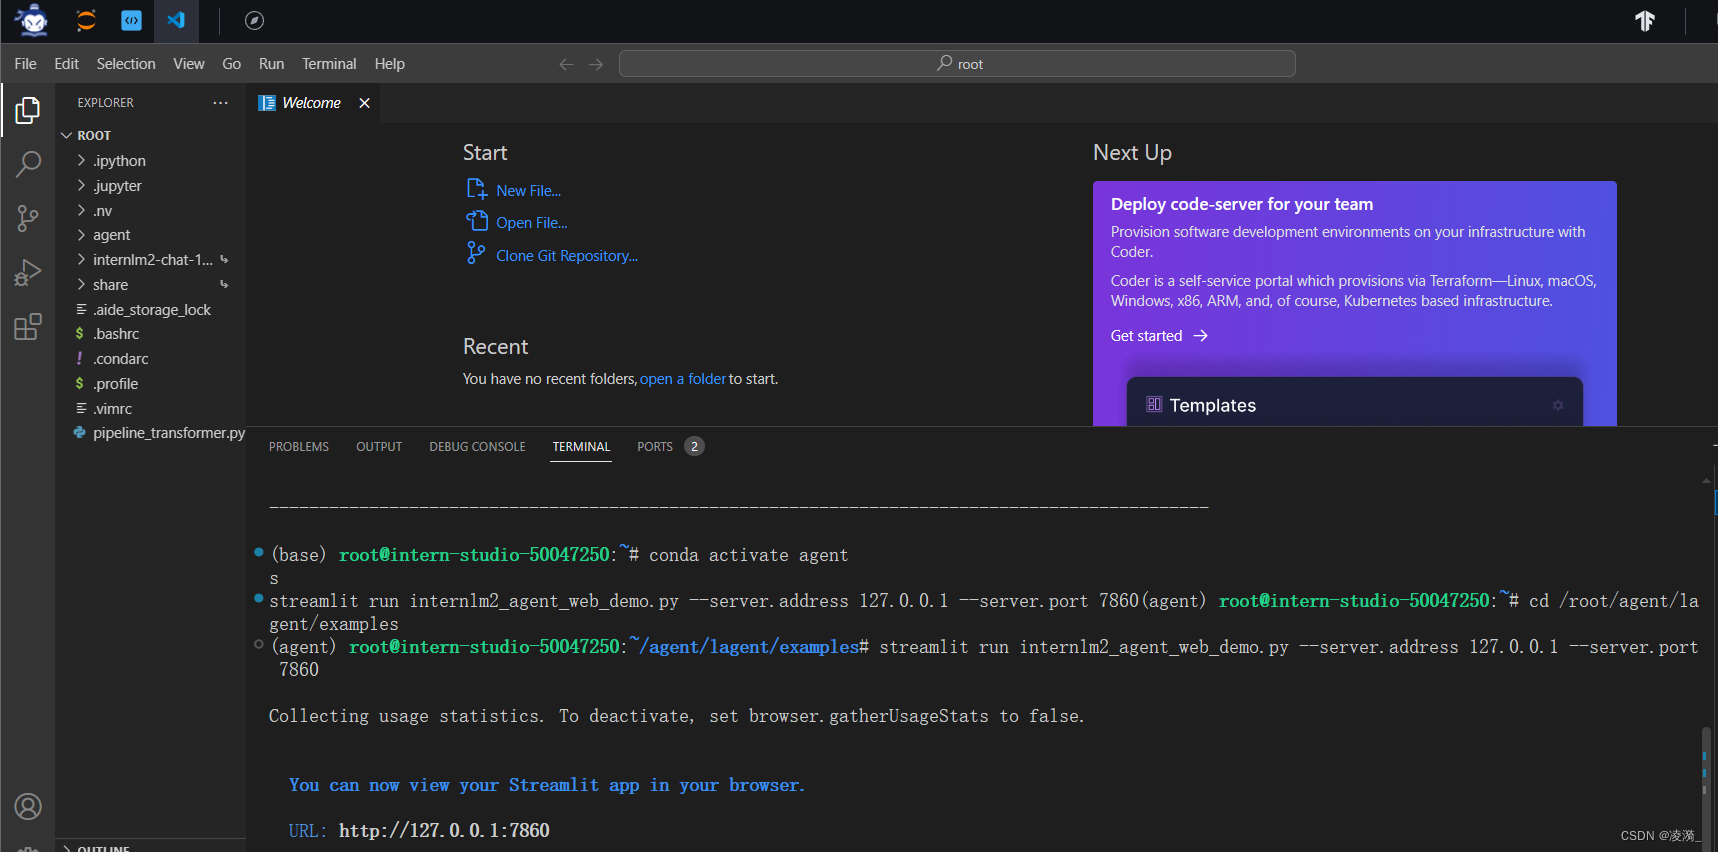
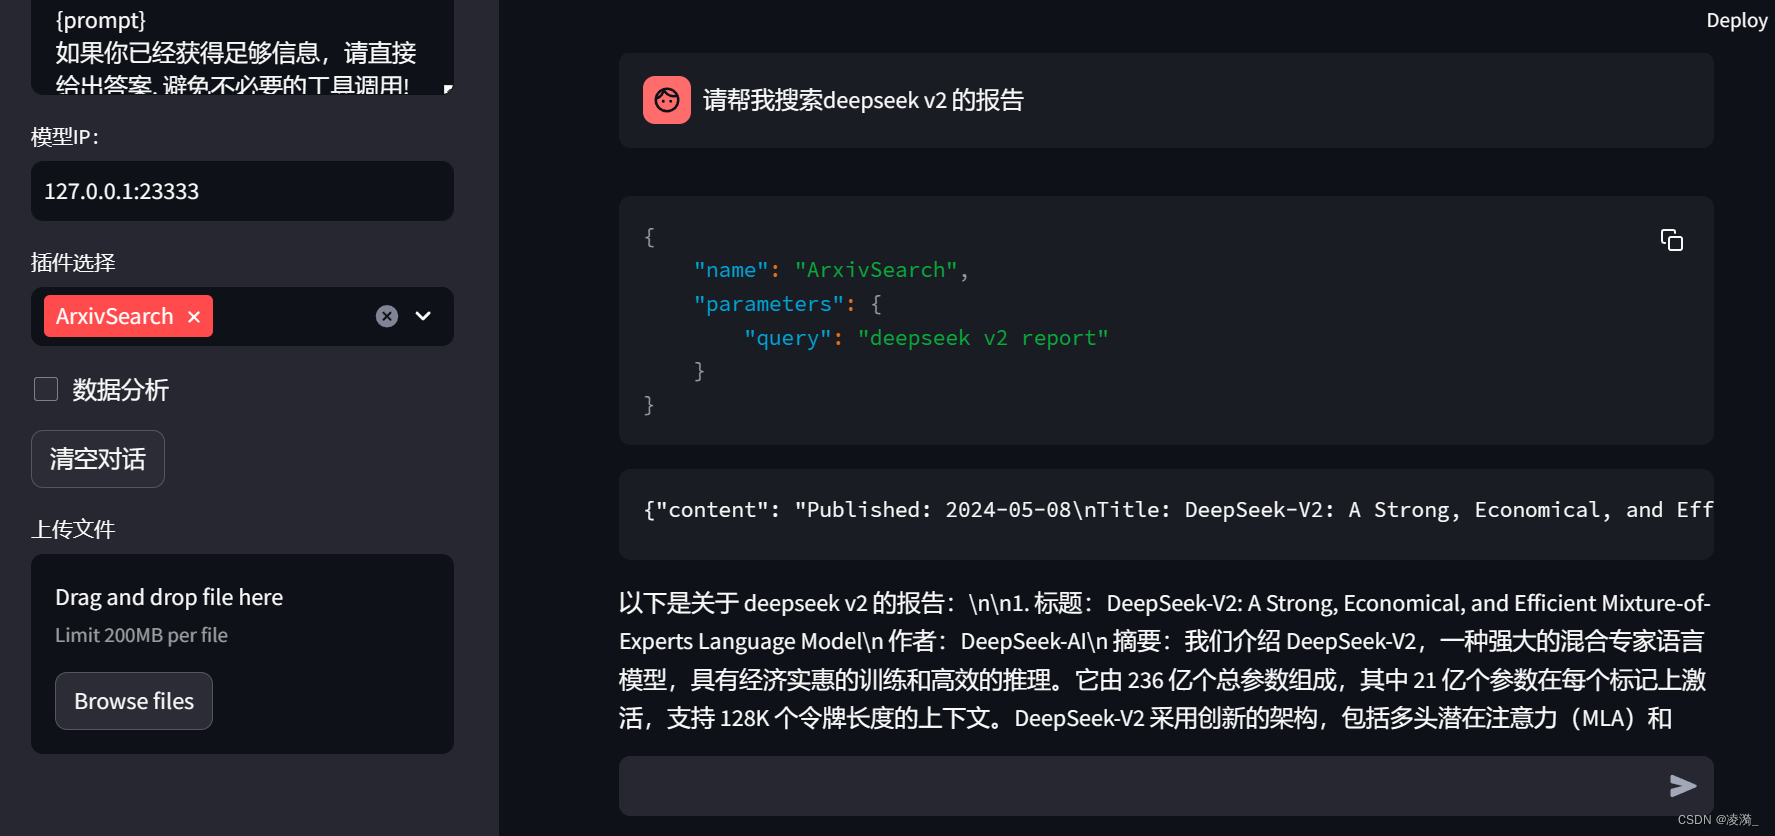
3. 使用自带的arxive search插件进行论文搜索:
4. 自定义工具(天气查询)进行调用
准备和风天气的API
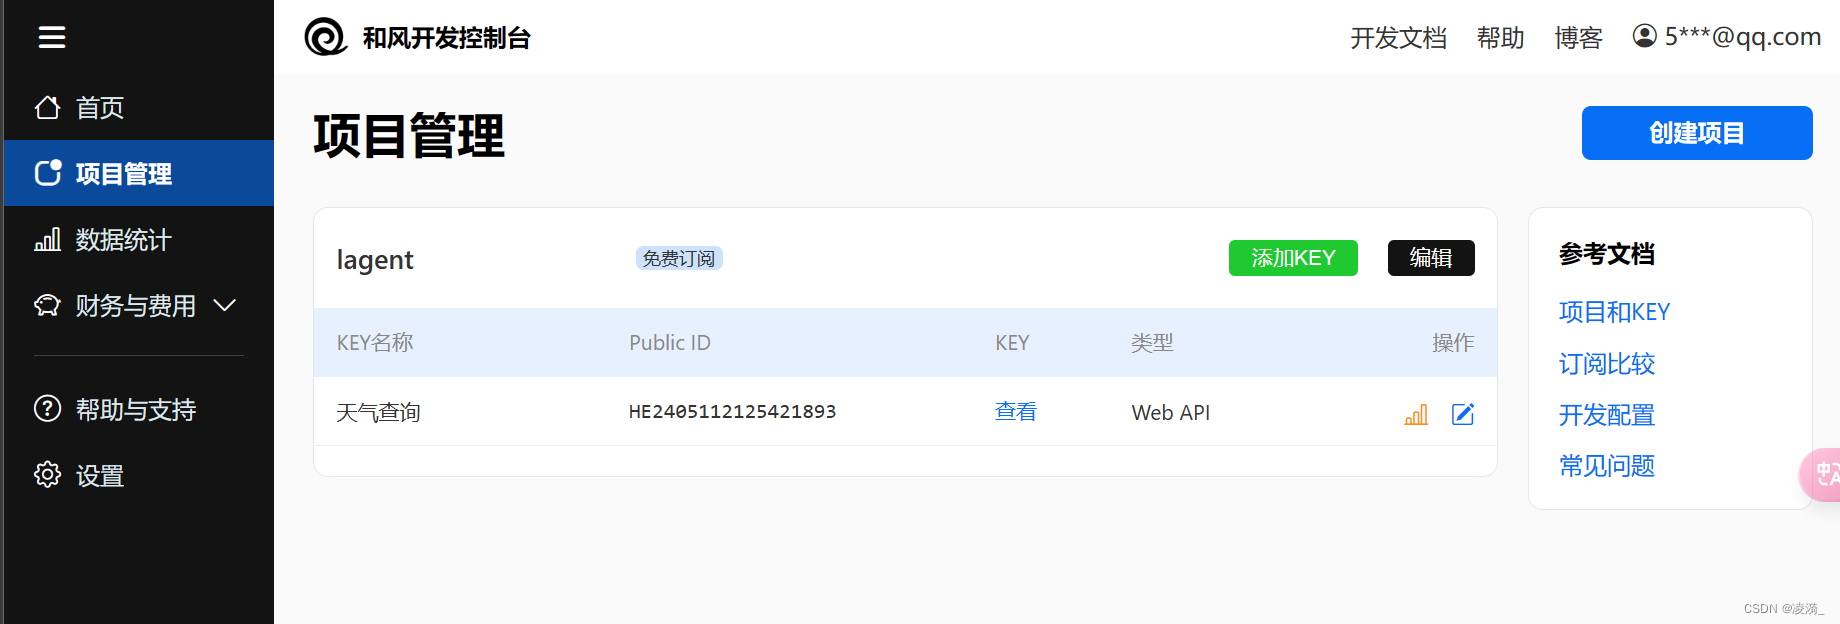
首先通过 touch /root/agent/lagent/lagent/actions/weather.py(大小写敏感)新建工具,文件使用的代码为:
import json
import os
import requests
from typing import Optional, Typefrom lagent.actions.base_action import BaseAction, tool_api
from lagent.actions.parser import BaseParser, JsonParser
from lagent.schema import ActionReturn, ActionStatusCodeclass WeatherQuery(BaseAction):"""天气查询插件,用于查询天气信息。"""def __init__(self,key: Optional[str] = None,  # 可选参数:API 密钥description: Optional[dict] = None,parser: Type[BaseParser] = JsonParser,enable: bool = True) -> None:super().__init__(description, parser, enable)# 从环境变量或传入的参数中获取天气 API 密钥key = os.environ.get('WEATHER_API_KEY', key)if key is None:raise ValueError('请设置天气 API 密钥,可以通过环境变量 WEATHER_API_KEY 设置,或者在实例化时传入 key 参数')self.key = key# 设置用于查询城市信息和天气信息的 URLself.location_query_url = 'https://geoapi.qweather.com/v2/city/lookup'self.weather_query_url = 'https://devapi.qweather.com/v7/weather/now'@tool_apidef run(self, query: str) -> ActionReturn:"""执行天气查询的方法。Args:query (str): 要查询的城市名称。"""tool_return = ActionReturn(type=self.name)# 调用 _search 方法查询天气信息status_code, response = self._search(query)if status_code == -1:tool_return.errmsg = responsetool_return.state = ActionStatusCode.HTTP_ERRORelif status_code == 200:# 解析查询结果并返回parsed_res = self._parse_results(response)tool_return.result = [dict(type='text', content=str(parsed_res))]tool_return.state = ActionStatusCode.SUCCESSelse:tool_return.errmsg = str(status_code)tool_return.state = ActionStatusCode.API_ERRORreturn tool_returndef _parse_results(self, results: dict) -> str:"""解析从 QWeather API 返回的天气信息。Args:results (dict): QWeather API 返回的天气信息,JSON 格式。Returns:str: 解析后的天气信息。"""now = results['now']data = [f'数据观测时间: {now["obsTime"]}',f'温度: {now["temp"]}°C',f'体感温度: {now["feelsLike"]}°C',f'天气: {now["text"]}',f'风向: {now["windDir"]},角度为 {now["wind360"]}°',f'风力等级: {now["windScale"]},风速为 {now["windSpeed"]} km/h',f'相对湿度: {now["humidity"]}',f'当前小时累计降水量: {now["precip"]} mm',f'大气压强: {now["pressure"]} 百帕',f'能见度: {now["vis"]} km',]return '\n'.join(data)def _search(self, query: str):"""查询城市代码和天气信息。Args:query (str): 要查询的城市名称。Returns:tuple: 包含状态码和响应结果的元组。"""# 查询城市代码try:city_code_response = requests.get(self.location_query_url,params={'key': self.key, 'location': query})except Exception as e:return -1, str(e)if city_code_response.status_code != 200:return city_code_response.status_code, city_code_response.json()city_code_response = city_code_response.json()if len(city_code_response['location']) == 0:return -1, '未查询到城市'city_code = city_code_response['location'][0]['id']# 查询天气信息try:weather_response = requests.get(self.weather_query_url,params={'key': self.key, 'location': city_code})except Exception as e:return -1, str(e)return weather_response.status_code, weather_response.json()
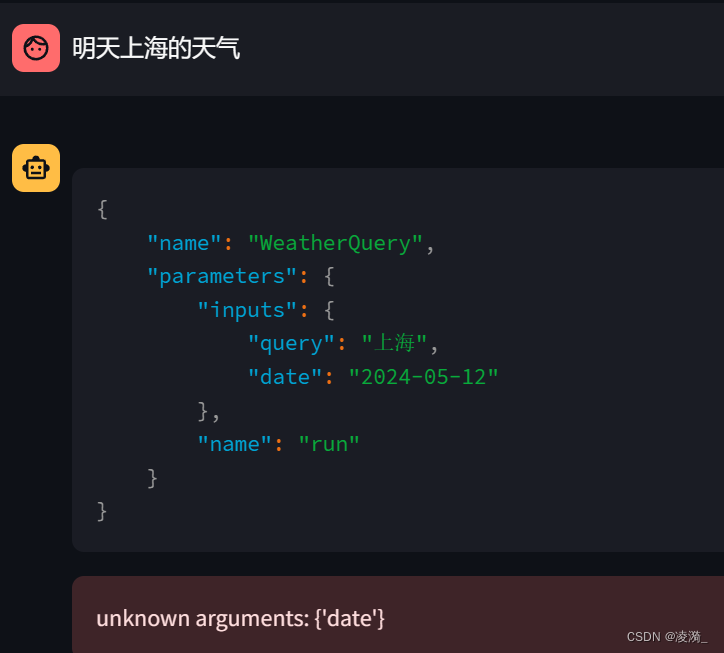
运行结果

但是换成明天的就不行了
2. AgentLego:组装智能体“乐高”
参考文档
https://github.com/InternLM/Tutorial/blob/camp2/agent/agentlego.md#1-%E7%9B%B4%E6%8E%A5%E4%BD%BF%E7%94%A8-agentlego
直接使用 AgentLego
安装相关依赖后,上传一张街景图片,使用目标检测工具。
通过 touch /root/agent/direct_use.py(大小写敏感)的方式在 /root/agent 目录下新建 direct_use.py 以直接使用目标检测工具,direct_use.py 的代码如下:
import reimport cv2
from agentlego.apis import load_tool# load tool
tool = load_tool('ObjectDetection', device='cuda')# apply tool
visualization = tool('/root/agent/road.jpg')
print(visualization)# visualize
image = cv2.imread('/root/agent/road.jpg')preds = visualization.split('\n')
pattern = r'(\w+) \((\d+), (\d+), (\d+), (\d+)\), score (\d+)'for pred in preds:name, x1, y1, x2, y2, score = re.match(pattern, pred).groups()x1, y1, x2, y2, score = int(x1), int(y1), int(x2), int(y2), int(score)cv2.rectangle(image, (x1, y1), (x2, y2), (0, 255, 0), 1)cv2.putText(image, f'{name} {score}', (x1, y1), cv2.FONT_HERSHEY_SIMPLEX, 0.8, (0, 255, 0), 1)cv2.imwrite('/root/agent/road_detection_direct.jpg', image)
运行结果如下:
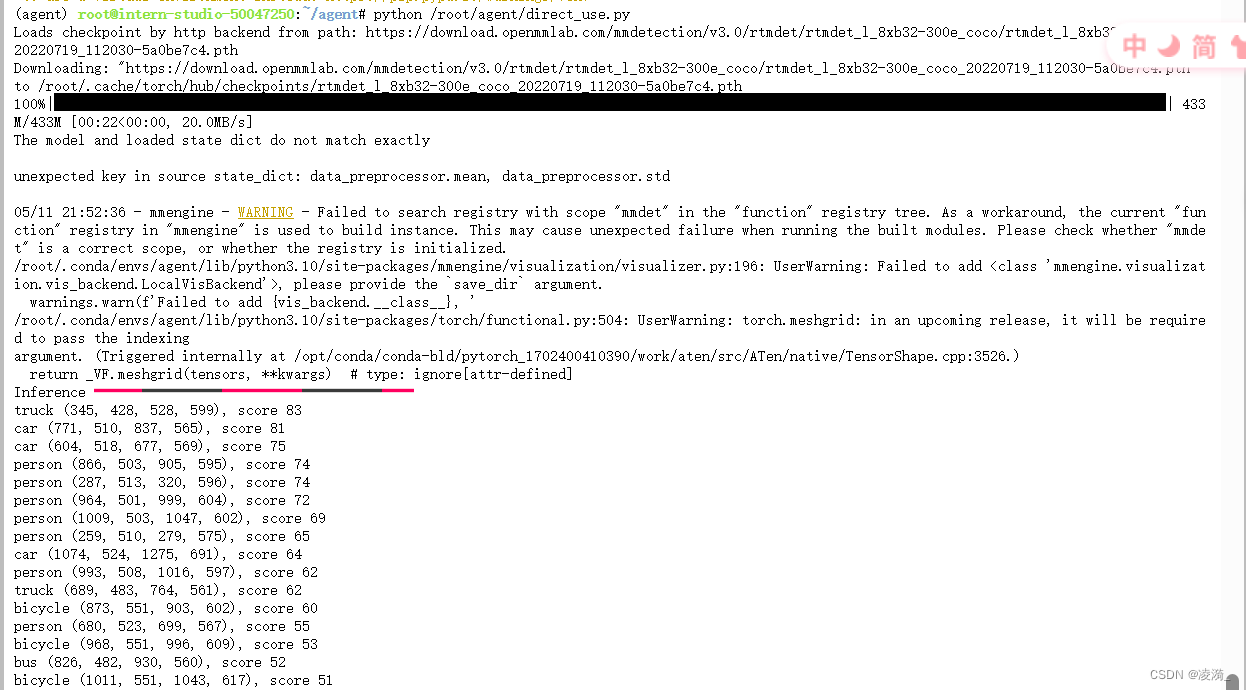
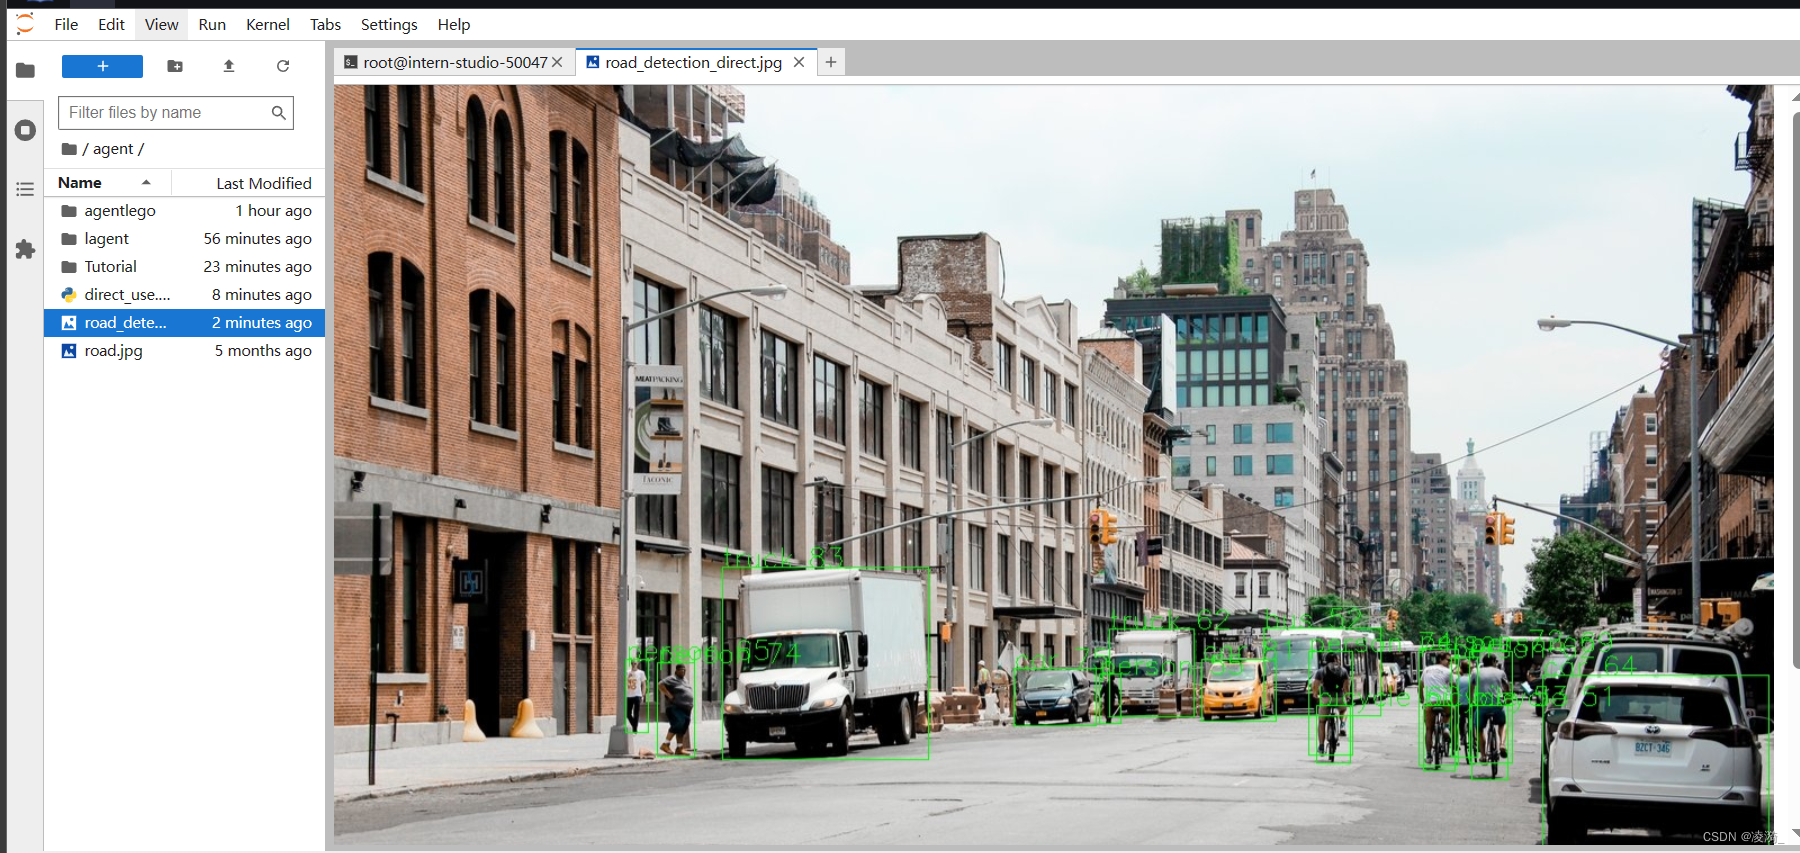
可以发现其识别出了car/person/truck/bicycle/bus等物体
更换一张图片进行测试:

会发现他没有识别出物体
“No object found”

再次更换一张街景图片进行识别

这是香港街头的一张图片,虽然比较复杂,但可以看出还是可以识别出大部分物体的。但图片左侧有一些人没有识别出来。
作为智能体工具使用
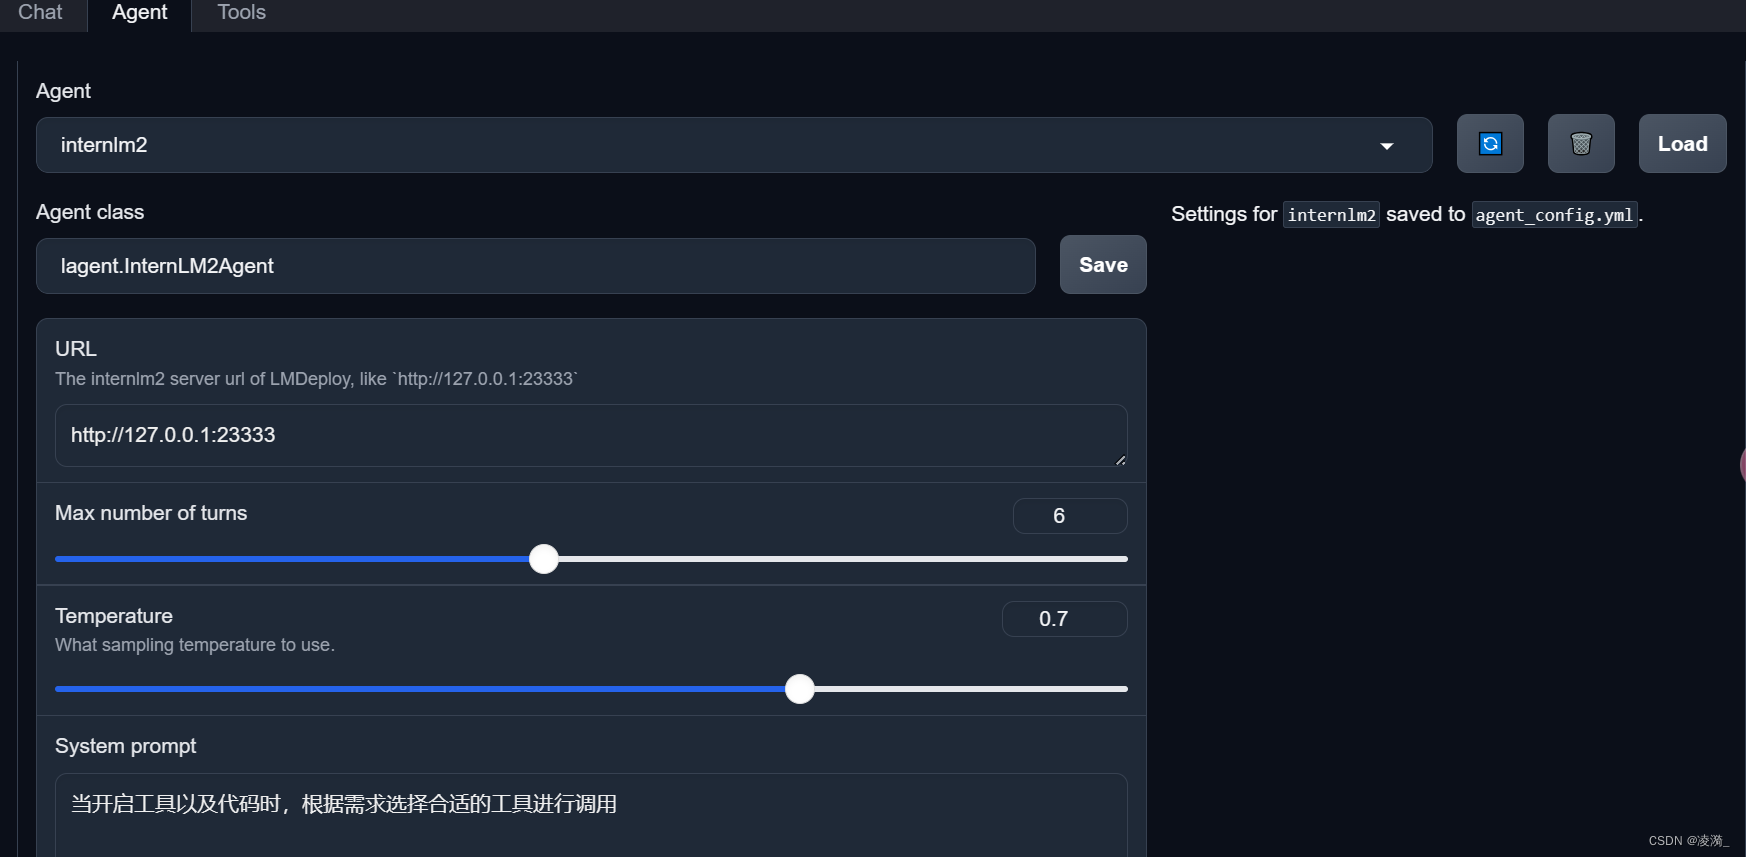
这样的使用方式可以在Web页面中,新增agent和工具吗,然后指定agent调用工具
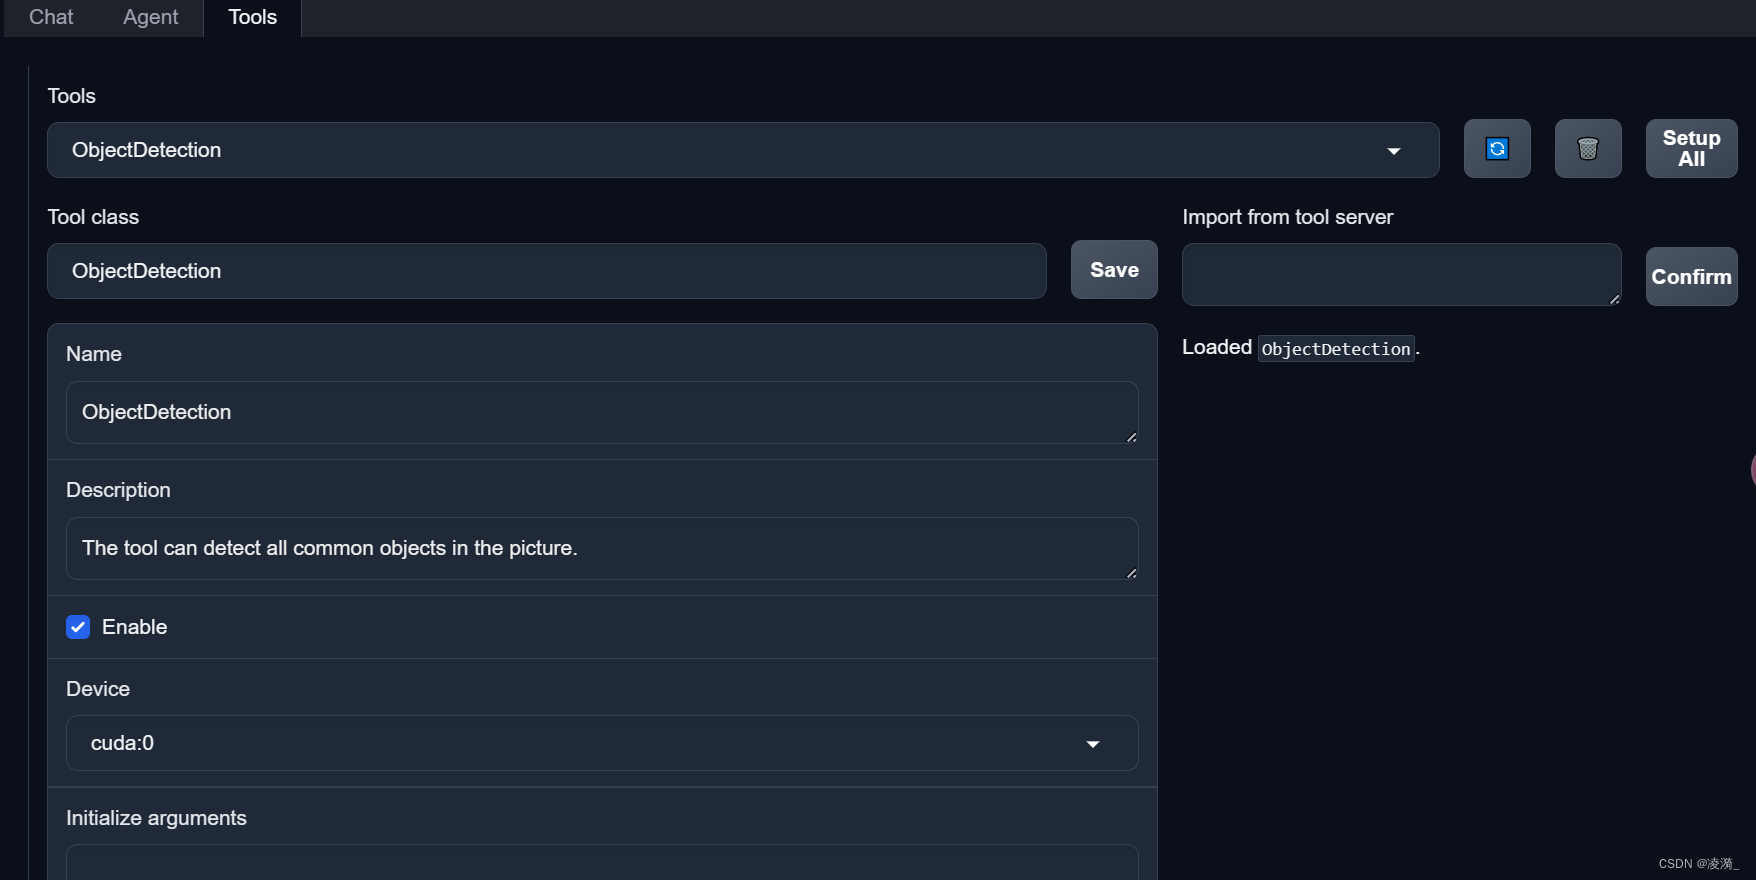

3. 使用自定义工具
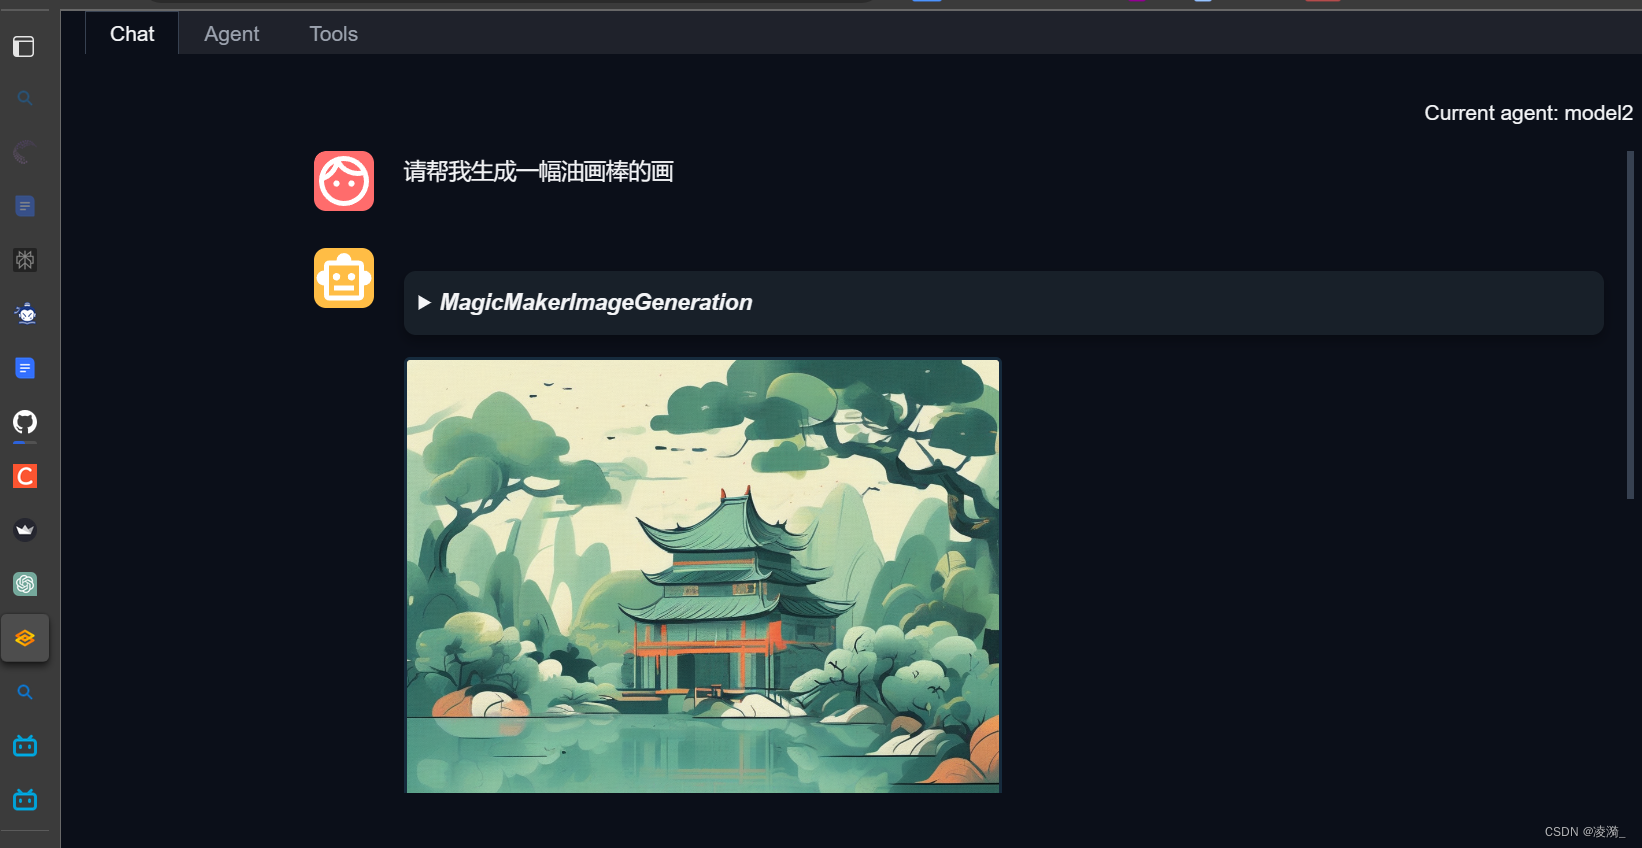
首先通过 touch /root/agent/agentlego/agentlego/tools/magicmaker_image_generation.py(大小写敏感)的方法新建工具文件。
import json
import requestsimport numpy as npfrom agentlego.types import Annotated, ImageIO, Info
from agentlego.utils import require
from .base import BaseToolclass MagicMakerImageGeneration(BaseTool):default_desc = ('This tool can call the api of magicmaker to ''generate an image according to the given keywords.')styles_option = ['dongman',  # 动漫'guofeng',  # 国风'xieshi',   # 写实'youhua',   # 油画'manghe',   # 盲盒]aspect_ratio_options = ['16:9', '4:3', '3:2', '1:1','2:3', '3:4', '9:16']@require('opencv-python')def __init__(self,style='guofeng',aspect_ratio='4:3'):super().__init__()if style in self.styles_option:self.style = styleelse:raise ValueError(f'The style must be one of {self.styles_option}')if aspect_ratio in self.aspect_ratio_options:self.aspect_ratio = aspect_ratioelse:raise ValueError(f'The aspect ratio must be one of {aspect_ratio}')def apply(self,keywords: Annotated[str,Info('A series of Chinese keywords separated by comma.')]) -> ImageIO:import cv2response = requests.post(url='https://magicmaker.openxlab.org.cn/gw/edit-anything/api/v1/bff/sd/generate',data=json.dumps({"official": True,"prompt": keywords,"style": self.style,"poseT": False,"aspectRatio": self.aspect_ratio}),headers={'content-type': 'application/json'})image_url = response.json()['data']['imgUrl']image_response = requests.get(image_url)image = cv2.cvtColor(cv2.imdecode(np.frombuffer(image_response.content, np.uint8), cv2.IMREAD_COLOR),cv2.COLOR_BGR2RGB)return ImageIO(image)

这篇关于LagentAgentLego智能体工具使用的文章就介绍到这儿,希望我们推荐的文章对编程师们有所帮助!


