本文主要是介绍头歌实践教学平台:投影变换v2.0,希望对大家解决编程问题提供一定的参考价值,需要的开发者们随着小编来一起学习吧!
第1关:一点透视
一. 任务描述
1. 本关任务
(1) 理解透视投影变换的方法; (2) 将projection函数和main函数中的空白部分补充完整。
2. 输入
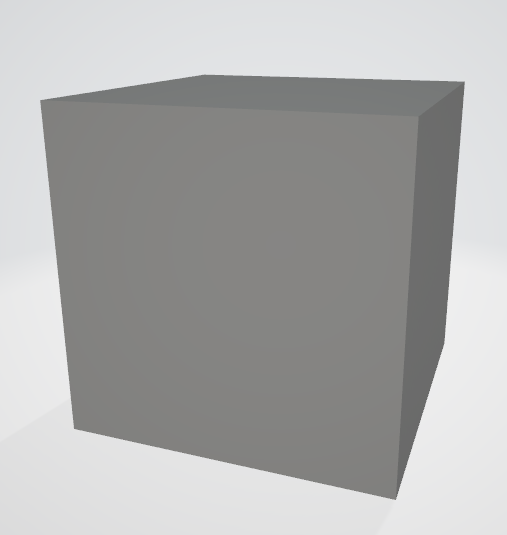
(1) 代码将自动输入一个边长为1的obj正方体模型,具体模型如下图:
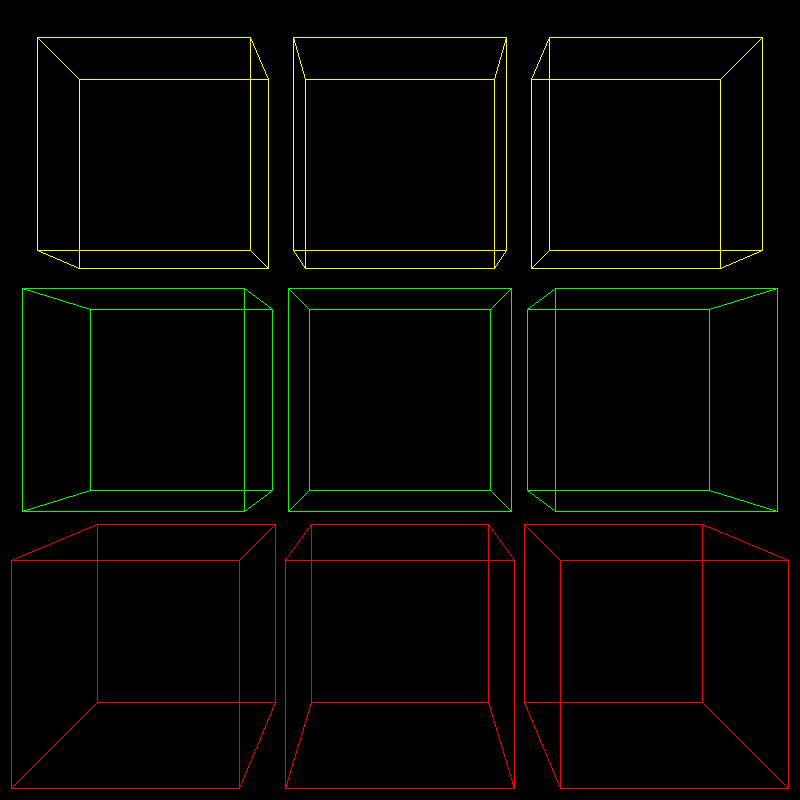
(2) 代码自动将模型投影到二维平面中心生成一个边长为1的立方体,经过模型变换和投影变换后生成三个绿色的方体,三个立方体的投影变换eye的坐标均为(0,0,5),具体图片如下所示:

(3) 参考已有代码,将中心立绿色方体的顶点分别向y轴负方向平移1.2个单位,绘制一个红色立方体。再将红色立方体顶点分别向x轴正,负两个方向平移1.2个单位,绘制两个红色立方体。三个立方体的投影变换eye的坐标均为(0,0,4); (4) 将中心绿色立方体的顶点分别向y轴正方向平移1.2个单位,绘制一个黄色立方体。再将黄色立方体顶点分别向x轴正,负两个方向平移1.2个单位,绘制两个黄色立方体。三个立方体的投影变换eye的坐标均为(0,0,8);
3. 输出
具体结果如下图所示:
二. 相关知识
1. 透视投影
透视投影相关知识点,请参考教材与课件或有关资料。
三. 操作说明
(1) 按要求补全代码; (2) 点击窗口右下角"测评"按钮,等待测评结果,如果通过后可进行下一关任务。
开始你的任务吧,祝你成功!
四.实验代码
#include <vector>
#include <cmath>
#include <algorithm>
#include <iostream>
#include "model.h"
#include "geometry.h"
#include "pngimage.h"using namespace std;
const double PI = acos(-1.0);void line(Vec3i p0, Vec3i p1, PNGImage  &image, PNGColor color)
{bool steep = false;if (std::abs(p0.x - p1.x) < std::abs(p0.y - p1.y)){std::swap(p0.x, p0.y);std::swap(p1.x, p1.y);steep = true;}if (p0.x > p1.x){std::swap(p0.x, p1.x);std::swap(p0.y, p1.y);}int dx = p1.x - p0.x;int dy = std::abs(p1.y - p0.y);int y = p0.y;int d = -dx;for (int x = p0.x; x <= p1.x; x++){if (steep)image.set(y, x, color);elseimage.set(x, y, color);d = d + 2 * dy;if (d > 0){y += (p1.y > p0.y ? 1 : -1);d = d - 2 * dx;}}
}Matrix projection(Vec3f eye, Vec3f center)
{Matrix m = Matrix::identity(4);// Please add the code here/********** Begin ********/m[3][2] = -1.f / (eye - center).norm();/********** End **********/return m;
}Matrix viewport(int x, int y, int w, int h, int depth) {Matrix m = Matrix::identity(4);m[0][3] = x + w / 2.f;m[1][3] = y + h / 2.f;m[2][3] = depth / 2.f;m[0][0] = w / 2.f;m[1][1] = h / 2.f;m[2][2] = depth / 2.f;return m;
}Matrix lookat(Vec3f eye, Vec3f center, Vec3f up) {Vec3f z = (eye - center).normalize();Vec3f x = (up^z).normalize();Vec3f y = (z^x).normalize();Matrix res = Matrix::identity(4);for (int i = 0; i < 3; i++) {res[0][i] = x[i];res[1][i] = y[i];res[2][i] = z[i];res[i][3] = -center[i];}return res;
}Matrix translation(Vec3f v) {Matrix Tr = Matrix::identity(4);Tr[0][3] = v.x;Tr[1][3] = v.y;Tr[2][3] = v.z;return Tr;
}Matrix scale(float factorX, float factorY, float factorZ)
{Matrix Z = Matrix::identity(4);Z[0][0] = factorX;Z[1][1] = factorY;Z[2][2] = factorZ;return Z;
}Matrix rotation_x(float angle)
{angle = angle * PI / 180;float sinangle = sin(angle);float cosangle = cos(angle);Matrix R = Matrix::identity(4);R[1][1] = R[2][2] = cosangle;R[1][2] = -sinangle;R[2][1] = sinangle;return R;
}Matrix rotation_y(float angle)
{angle = angle * PI / 180;float sinangle = sin(angle);float cosangle = cos(angle);Matrix R = Matrix::identity(4);R[0][0] = R[2][2] = cosangle;R[0][2] = sinangle;R[2][0] = -sinangle;return R;
}Matrix rotation_z(float angle) {angle = angle * PI / 180;float sinangle = sin(angle);float cosangle = cos(angle);Matrix R = Matrix::identity(4);R[0][0] = R[1][1] = cosangle;R[0][1] = -sinangle;R[1][0] = sinangle;return R;
}int main(int argc, char** argv)
{const PNGColor white = PNGColor(255, 255, 255, 255);const PNGColor black = PNGColor(0, 0, 0, 255);const PNGColor red = PNGColor(255, 0, 0, 255);const PNGColor green = PNGColor(0, 255, 0, 255);const PNGColor blue = PNGColor(0, 0, 255, 255);const PNGColor yellow = PNGColor(255, 255, 0, 255);Model *model = NULL;const int width = 800;const int height = 800;const int depth = 255;Vec3f center(0, 0, 0);Matrix ViewPort = viewport(width / 4, width / 4, width / 2, height / 2, depth);//generate some imagePNGImage image(width, height, PNGImage::RGBA); image.init(black);model = new Model("cube.obj");for (int i = 0; i < model->nfaces(); i++){std::vector<int> face = model->face(i);for (int j = 0; j < (int)face.size(); j++){Vec3f wp0 = model->vert(face[j]);Vec3f wp1 = model->vert(face[(j + 1) % face.size()]);Matrix S0 = scale(0.5, 0.5, 0.5);Vec3f swp0 = S0 * wp0;Vec3f swp1 = S0 * wp1;// 一点透视 float t[3] = { -1.2, 0, 1.2 };Matrix ModelView = Matrix::identity(4);PNGColor clr[3] = { red, green, yellow };Vec3f eye2(0, 0, 5);Matrix Projection2 = projection(eye2, center);for (int j = 0; j < 3; j++){ModelView = translation(Vec3f(t[j], t[1], 0));Vec3f op0 = ViewPort * Projection2 * ModelView * swp0;Vec3f op1 = ViewPort * Projection2 * ModelView *swp1;line(op0, op1, image, green);}// Please add the code here/********** Begin ********/float t33[3] = { 1.2, 0,-1.2 };Matrix ModelView33 = Matrix::identity(4);PNGColor clrRed[3] = { red, red, red };Vec3f eye33(0, 0, 4);Matrix Projection33 = projection(eye33, center);for (int j = 0; j < 3; j++){ModelView33 = translation(Vec3f(t33[j], t[0], 0));Vec3f op0 = ViewPort * Projection33 * ModelView33 * swp0;Vec3f op1 = ViewPort * Projection33 * ModelView33 * swp1;line(op0, op1, image, red);}float t44[3] = { 1.2, 0,-1.2 };Matrix ModelView44 = Matrix::identity(4);PNGColor clrYellow[3] = { yellow, yellow, yellow };Vec3f eye44(0, 0, 8);Matrix Projection44 = projection(eye44, center);for (int j = 0; j < 3; j++){ModelView44 = translation(Vec3f(t44[j], t[2], 0));Vec3f op0 = ViewPort * Projection44 * ModelView44 * swp0;Vec3f op1 = ViewPort * Projection44 * ModelView44 * swp1;line(op0, op1, image, yellow);}/********** End **********/}}image.flip_vertically(); // i want to have the origin at the left bottom corner of the imageimage.write_png_file("../img_step1/test.png");delete model;return 0;
}
这篇关于头歌实践教学平台:投影变换v2.0的文章就介绍到这儿,希望我们推荐的文章对编程师们有所帮助!


