本文主要是介绍前端vite+rollup前端监控初始化——封装基础fmp消耗时间的npm包并且发布npm beta版本,希望对大家解决编程问题提供一定的参考价值,需要的开发者们随着小编来一起学习吧!
文章目录
- ⭐前言
- 💖vue3系列文章
- ⭐初始化npm项目
- 💖type为module
- 💖rollup.config.js
- ⭐封装fmp耗时计算的class
- 💖npm build打包class对象
- ⭐发布npm的beta版本
- 💖 npm发布beta版本
- ⭐安装web-performance-tool的beta版本并使用
- 💖 安装beta版本
- 💖 vue3中使用
- ⭐结束

⭐前言
大家好,我是yma16,本文分享关于 前端vite+rollup——封装性能优化的npm包。
什么是 rollup
Rollup 是一个用于 JavaScript 的模块打包工具,它将小的代码片段编译成更大、更复杂的代码,例如库或应用程序。它使用 JavaScript 的 ES6 版本中包含的新标准化代码模块格式,而不是以前的 CommonJS 和 AMD 等特殊解决方案。ES 模块允许你自由无缝地组合你最喜欢的库中最有用的个别函数。这在未来将在所有场景原生支持,但 Rollup 让你今天就可以开始这样做。
npm普遍性
通过 npm,开发者可以轻松地搜索和安装成千上万个可重用的代码包。npm 提供了一个全球性的软件注册表(registry),开发者可以在其中发布他们的模块,以便其他人能够方便地使用它们。
💖vue3系列文章
vue3 + fastapi 实现选择目录所有文件自定义上传到服务器
前端vue2、vue3去掉url路由“ # ”号——nginx配置
csdn新星计划vue3+ts+antd赛道——利用inscode搭建vue3(ts)+antd前端模板
认识vite_vue3 初始化项目到打包
python_selenuim获取csdn新星赛道选手所在城市用echarts地图显示
让大模型分析csdn文章质量 —— 提取csdn博客评论在文心一言分析评论区内容
前端vue3——html2canvas给网站截图生成宣传海报
vue3+echarts可视化——记录我的2023编程之旅
前端vite+vue3——自动化配置路由布局
前端vite+vue3——可视化页面性能耗时指标(fmp、fp)
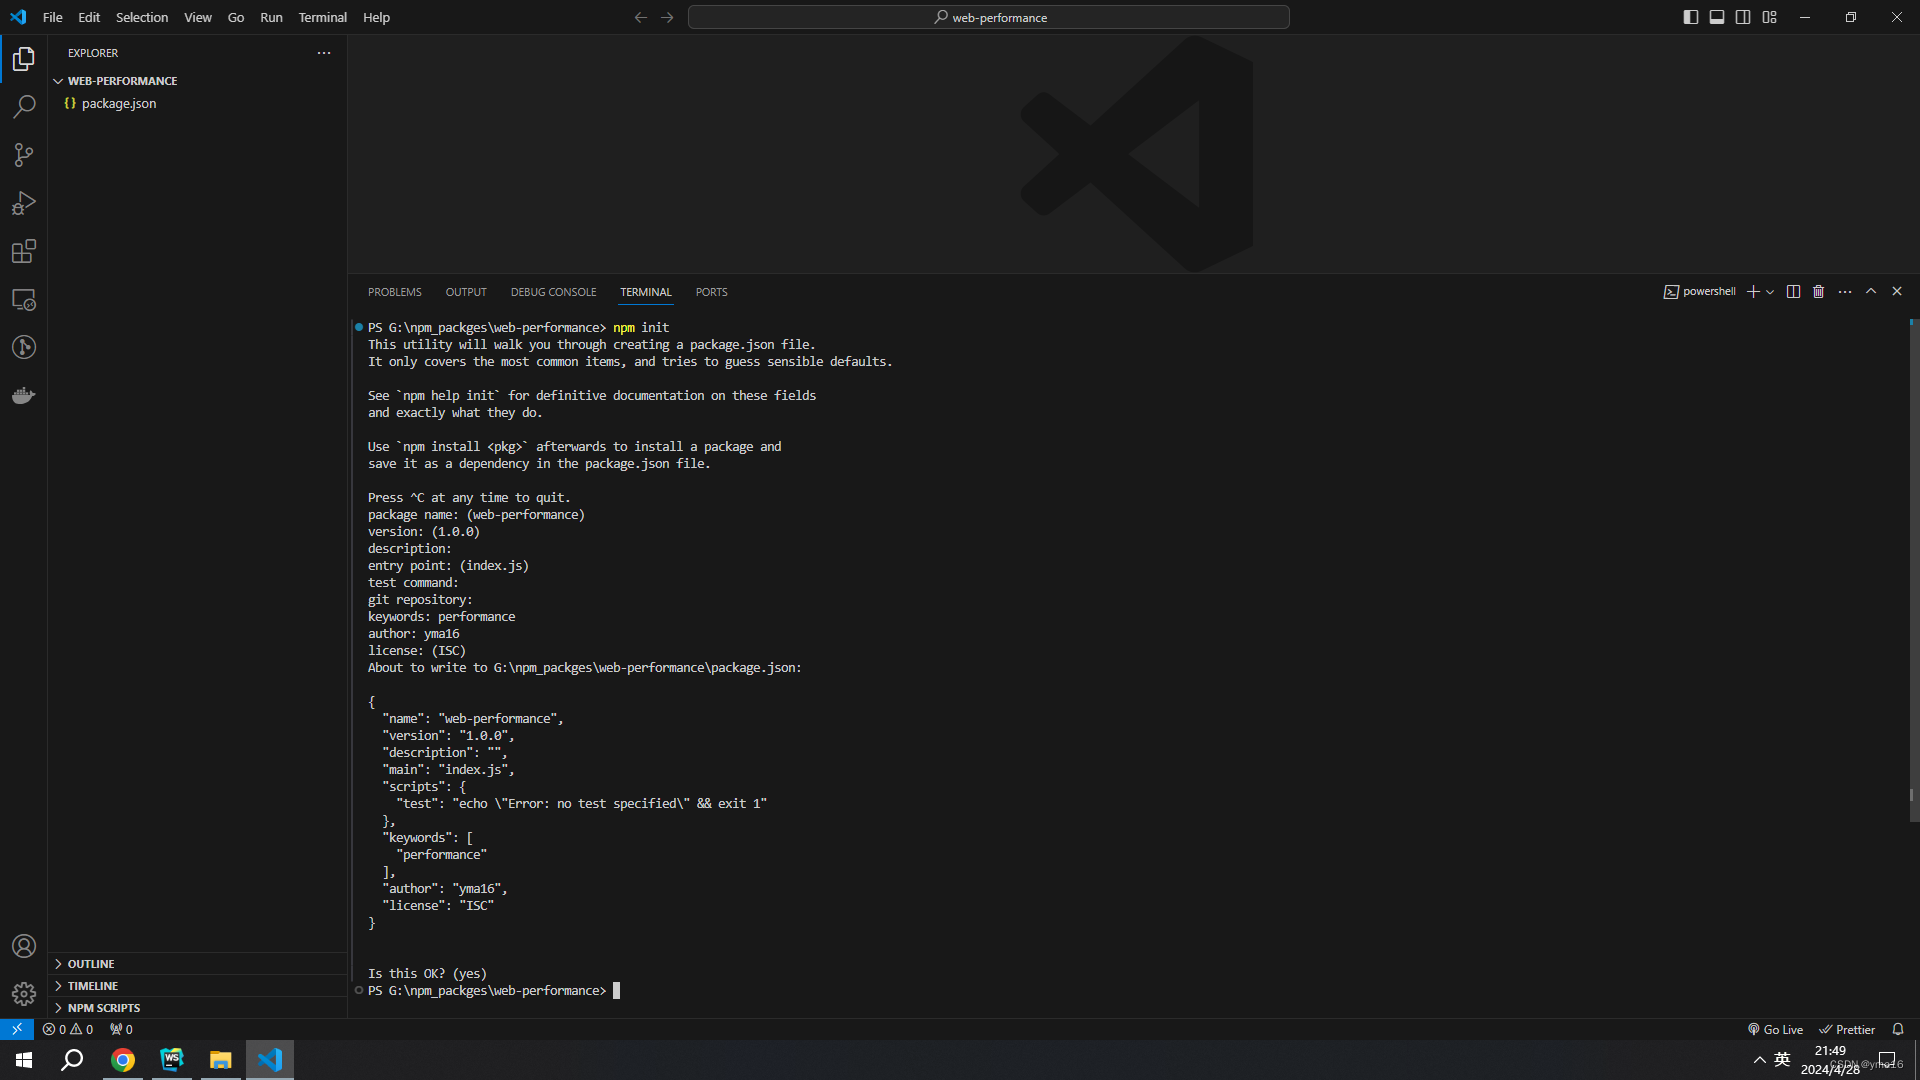
⭐初始化npm项目
初始化
npm init
💖type为module
package.json 添加type为module
{"type": "module"}
安装 rollup
npm install rollup --save-dev
npm install --save-dev @rollup/plugin-json
npm install --save-dev @rollup/plugin-terser
添加build
{"scripts": {"build": "rollup --config"}
}
💖rollup.config.js
配置rollup.config.js,打包src目录下的main.js
// rollup.config.js
import json from '@rollup/plugin-json';
import terser from '@rollup/plugin-terser';export default {input: 'src/main.js',output: [{file: 'dist/index.js',}],plugins: [json(), terser()]
};
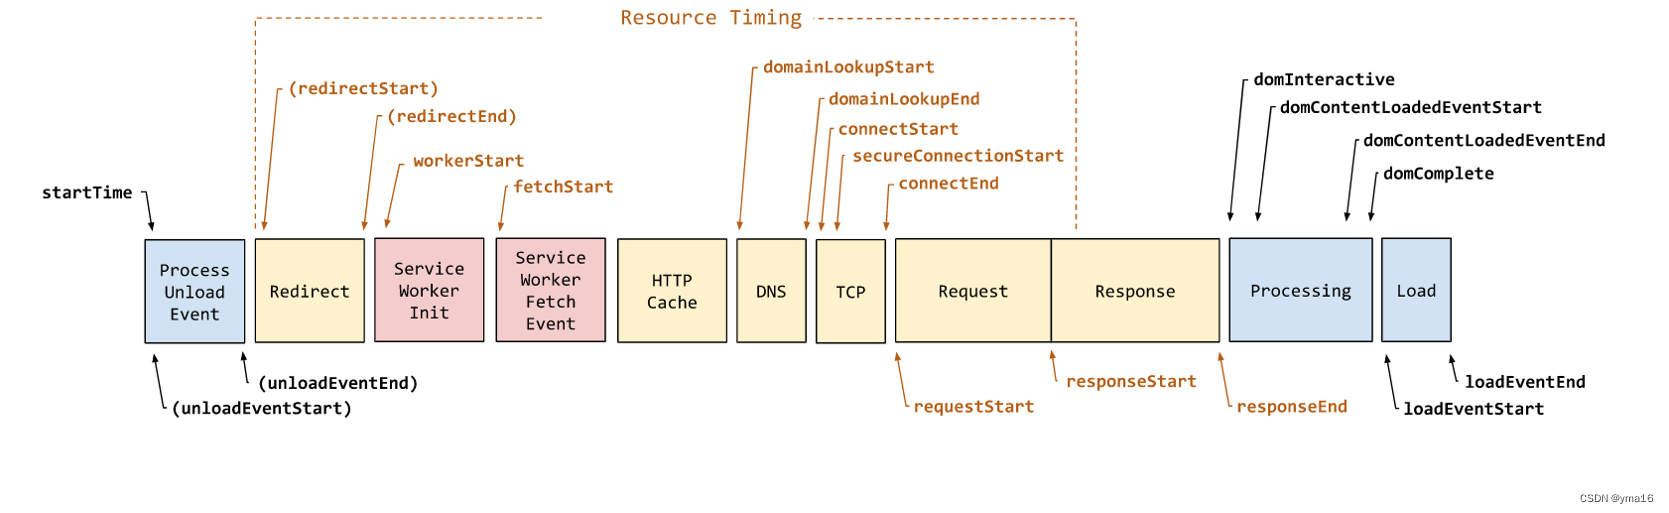
⭐封装fmp耗时计算的class
原理:
Performance 接口可以获取到当前页面中与性能相关的信息
并对外暴露一个mutation的使用方式
完整代码如下
class WebPerformance {// performanceperformanceConfig = {}constructor() {// 初始化为{}this.performanceConfig = {}}// 获取performancegetPerformance() {return this.performanceConfig}// 配置performancesetPerformance(key, value) {this.performanceConfig[key] = value}calcPerformance() {// Time to when activation occurredlet activationStart =performance.getEntriesByType("navigation")[0].activationStart;// Time to first paintlet firstPaint = performance.getEntriesByName("first-paint")[0].startTime;// Time to first contentful paintlet firstContentfulPaint = performance.getEntriesByName("first-contentful-paint",)[0].startTime;console.log("time to first paint: " + (firstPaint - activationStart));console.log("time to first-contentful-paint: " + (firstContentfulPaint - activationStart),);this.setPerformance('time to first paint', firstPaint - activationStart)this.setPerformance('time to first-contentful-paint', firstContentfulPaint - activationStart)const entries = performance.getEntriesByType("navigation");const that = thisentries.forEach((entry) => {console.log(`${entry.name}: domComplete time: ${entry.domComplete}ms`);that.setPerformance('domComplete time', entry.domComplete)const domContentLoadedTime =entry.domContentLoadedEventEnd - entry.domContentLoadedEventStart;console.log(`${entry.name}: DOMContentLoaded processing time: ${domContentLoadedTime}ms`,);that.setPerformance(entry.name, domContentLoadedTime)});}// 监听 dom变化mutationDomAction(listenDom, callbackAction) {console.log('listenDom', listenDom);// 观察器的配置(需要观察什么变动)const config = { attributes: true, childList: true, subtree: true };// 当观察到变动时执行的回调函数const callback = function(mutationsList, observer) {console.log('listenDom', listenDom)const renderHeight = listenDom.offsetHeightconsole.log('renderHeight_____________', renderHeight)console.log('change_______________', mutationsList)// Use traditional 'for loops' for IE 11// for (let mutation of mutationsList) {//     if (mutation.type === "childList") {//         console.log("A child node has been added or removed.");//     } else if (mutation.type === "attributes") {//         console.log("The " + mutation.attributeName + " attribute was modified.");//     }// }if (parseInt(renderHeight)) {// 第一次监听dom 存在高度则判定已经渲染完root节点,不关注子节点callbackAction()// 停止观察observer.disconnect();}};// 创建一个观察器实例并传入回调函数const observer = new MutationObserver(callback);// 以上述配置开始观察目标节点observer.observe(listenDom, config);}
}export { WebPerformance }
注意其中的class需要export抛出来。
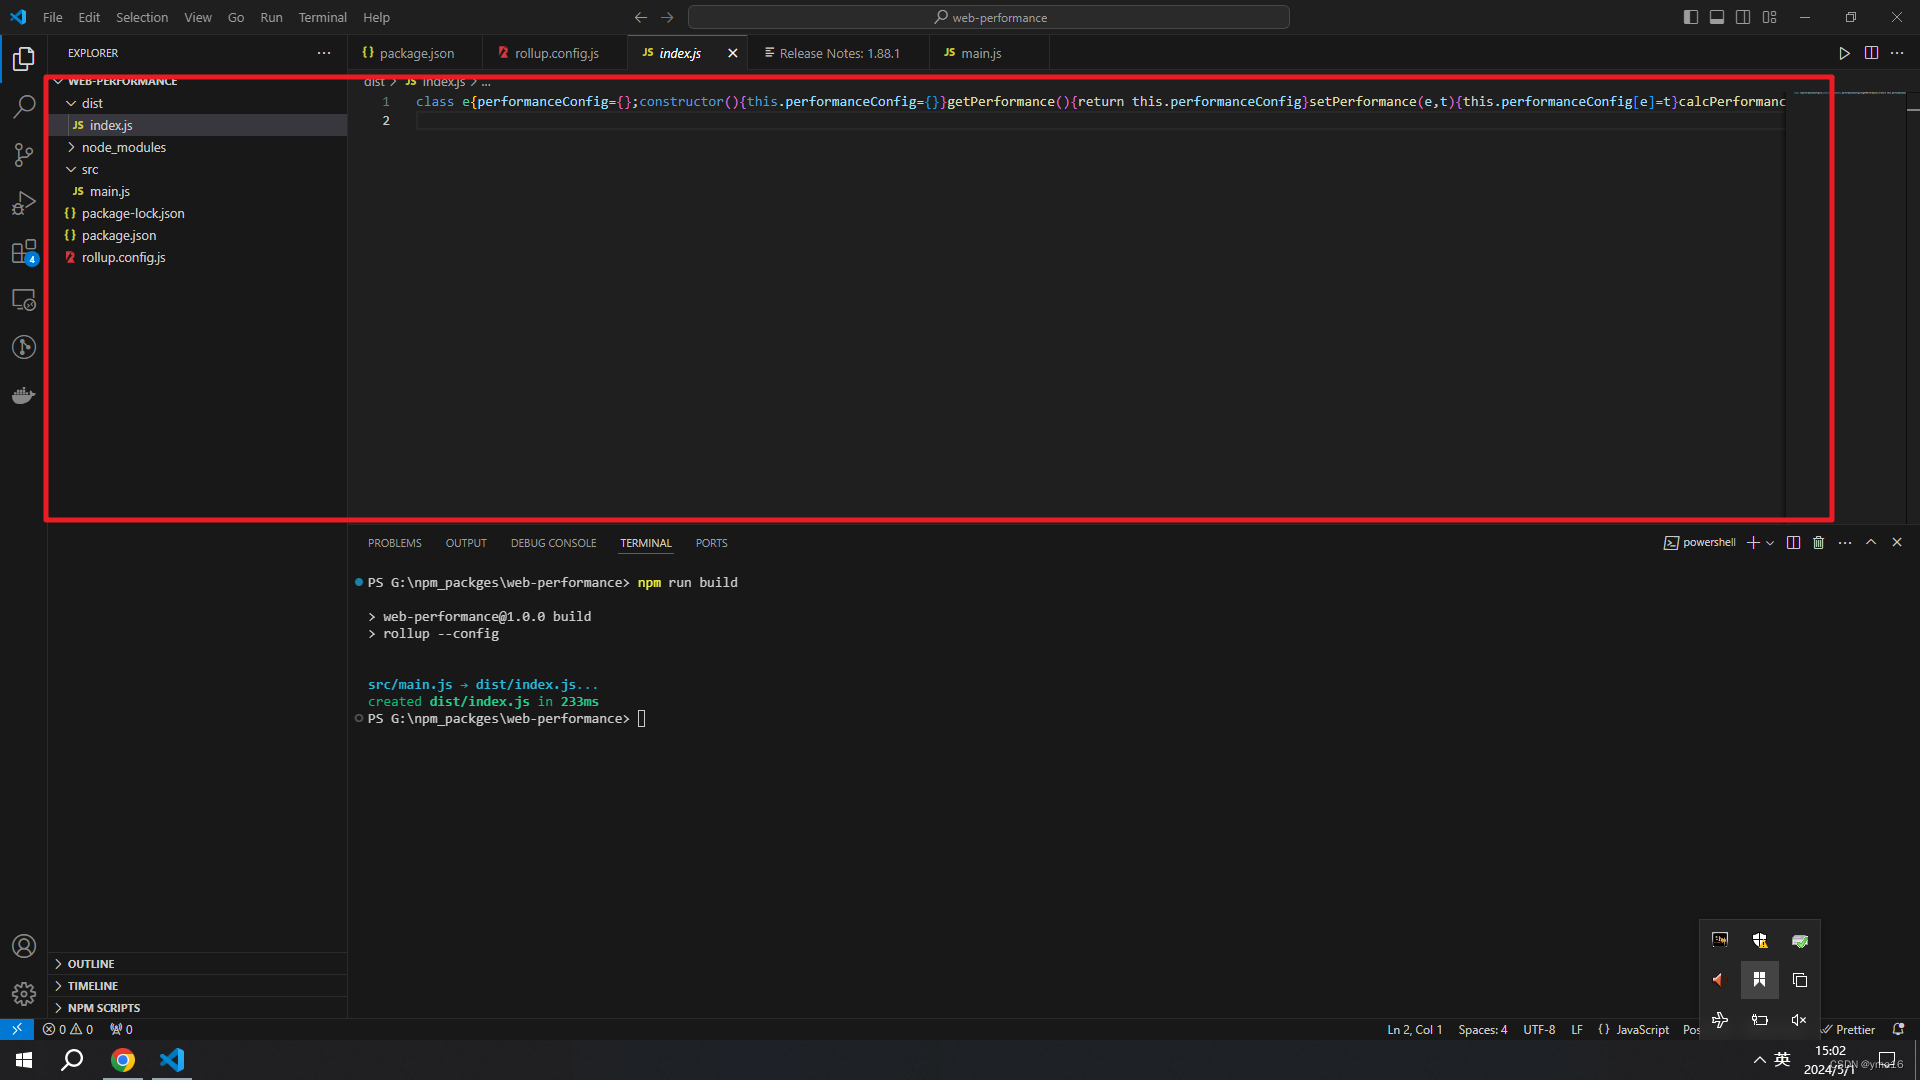
💖npm build打包class对象
打包对象
npm run build
结果如下,打包的index文件已经压缩
⭐发布npm的beta版本
发布npm的基础篇
nodejs_npm发布package
配置npm包的package.json
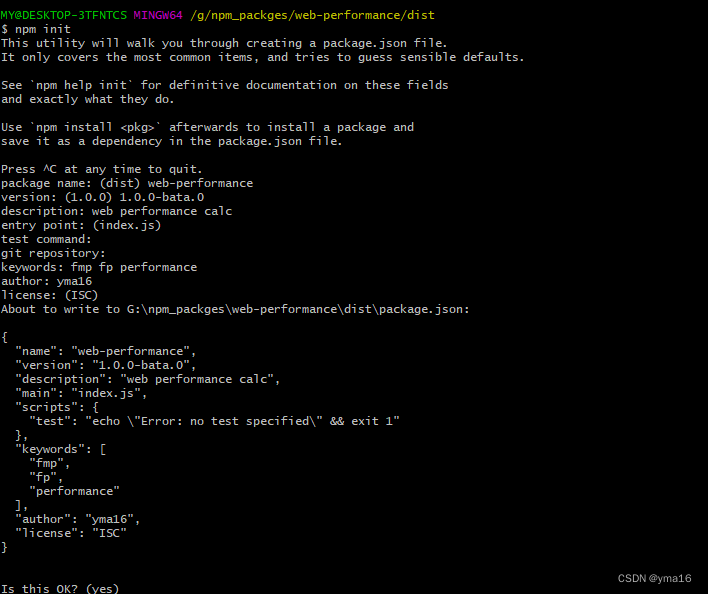
配置如下
{"name": "web-performance-tool","version": "1.0.0-bata.0","description": "web performance calc","main": "index.js","scripts": {"test": "echo \"Error: no test specified\" && exit 1"},"keywords": ["fmp","fp","performance"],"author": "yma16","license": "ISC"
}
💖 npm发布beta版本
npm publish --tag beta
发布成功
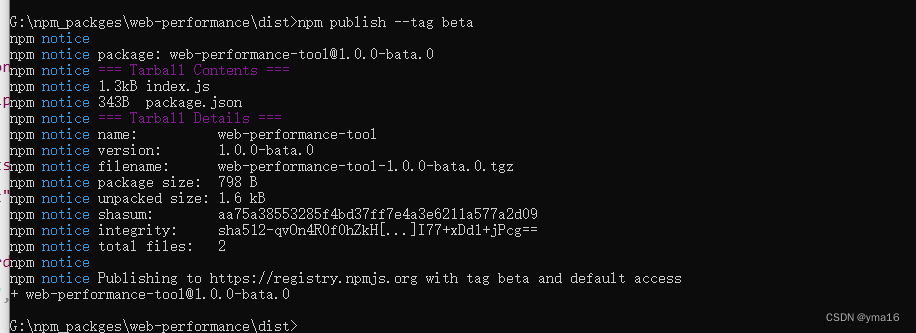
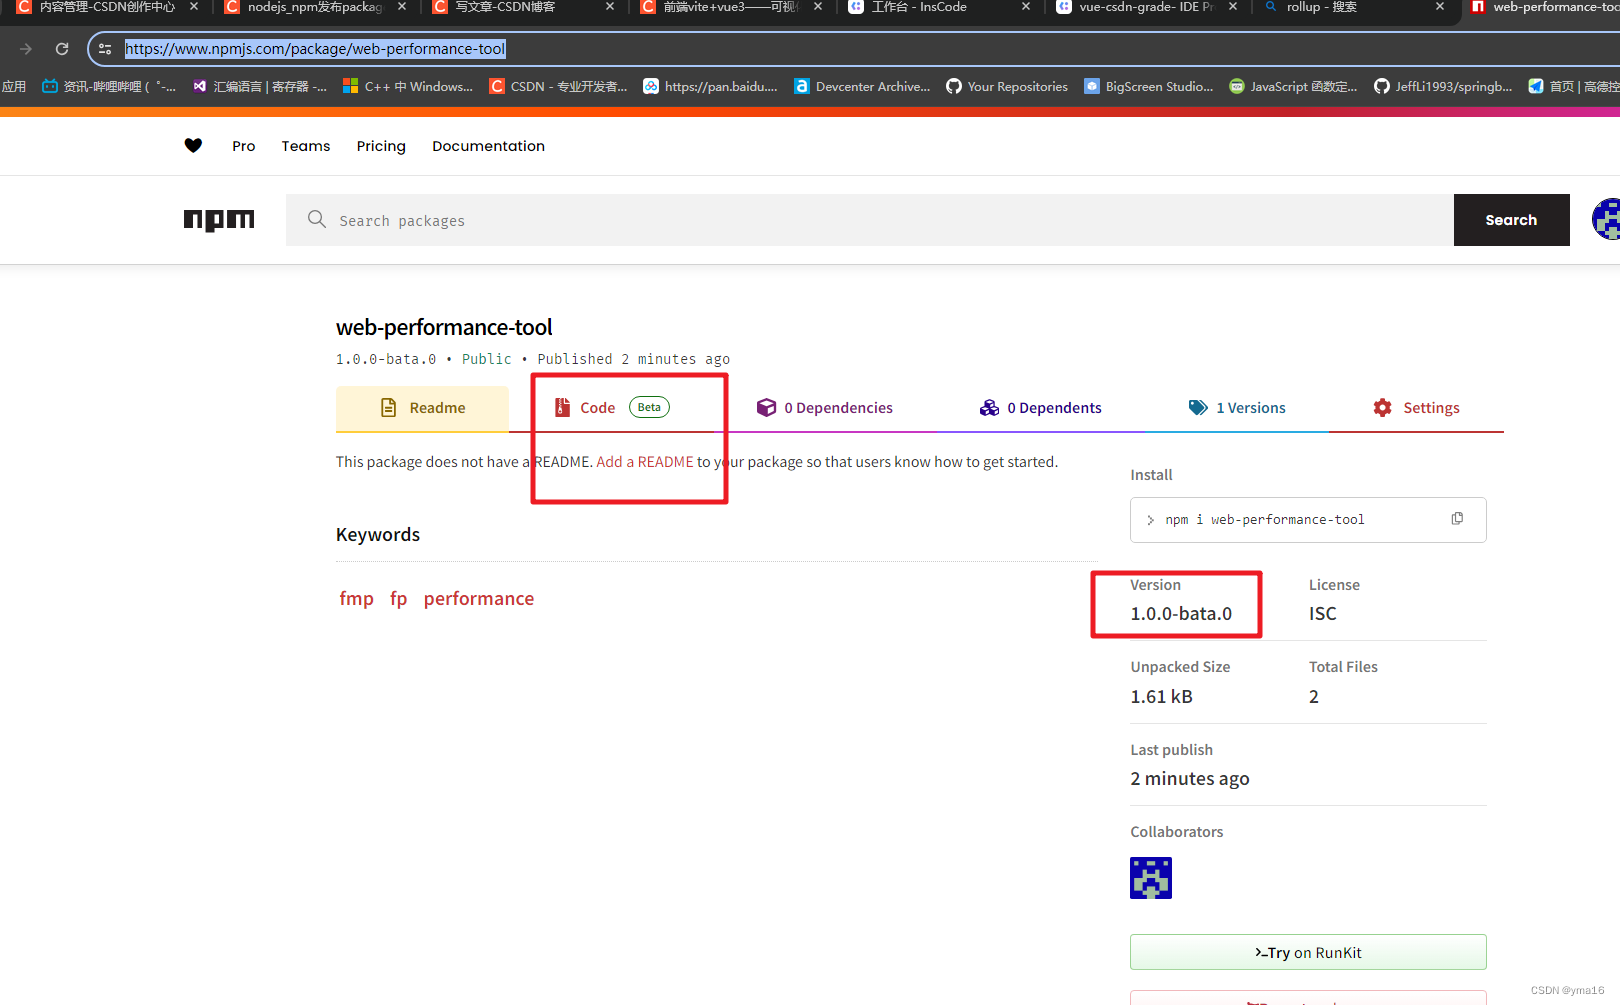
npm包的地址
https://www.npmjs.com/package/web-performance-tool
⭐安装web-performance-tool的beta版本并使用
💖 安装beta版本
npm 安装指定镜像https://registry.npmmirror.com
npm install web-performance-tool@beta --registry https://registry.npmmirror.com
使用yarn
yarn add web-performance-tool@beta --registry https://registry.npmmirror.com
💖 vue3中使用
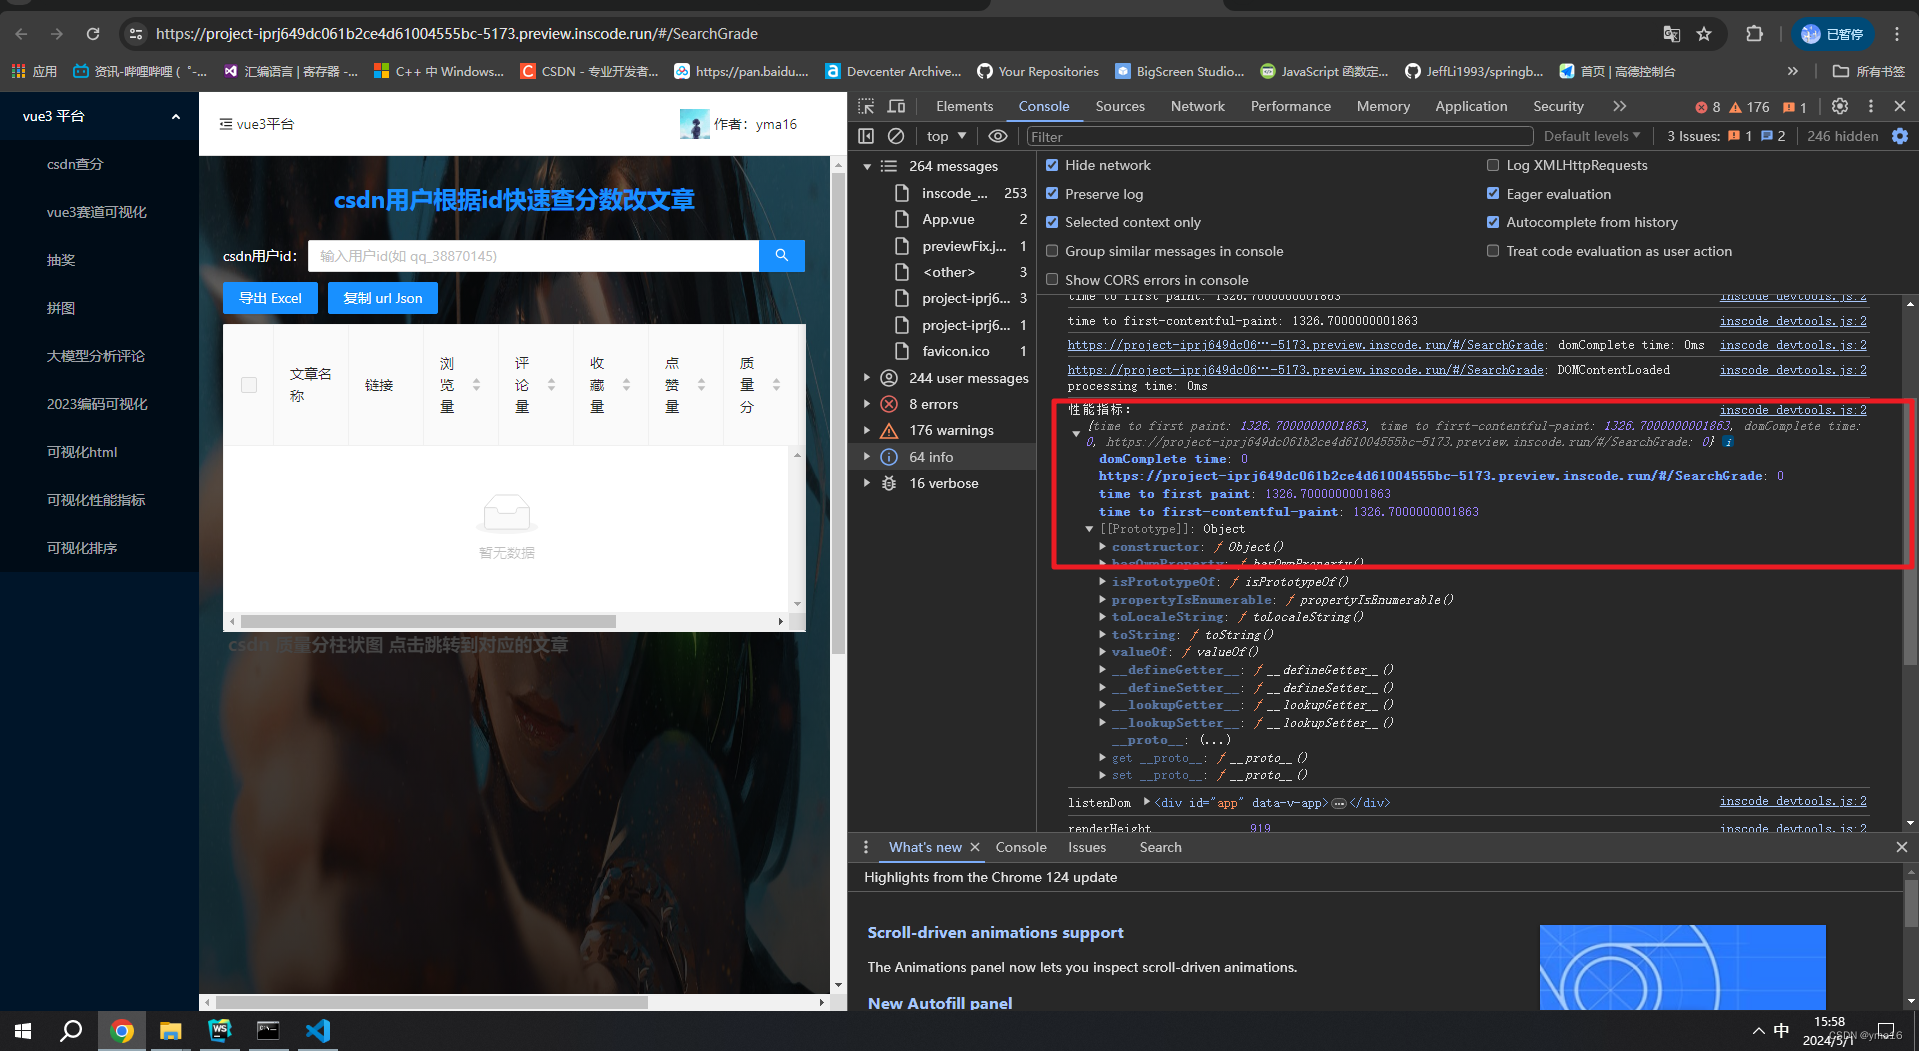
页面渲染完使用WebPerformance
import {WebPerformance} from 'web-performance-tool';
onMounted(()=>{const WebPerformanceInstance=new WebPerformance();// 计算性能WebPerformance.calcPerformance();console.log('性能指标:',WebPerformanceInstance.getPerformance())
})
计算结果符合预期:
time to first paint: 1326.7000000001863
time to first-contentful-paint: 1326.7000000001863
⭐结束
本文分享到这结束,如有错误或者不足之处欢迎指出!

👍 点赞,是我创作的动力!
⭐️ 收藏,是我努力的方向!
✏️ 评论,是我进步的财富!
💖 最后,感谢你的阅读!
这篇关于前端vite+rollup前端监控初始化——封装基础fmp消耗时间的npm包并且发布npm beta版本的文章就介绍到这儿,希望我们推荐的文章对编程师们有所帮助!


