本文主要是介绍SpringCloudStream 3.x rabbit 使用,希望对大家解决编程问题提供一定的参考价值,需要的开发者们随着小编来一起学习吧!
1. 前言
今天带来的是SpringCloudStream 3.x 的新玩法,通过四大函数式接口的方式进行数据的发送和监听。本文将通过 rabbitMQ 的方式进行演示
3.x版本后是 可以看到 @StreamListener 和 @EnableBinding 都打上了@Deprecated 注解。后续的版本更新中会逐渐替换成函数式的方式实现。 既然通过四大函数式接口的方式替换了注解的方式 那么
该如何进行绑定呢?通过:spring.cloud.stream.function.definition: 名称 的方式进行绑定 公开topic。不管是创建 Consumer 还是 Supplier 或者是 Function Stream都会将其的 方法名称 进行 一个topic 拆封 和 绑定 假设 创建了一个 Consumer< String > myTopic 的方法,Stream 会将其 拆分成 in 和 out 两个通道 input - < functionName > + -in- + < index > output - <
functionName > + -out- + < index > 格式拆分 myTopic-in-0 myTopic-out-0
2. 项目演练
spring boot用的是2.7.0的
2.1 引用依赖
 <dependency><groupId>org.springframework.cloud</groupId><artifactId>spring-cloud-starter-stream-rabbit</artifactId>
</dependency>
2.2 修改配置文件
server:port: 8080
# rabbitmq 消费者配置
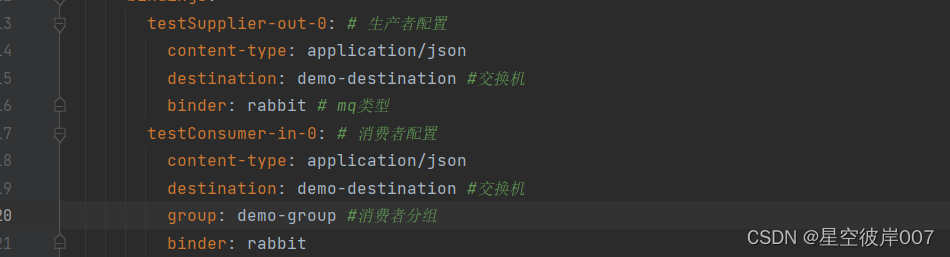
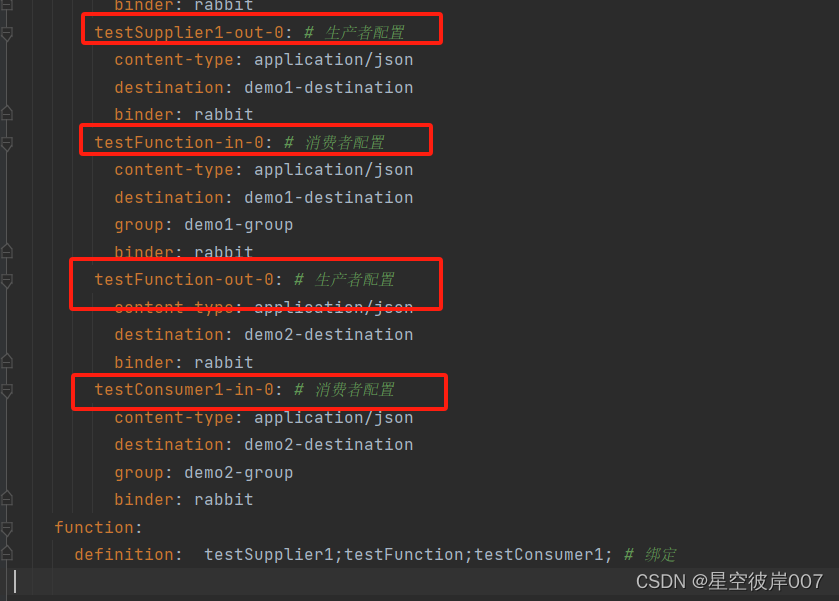
spring:rabbitmq:host: localhost # rabbitmq服务地址port: 5672username: guestpassword: guestcloud:stream:bindings:testSupplier-out-0: # 生产者配置content-type: application/jsondestination: demo-destination #交换机binder: rabbit # mq类型testConsumer-in-0: # 消费者配置content-type: application/jsondestination: demo-destination #交换机group: demo-group #消费者分组binder: rabbittestSupplier1-out-0: # 生产者配置content-type: application/jsondestination: demo1-destinationbinder: rabbittestFunction-in-0: # 消费者配置content-type: application/jsondestination: demo1-destinationgroup: demo1-groupbinder: rabbittestFunction-out-0: # 生产者配置content-type: application/jsondestination: demo2-destinationbinder: rabbittestConsumer1-in-0: # 消费者配置content-type: application/jsondestination: demo2-destinationgroup: demo2-groupbinder: rabbitfunction:definition: testSupplier;testConsumer;testSupplier1;testFunction;testConsumer1; # 绑定
2.3 具体使用
2.3.1 自动发送消息
修改配置文件
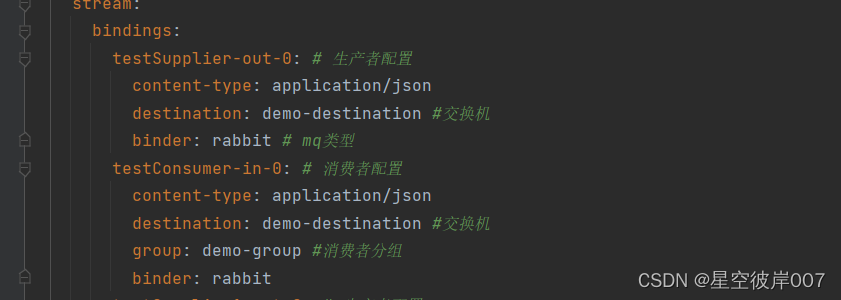

定义生产者bean
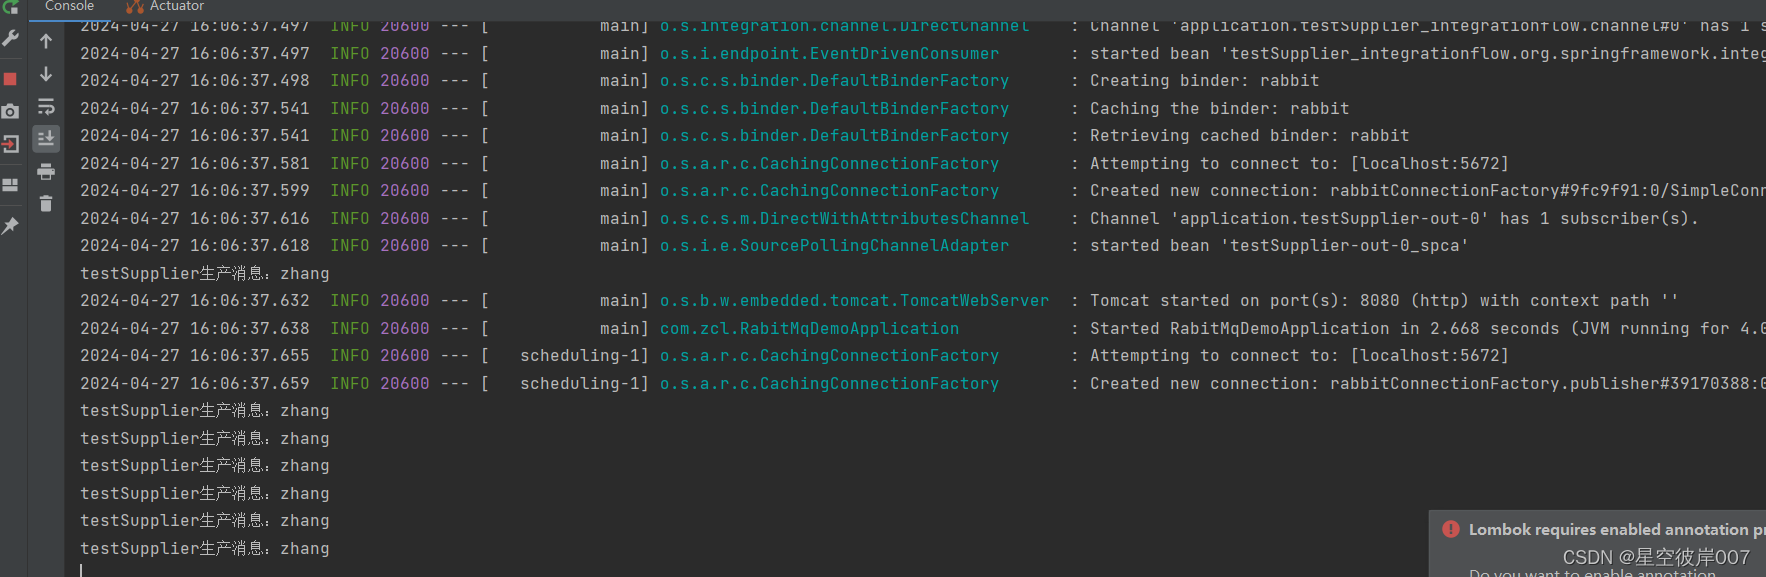
/*** 注意方法名称 testSupplier 要与配置文件中的spring.cloud.stream.bindings.testSupplier-out-0 保持一致* 其中 -out-0 是固定写法,out 标识生产者类型,0是生产者索引*/@Beanpublic Supplier<Person> testSupplier() {return ()->{Person person = new Person();person.setName("zhang");System.out.println("testSupplier生产消息:"+person);return person;};}
使用Supplier函数作为生产者,这个生产者,会一直自动生产消息。
定义消费者bean
/*** 注意方法名称 testConsumer 要与配置文件中的spring.cloud.stream.bindings.testConsumer-in-0 保持一致* 其中 -in-0 是固定写法,in 标识消费者类型,0是消费者索引*/@Beanpublic Consumer<Person> testConsumer() {return msg -> {System.out.println("testConsumer消费消息: " + msg);};}
使用Consumer函数作为消费者,是自动检测的,只要队列中有数据就会取出来消费,本项目中该消费者配置如下:
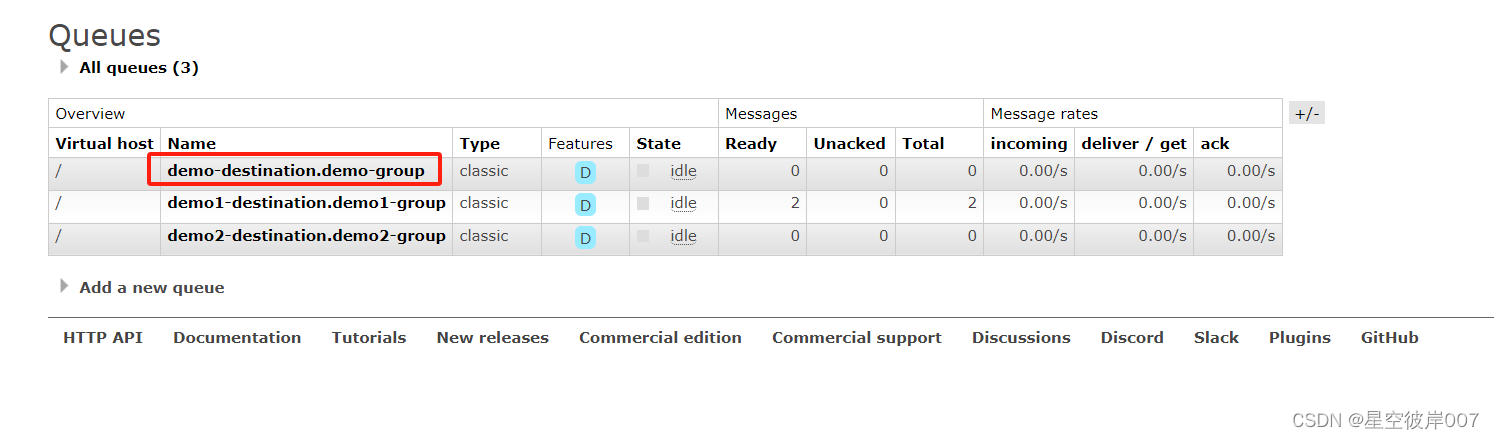
testConsumer-in-0: # 消费者配置content-type: application/jsondestination: demo-destination #交换机group: demo-group #消费者分组binder: rabbit
该消费者会一直监控队列destination.group ,也就是demo-destination.demo-group

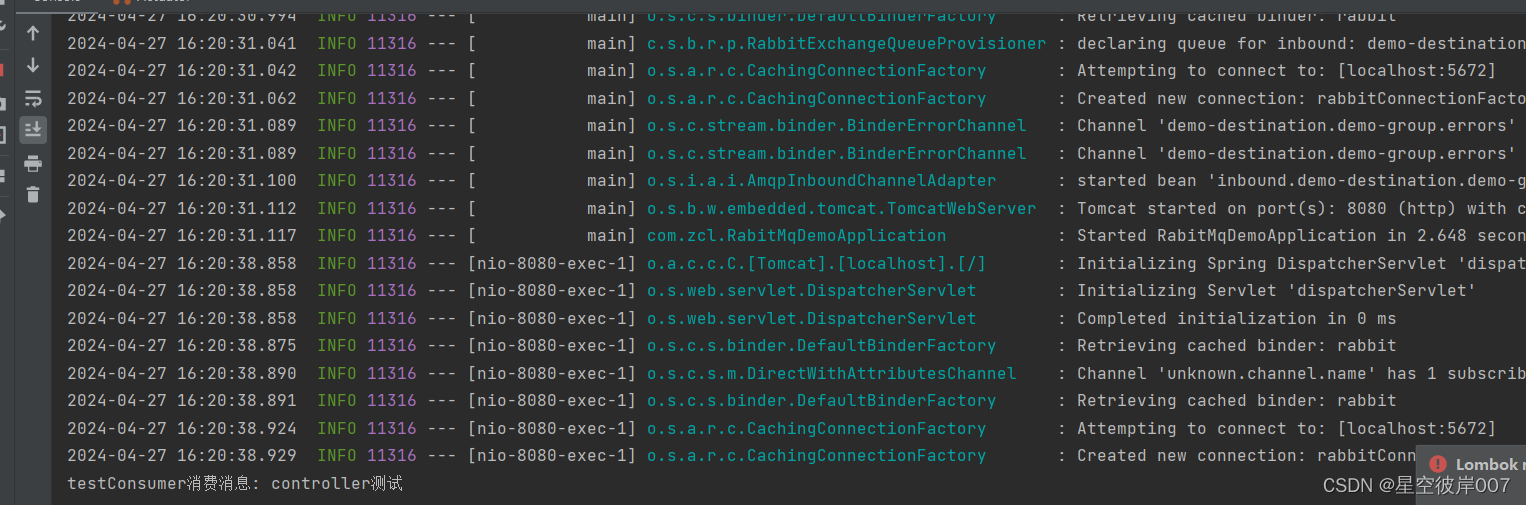
2.3.2 手动发送消息
只绑定消费者,生产者不绑定,其他的和自动发送消息一样不变


发送消息
@GetMapping("sendMsg")public String sendMsg(){Person person = new Person();person.setName("controller测试");Message<Person> message = MessageBuilder.withPayload(person).build();// 发送消息streamBridge.send("testSupplier-out-0", message);return "发送成功";}

2.3.3 加工消息
- 修改配置文件
- 生产者定义
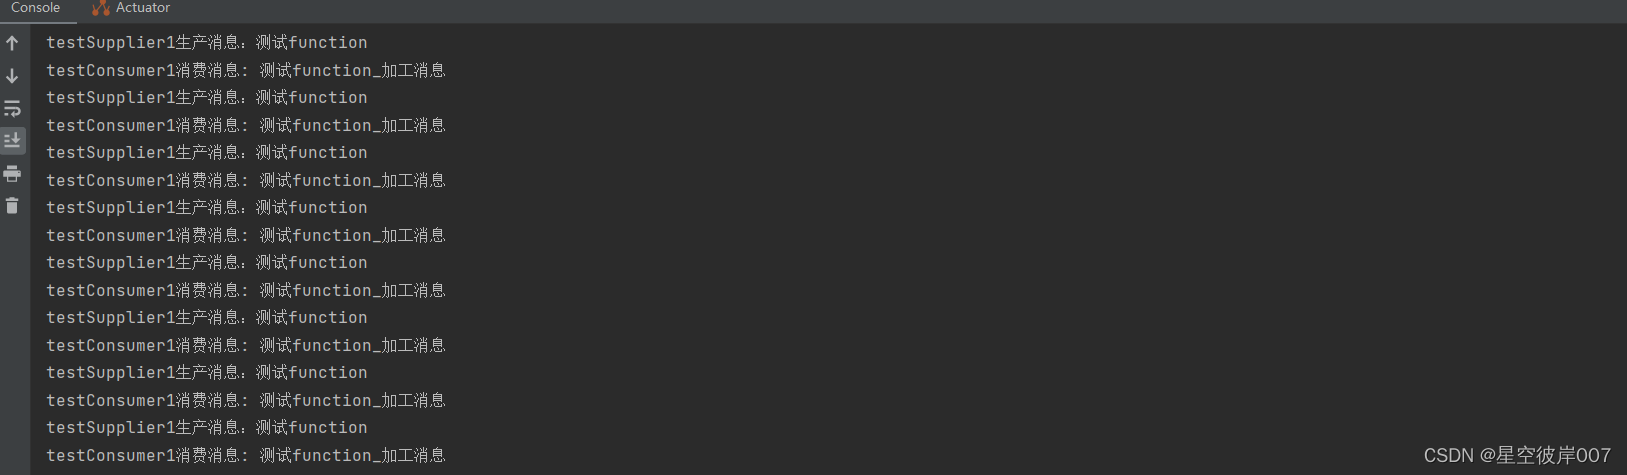
@Beanpublic Supplier<Person> testSupplier1() {return ()->{Person person = new Person();person.setName("测试function");System.out.println("testSupplier1生产消息:"+person);return person;};}
- 消费者定义
@Beanpublic Consumer<Person> testConsumer1() {return msg -> {System.out.println("testConsumer1消费消息: " + msg);};}
- 加工funtion定义
@Beanpublic Function<Person, Person> testFunction() {return msg -> {msg.setName(msg.getName()+"_加工消息");return msg;};}
- 结果
3 项目源码
3.1 pom.xml 文件
<?xml version="1.0" encoding="UTF-8"?>
<project xmlns="http://maven.apache.org/POM/4.0.0" xmlns:xsi="http://www.w3.org/2001/XMLSchema-instance"xsi:schemaLocation="http://maven.apache.org/POM/4.0.0 https://maven.apache.org/xsd/maven-4.0.0.xsd"><modelVersion>4.0.0</modelVersion><parent><groupId>org.springframework.boot</groupId><artifactId>spring-boot-starter-parent</artifactId><version>2.7.0</version><relativePath/> <!-- lookup parent from repository --></parent><groupId>com.zcl</groupId><artifactId>rabitMQDemo</artifactId><version>0.0.1-SNAPSHOT</version><name>rabitMQDemo</name><description>rabitMQDemo</description><properties><java.version>1.8</java.version><spring-cloud.version>2021.0.3</spring-cloud.version></properties><dependencies><dependency><groupId>org.springframework.cloud</groupId><artifactId>spring-cloud-starter-stream-rabbit</artifactId></dependency><dependency><groupId>org.springframework.boot</groupId><artifactId>spring-boot-starter-test</artifactId><scope>test</scope></dependency><dependency><groupId>org.springframework.boot</groupId><artifactId>spring-boot-starter-web</artifactId></dependency></dependencies><dependencyManagement><dependencies><dependency><groupId>org.springframework.cloud</groupId><artifactId>spring-cloud-dependencies</artifactId><version>${spring-cloud.version}</version><type>pom</type><scope>import</scope></dependency></dependencies></dependencyManagement><build><plugins><plugin><groupId>org.springframework.boot</groupId><artifactId>spring-boot-maven-plugin</artifactId></plugin></plugins></build></project>
3.2 application.yaml
server:port: 8080
--- # rabbitmq 消费者配置
spring:rabbitmq:host: localhostport: 5672username: guestpassword: guestcloud:stream:bindings:testSupplier-out-0:content-type: application/jsondestination: demo-destinationgroup: demo-groupbinder: rabbittestConsumer-in-0:content-type: application/jsondestination: demo-destinationgroup: demo-groupbinder: rabbittestSupplier1-out-0:content-type: application/jsondestination: demo1-destinationgroup: demo1-groupbinder: rabbittestFunction-in-0:content-type: application/jsondestination: demo1-destinationgroup: demo1-groupbinder: rabbittestFunction-out-0:content-type: application/jsondestination: demo2-destinationgroup: demo2-groupbinder: rabbittestConsumer1-in-0:content-type: application/jsondestination: demo2-destinationgroup: demo2-groupbinder: rabbitfunction:definition: testSupplier1;testFunction;testConsumer1;
3.3 RabbitMqComponent.java
package com.zcl.component;import com.zcl.RabitMqDemoApplication;
import com.zcl.entity.Person;
import org.springframework.context.annotation.Bean;
import org.springframework.stereotype.Component;import java.util.function.Consumer;
import java.util.function.Function;
import java.util.function.Supplier;@Component
public class RabbitMqComponent {/*** 注意方法名称 testConsumer 要与配置文件中的spring.cloud.stream.bindings.testConsumer-in-0 保持一致* 其中 -in-0 是固定写法,in 标识消费者类型,0是消费者索引*/@Beanpublic Consumer<Person> testConsumer() {return msg -> {System.out.println("testConsumer消费消息: " + msg);};}/*** 注意方法名称 testSupplier 要与配置文件中的spring.cloud.stream.bindings.testSupplier-out-0 保持一致* 其中 -out-0 是固定写法,out 标识生产者类型,0是生产者索引*/@Beanpublic Supplier<Person> testSupplier() {return ()->{Person person = new Person();person.setName("zhang");System.out.println("testSupplier生产消息:"+person);return person;};}@Beanpublic Supplier<Person> testSupplier1() {return ()->{Person person = new Person();person.setName("测试function");System.out.println("testSupplier1生产消息:"+person);return person;};}@Beanpublic Function<Person, Person> testFunction() {return msg -> {msg.setName(msg.getName()+"_加工消息");return msg;};}@Beanpublic Consumer<Person> testConsumer1() {return msg -> {System.out.println("testConsumer1消费消息: " + msg);};}
}
这篇关于SpringCloudStream 3.x rabbit 使用的文章就介绍到这儿,希望我们推荐的文章对编程师们有所帮助!


