本文主要是介绍微信小程序和公众号打通,实现用户关注公众号送优惠券,希望对大家解决编程问题提供一定的参考价值,需要的开发者们随着小编来一起学习吧!
前提
小程序
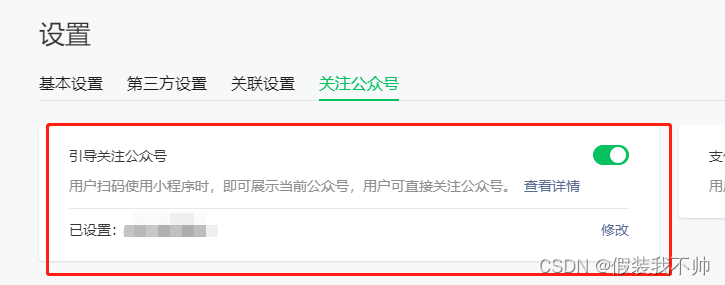
公众号
微信开放平台
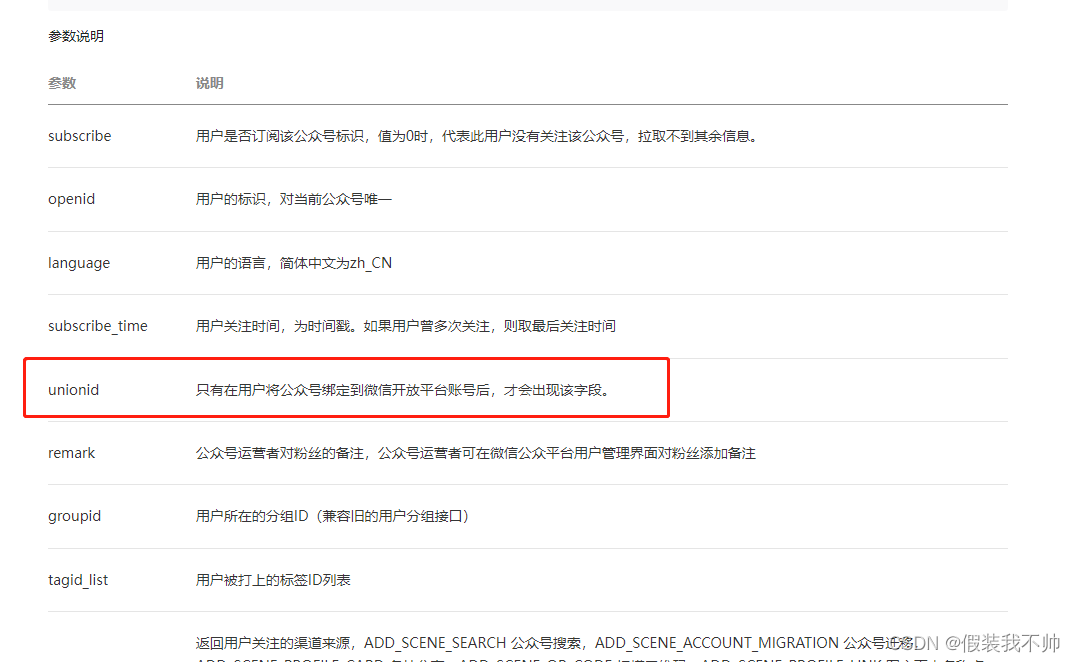
小程序和公众号都需要绑定到同一个微信开放平台,因为要获取Unionid,unionid是什么
如果开发者拥有多个移动应用、网站应用、和公众账号(包括小程序),可通过 UnionID 来区分用户的唯一性,因为只要是同一个微信开放平台账号下的移动应用、网站应用和公众账号(包括小程序),用户的 UnionID 是唯一的。换句话说,同一用户,对同一个微信开放平台下的不同应用,UnionID是相同的。
微信公众号获取unionid
小程序获取unionid

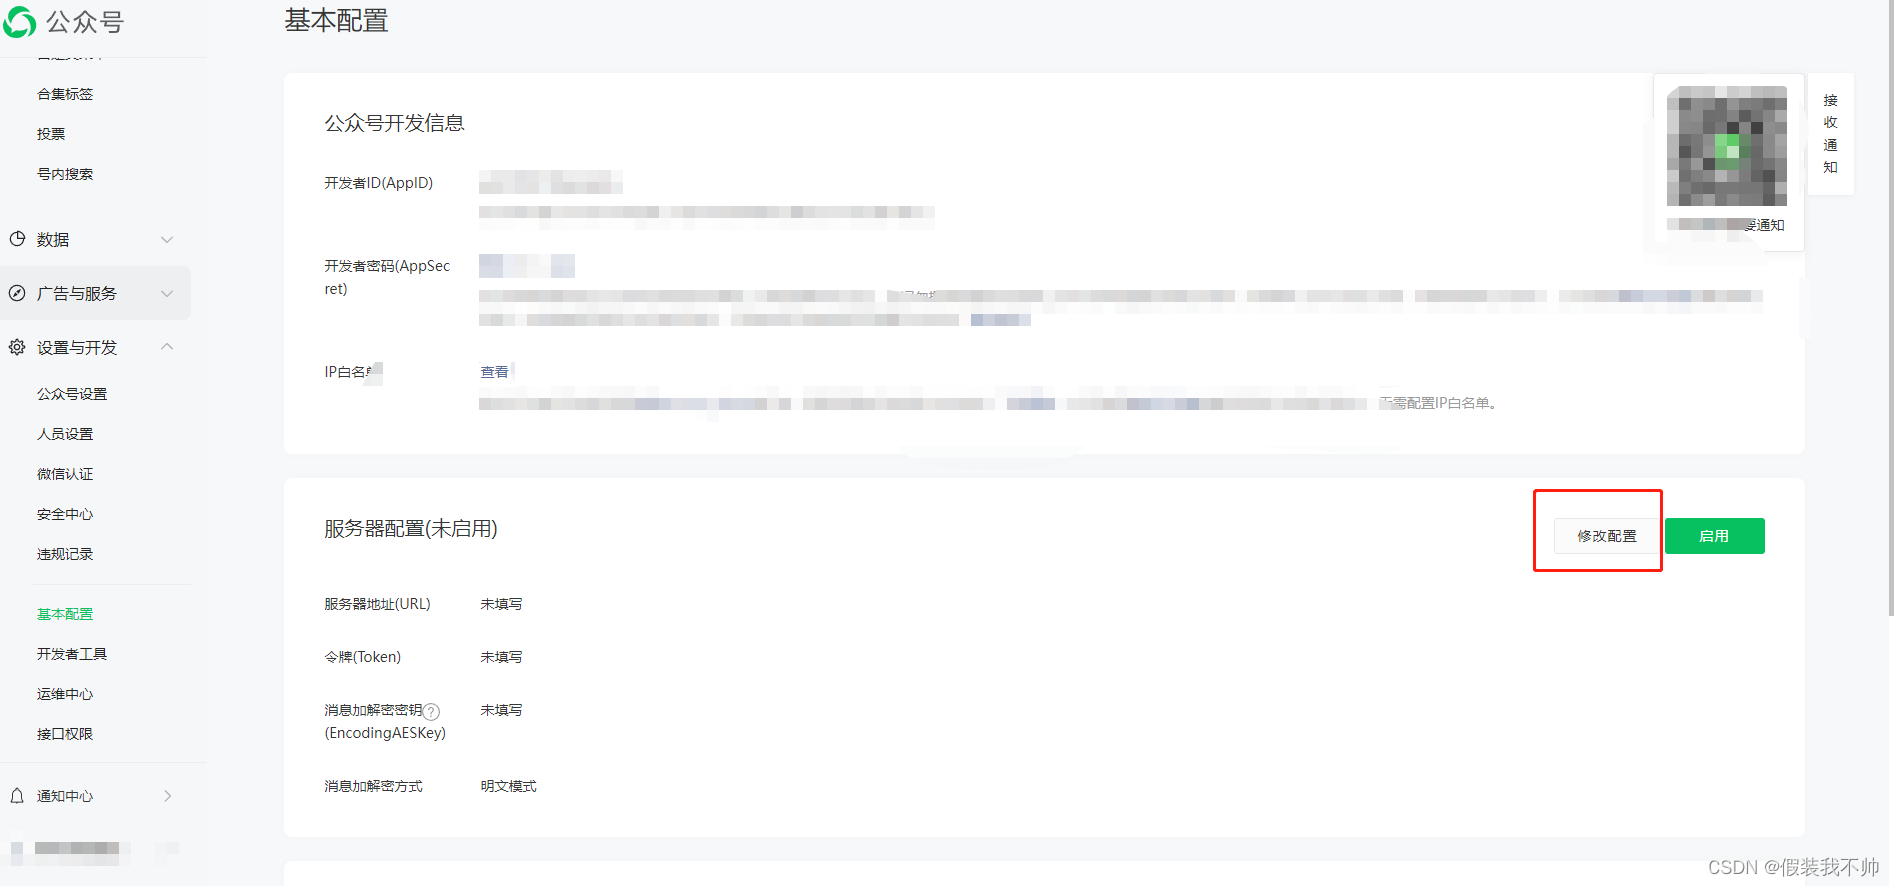
获取参数
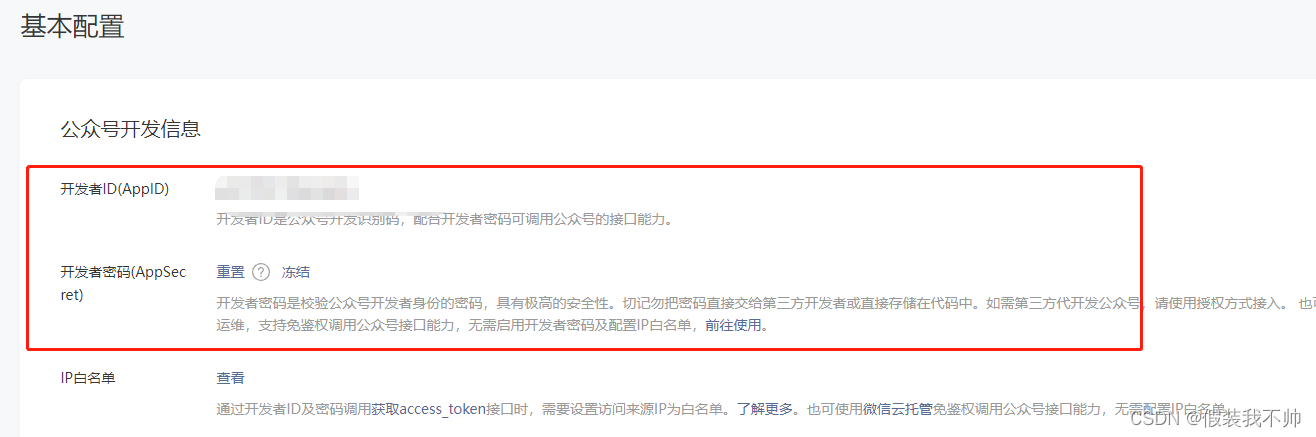
公众号appid和appsecret
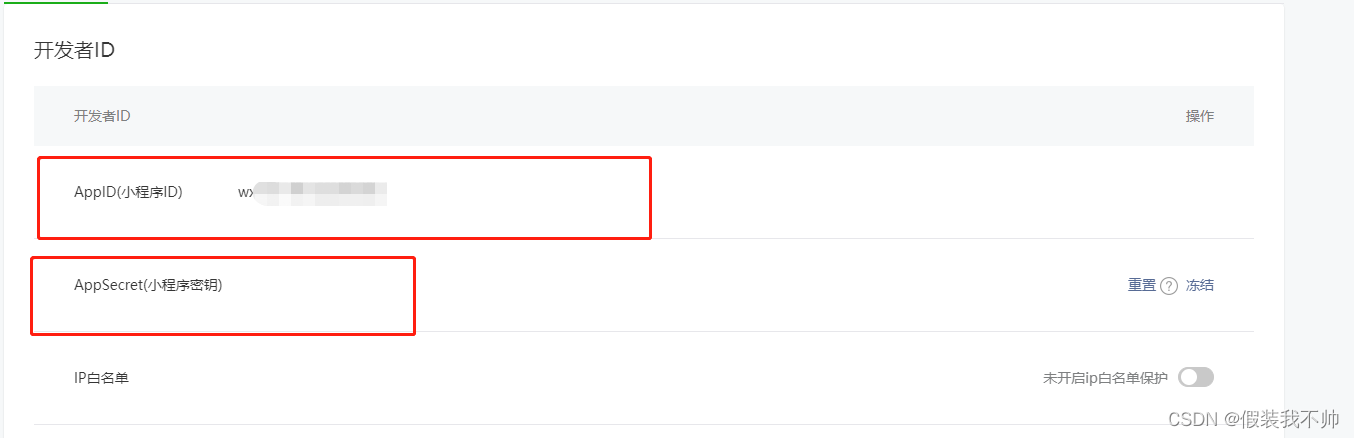
小程序appid和appsecret
微信小程序关注公众号组件
https://developers.weixin.qq.com/miniprogram/dev/component/official-account.html
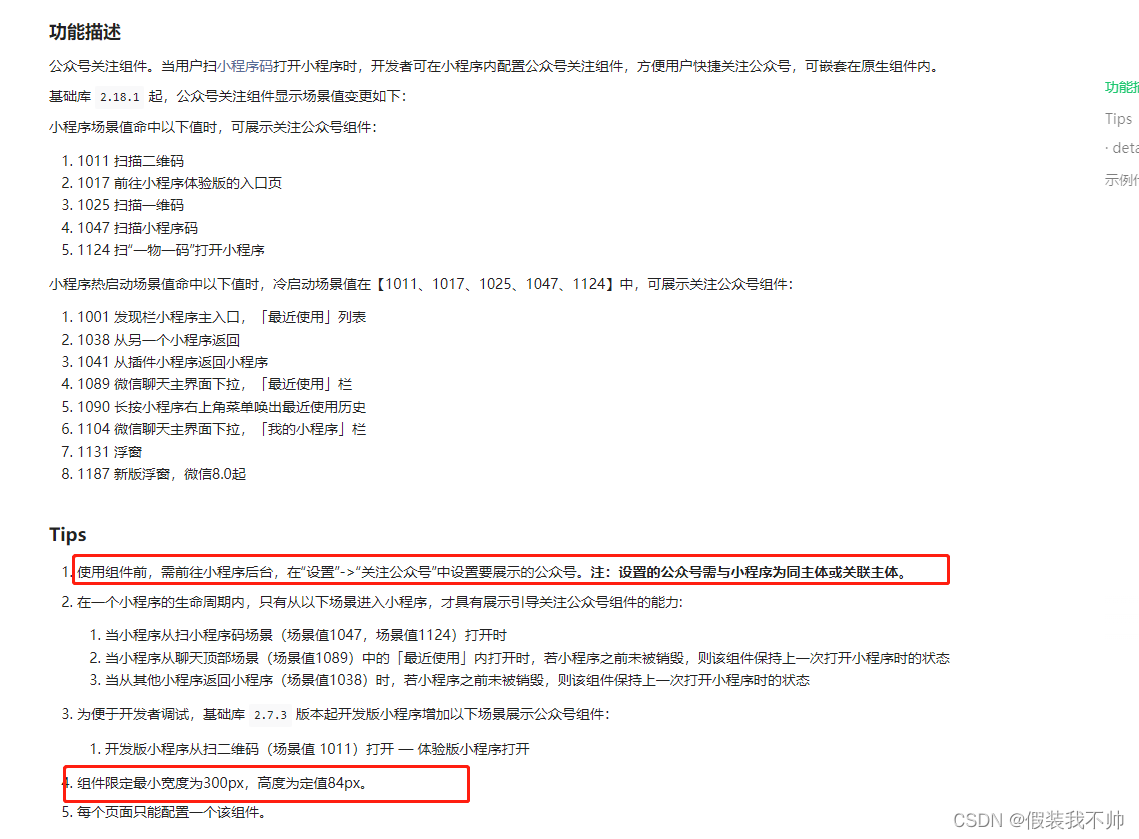
小程序测试需要设置场景值
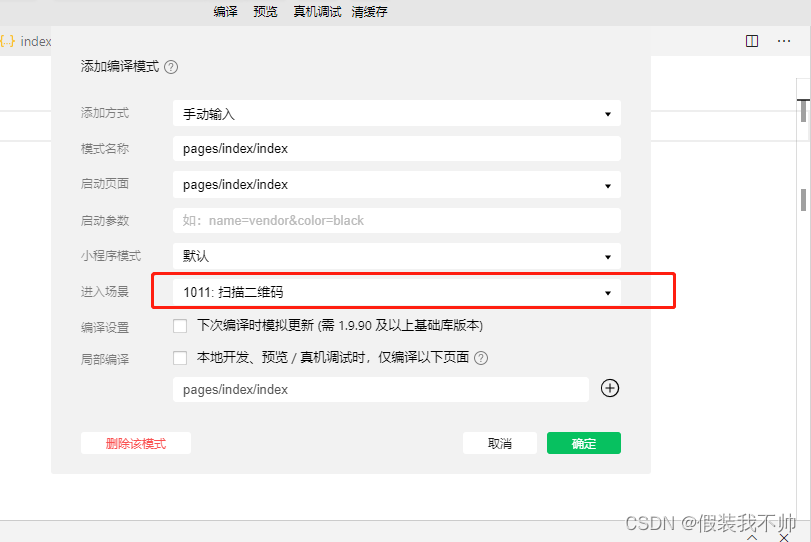
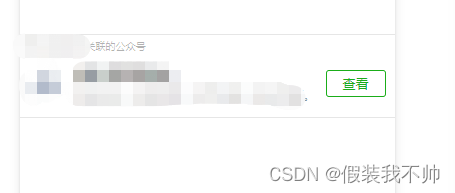
这个展示有条件,不过基本能满足,如果没有关注就是显示关注,因为关注了所以显示的是查看,模拟器上没法点击,需要发布体验版去真机上使用,如果场景下不支持,则可以模拟写一个,不过功能没法实现,最终方案是通过webview跳转公众号文件引导关注
<template><view class="offical-account-container"><view class="top-text">xxx小程序关联的公众号</view><view class="content"><view class="logo"><image src="../../static/images/officalaccount/logo.png"></image></view><view class="info"><view class="name">公众号名字</view><view class="detial">公众号简介。</view></view><view class="action"><!--未关注--><view class="action-item">关注</view><!--已关注--><!-- <view class="action-item">查看</view> --></view></view></view>
</template><script>export default {name:"follow-official-account",data() {return {};}}
</script><style lang="scss" scoped>
.offical-account-container{padding: 16rpx;width: 750rpx;height: 168rpx;overflow: hidden;background-color: #fff;.top-text{color: #b2b2b2;font-size: 24rpx;height: 24rpx;line-height: 24rpx;}.content{display: flex;flex-direction: row;justify-content: space-between;align-items: center;width: 100%;margin-top:32rpx;height: 72rpx;.info{// padding-left: 20rpx;// padding-right: 20rpx;height: 80rpx;max-width: 474rpx;.name{font-size: 32rpx;color: #303133;overflow: hidden;white-space: nowrap;text-overflow: ellipsis;}.detial{font-size: 24rpx;color: #7f7f7f;overflow: hidden;white-space: nowrap;text-overflow: ellipsis;}}.logo{width: 80rpx;height: 80rpx;min-width: 80rpx;image{width: 100%;height: 100%;}}.action{// margin-right: 24rpx;padding-right: 8rpx;display: flex;align-items: center;justify-content: center;width: 130rpx;height: 80rpx;.action-item{width: 130rpx;height:56rpx;border:2rpx solid #1aad19;color: #1aad19;text-align: center;line-height: 56rpx;font-size: 28rpx;border-radius: 6rpx;}}}
}
</style>
后端需要安装SKIT.FlurlHttpClient.Wechat.Api组件

后端初始化client
小程序
/// <summary>
/// 客户端
/// </summary>
private WechatApiClient client;public WeChatMiniProgramClient(IOptions<xxx> config)
{var options = new WechatApiClientOptions(){AppId = config.Value.AppId,AppSecret = config.Value.AppSecret,ImmeDeliveryAppKey = "",ImmeDeliveryAppSecret = "",VirtualPaymentAppKey = "",MidasOfferId = "",MidasAppKey = "",MidasOfferIdV2 = "",MidasAppKeyV2 = ""};client = WechatApiClientBuilder.Create(options).Build();
}
公众号
/// <summary>
/// 客户端
/// </summary>
private WechatApiClient client;/// <summary>
/// 构造函数注入
/// </summary>
public OfficalAccountClient(IOptions<xxxx> config)
{var options = new WechatApiClientOptions(){AppId = config.Value.AppId,AppSecret = config.Value.AppSecret,ImmeDeliveryAppKey = "",ImmeDeliveryAppSecret = "",VirtualPaymentAppKey = "",MidasOfferId = "",MidasAppKey = "",MidasOfferIdV2 = "",MidasAppKeyV2 = "",PushToken = config.Value.Token,PushEncodingAESKey  =config.Value.EncodingAesKey};client = WechatApiClientBuilder.Create(options).Build();
}
小程序获取unionid
uni-app和小程序获取wx.login下的code
uni.login({provider:'weixin',success: function(res) {console.log(res);if (res.code) {console.log(res.code);} else {//login成功,但是没有取到code_this.$refs.uToast.show({title: '未取得code,请重试',type: 'error',})}},fail: function(res) {_this.$refs.uToast.show({title: '获取wx.login失败,请重试',type: 'error',})}
})
wx.login({success(res) {if (res.code) {//TODO 根据code获取openid以及unionid} else {wx.showToast({icon: "none",title: '获取信息失败',})}}
})
后端解析
/// <summary>
/// jscode获取openid
/// </summary>
/// <param name="jsCode"></param>
/// <returns></returns>
public async Task<(string openId,string unionId)> WeChatLogin(string jsCode)
{try{var userLoginRequest = new SnsJsCode2SessionRequest();userLoginRequest.JsCode = jsCode;var loginInfo = await client.ExecuteSnsJsCode2SessionAsync(userLoginRequest);if (loginInfo.IsSuccessful()){return (loginInfo.OpenId,loginInfo.UnionId ?? "");}return (string.Empty,string.Empty);}catch (Exception ex){return (string.Empty,string.Empty);}
}
公众号获取unionid
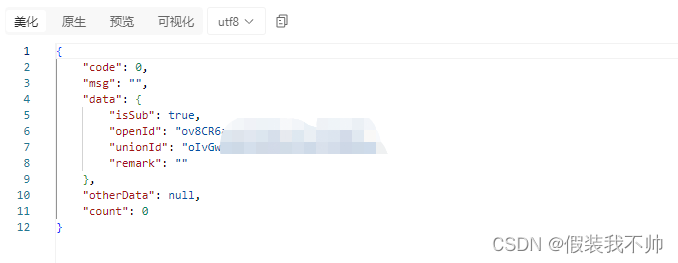
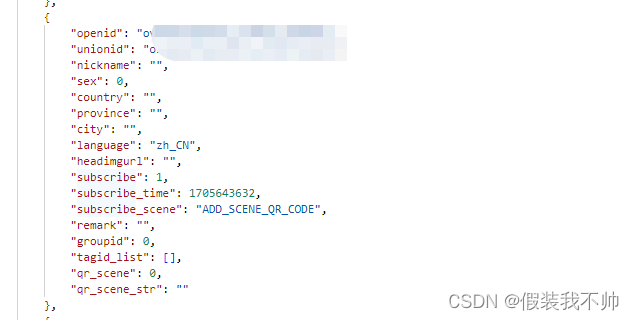
根据openid获取unionid
/// <summary>
/// 获取关注公众号的用户详情
/// </summary>
/// <param name="openId"></param>
public async Task<(bool isSub,string errMsg,string openId,string unionId,string remark)> GetOfficalAccountFollowUserInfo(string openId)
{var accessToken = await WeChatGetOfficalAccountToken();var response = await _officalAccountClient.GetOfficalFllowAccountUserInfo(accessToken, openId);if (!response.IsSuccessful()){if (response.ErrorCode == 42001){accessToken = await WeChatGetOfficalAccountToken(true);response = await _officalAccountClient.GetOfficalFllowAccountUserInfo(accessToken, openId);if (!response.IsSuccessful()){return (false,response.ErrorMessage, string.Empty, string.Empty,string.Empty);}}else{return (false,response.ErrorMessage, string.Empty, string.Empty,string.Empty);}}return (response.IsSubscribed, string.Empty, response.OpenId,response.UnionId,response.Remark);
}/// <summary>
/// 获取关注公众号的多个用户详情
/// </summary>
/// <param name="openIds"></param>
public async Task<(bool isSuccess,string errMsg,List<CgibinUserInfoBatchGetResponse.Types.User> list)> GetOfficalAccountFollowUsersInfo(List<string> openIds)
{var accessToken = await WeChatGetOfficalAccountToken();var response = await _officalAccountClient.GetOfficalFllowAccountUsersInfo(accessToken, openIds);if (!response.IsSuccessful()){if (response.ErrorCode == 42001){accessToken = await WeChatGetOfficalAccountToken(true);response = await _officalAccountClient.GetOfficalFllowAccountUsersInfo(accessToken, openIds);if (!response.IsSuccessful()){return (false,response.ErrorMessage,null);}}else{return (false,response.ErrorMessage,null);}}return (true,response.ErrorMessage,response.UserList.ToList());
}
用户关注/取消关注公众号监听
申请测试号,主要是提前写好接口
接入指南
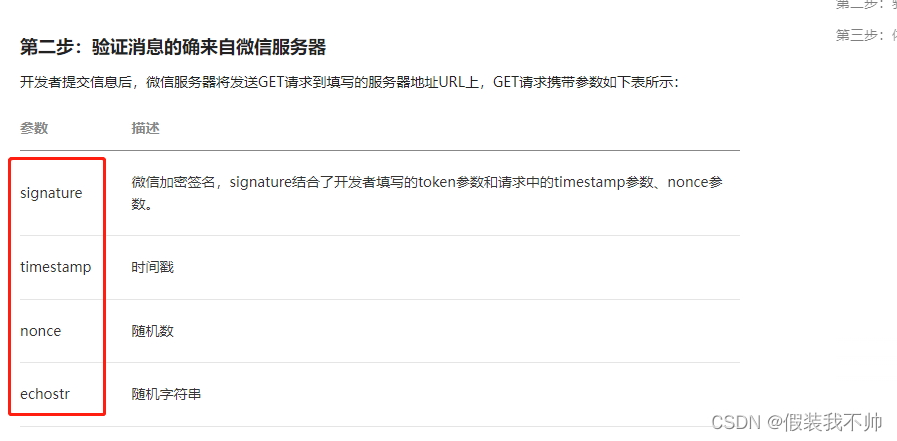
/// <summary>
/// 微信公众号服务器传递过来的消息验证
/// </summary>
/// <returns></returns>
public bool ValidateMsg(string timestamp,string nonce,string signature)
{/* 验证微信服务器 */bool ret = client.VerifyEventSignatureForEcho(webhookTimestamp: timestamp,webhookNonce: nonce,webhookSignature: signature);return ret;
}class XXXParamModel
{/// <summary>/// 微信加密签名,signature/// 结合了开发者填写的token参数和请求中的timestamp参数、nonce参数。/// </summary>public string Signature { get; set; }/// <summary>/// 时间戳/// </summary>public string Timestamp { get; set; }/// <summary>/// 随机数/// </summary>public string Nonce { get; set; }/// <summary>/// 随机字符串/// </summary>public string Echostr { get; set; }
}/// <summary>
/// 微信公众号验证
/// </summary>
/// <param name="param"></param>
/// <returns></returns>
[HttpGet]
public IActionResult OfficalAccountValidate([FromQuery]XXXParamModel param)
{var isValid = _officalAccountWechatHelper.ValidateMsg(param.Timestamp, param.Nonce, param.Nonce);if (isValid){//返回随机字符串则表示验证通过return Content(param.Echostr);}return Content("");
}
本地测试做好内网穿透
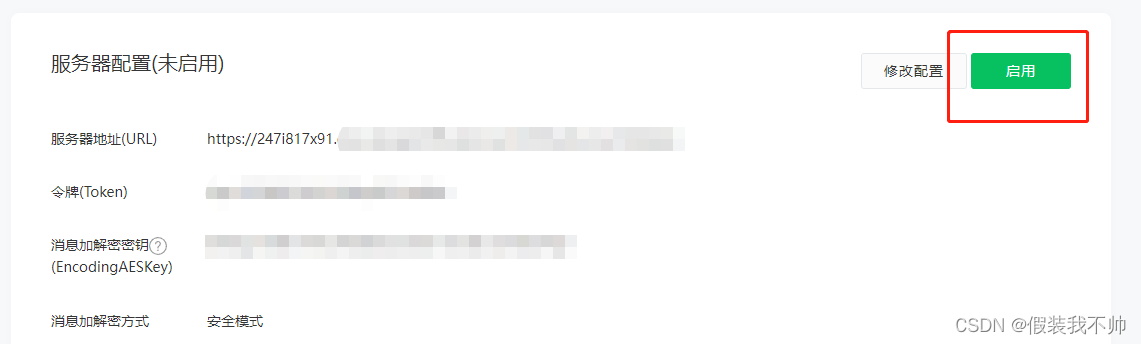
点击提交即可,验证通过即可
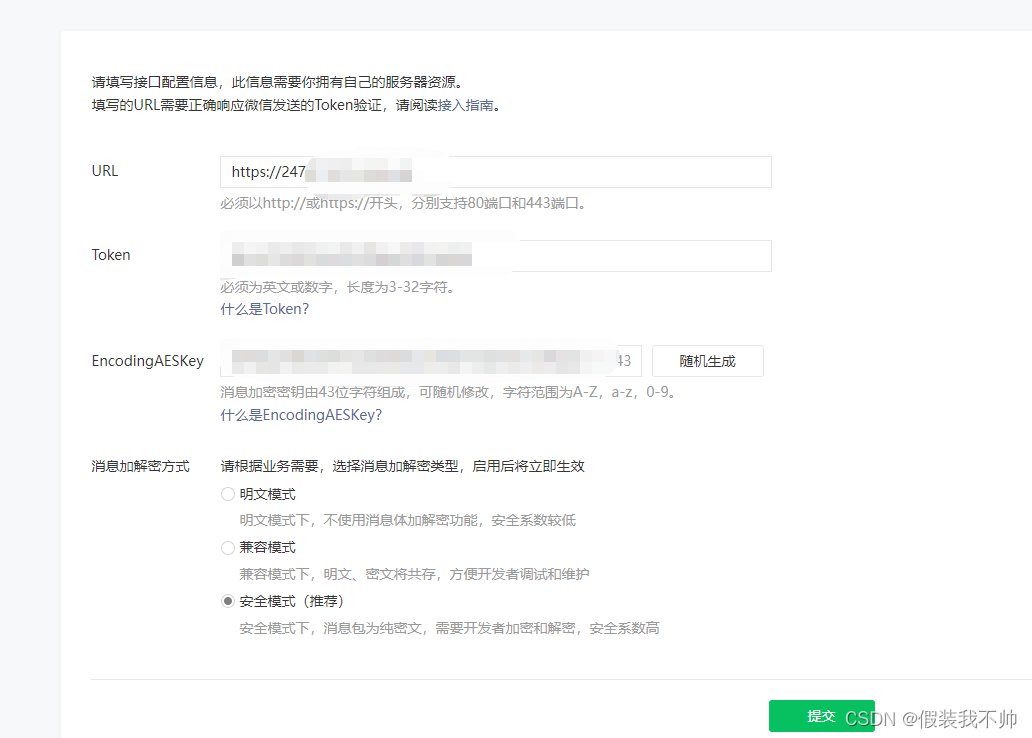
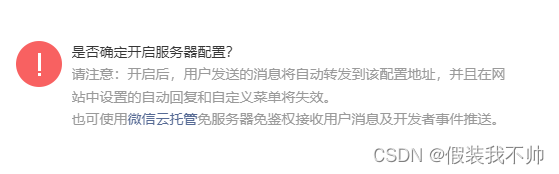
通过之后可以点击启用
需要处理菜单
//允许多次读取
public void Configure(IApplicationBuilder app, IWebHostEnvironment env, ILoggerFactory loggerFactory)
{//允许body重用app.Use(next => context =>{context.Request.EnableBuffering();return next(context);})
}/// <summary>
/// 微信公众号消息处理
/// </summary>
/// <param name="param"></param>
/// <returns></returns>
[HttpPost]
public async Task<IActionResult> OfficalAccountMessageHandler([FromQuery]XXXParamModel param)
{var isValid = _officalAccountWechatHelper.ValidateMsg(param.Timestamp, param.Nonce, param.Signature);if (!isValid){return Content("验证失败");}//过滤器或者中间件中调用var body = Request.Body;if (body.CanSeek){body.Seek(0L, SeekOrigin.Begin);}string bodyData = string.Empty;bodyData =await new StreamReader(body, Encoding.UTF8).ReadToEndAsync();Console.WriteLine(bodyData);return Content("");
}

解密
/// <summary>
/// 解密xml数据
/// </summary>
/// <param name="xmlData"></param>
/// <returns></returns>
public WechatApiEvent DecryptXmlData(string xmlData)
{var xml = client.DeserializeEventFromXml(xmlData);return xml;
}
消息处理的完整的代码
/// <summary>
/// 微信公众号消息处理
/// </summary>
/// <param name="param"></param>
/// <returns></returns>
[HttpPost]
public async Task<IActionResult> OfficalAccountMessageHandler(
[FromQuery] OfficalAccountMessageHandlerParamModel param)
{
string responseData = string.Empty;
var isValid = _officalAccountWechatHelper.ValidateMsg(param.Timestamp, param.Nonce, param.Signature);
if (!isValid)
{return Content("验证失败");
}//过滤器或者中间件中调用
var body = Request.Body;
if (body.CanSeek)
{body.Seek(0L, SeekOrigin.Begin);
}
string bodyData = string.Empty;
bodyData = await new StreamReader(body, Encoding.UTF8).ReadToEndAsync();
var decryptXmlData = _officalAccountWechatHelper.DecryptXmlData(bodyData);
switch (decryptXmlData.MessageType.ToLower())
{case RequestMsgType.Text:break;case RequestMsgType.Location:break;case RequestMsgType.Image:break;case RequestMsgType.Voice:break;case RequestMsgType.Video:break;case RequestMsgType.ShortVideo:break;case RequestMsgType.Link:break;case RequestMsgType.MessageEvent:var eventType = decryptXmlData.Event;var openId = decryptXmlData.FromUserName;if (!string.IsNullOrEmpty(eventType)){switch (eventType){//关注case EventType.Subscribe://TODO 关注之后的处理//发送被动回复消息responseData =_officalAccountWechatHelper.SendTxtMsg("欢迎关注~~", openId, decryptXmlData.ToUserName);Console.WriteLine(responseData);break;//取消关注case EventType.Unsubscribe://TODO 取消关注之后的处理break;case EventType.Localtion:break;default:break;}}break;default:break;
}
return Content(responseData);
}
已有数据如何处理
公众号有获取关注的列表,根据列表中的openid获取unionid,小程序也有保存unionid,根据unionid关联起来就能实现之前数据的处理,不过没有登陆过的客户应该没法处理了,需要再客户登陆的时候获取unionid然后进行判定
公众号获取关注的列表
/// <summary>
/// 获取关注的用户列表
/// </summary>
/// <param name="token"></param>
/// <param name="nextOpenid"></param>
public async Task<CgibinUserGetResponse> GetOfficalAccountFollowUserList(string token,string nextOpenid="")
{var request = new CgibinUserGetRequest();request.AccessToken = token;if (!string.IsNullOrEmpty(nextOpenid)){request.NextOpenId = nextOpenid;}var userGetResponse = await client.ExecuteCgibinUserGetAsync(request);return userGetResponse;
}
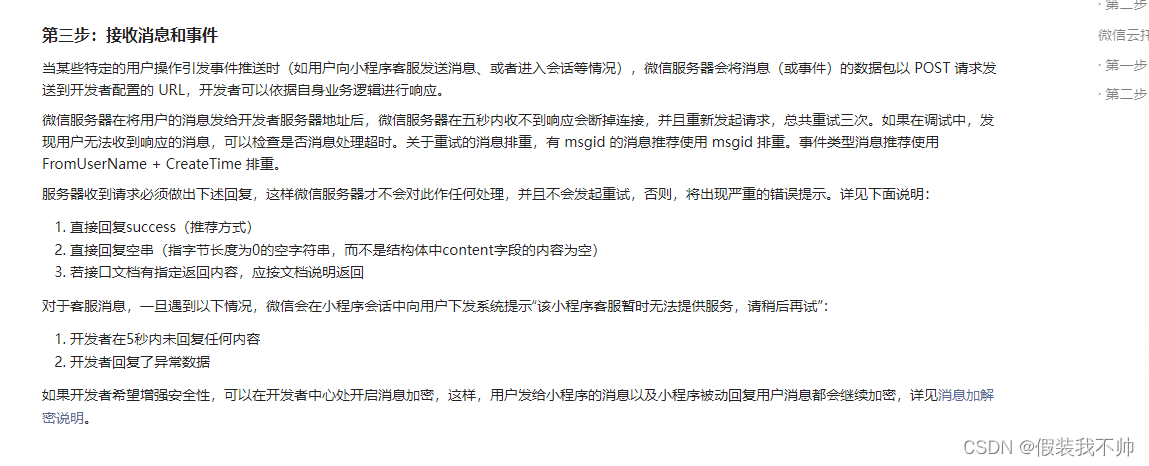
关注公众号之后给用户发送消息
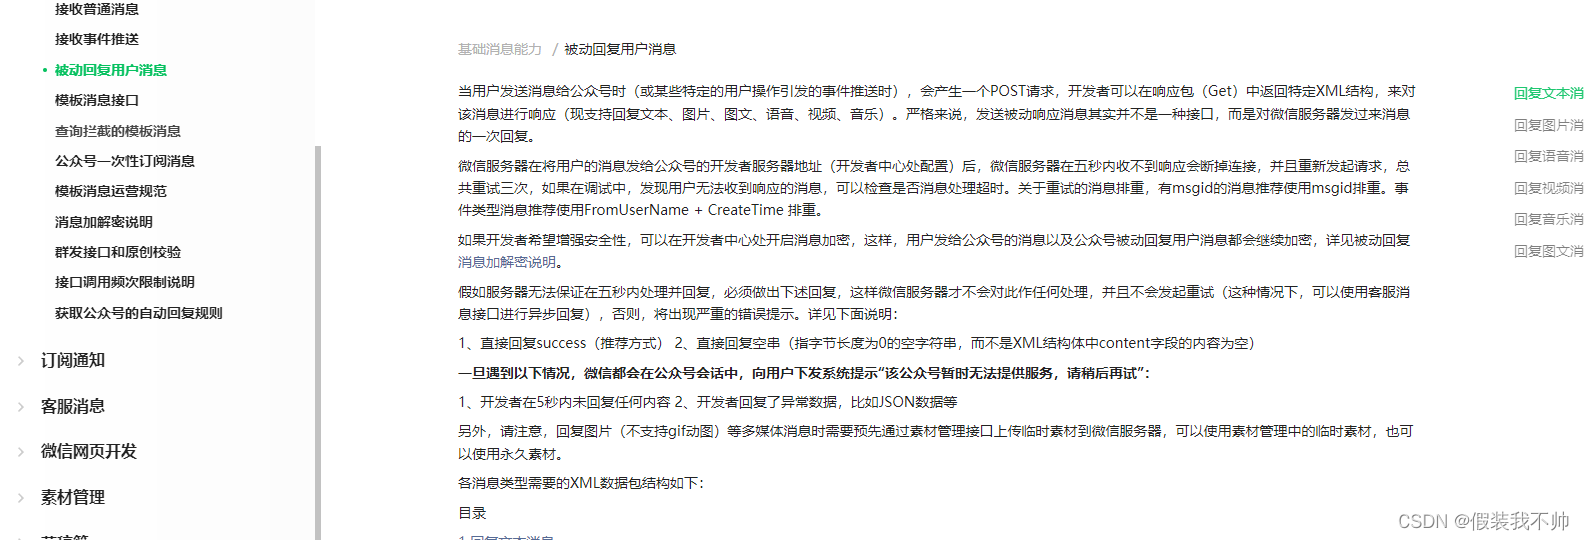
进行xml拼接加密处理,然后在微信调用关注的事件通知的时候返回即可
/// <summary>
/// 获取unix时间戳,扩展方法
/// </summary>
/// <param name="dt"></param>
/// <returns></returns>
public static long GetUnixTimeStampSeconds(this DateTime dt)
{long unixTime = ((DateTimeOffset)dt).ToUnixTimeSeconds();return unixTime;
}/// <summary>
/// 解密文本的xml数据
/// </summary>
/// <param name="xmlData"></param>
/// <returns></returns>
public string SendTxtMsg(string content, string toOpenId, string fromOpenId)
{var replyModel = new SKIT.FlurlHttpClient.Wechat.Api.Events.TextMessageReply(){ToUserName = toOpenId,FromUserName = fromOpenId,MessageType = "text",Content = content,CreateTimestamp = DateTime.Now.GetUnixTimeStampSeconds()};string replyXml = client.SerializeEventToXml(replyModel);return replyXml;
}
参考
uni-app使用微信小程序原生组件
这篇关于微信小程序和公众号打通,实现用户关注公众号送优惠券的文章就介绍到这儿,希望我们推荐的文章对编程师们有所帮助!


