本文主要是介绍springboot2.0发送邮件。QQ、网易【亲测有效】,希望对大家解决编程问题提供一定的参考价值,需要的开发者们随着小编来一起学习吧!
目的:springboot2.0-发送邮箱。QQ、网易邮箱
第一步:添加依赖【网上都是说添一种依赖这是错误的,会出现注入的时候为null】
<!--邮箱依赖--><dependency><groupId>org.springframework.boot</groupId><artifactId>spring-boot-starter-mail</artifactId></dependency><dependency><groupId>org.springframework</groupId><artifactId>spring-context-support</artifactId><version>4.3.7.RELEASE</version></dependency>第二步、配置application.yml
注意:下面的password,并不是你的邮箱登陆密码,而是

2-1:126邮箱配置
spring:#邮箱配置mail:host: smtp.126.com#发送者邮箱账号username: xdxBlog@126.com#发送者密钥password: xxxxxxxxdefault-encoding: utf-8port: 465properties:mail:debug:truesmtp:socketFactory:class: javax.net.ssl.SSLSocketFactory2-2:qq邮箱配置
spring:#邮箱配置mail:host: smtp.qq.com#发送者邮箱账号username: 11111111@qq.com#发送者密码password: xxxxxxxdefault-encoding: utf-8port: 465properties:mail:debug:truesmtp:socketFactory:class: javax.net.ssl.SSLSocketFactory第三步:开启你的 POP3/SMTP/IMAP
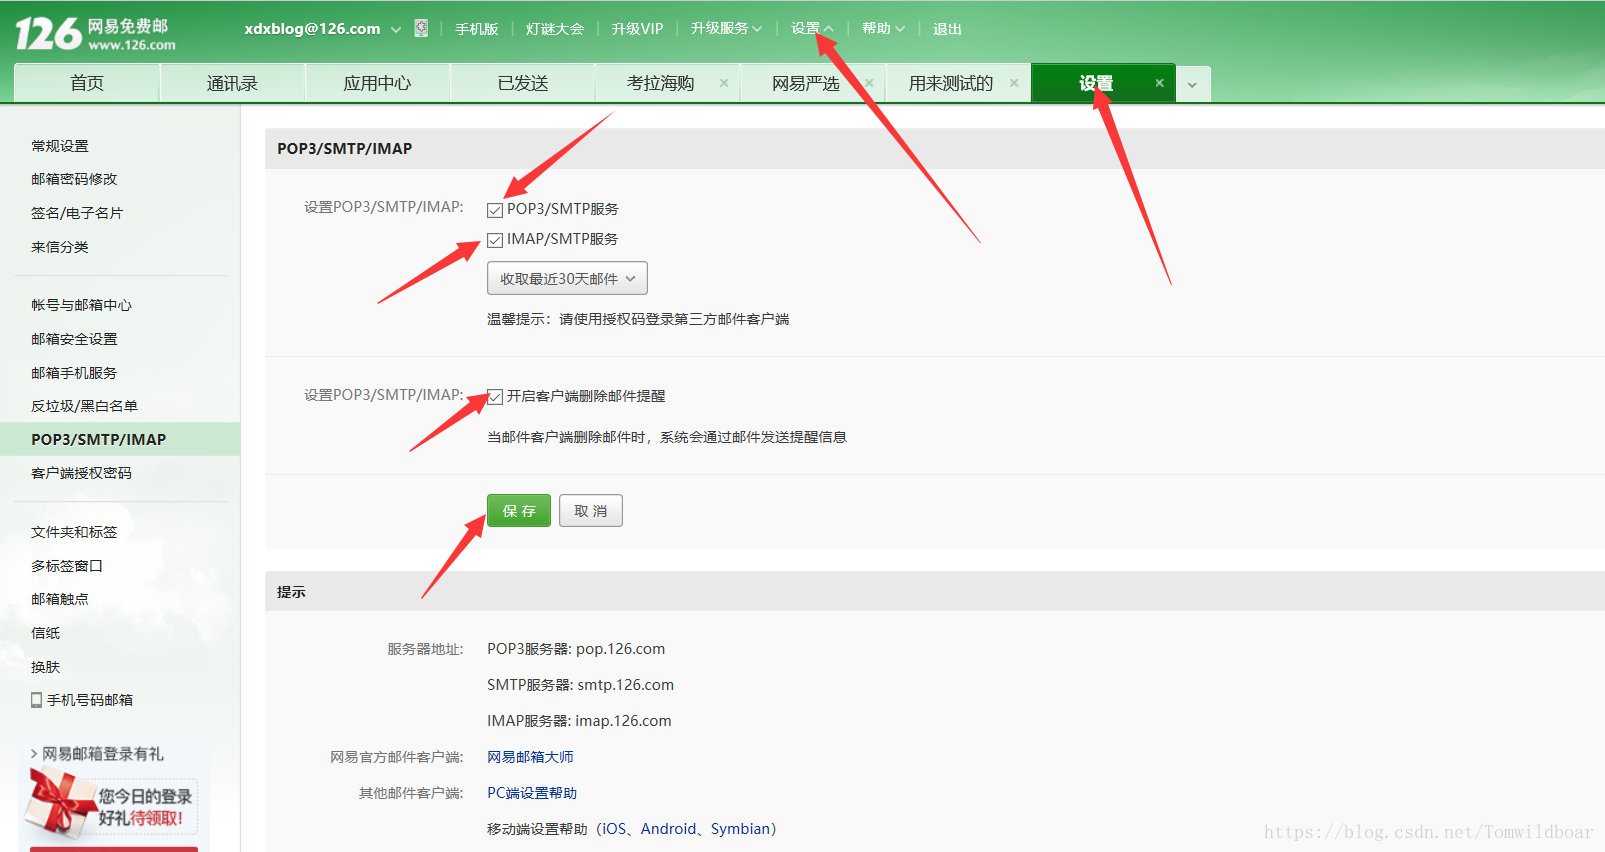
以网易邮箱为例(自行去百度 QQ邮箱的这个很简单就百度的到)
第四步:测试
package com.xdx97.backstage.utils;import org.springframework.beans.factory.annotation.Autowired;
import org.springframework.mail.SimpleMailMessage;
import org.springframework.mail.javamail.JavaMailSender;
import org.springframework.web.bind.annotation.RequestMapping;
import org.springframework.web.bind.annotation.RestController;//发送邮箱
@RestController
public class SendMail {@Autowiredprivate JavaMailSender jms; //自动注入的Bean@RequestMapping(value = "/bb")public String sendMail(){
//        JavaMailSenderImpl jms = new JavaMailSenderImpl();//建立邮件消息SimpleMailMessage mainMessage = new SimpleMailMessage();//发送者mainMessage.setFrom("xdxBlog@126.com");//接收者mainMessage.setTo("1455465841@qq.com");//发送的标题mainMessage.setSubject("用来测试的");//发送的内容mainMessage.setText("这是邮件");jms.send(mainMessage);return "1";}}
注意:
在这里你可能遇到这么一个错 Couldn't connect to host, port: localhost, 25; timeout -1;
参考:https://blog.csdn.net/Tomwildboar/article/details/83028226
附邮箱端口大全:https://blog.csdn.net/qq510304723/article/details/50172111#commentBox
这篇关于springboot2.0发送邮件。QQ、网易【亲测有效】的文章就介绍到这儿,希望我们推荐的文章对编程师们有所帮助!


