本文主要是介绍京西商城——前端项目的创建以及前后端联调,希望对大家解决编程问题提供一定的参考价值,需要的开发者们随着小编来一起学习吧!
创建VUE项目
在jingxi_shop_project文件夹中再创建一个 frontend 文件夹用来存放前端项目
/jingxi_shop_project/backend/jingxi_shop_project....../frontend/jingxi_shop_web......
首先要安装 node.js 和 VUE cli,进入到项目目录内创建项目
vue create jingxi_shop_web,在这个项目我选择了VUE3,Router,VueX,CSS Pre-processos作为基础配置。
项目资源准备
首先在src目录(一般开发都在src下进行)
CSS
src下的assets下,创建了css文件夹来存放css的基础配置(大家可以把css样式代码直接拿走食用)
assets/css/base.js:
@charset "utf-8"
@import ".base/.css";/* 全局重置和基础样式 */
html, body, div, span, applet, object, iframe,
h1, h2, h3, h4, h5, h6, p, blockquote, pre,
a, abbr, acronym, address, big, cite, code,
del, dfn, em, img, ins, kbd, q, s, samp,
small, strike, strong, sub, sup, tt, var,
b, u, i, center,
dl, dt, dd, ol, ul, li,
fieldset, form, label, legend,
table, caption, tbody, tfoot, thead, tr, th, td,
article, aside, canvas, details, embed,
figure, figcaption, footer, header, hgroup,
menu, nav, output, ruby, section, summary,
time, mark, audio, video {margin: 0;padding: 0;outline: none;
} */* {margin: 0;padding: 0;outline: none;
}body {font-size: 12px !important;font-family: '微软雅黑', Helvetica, Arial, sans-serif, '宋体', Verdana;background-color: #fff;color: #333;
}li{list-style: none;
}img{border: 0 none;vertical-align: middle;
}a {color: #333;text-decoration: none !important;outline: none;cursor: pointer;
}a:focus{outline: none;
}.clearfix::after{visibility: hidden;clear: both;height: 0px;display: block;content: "";
}input{vertical-align: middle;border: none;background-color: none;
}select{vertical-align: middle;border: none;background-color: none;
}button{text-align: center;border: 0;cursor: pointer;
}h1,
h2,
h3,
h4,
h5,
h6 {font-weight: normal;font-size: 12px;
}textarea,
input {word-wrap: break-word;word-break: break-all;padding: 0px;background: none;
}label{cursor: pointer;
}input[type="button"]::-moz-focus-inner,
input[type="submit"]::-moz-focus-inner{border: none;
}input[type="button"],
input[type="submit"]{cursor: pointer;
}input:focus {outline: none;
}.fl{float: left;
}.fr{float: right;
}.cs{cursor: pointer;
}/* 超过一行的多余内容变成... */
.dian1{text-overflow: -o-ellipsis-lastline;overflow: hidden;text-overflow: ellipsis;display: -webkit-box;-webkit-line-clamp: 1;-webkit-box-orient: vertical;
}/* 超过一行的多余内容变成... */
.dian1{text-overflow: -o-ellipsis-lastline;overflow: hidden;text-overflow: ellipsis;display: -webkit-box;-webkit-line-clamp: 2;-webkit-box-orient: vertical;
}/* 超过一行的多余内容变成... */
.dian1{text-overflow: -o-ellipsis-lastline;overflow: hidden;text-overflow: ellipsis;display: -webkit-box;-webkit-line-clamp: 3;-webkit-box-orient: vertical;
}
assets/css/config.js:
@import './base.css';/* 定义全局变量 */:root {--font-red: #ef0115;--font-gray: #999;--content-width: 1200px;--el-color-danger: #e2231a !important;
}
iconfont
Iconfont 是一种将图标以字体形式嵌入到网页中的技术,它允许开发者通过简单的 CSS 类来使用和控制图标,提供了跨平台的一致性、可伸缩性和样式一致性,同时减少了HTTP请求和图标文件的体积,优化了网页性能和开发效率。
只需要再在iconfont官网选择需要的iconfont样式,下载到项目就可以使用
element-Puls
我们之后还会用到element-Plus,可以先下载 npm install element-Plus
导入main.js
在main.js入口文件导入我们刚刚下载的资源才可以在项目中使用
import { createApp } from 'vue'
import App from './App.vue'
import router from './router'
import store from './store'
// 引入CSS样式
import '@/assets/css/config.css'
// 引入iconfont样式
import '@/iconfont/iconfont.css'
// 引入ElementPlus
import ElementPlus from 'element-plus'
import 'element-plus/dist/index.css'createApp(App).use(store).use(router).use(ElementPlus).mount('#app')
前后端联调
我们可以在src下创建一个 network 文件夹来处理网络请求
我们可以将axios请求封装成两个文件,将通用的部分封装成一个axios的基础配置(包括基础 URL、超时时间、请求和响应拦截器等)
然后再定义包含实际请求函数的文件。
src/network/requestConfig.js:
import axios from 'axios';export function request(config){const instance = axios.create({baseURL: "http://localhost:8000",timeout: 5000})// 请求拦截instance.interceptors.request.use(config=>{console.log('Sending request to:', config.url);return config;}, err=>{console.error('Request error:', err);})// 响应拦截instance.interceptors.response.use(res=>{console.log('Received response from:', res.config.url);return res.data?res.data:res;}, err=>{console.error('Response error:', err);})return instance(config);
}
src/network/home.js:
import {request} from './requestConfig.js'export function getMainmenu(){return request({url: "/menu/main_menu",})
}
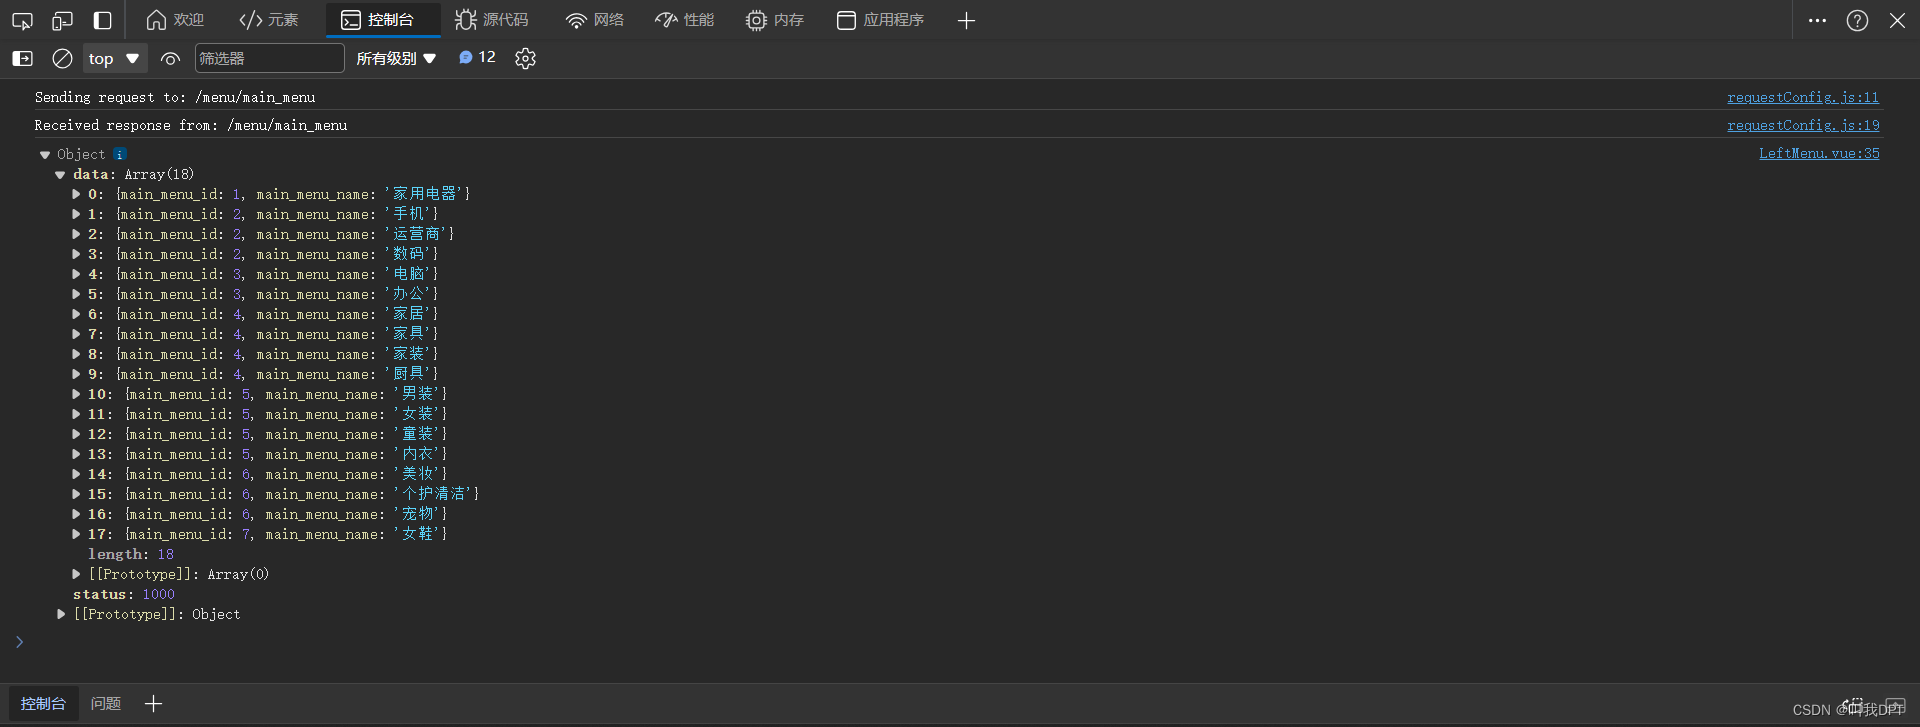
验证前后端联通
在页面组件中调用上面封装好的请求函数
<script setup>import {getMainmenu} from "@/network/home.js"import { onMounted, ref } from "vue"let leftMenuData = ref([])onMounted(()=>{getMainmenu().then(res=>{console.log(res);})})
</script>
解决跨域问题
Access to XMLHttpRequest at ‘http://localhost:8000/menu/main_menu/’ (redirected from ‘http://localhost:8000/menu/main_menu’) from origin ‘http://localhost:8080’ has been blocked by CORS policy: No ‘Access-Control-Allow-Origin’ header is present on the requested resource.

此时我们运行前后端,会发现在控制台有这样一个跨域问题,是因为端口号不同造成的请求失败,这就要我们在后端项目的settings中配置CORS来允许任何来自不同源(域名、协议或端口)的 web 页面访问服务器上的资源。
- 安装django-cors-header
- 在INSTALLED_APPS中加入
'corsheaders' - 在MIDDLEWARE中加入
'corsheaders.middleware.CorsMiddleware' - 在settings底部配置允许来自不同源(域名、协议或端口)的 web 页面访问服务器上的资源
settings.py
...
ALLOWED_HOSTS = ['*']
CORS_ALLOW_CREDENTIALS = True
CORS_ALLOW_ALL_ORIGINS = True
CORS_ALLOW_HEADERS = ('*')
此时控制台就正常打印后端的数据了
gitee仓库地址
https://gitee.com/duan-peitong/jignxi_shop_project
若有错误与不足请指出,关注DPT一起进步吧!!!
这篇关于京西商城——前端项目的创建以及前后端联调的文章就介绍到这儿,希望我们推荐的文章对编程师们有所帮助!


