本文主要是介绍OpenHarmony 3.2 Release版本Codec HDI适配过程,希望对大家解决编程问题提供一定的参考价值,需要的开发者们随着小编来一起学习吧!
简介
OpenHarmony Codec HDI(Hardware Device Interface)驱动框架基于 OpenMax 实现了视屏硬件编解码驱动,提供 Codec 基础能力接口供上层媒体服务调用,包括获取组件编解码能力、创建组件、参数设置、数据的轮转和控制、以及销毁组件等功能,实现对视频数据的编解码处理。
视频编解码驱动架构

Codec HDI 2.0 接口依赖 OpenMax IL 的标准接口。OMX Wrapper 将 OMX 接口的实现封装成 libOMX_Core.z.so 供 HDI 层调用。如果 codec 驱动为实现 OpenMax 标准接口,则需根据驱动适配实现 OMX Interface 接口。
Codec HDI 2.0 接口列表:
| 头文件 | 接口名称 | 功能描述 |
|---|---|---|
| codec_component _manager.h | int32_t (*GetComponentNum)(); | 获取 Codec 编解码组件数量 |
| int32_t (*GetComponentCapabilityList)(CodecCompCapability *capList, int32_t count); | 获取编解码能力集表 | |
| int32_t (*CreateComponent)(struct CodecComponentType **component, uint32_t *componentId, char *compName, int64_t appData, struct CodecCallbackType *callbacks); | 创建 Codec 组件实例 | |
| int32_t (*DestroyComponent)(uint32_t componentId); | 销毁组件实例 | |
| codec_component _if.h | int32_t (*GetComponentVersion)(struct CodecComponentType *self, struct CompVerInfo *verInfo); | 获取 Codec 组件版本号 |
| int32_t (*SendCommand)(struct CodecComponentType *self, enum OMX_COMMANDTYPE cmd, uint32_t param, int8_t *cmdData, uint32_t cmdDataLen); | 发送命令给组件 | |
| int32_t (*GetParameter)(struct CodecComponentType *self, uint32_t paramIndex, int8_t *paramStruct, uint32_t paramStructLen); | 获取组件参数设置 | |
| int32_t (*SetParameter)(struct CodecComponentType *self, uint32_t index, int8_t *paramStruct, uint32_t paramStructLen); | 设置组件需要的参数 | |
| int32_t (*GetConfig)(struct CodecComponentType *self, uint32_t index, int8_t *cfgStruct, uint32_t cfgStructLen); | 获取组件的配置结构 | |
| int32_t (*SetConfig)(struct CodecComponentType *self, uint32_t index, int8_t *cfgStruct, uint32_t cfgStructLen); | 设置组件的配置 | |
| int32_t (*GetExtensionIndex)(struct CodecComponentType *self, const char *paramName, uint32_t *indexType); | 根据字符串获取组件的扩展索引 | |
| int32_t (*GetState)(struct CodecComponentType *self, enum OMX_STATETYPE *state); | 获取组件的状态 | |
| int32_t (*ComponentTunnelRequest)(struct CodecComponentType *self, uint32_t port, int32_t tunneledComp, uint32_t tunneledPort, struct OMX_TUNNELSETUPTYPE *tunnelSetup); | 设置组件 Tunneled 方式通信 | |
| int32_t (*UseBuffer)(struct CodecComponentType *self, uint32_t portIndex, struct OmxCodecBuffer *buffer); | 指定组件端口的 buffer | |
| int32_t (*AllocateBuffer)(struct CodecComponentType *self, uint32_t portIndex, struct OmxCodecBuffer *buffer); | 向组件申请端口 buffer | |
| int32_t (*FreeBuffer)(struct CodecComponentType *self, uint32_t portIndex, const struct OmxCodecBuffer *buffer); | 释放 buffer | |
| int32_t (*EmptyThisBuffer)(struct CodecComponentType *self, const struct OmxCodecBuffer *buffer); | 编解码输入待处理 buffer | |
| int32_t (*FillThisBuffer)(struct CodecComponentType *self, const struct OmxCodecBuffer *buffer); | 编解码输出填充 buffer | |
| int32_t (*SetCallbacks)(struct CodecComponentType *self, struct CodecCallbackType *callback, int64_t appData); | 设置 Codec 组件的回调函数 | |
| int32_t (*ComponentDeInit)(struct CodecComponentType *self); | 组件去初始化 | |
| int32_t (*UseEglImage)(struct CodecComponentType *self, struct OmxCodecBuffer *buffer, uint32_t portIndex, int8_t *eglImage, uint32_t eglImageLen); | 使用已在 ELG 中申请的空间 | |
| int32_t (*ComponentRoleEnum)(struct CodecComponentType *self, uint8_t *role, uint32_t roleLen, uint32_t index); | 获取组件角色 | |
| codec_callback_if.h | int32_t (*EventHandler)(struct CodecCallbackType *self, enum OMX_EVENTTYPE event, struct EventInfo *info); | 事件上报 |
| int32_t (*EmptyBufferDone)(struct CodecCallbackType *self, int64_t appData, const struct OmxCodecBuffer *buffer); | 上报输入 buffer 编码或者解码处理完毕 | |
| int32_t (*FillBufferDone)(struct CodecCallbackType *self, int64_t appData, const struct OmxCodecBuffer *buffer); | 上报输出 buffer 填充完毕 |
Codec HDI 相关目录接口
├── //drivers/peripheral/codec
│   ├── hal
│   │   ├── BUILD.gn
│   │   ├── idl_service
│   │   ├── include
│   │   ├── passthrough             # v2.0到v1.0的转换,v1.0接口已弃用,无需实现
│   │   ├── src
│   │   ├── v1.0                    # codec hdi v1.0接口的实现,已弃用,MediaService已不对接相关接口。
│   │   └── v2.0                    # codec hdi v2.0接口的实现,依赖OpenMax接口,需封装实现libOMX_Core.z.so
│   ├── hdi_service                 # codec_host相关实现
│   │   ├── BUILD.gn
│   │   ├── codec_proxy
│   │   ├── codec_service_stub
│   │   └── common
│   ├── interfaces
│   │   └── include
│   └── test
OMX_Core 相关接口
codec hdi V2.0 的实现依赖 libOMX_Core.z.so,需根据 OpenMax 标准接口封装实现。
参考 drivers/peripheral/codec/hal/v2.0/hdi_impl/include/codec_omx_core.h 的定义调用过程。
typedef OMX_ERRORTYPE (*InitFunc)();
typedef OMX_ERRORTYPE (*DeinitFunc)();
typedef OMX_ERRORTYPE (*ComponentNameEnumFunc)(OMX_STRING, OMX_U32, OMX_U32);
typedef OMX_ERRORTYPE (*GetHandleFunc)(OMX_HANDLETYPE *, OMX_STRING, OMX_PTR, OMX_CALLBACKTYPE *);
typedef OMX_ERRORTYPE (*FreeHandleFunc)(OMX_HANDLETYPE);
typedef OMX_ERRORTYPE (*GetRolesOfComponentFunc)(OMX_STRING, OMX_U32 *, OMX_U8 **);
HCS 配置
配置 codec_host 服务
./hdf_config/uhdf/device_info.hcs
codec :: host {hostName = "codec_host";priority = 50;gid = ["codec_host", "uhdf_driver", "vendor_mpp_driver"];codec_omx_device :: device {device0 :: deviceNode {policy = 2;priority = 100;moduleName = "libcodec_hdi_omx_server.z.so";serviceName = "codec_hdi_omx_service";deviceMatchAttr = "media_codec_capabilities";}}
}
配置 codec_capabilities
根据 codec::host 中配置的 deviceMatchAttr,配置 hdf.hcs
./hdf_config/uhdf/hdf.hcs
#include "media_codec_capabilitie.hcs"参考 media_codec_capabilitie.hcs
root {module = "master";codec_config {match_attr = "media_codec_capabilities";use_openmax = true;// capsMask: 0x01, Adaptive playback; 0x02, Secure playback; 0x04, Tunnel playback.// allocateMask: 0x01, Input buffer allocated within the Codec module;// allocateMask: 0x02, Input buffer allocated by an external user;// allocateMask: 0x04, Output buffer allocated within the Codec module;// allocateMask: 0x08, Output buffer allocated by an external user.
VideoHwEncoders {/* node name explanation -- HDF_video_hw_enc_avc_rk:**** HDF____________video__________________hw____________________enc____________avc_______rk** | | | | | |** HDF or OMX video or audio hardware or software encoder or decoder mime vendor*/HDF_video_hw_enc_avc_rk {role = 1;type = 1;name = "OMX.rk.video_encoder.avc";supportProfiles = [1, 32768, 2, 32768, 8, 32768];maxInst = 4;isSoftwareCodec = false;processModeMask = [];capsMask = [0x01];minBitRate = 1;maxBitRate = 40000000;minWidth = 176;minHeight = 144;maxWidth = 1920;maxHeight = 1088;widthAlignment = 16;heightAlignment = 8;minBlockCount = 99;maxBlockCount = 8160;minBlocksPerSecond = 99;maxBlocksPerSecond = 489600;blockSizeWidth = 16;blockSizeHeight = 16;supportPixelFmts = [28, 24, 20, 12];measuredFrameRate = [320, 240, 165, 165, 720, 480, 149, 149, 1280, 720, 73, 73, 1920, 1080, 18, 18];bitRateMode = [1, 2];minFrameRate = 1;maxFrameRate = 60;}..................}
}RK3568 的参考适配过程
OMX Wrapper 的封装
根据 gn 文件://drivers/peripheral/codec/BUILD.gn
OMX_IL_PATH = rebase_path("//device/soc/${device_company}/${product_name}/hardware/omx_il")cmd = "if [ -f ${OMX_IL_PATH}/BUILD.gn ]; then echo true; else echo false; fi"HAVE_OMX_IL_PATH =exec_script("//build/lite/run_shell_cmd.py", [ cmd ], "value")
if (HAVE_OMX_IL_PATH) {deps += [ "${OMX_IL_PATH}:lib_omx" ]}需创建 lib_omx 工程,并封装实现 libOMX_Core.z.so,供 codec hdi 接口调用。
如果 codec 驱动已实现 OpenMax 标准接口,则可直接封装 libOMX_Core 库,否则需要根据私有驱动实现 OpenMax 接口。
参考 RK3568 的适配过程,因 codec 驱动使用 rockchip 的 mpp 平台实现,需根据私有驱动实现 OpenMax 的接口。
参考 gn 文件://device/soc/rockchip/rk3568/hardware/omx_il/BUILD.gn
group("lib_omx") {if (product_name == "rk3568") {deps = ["//device/soc/rockchip/rk3568/hardware/omx_il/component/video/dec:libomxvpu_dec","//device/soc/rockchip/rk3568/hardware/omx_il/component/video/enc:libomxvpu_enc","//device/soc/rockchip/rk3568/hardware/omx_il/core:libOMX_Core","//device/soc/rockchip/rk3568/hardware/omx_il/libOMXPlugin:libOMX_Pluginhw",]}
}
hcs 配置
-
配置 codec_host 服务
//vendor/hihope/rk3568/hdf_config/uhdf/device_info.hcscodec :: host {hostName = "codec_host";priority = 50;gid = ["codec_host", "uhdf_driver", "vendor_mpp_driver"];codec_omx_device :: device {device0 :: deviceNode {policy = 2;priority = 100;moduleName = "libcodec_hdi_omx_server.z.so";serviceName = "codec_hdi_omx_service";deviceMatchAttr = "codec_component_capabilities";}} } -
配置 codec hcs
需根据硬件信息配置编解码组件的配置参数
//vendor/hihope/rk3568/hdf_config/uhdf/hdf.hcs#include "media_codec/codec_component_capabilities.hcs"//vendor/hihope/rk3568/hdf_config/uhdf/media_codec/codec_component_capabilities.hcs
root {module = "master";codec_config {match_attr = "codec_component_capabilities";use_openmax = true;// capsMask: 0x01, Adaptive playback; 0x02, Secure playback; 0x04, Tunnel playback.// allocateMask: 0x01, Input buffer allocated within the Codec module;// allocateMask: 0x02, Input buffer allocated by an external user;// allocateMask: 0x04, Output buffer allocated within the Codec module;// allocateMask: 0x08, Output buffer allocated by an external user.VideoHwEncoders {/* node name explanation -- HDF_video_hw_enc_avc_rk:****    HDF____________video__________________hw____________________enc____________avc_______rk**     |               |                    |                      |              |        |** HDF or OMX    video or audio    hardware or software    encoder or decoder    mime    vendor*/HDF_video_hw_enc_avc_rk {role = 1;type = 1;name = "OMX.rk.video_encoder.avc";supportProfiles = [1, 32768, 2, 32768, 8, 32768];maxInst = 4;isSoftwareCodec = false;processModeMask = [];capsMask = [0x01];minBitRate = 1;maxBitRate = 40000000;minWidth = 176;minHeight = 144;maxWidth = 1920;maxHeight = 1088;widthAlignment = 16;heightAlignment = 8;minBlockCount = 0xFFFFFFFF;maxBlockCount = 0xFFFFFFFF;minBlocksPerSecond = 0xFFFFFFFF;maxBlocksPerSecond = 0xFFFFFFFF;blockSizeWidth = 0xFFFFFFFF;blockSizeHeight = 0xFFFFFFFF;supportPixelFmts = [28, 24, 20, 12];measuredFrameRate = [320, 240, 165, 165, 720, 480, 149, 149, 1280, 720, 73, 73, 1920, 1080, 18, 18];bitRateMode = [1, 2];minFrameRate = 0;maxFrameRate = 0;}}VideoHwDecoders {HDF_video_hw_dec_avc_rk {role = 1;type = 0;name = "OMX.rk.video_decoder.avc";supportProfiles = [1, 32768, 2, 32768, 8, 32768];maxInst = 6;isSoftwareCodec = false;processModeMask = [];capsMask = [0x01];minBitRate = 1;maxBitRate = 10000000;minWidth = 176;minHeight = 144;maxWidth = 4096;maxHeight = 2160;widthAlignment = 8;heightAlignment = 8;minBlockCount = 0xFFFFFFFF;maxBlockCount = 0xFFFFFFFF;minBlocksPerSecond = 1;maxBlocksPerSecond = 244800;blockSizeWidth = 16;blockSizeHeight = 16;supportPixelFmts = [24];measuredFrameRate = [320, 240, 617, 617, 720, 480, 559, 559, 1280, 720, 276, 276, 1920, 1080, 164, 164, 3840, 2160, 30, 30];bitRateMode = [];minFrameRate = 0;maxFrameRate = 0;}HDF_video_hw_dec_mpeg2_rk {role = 0xFFFFFFFF;type = 0;name = "OMX.rk.video_decoder.m2v";supportProfiles = [0, 3, 1, 3];maxInst = 6;isSoftwareCodec = false;processModeMask = [];capsMask = [0x01];minBitRate = 1;maxBitRate = 10000000;minWidth = 176;minHeight = 144;maxWidth = 1920;maxHeight = 1088;widthAlignment = 8;heightAlignment = 8;minBlockCount = 0xFFFFFFFF;maxBlockCount = 0xFFFFFFFF;minBlocksPerSecond = 1;maxBlocksPerSecond = 244800;blockSizeWidth = 16;blockSizeHeight = 8;supportPixelFmts = [24];measuredFrameRate = [];bitRateMode = [];minFrameRate = 0;maxFrameRate = 0;}HDF_video_hw_dec_v8p_rk {role = 0xFFFFFFFF;type = 0;name = "OMX.rk.video_decoder.vp8";supportProfiles = [];maxInst = 6;isSoftwareCodec = false;processModeMask = [];capsMask = [0x01];minBitRate = 1;maxBitRate = 10000000;minWidth = 176;minHeight = 144;maxWidth = 1920;maxHeight = 1088;widthAlignment = 8;heightAlignment = 8;minBlockCount = 0xFFFFFFFF;maxBlockCount = 0xFFFFFFFF;minBlocksPerSecond = 1;maxBlocksPerSecond = 244800;blockSizeWidth = 16;blockSizeHeight = 16;supportPixelFmts = [24];measuredFrameRate = [320, 180, 500, 500, 640, 360, 387, 387, 1280, 720, 112, 112, 1920, 1080, 77, 77];bitRateMode = [];minFrameRate = 0;maxFrameRate = 0;}HDF_video_hw_dec_h263_rk {role = 0xFFFFFFFF;type = 0;name = "OMX.rk.video_decoder.h263";supportProfiles = [1, 1, 1, 2, 1, 4, 1, 16, 8, 1, 8, 2, 8, 4, 8, 16];maxInst = 6;isSoftwareCodec = false;processModeMask = [];capsMask = [0x01];minBitRate = 1;maxBitRate = 10000000;minWidth = 176;minHeight = 144;maxWidth = 1920;maxHeight = 1088;widthAlignment = 8;heightAlignment = 8;minBlockCount = 0xFFFFFFFF;maxBlockCount = 0xFFFFFFFF;minBlocksPerSecond = 1;maxBlocksPerSecond = 244800;blockSizeWidth = 16;blockSizeHeight = 16;supportPixelFmts = [24];measuredFrameRate = [176, 144, 600, 600, 352, 288, 600, 600];bitRateMode = [];minFrameRate = 0;maxFrameRate = 0;}HDF_video_hw_dec_m4v_rk {role = 3;type = 0;name = "OMX.rk.video_decoder.m4v";supportProfiles = [1, 1, 1, 2, 1, 4, 1, 8, 1, 16];maxInst = 6;isSoftwareCodec = false;processModeMask = [];capsMask = [0x01];minBitRate = 1;maxBitRate = 10000000;minWidth = 176;minHeight = 144;maxWidth = 1920;maxHeight = 1088;widthAlignment = 8;heightAlignment = 8;minBlockCount = 0xFFFFFFFF;maxBlockCount = 0xFFFFFFFF;minBlocksPerSecond = 1;maxBlocksPerSecond = 244800;blockSizeWidth = 16;blockSizeHeight = 16;supportPixelFmts = [24];measuredFrameRate = [176, 144, 600, 600];bitRateMode = [];minFrameRate = 0;maxFrameRate = 0;}HDF_video_hw_dec_flv_rk {role = 0xFFFFFFFF;type = 0;name = "OMX.rk.video_decoder.flv1";supportProfiles = [];maxInst = 6;isSoftwareCodec = false;processModeMask = [];capsMask = [0x01];minBitRate = 1;maxBitRate = 10000000;minWidth = 176;minHeight = 144;maxWidth = 1920;maxHeight = 1088;widthAlignment = 8;heightAlignment = 8;minBlockCount = 0xFFFFFFFF;maxBlockCount = 0xFFFFFFFF;minBlocksPerSecond = 1;maxBlocksPerSecond = 244800;blockSizeWidth = 16;blockSizeHeight = 16;supportPixelFmts = [24];measuredFrameRate = [];bitRateMode = [];minFrameRate = 0;maxFrameRate = 0;}HDF_video_hw_dec_mjpeg_rk {role = 0;type = 0;name = "OMX.rk.video_decoder.mjpeg";supportProfiles = [];maxInst = 6;isSoftwareCodec = false;processModeMask = [];capsMask = [0x01];minBitRate = 1;maxBitRate = 10000000;minWidth = 176;minHeight = 144;maxWidth = 1920;maxHeight = 1088;widthAlignment = 8;heightAlignment = 8;minBlockCount = 0xFFFFFFFF;maxBlockCount = 0xFFFFFFFF;minBlocksPerSecond = 1;maxBlocksPerSecond = 244800;blockSizeWidth = 16;blockSizeHeight = 16;supportPixelFmts = [24];measuredFrameRate = [];bitRateMode = [];minFrameRate = 0;maxFrameRate = 0;}HDF_video_hw_dec_hevc_rk {role = 2;type = 0;name = "OMX.rk.video_decoder.hevc";supportProfiles = [1, 1, 1, 4, 1, 16, 1, 64, 1, 256, 1, 1024, 1, 4096, 1, 16384, 1, 65536, 2, 65536];maxInst = 6;isSoftwareCodec = false;processModeMask = [];capsMask = [0x01];minBitRate = 1;maxBitRate = 160000000;minWidth = 176;minHeight = 144;maxWidth = 1920;maxHeight = 1088;widthAlignment = 2;heightAlignment = 2;minBlockCount = 0xFFFFFFFF;maxBlockCount = 0xFFFFFFFF;minBlocksPerSecond = 1;maxBlocksPerSecond = 244800;blockSizeWidth = 16;blockSizeHeight = 16;supportPixelFmts = [24];measuredFrameRate = [352, 288, 700, 700, 720, 480, 700, 700, 640, 360, 980, 980, 1280, 720, 600, 600, 1920, 1080, 130, 130, 3840, 2160, 130, 130];bitRateMode = [];minFrameRate = 0;maxFrameRate = 0;}}VideoSwEncoders {}VideoSwDecoders {}AudioHwEncoders {}AudioHwDecoders {}AudioSwEncoders {}AudioSwDecoders {}}
}
适配验证
-
当系统启动后,拉起 codec_host 进程,日志中有加载 hcs 配置的 component 相关组件的 log,则初步判定适配过程正常。
-
当前系统通过 gstreamer 插件实现视频编解码功能。当未实现硬件编解码时,默认使用 FFmpeg 软件编解码。
codec hdi 插件加载过程如下:
///foundation/multimedia/player_framework/services/engine/gstreamer/plugins/codec/hdi_plugins/hdi_init.cppvoid HdiInit::AddHdiCap(CodecCompCapability &hdiCap) {MEDIA_LOGI("Add codec name %{public}s", hdiCap.compName);CapabilityData codecCap;codecCap.codecName = hdiCap.compName;codecCap.codecType = GetCodecType(hdiCap.type);codecCap.mimeType = GetCodecMime(hdiCap.role);codecCap.isVendor = !hdiCap.isSoftwareCodec;codecCap.alignment = {hdiCap.port.video.whAlignment.widthAlignment, hdiCap.port.video.whAlignment.heightAlignment};codecCap.bitrateMode = GetBitrateMode(hdiCap.port.video);codecCap.width = {hdiCap.port.video.minSize.width, hdiCap.port.video.maxSize.width};codecCap.height = {hdiCap.port.video.minSize.height, hdiCap.port.video.maxSize.height};codecCap.bitrate = {hdiCap.bitRate.min, hdiCap.bitRate.max};codecCap.frameRate = {hdiCap.port.video.frameRate.min, hdiCap.port.video.frameRate.max};codecCap.format = GetCodecFormats(hdiCap.port.video);codecCap.blockPerFrame = {hdiCap.port.video.blockCount.min, hdiCap.port.video.blockCount.max};codecCap.blockPerSecond = {hdiCap.port.video.blocksPerSecond.min, hdiCap.port.video.blocksPerSecond.max};codecCap.blockSize = {hdiCap.port.video.blockSize.width, hdiCap.port.video.blockSize.height};codecCap.measuredFrameRate = GetMeasuredFrameRate(hdiCap.port.video);codecCap.profileLevelsMap = GetCodecProfileLevels(hdiCap);capabilitys_.push_back(codecCap); }
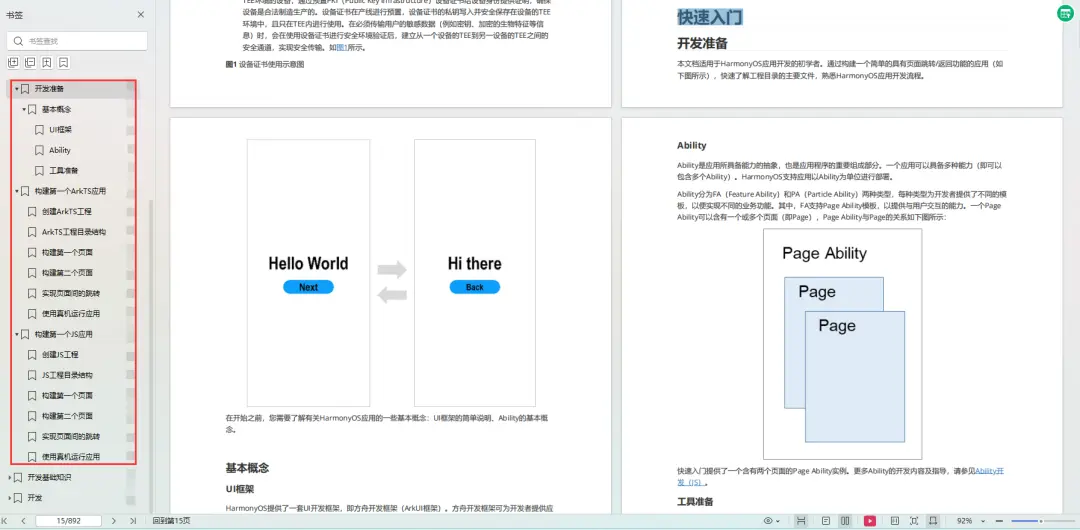
为了能让大家更好的学习鸿蒙(HarmonyOS NEXT)开发技术,这边特意整理了《鸿蒙开发学习手册》(共计890页),希望对大家有所帮助:https://qr21.cn/FV7h05
《鸿蒙开发学习手册》:
如何快速入门:https://qr21.cn/FV7h05
- 基本概念
- 构建第一个ArkTS应用
- ……
开发基础知识:https://qr21.cn/FV7h05
- 应用基础知识
- 配置文件
- 应用数据管理
- 应用安全管理
- 应用隐私保护
- 三方应用调用管控机制
- 资源分类与访问
- 学习ArkTS语言
- ……
基于ArkTS 开发:https://qr21.cn/FV7h05
- Ability开发
- UI开发
- 公共事件与通知
- 窗口管理
- 媒体
- 安全
- 网络与链接
- 电话服务
- 数据管理
- 后台任务(Background Task)管理
- 设备管理
- 设备使用信息统计
- DFX
- 国际化开发
- 折叠屏系列
- ……

鸿蒙开发面试真题(含参考答案):https://qr18.cn/F781PH
鸿蒙开发面试大盘集篇(共计319页):https://qr18.cn/F781PH
1.项目开发必备面试题
2.性能优化方向
3.架构方向
4.鸿蒙开发系统底层方向
5.鸿蒙音视频开发方向
6.鸿蒙车载开发方向
7.鸿蒙南向开发方向
这篇关于OpenHarmony 3.2 Release版本Codec HDI适配过程的文章就介绍到这儿,希望我们推荐的文章对编程师们有所帮助!


