本文主要是介绍uniapp对接萤石云 实现监控播放、云台控制、截图、录像、历史映像等功能,希望对大家解决编程问题提供一定的参考价值,需要的开发者们随着小编来一起学习吧!
萤石云开发平台地址:文档概述 · 萤石开放平台API文档 (ys7.com)
萤石云监控播放
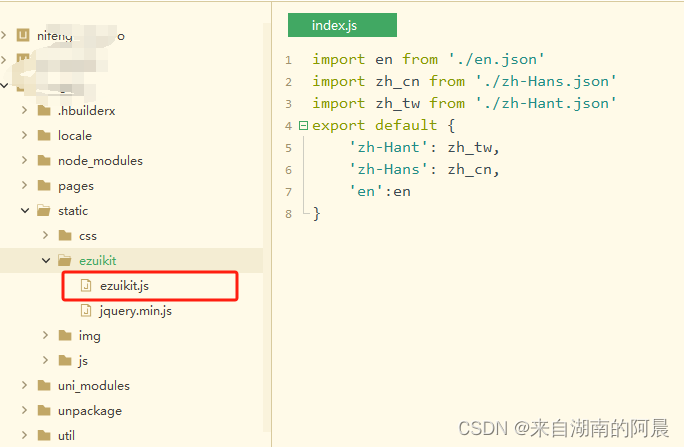
- 首先引入萤石云js
js地址:GitHub - Ezviz-OpenBiz/EZUIKit-JavaScript-npm: 轻应用npm版本,降低接入难度,适配自定义UI,适配主流框架

video.vue
<template><view class="content"><view class="preview" id="video-container"></view><view><button @click="ezuikit.stop">stop</button><button @click="ezuikit.play">play</button></view></view>
</template><script>export default {data() {return {strings: ' '}},methods: {}}
</script><script module="ezuikit" lang="renderjs">var player = null;export default {mounted() {console.log('mounted...');if (typeof window.EZUIKit !== 'undefined') {console.log('defined EZUIKit...');this.initPlayer();} else {console.log('undefined EZUIKit...');				// 动态引入较大类库避免影响页面展示const script = document.createElement('script')// view 层的页面运行在 www 根目录,其相对路径相对于 www 计算script.src = 'static/ezuikit.js'script.onload = this.initPlayer.bind(this)document.head.appendChild(script)}},methods: {initPlayer() {const {windowWidth,windowHeight} = uni.getSystemInfoSync();console.log('initPlayer...');fetch('https://open.ys7.com/jssdk/ezopen/demo/token').then(response => response.json()).then(res => {var accessToken = res.data.accessToken;player = new EZUIKit.EZUIKitPlayer({id: 'video-container', // 视频容器IDaccessToken: accessToken,url: 'ezopen://open.ys7.com/G39444019/1.live',// simple - 极简版; pcLive-pc直播;pcRec-pc回放;mobileLive-移动端直播;mobileRec-移动端回放;security - 安防版;voice-语音版;//template: 'simple',plugin: ['talk'], // 加载插件,talk-对讲width: windowWidth,height: windowWidth * 2 / 3,});window.player = player;});},play() {var playPromise = player.play();playPromise.then((data) => {console.log("promise 获取 数据", data)})},stop() {var stopPromise = player.stop();stopPromise.then((data) => {console.log("promise 获取 数据", data)})}}}
</script><style>.content {display: flex;flex-direction: column;align-items: center;justify-content: center;}.preview {background-color: black;}
</style>
云台控制
player = new EZUIKit.EZUIKitPlayer({id: 'ezuikit', // 视频容器IDaccessToken: this.ezuikitDataM.accessToken,url: 'ezopen://open.ys7.com/' + this.ezuikitDataM.deviceSerial + '/'+this.ezuikitDataM.channelNo+'.live',// simple - 极简版; pcLive-pc直播;pcRec-pc回放;mobileLive-移动端直播;mobileRec-移动端回放;security - 安防版;voice-语音版;template: 'mobileLive',plugin: ['talk', 'ptz'], // 加载插件,talk-对讲width: windowWidth,height: windowWidth * 2 / 3,});截图
使用接口:https://open.ys7.com/api/lapp/device/capture - 设备抓拍图片
接口文档位置:文档概述 · 萤石开放平台API文档 (ys7.com)
screenshot() {this.isLoading = truelet _this = thispost('/api/lapp/device/capture', {'accessToken': this.ezuikitData.accessToken,'deviceSerial': this.ezuikitData.deviceSerial,'channelNo': this.newData.channelNo,'quality': 1}, {'content-type': 'application/x-www-form-urlencoded'}, 'https://open.ys7.com').then(res => {uni.saveImageToPhotosAlbum({filePath: res.data.data.picUrl,success: function(res2) {_this.isLoading = false_this.$refs.messagePopup.showMessage('success', '圖片保存成功')},fail: function(err2) {}});}).catch(err => {console.error(err);});}录像
- 首先要创建一个存储项目,拿到项目ID后再录制
- 录制视频到云端项目存储
即时视频转码录制存储接口,接口:https://open.ys7.com/api/open/cloud/v1/instant/record/save
接口描述:立即开始进行视频录制
预约视频转码录制存储接口,接口:https://open.ys7.com/api/open/cloud/v1/preview/save
接口描述: 从实时视频中取流进行转码录制,注意该接口开始时间需在未来 10 分钟后
文档地址:文档概述 · 萤石开放平台API文档 (ys7.com)
//即时录制
recordSave() {let _this = thispost('/api/open/cloud/v1/instant/record/save', {'projectId': 'YtechAppRecord','recordSeconds': '15'}, {'accessToken': this.ezuikitData.accessToken,'deviceSerial': this.ezuikitData.deviceSerial,'localIndex': this.ezuikitData.channelNo,'content-type': 'application/x-www-form-urlencoded'}, 'https://open.ys7.com').then(res => {_this.taskId = res.data.data.taskId}).catch(err => {console.error(err);});}- 根据任务ID查询视频文件,并获取下载链接
接口:https://open.ys7.com/api/v3/open/cloud/task/files
文档:https://open.ys7.com/api/v3/open/cloud/task/files
taskFiles() {let _this = thisget('/api/v3/open/cloud/task/files', {'accessToken': _this.ezuikitData.accessToken,'taskId': _this.taskId,'hasUrl': true}, {'content-type': 'application/x-www-form-urlencoded'}, 'https://open.ys7.com').then(res => {uni.downloadFile({url: res.data.data[0].downloadUrls[0],success: (downloadResult) => {if (downloadResult.statusCode === 200) {uni.saveVideoToPhotosAlbum({filePath: downloadResult.tempFilePath,success: () => {_this.$refs.messagePopup.showMessage('default', '保存到相冊成功')},fail: (err) => {console.log(err)}});}},fail: (err) => {console.log(err)}})}).catch(err => {console.error(err);});}历史映像
player = new EZUIKit.EZUIKitPlayer({id: 'ezuikit', // 视频容器IDaccessToken: this.ezuikitDataM.accessToken,url: 'ezopen://open.ys7.com/' + this.ezuikitDataM.deviceSerial + '/'+this.ezuikitDataM.channelNo+'.live',// simple - 极简版; pcLive-pc直播;pcRec-pc回放;mobileLive-移动端直播;mobileRec-移动端回放;security - 安防版;voice-语音版;template: 'mobileRec',width: windowWidth,height: windowWidth * 2 / 3});<script module="ezuikit" lang="renderjs">
- renderjs的概念
运行在视图层的js,只支持app-vue和h5(简单来说就是开了另外一条线程)
- renderjs的作用
大幅降低逻辑层和视图层的通讯损耗,提供高性能视图交互能力(减少通讯损耗提升性能,例如一些手势或canvas动画的场景)
在视图层操作dom,运行for web的js库(可以操作dom,意味着拥有window、document等这些全局变量,在app-vue的service层没有这些)
uniapp官网说明地址:renderjs | uni-app官网
- renderjs的使用
在原先的script标签的同级新增一个script,设置lang=renderjs,module=(值任意,相当于命名空间,之后会根据这个名字调用其中的方法)
renderjs和service层的通信示例一
<template><view class="content"><!-- #ifdef APP-PLUS || H5 --><view @click="echarts.onClick" :prop="option" :change:prop="echarts.updateEcharts" id="echarts" class="echarts"></view><button @click="changeOption">更新数据</button><!-- #endif --><!-- #ifndef APP-PLUS || H5 --><view>非 APP、H5 环境不支持</view><!-- #endif --></view>
</template><script>export default {data() {return {option: {title: {text: 'ECharts 入门示例'},tooltip: {},legend: {data: ['销量']},xAxis: {data: ["衬衫", "羊毛衫", "雪纺衫", "裤子", "高跟鞋", "袜子"]},yAxis: {},series: [{name: '销量',type: 'bar',data: [5, 20, 36, 10, 10, 20]}]}}},onLoad() {},methods: {changeOption() {const data = this.option.series[0].data// 随机更新示例数据data.forEach((item, index) => {data.splice(index, 1, Math.random() * 40)})},onViewClick(options) {console.log(options)}}}
</script><script module="echarts" lang="renderjs">let myChartexport default {mounted() {if (typeof window.echarts === 'function') {this.initEcharts()} else {// 动态引入较大类库避免影响页面展示const script = document.createElement('script')// view 层的页面运行在 www 根目录,其相对路径相对于 www 计算script.src = 'static/echarts.js'script.onload = this.initEcharts.bind(this)document.head.appendChild(script)}},methods: {initEcharts() {myChart = echarts.init(document.getElementById('echarts'))// 观测更新的数据在 view 层可以直接访问到myChart.setOption(this.option)},updateEcharts(newValue, oldValue, ownerInstance, instance) {// 监听 service 层数据变更myChart.setOption(newValue)},onClick(event, ownerInstance) {// 调用 service 层的方法ownerInstance.callMethod('onViewClick', {test: 'test'})}}}
</script><style>.content {display: flex;flex-direction: column;align-items: center;justify-content: center;}.echarts {margin-top: 100px;width: 100%;height: 300px;}
</style>
renderjs和service层的通信示例二
<template><view class="videoDetails"><view class="CommonTop_top"></view><view class="CommonTop_app"><view class="left" @click="returnPage()"><uni-icons type="left" color="#8c8c8c" :size="28"></uni-icons></view><view class="tilte">{{ezuikitData?.channelName}}</view></view><view class="CommonTop_bottom"></view><view class="CommonTop_bottom_two" style="height: var(--status-bar-height);"></view><view class="content"><view class="videoBoxDetail"><view class="preview" :info="ezuikitData" :change:info="ezuikit.receiveInfo" id="ezuikit"></view></view><view class="tips">{{$t('VIDEO.16')}}</view></view></view>
</template><script>import {reactive,ref,toRefs,onMounted} from 'vue';import {onReady,onLoad} from "@dcloudio/uni-app"import {get,post} from '@/util/request/request.js'import localStorage from '@/util/commen/localStorage.js'export default {data() {return {ezuikitData: {},userInfo: JSON.parse(localStorage.get('userInfo')),projInfo: JSON.parse(localStorage.get('projInfo'))}},onLoad(option) {let newData = JSON.parse(decodeURIComponent(option.data))console.log(newData,'...........................')this.ezuikitData = newData},methods: {returnPage() {uni.navigateBack({delta: 1})}}}
</script>
<script module="ezuikit" lang="renderjs">var player = nullvar ezuikitDataM = nullexport default {mounted() {if (typeof window.EZUIKit !== 'undefined') {this.initPlayer();} else {const script = document.createElement('script')script.src = 'static/ezuikit/ezuikit.js'script.onload = this.initPlayer.bind(this)document.head.appendChild(script)}},methods: {receiveInfo(newValue, oldValue, ownerInstance, instance) {if (JSON.stringify(newValue) != '{}') {this.ezuikitDataM = newValueconsole.log('新值', JSON.stringify(this.ezuikitDataM))}},initPlayer() {const windowWidth = uni.upx2px(750)player = new EZUIKit.EZUIKitPlayer({id: 'ezuikit', // 视频容器IDaccessToken: this.ezuikitDataM.accessToken,url: 'ezopen://open.ys7.com/' + this.ezuikitDataM.deviceSerial + '/'+this.ezuikitDataM.channelNo+'.live',// simple - 极简版; pcLive-pc直播;pcRec-pc回放;mobileLive-移动端直播;mobileRec-移动端回放;security - 安防版;voice-语音版;template: 'mobileLive',plugin: ['talk', 'ptz'], // 加载插件,talk-对讲width: windowWidth,height: windowWidth * 2 / 3,});window.player = player;}}}
</script>
<style scoped>.videoDetails {position: relative;}.videoDetails .tips {position: absolute;bottom: -70rpx;color: #8c8c8c;width: 100%;text-align: center;}
</style>
其他关于renderjs文章推荐:uniapp中使用renderjs的一些细节 - 掘金
这篇关于uniapp对接萤石云 实现监控播放、云台控制、截图、录像、历史映像等功能的文章就介绍到这儿,希望我们推荐的文章对编程师们有所帮助!


