本文主要是介绍GraalVM详细安装及打包springboot、java、javafx使用教程(打包javafx项目篇),希望对大家解决编程问题提供一定的参考价值,需要的开发者们随着小编来一起学习吧!
前言
在当前多元化开发环境下,Java作为一种广泛应用的编程语言,其应用部署效率与灵活性的重要性日益凸显。Spring Boot框架以其简洁的配置和强大的功能深受开发者喜爱,而JavaFX则为开发者提供了构建丰富桌面客户端应用的能力。然而,将Spring Boot后端服务与JavaFX前端界面整合并实现高效部署,对许多开发者来说是一项挑战。
GraalVM的出现,恰好解决了这一难题。作为Oracle公司推出的一款高性能运行时环境,它支持多种语言运行,并能将Java应用编译为原生可执行文件,从而大大提升了应用的启动速度和资源利用率。通过利用GraalVM的原生镜像生成工具(Substrate VM),我们可以将Spring Boot应用与JavaFX项目无缝集成,并将其打包为独立的、跨平台的可执行程序。
本教程将深入浅出地为您介绍如何详细安装GraalVM,以及如何在此基础上,将普通的Java项目进行打包,以实现高效便捷的应用部署。我们将逐步解析操作步骤,助您掌握这一技术,提升项目的部署效率和用户体验。
1. 环境搭建
上一篇:GraalVM详细安装及打包springboot、java、javafx使用教程(打包普通JAVA项目篇)
下一篇:GraalVM详细安装及打包springboot、java、javafx使用教程(打包springboot2篇)
2.项目搭建
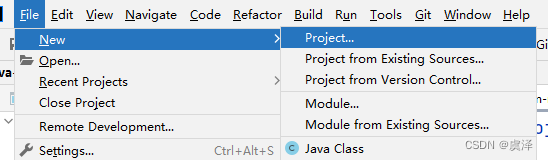
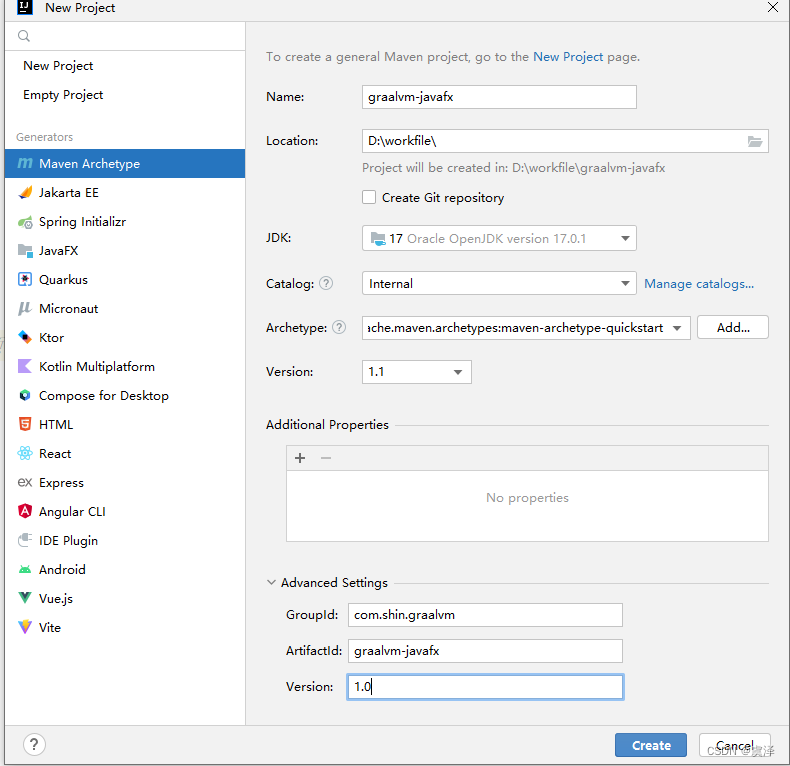
1.新建java项目
idea–>file—>new—>project填写好相关信息,选择JDK17
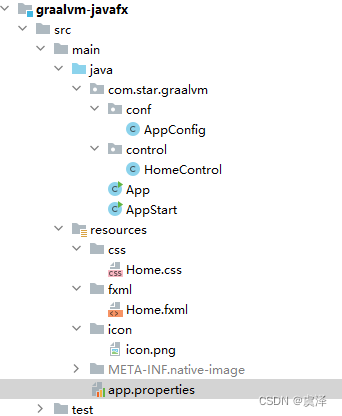
2.完整项目结构
3.导入依赖文件
<properties><project.build.sourceEncoding>UTF-8</project.build.sourceEncoding><java.version>17</java.version><maven.compiler.source>${java.version}</maven.compiler.source><maven.compiler.target>${java.version}</maven.compiler.target><javafx.version>17.0.2</javafx.version><javafx.staticSdk.version>21-ea+5</javafx.staticSdk.version><gluonfx-maven-plugin.version>1.0.18</gluonfx-maven-plugin.version><start-class>com.star.graalvm.AppStart</start-class></properties>
依赖
<dependencies><dependency><groupId>org.openjfx</groupId><artifactId>javafx-controls</artifactId><version>${javafx.version}</version></dependency><dependency><groupId>org.openjfx</groupId><artifactId>javafx-fxml</artifactId><version>${javafx.version}</version></dependency><dependency><groupId>org.openjfx</groupId><artifactId>javafx-media</artifactId><version>${javafx.version}</version></dependency><dependency><groupId>junit</groupId><artifactId>junit</artifactId><version>3.8.1</version><scope>test</scope></dependency></dependencies>
导入编译打包插件
<build><plugins><plugin><groupId>org.apache.maven.plugins</groupId><artifactId>maven-compiler-plugin</artifactId><version>3.8.1</version><configuration><release>${java.version}</release></configuration></plugin><plugin><groupId>org.openjfx</groupId><artifactId>javafx-maven-plugin</artifactId><version>0.0.8</version><configuration><mainClass>${start-class}</mainClass></configuration></plugin><plugin><groupId>com.gluonhq</groupId><artifactId>gluonfx-maven-plugin</artifactId><version>${gluonfx-maven-plugin.version}</version><configuration><!--运行主类--><mainClass>${start-class}</mainClass><!--Java11 静态库的版本Default: 11-ea+10--><!--<javaStaticSdkVersion>11-ea+10</javaStaticSdkVersion>--><!--Java17 静态库的版本21-ea+5 --><javafxStaticSdkVersion>${javafx.staticSdk.version}</javafxStaticSdkVersion><!-- 允许的资源文件后缀 --><resourcesList><list>.*\\.properties$</list><list>.*\\.yml$</list><list>.*\\.dll</list></resourcesList><!-- 涉及反射的类 --><reflectionList><list>com.star.graalvm.App</list><list>com.star.graalvm.control.HomeControl</list></reflectionList><nativeImageArgs><!-- “快速构建”模式,以减少在开发过程中生成本机可执行文件所需的时间。请注意,此模式可能会对峰值性能和生成的可执行文件的大小产生负面影响,因此建议仅用于开发目的。 --><arg>--add-exports=org.graalvm.nativeimage.builder/com.oracle.svm.core.jdk=ALL-UNNAMED</arg></nativeImageArgs><releaseConfiguration><!-- all targets --><!--<packageType></packageType>--><description>graalvm-javafx</description><vendor>shin</vendor><version>${version}</version></releaseConfiguration><runtimeArgs><arg>-Dfile.encoding=UTF-8</arg></runtimeArgs></configuration><executions><execution><goals><goal>build</goal></goals><phase>package</phase></execution></executions></plugin></plugins></build>
4.新建java类
1.启动类
package com.star.graalvm;import com.star.graalvm.conf.AppConfig;
import javafx.application.Application;
import javafx.fxml.FXMLLoader;
import javafx.scene.Parent;
import javafx.scene.Scene;
import javafx.scene.image.Image;
import javafx.stage.Screen;
import javafx.stage.Stage;import java.util.regex.Pattern;/*** @create 2023-09* @author lstar* @description: 主程序*/
public class App extends Application {public static void main(String[] args) {// 解决Linux上编译为native-image时运行错误:String osName = System.getProperty("os.name", "");if (Pattern.matches("Linux.*", osName)) {System.setProperty("prism.forceGPU", "true");}AppConfig.init();launch(args);}@Overridepublic void init() throws Exception {super.init();// 设置系统屏幕缩放比例try {var scaleX =  Screen.getScreens().get(0).getOutputScaleX();System.setProperty("glass.win.uiScale", String.valueOf(scaleX));} catch (Exception ignored) {System.setProperty("glass.win.uiScale", "1.0");}}@Overridepublic void start(Stage primaryStage) throws Exception {// 加载并创建主场景Parent root = FXMLLoader.load(getClass().getResource("/fxml/Home.fxml"));Scene scene = new Scene(root, AppConfig.stageWidth, AppConfig.stageHeight);// 设置窗口信息primaryStage.setTitle(AppConfig.title);primaryStage.setResizable(AppConfig.stageResizable);primaryStage.getIcons().add(new Image(App.class.getResourceAsStream(AppConfig.icon)));primaryStage.setScene(scene);primaryStage.show();}@Overridepublic void stop() throws Exception {System.out.println("stop");super.stop();}
}
java11以上已经移除了javafx相关组件之前运行启动类是无法运行的
package com.star.graalvm;import javafx.application.Application;/*** @create 2023-09* @author lstar* @description: 启动类*/
public class AppStart
{public static void main( String[] args ){Application.launch(App.class);}
}
2.视图控制类
package com.star.graalvm.control;import javafx.fxml.FXML;
import javafx.fxml.Initializable;
import javafx.scene.control.Alert;
import javafx.scene.control.Button;
import javafx.scene.control.TextField;
import javafx.scene.image.Image;
import javafx.scene.image.ImageView;
import javafx.scene.input.MouseEvent;
import javafx.scene.layout.AnchorPane;
import javafx.stage.FileChooser;
import javafx.stage.Window;import java.io.File;
import java.util.Arrays;/*** @create 2023-09* @author lstar* @description: 视图控制类*/
public class HomeControl {@FXMLpublic Button alterBtn;@FXMLpublic Button fileBtn;@FXMLpublic TextField fileText;@FXMLpublic AnchorPane rootPane;@FXMLpublic ImageView imgView;@FXMLpublic void initialize() {System.out.println("init");}/*** 文件按钮单击事件*/@FXMLpublic void fileBtnClick(MouseEvent actionEvent) {Window window = rootPane.getScene().getWindow();FileChooser fc = new FileChooser();//设置选择框的左上角标题fc.setTitle("单文件选择");//设置文件初始化打开路径fc.setInitialDirectory(new File("D:" + File.separator));//设置文件的选择类型fc.getExtensionFilters().addAll(new FileChooser.ExtensionFilter("图片类型", "*.jpg", "*.png", "*.gif"),new FileChooser.ExtensionFilter("文本类型", "*.txt", "*.java", "*.doc", "*.docx", "*.xlx", "*.xlsx", "*.fxml"),new FileChooser.ExtensionFilter("所有类型", "*.*"));//文件显示框 选择的文件返回一个fileFile file = fc.showOpenDialog(window);String fileName = file == null ? "" : file.getName();String fileAbsolutePath = file == null ? "" : file.getAbsolutePath();if (file != null) {fileText.setText("文件名:" + fileName+"========" + "文件路径:" + fileAbsolutePath);if(isImageFile(file)){imgView.setImage(new Image(fileAbsolutePath));}}}/*** 判断文件后缀* @param file* @return*/public static boolean isImageFile(File file) {if (file == null || !file.exists()) {return false;}String fileName = file.getName();int dotIndex = fileName.lastIndexOf(".");if (dotIndex <= 0 || dotIndex == fileName.length() - 1) {// 没有后缀名或者点在文件名末尾,都不是图片return false;}String extension = fileName.substring(dotIndex + 1).toLowerCase(); // 获取小写后缀名return Arrays.asList("jpg", "jpeg", "png", "gif").contains(extension);}/*** 弹出框按钮单击事件*/@FXMLpublic void alterBtnClick(MouseEvent actionEvent) {String javaVersion = System.getProperty("java.version");String javafxVersion = System.getProperty("javafx.version");Alert alert = new Alert(Alert.AlertType.INFORMATION);alert.setHeaderText("Hello Graalvm");alert.setContentText("Hello, JavaFX " + javafxVersion + ", running on Java " + javaVersion + ".");alert.show();}}
3. 应用配置类
package com.star.graalvm.conf;import com.star.graalvm.App;import java.io.IOException;
import java.io.InputStream;
import java.util.Properties;/*** @create 2023-09* @author lstar* @description: 应用配置文件*/
public class AppConfig {/*** 应用标题*/public static String title = "JavaFx Test Application";/*** 应用图标*/public static String icon = "/icon/icon.png";/*** 窗口宽度*/public static int stageWidth = 600;/*** 窗口高度*/public static int stageHeight = 600;/*** 允许调整窗口尺寸*/public static boolean stageResizable = true;public static void init() {try {Properties properties = new Properties();InputStream in = App.class.getResourceAsStream("app.properties");properties.load(in);title = properties.getProperty("title");icon = properties.getProperty("icon");stageWidth = Integer.parseInt(properties.getProperty("stage.width"));stageHeight = Integer.parseInt(properties.getProperty("stage.height"));stageResizable = Boolean.parseBoolean(properties.getProperty("stage.resizable"));} catch (IOException e) {e.printStackTrace();}}}
app.properties 属性配置文件放在resources目录下
title=GraalVM & JavaFx Test Application
icon=icon/icon.png
stage.width=600
stage.height=600
stage.resizable=true
4.Home.fxml文件
<?xml version="1.0" encoding="UTF-8"?><?import javafx.scene.control.*?>
<?import javafx.scene.image.*?>
<?import javafx.scene.layout.*?><AnchorPane fx:id="rootPane" maxHeight="-Infinity" maxWidth="-Infinity" minHeight="-Infinity" minWidth="-Infinity" prefHeight="600.0" prefWidth="600.0" stylesheets="@../css/Home.css" xmlns="http://javafx.com/javafx/17.0.2-ea" xmlns:fx="http://javafx.com/fxml/1" fx:controller="com.star.graalvm.control.HomeControl"><children><Button fx:id="alterBtn" layoutX="74.0" layoutY="112.0" mnemonicParsing="false" onMouseClicked="#alterBtnClick" prefHeight="28.0" prefWidth="68.0" text="弹窗" /><Button fx:id="fileBtn" layoutX="441.0" layoutY="112.0" mnemonicParsing="false" onMouseClicked="#fileBtnClick" prefHeight="28.0" prefWidth="68.0" text="文件选择" /><TextField fx:id="fileText" layoutX="86.0" layoutY="170.0" prefHeight="43.0" prefWidth="429.0" promptText="文件地址" /><ImageView fx:id="imgView" fitHeight="290.0" fitWidth="429.0" layoutX="89.0" layoutY="242.0" pickOnBounds="true" preserveRatio="true" /></children>
</AnchorPane>
5.css文件
#rootPane{/*背景颜色*/-fx-background-color: #b6e3c1;
}
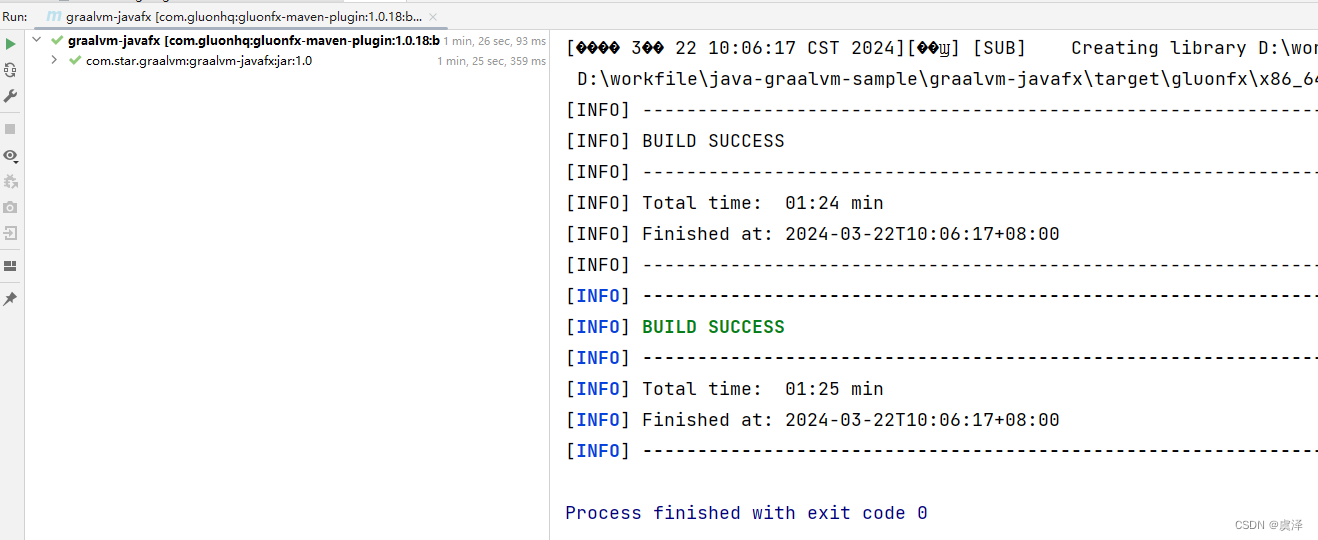
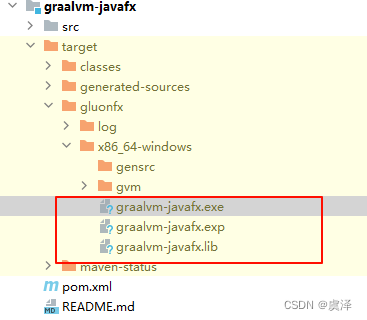
3.构建方式exe
执行完成后exe和jar文件在target—>gluonfx—>x86_64windows下
1.方式一:命令行
使用idea的terminal命令行进入项目目录,使用mvn命令构建
mvn clean
mvn gluonfx:run
mvn gluonfx:runagent
mvn gluonfx:build
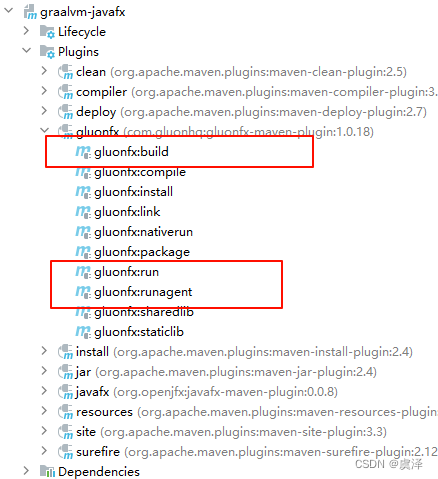
2.方式二:maven插件
使用idea的maven插件打包idea—>maven—>当前项目—>plugins—>gluonfx---->gluonfx:run—>gluonfx:runagent—gluonfx:build>
4.示例代码
- gitee
- github
这篇关于GraalVM详细安装及打包springboot、java、javafx使用教程(打包javafx项目篇)的文章就介绍到这儿,希望我们推荐的文章对编程师们有所帮助!


