本文主要是介绍Guided Policy Search Ubuntu 18.04 + ROS melodic安装过程,希望对大家解决编程问题提供一定的参考价值,需要的开发者们随着小编来一起学习吧!
Guided Policy Search Ubuntu 18.04 + ROS melodic安装过程
- 一 安装依赖
- 二 下载以及预编译源码
- 三 ROS Setup
- 四 安装神经网络库
- 五 测试GPS示例PR2-example
- 六 总结
前提已安装 ROS-melodic+gazebo
一 安装依赖
python 使用Python 2.7版本。
pip install numpy
pip install matplotlib
pip install scipy
sudo apt-get install libprotobuf-dev protobuf-compiler libboost-all-dev
pip install protobuf
二 下载以及预编译源码
git clone https://github.com/cbfinn/gps.git
cd gps
./compile_proto.sh
三 ROS Setup
1、Ubuntu 18.04 安装 ROS melodic,可以参照官网Ubuntu install of ROS Melodic .
2、ROS melodic 安装PR2功能包,参照教程ROS Melodic 安装PR2 .
3、将路径添加到~/.bashrc 终端启动文件中:
gedit ~/.bashrc
在打开的文件最后添加export ROS_PACKAGE_PATH=$ROS_PACKAGE_PATH:/path/to/gps:/path/to/gps/src/gps_agent_pkg,例如:
# enable programmable completion features (you don't need to enable
# this, if it's already enabled in /etc/bash.bashrc and /etc/profile
# sources /etc/bash.bashrc).
if ! shopt -oq posix; thenif [ -f /usr/share/bash-completion/bash_completion ]; then. /usr/share/bash-completion/bash_completionelif [ -f /etc/bash_completion ]; then. /etc/bash_completionfi
fi
source /opt/ros/melodic/setup.bashexport ROS_PACKAGE_PATH=$ROS_PACKAGE_PATH:/home/eric/gps:/home/eric/gps/src/gps_agent_pkg
保存之后,source一下:
source ~/.bashrc
到目前位置,必要的文件已经安装完毕,下面是编译gps包,也是需要填坑的部分。
4、编译 gps
cd ~/gps/src/gps_agent_pkg/
cmake .
make -j
在make -j 这个阶段会出现错误提示 ResourceNotFound: convex_decomposition:
...
ResourceNotFound: convex_decomposition
ROS path [0]=/opt/ros/melodic/share/ros
ROS path [1]=/opt/ros/melodic/share
ROS path [2]=/home/eric/gps
ROS path [3]=/home/eric/gps/src/gps_agent_pkg
...
这是系统缺少convex_decomposition模块导致的,需要先安装:
sudo apt-get install ros-melodic-convex-decomposition
安装完毕之后,再次执行 make -j 又会出现一个错误 ResourceNotFound: ivcon:
ResourceNotFound: ivcon
ROS path [0]=/opt/ros/melodic/share/ros
ROS path [1]=/opt/ros/melodic/share
ROS path [2]=/home/eric/gps
ROS path [3]=/home/eric/gps/src/gps_agent_pkg
ERROR: ivcon
ROS path [0]=/opt/ros/melodic/share/ros
ROS path [1]=/opt/ros/melodic/share
ROS path [2]=/home/eric/gps
ROS path [3]=/home/eric/gps/src/gps_agent_pkg
Traceback (most recent call last):
安装 ivcon:
sudo apt-get install ros-melodic-ivcon
再次执行 make -j ,会出现代码上的错误error: expected constructor, destructor, or type conversion before ‘(’ token PLUGINLIB_DECLARE_CLASS(gps_agent_pkg, GPSPR2Plugin
/home/eric/gps/src/gps_agent_pkg/src/pr2plugin.cpp:235:24: error: expected constructor, destructor, or type conversion before ‘(’ tokenPLUGINLIB_DECLARE_CLASS(gps_agent_pkg, GPSPR2Plugin,^
CMakeFiles/gps_agent_lib.dir/build.make:242: recipe for target 'CMakeFiles/gps_agent_lib.dir/src/pr2plugin.cpp.o' failed
make[2]: *** [CMakeFiles/gps_agent_lib.dir/src/pr2plugin.cpp.o] Error 1
make[2]: *** Waiting for unfinished jobs....
/home/eric/gps/src/gps_agent_pkg/src/robotplugin.cpp: In member function ‘virtual gps_control::Sensor* gps_control::RobotPlugin::get_sensor(gps_control::SensorType, gps::ActuatorType)’:
/home/eric/gps/src/gps_agent_pkg/src/robotplugin.cpp:543:1: warning: control reaches end of non-void function [-Wreturn-type]}^
CMakeFiles/Makefile2:67: recipe for target 'CMakeFiles/gps_agent_lib.dir/all' failed
make[1]: *** [CMakeFiles/gps_agent_lib.dir/all] Error 2
Makefile:129: recipe for target 'all' failed
make: *** [all] Error 2
出现这个错误的原因是ROS melodic对PLUGINLIB_DECLARE_CLASS改写了,需要我们改写源码,改成PLUGINLIB_EXPORT_CLASS,具体操作如下:
gedit ~/gps/src/gps_agent_pkg/src/pr2plugin.cpp
打开文件pr2plugin.cpp文件之后,最后一个语句需要改写成如下形式:
// Register controller to pluginlib
//PLUGINLIB_DECLARE_CLASS(gps_agent_pkg, GPSPR2Plugin,
//						gps_control::GPSPR2Plugin,
//						pr2_controller_interface::Controller)PLUGINLIB_EXPORT_CLASS(gps_control::GPSPR2Plugin, pr2_controller_interface::Controller)
修改完之后,再次执行 make -j :
make -j
[ 73%] Linking CXX shared library lib/libgps_agent_lib.so
[100%] Built target gps_agent_lib
编译gps_agent_pkg成功!
四 安装神经网络库
官方指导是caffe和tensorflow二选一,这里选用tensorflow 1.14.0
pip install tensorflow
测试一下:
$ python
Python 2.7.17 (default, Jul 20 2020, 15:37:01)
[GCC 7.5.0] on linux2
Type "help", "copyright", "credits" or "license" for more information.
>>> import tensorflow
>>>
没有报错说明安装成功!
五 测试GPS示例PR2-example
1、启动gazeo环境下的pr2
roslaunch gps_agent_pkg pr2_gazebo.launch
会出现如下错误Resource not found: gazebo_worlds:
Resource not found: gazebo_worlds
ROS path [0]=/opt/ros/melodic/share/ros
ROS path [1]=/opt/ros/melodic/share
ROS path [2]=/home/eric/gps
ROS path [3]=/home/eric/gps/src/gps_agent_pkg
The traceback for the exception was written to the log file
这是因为现在的gazebo的功能包名字更改了,需要对pr2_gazebo.launch文件进行更改:
gedit ~/gps/src/gps_agent_pkg/launch/pr2_gazebo_no_controller.launch
具体内容如下:
<launch><!-- Use the following for ROS hydro or later: <include file="$(find gazebo_ros)/launch/empty_world.launch"> --><include file="$(find gazebo_ros)/launch/empty_world.launch"></include><include file="$(find pr2_gazebo)/launch/pr2_no_controllers.launch" /></launch>
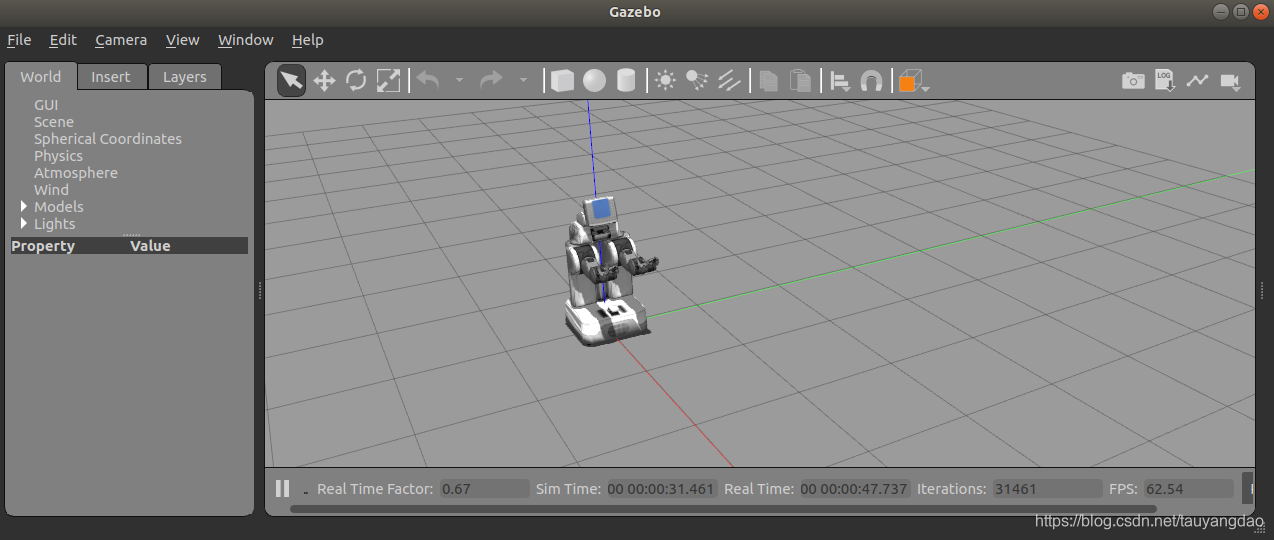
2、修改完毕之后,再次运行
roslaunch gps_agent_pkg pr2_gazebo.launch
便可以打开gazebo环境:
3、运行示例pr2_example
python ~/gps/python/gps/gps_main.py pr2_example
这时会出现错误:AttributeError: ‘AxesSubplot’ object has no attribute ‘set_axis_bgcolor’,
python/gps/agent/ros/ros_utils.py:106: SyntaxWarning: The publisher should be created with an explicit keyword argument 'queue_size'. Please see http://wiki.ros.org/rospy/Overview/Publishers%20and%20Subscribers for more information.self._pub = rospy.Publisher(pub_topic, pub_type)
Traceback (most recent call last):File "python/gps/gps_main.py", line 414, in <module>main()File "python/gps/gps_main.py", line 399, in maingps = GPSMain(hyperparams.config, args.quit)File "python/gps/gps_main.py", line 49, in __init__self.gui = GPSTrainingGUI(config['common']) if config['gui_on'] else NoneFile "python/gps/gui/gps_training_gui.py", line 98, in __init__self._action_output = Textbox(self._fig, self._gs_action_output, border_on=True)File "python/gps/gui/textbox.py", line 41, in __init__self.set_bgcolor(bgcolor, bgalpha)  # this must come after fig.canvas.draw()File "python/gps/gui/textbox.py", line 64, in set_bgcolorself._ax.set_axis_bgcolor(ColorConverter().to_rgba(color, alpha))
AttributeError: 'AxesSubplot' object has no attribute 'set_axis_bgcolor'
这是因为matplotlib库更新的缘故,需要打开对应的函数进行修改:
‘set_axis_bgcolor’ -->set_facecolor’
‘get_axis_bgcolor’ -->get_facecolor’
gedit ~/gps/python/gps/gui/textbox.py
"""
TextboxA Textbox represents the standard textbox. It has basic capabilities for
setting the text, appending text, or changing the background color.
If a log filename is given, all text displayed by the Textbox is also placed
within the log file.
"""
import matplotlib as mpl
import matplotlib.pyplot as plt
import matplotlib.gridspec as gridspec
from matplotlib.colors import ColorConverterclass Textbox:def __init__(self, fig, gs, log_filename=None, max_display_size=10,border_on=False, bgcolor=mpl.rcParams['figure.facecolor'], bgalpha=1.0,fontsize=12, font_family='sans-serif'):self._fig = figself._gs = gridspec.GridSpecFromSubplotSpec(1, 1, subplot_spec=gs)self._ax = plt.subplot(self._gs[0])self._log_filename = log_filenameself._text_box = self._ax.text(0.01, 0.95, '', color='black',va='top', ha='left', transform=self._ax.transAxes,fontsize=fontsize, family=font_family)self._text_arr = []self._max_display_size = max_display_sizeself._ax.set_xticks([])self._ax.set_yticks([])if not border_on:self._ax.spines['top'].set_visible(False)self._ax.spines['right'].set_visible(False)self._ax.spines['bottom'].set_visible(False)self._ax.spines['left'].set_visible(False)self._fig.canvas.draw()self._fig.canvas.flush_events()     # Fixes bug with Qt4Agg backendself.set_bgcolor(bgcolor, bgalpha)  # this must come after fig.canvas.draw()#TODO: Add docstrings here.def set_text(self, text):self._text_arr = [text]self._text_box.set_text('\n'.join(self._text_arr))self.log_text(text)self.draw()def append_text(self, text):self._text_arr.append(text)if len(self._text_arr) > self._max_display_size:self._text_arr = self._text_arr[-self._max_display_size:]self._text_box.set_text('\n'.join(self._text_arr))self.log_text(text)self.draw()def log_text(self, text):if self._log_filename is not None:with open(self._log_filename, 'a') as f:f.write(text + '\n')def set_bgcolor(self, color, alpha=1.0):self._ax.set_facecolor(ColorConverter().to_rgba(color, alpha))self.draw()def draw(self):color, alpha = self._ax.get_facecolor(), self._ax.get_alpha()self._ax.set_facecolor(mpl.rcParams['figure.facecolor'])self._ax.draw_artist(self._ax.patch)self._ax.set_facecolor(ColorConverter().to_rgba(color, alpha))self._ax.draw_artist(self._ax.patch)self._ax.draw_artist(self._text_box)self._fig.canvas.update()self._fig.canvas.flush_events()   # Fixes bug with Qt4Agg backend
再次运行示例:
python ~/gps/python/gps/gps_main.py pr2_example
成功运行!!!
等待一会儿,训练结果就会在gui界面上显示出来。

六 总结
刚开始接触guided policy search 算法,第一步就有这么多坑,任重而道远!加油。
这篇关于Guided Policy Search Ubuntu 18.04 + ROS melodic安装过程的文章就介绍到这儿,希望我们推荐的文章对编程师们有所帮助!


