本文主要是介绍SpringBoot ApplicationListener实现发布订阅模式,希望对大家解决编程问题提供一定的参考价值,需要的开发者们随着小编来一起学习吧!
文章目录
- 前言
- 一、Spring对JDK的扩展
- 二、快速实现发布订阅模式
前言
发布订阅模式(Publish-Subscribe Pattern)通常又称观察者模式,它被广泛应用于事件驱动架构中。即一个事件的发布,该行为会通过同步或者异步的方式告知给订阅该事件的订阅者。JDK中提供了EventListener作为所有订阅者的接口规范(即所有的订阅者都应该实现该接口),而EventObject则作为所有事件发布者的实现规范(即所有事件发布者都应该继承该类)。对于观察者的原理不是本章讨论的重点,本章只是演示如何在SpringBoot中实现发布订阅模式。
一、Spring对JDK的扩展
在Spring中,提供了接口ApplicationListener作为Spring观察者(也叫监听者)的实现规范,ApplicationListener其实是对JDK中EventListener中的扩展,增加了onApplicationEvent方法作为触发监听的方法。而事件发布对象ApplicationEvent也是继承了JDK中的EventObject类,仅仅增加了参数timestamp用于记录事件创建的时间。也就是说如果要使用Spring提供的发布订阅模式,您的监听器应该实现ApplicationListener接口,通过onApplicationEvent方法获取监听的内容。事件则必须继承ApplicationEvent。
ApplicationListener源码:
@FunctionalInterface
public interface ApplicationListener<E extends ApplicationEvent> extends EventListener {/*** Handle an application event.* @param event the event to respond to*/void onApplicationEvent(E event);}
ApplicationEvent源码:
public abstract class ApplicationEvent extends EventObject {/** use serialVersionUID from Spring 1.2 for interoperability. */private static final long serialVersionUID = 7099057708183571937L;/** System time when the event happened. */private final long timestamp;/*** Create a new {@code ApplicationEvent}.* @param source the object on which the event initially occurred or with* which the event is associated (never {@code null})*/public ApplicationEvent(Object source) {super(source);this.timestamp = System.currentTimeMillis();}/*** Return the system time in milliseconds when the event occurred.*/public final long getTimestamp() {return this.timestamp;}}
二、快速实现发布订阅模式
配置线程池是必要的,因为发布订阅模式的一个好处就是可以实现解耦,而解耦最好的方式就是采用异步线程处理。如果我们不配置线程池,则在spring中默认会采用同步的方式进行消息发布和订阅消费。这样一来就没有任何意义了。首先在yaml或者properties中配置线程池信息:
thread:executor:corePoolSize: 8 #核心线程keepAliveSeconds: 30000 # 活跃时间maxPoolSize: 16 #最大线程数queueCapacity: 100000 #最大队列长度
然后通过配置文件读取配置信息,创建线程池并注入IOC容器
package com.hl.by.common.thread;import com.hl.by.common.utils.JsonUtils;
import org.springframework.beans.factory.annotation.Value;
import org.springframework.context.annotation.Bean;
import org.springframework.context.annotation.Configuration;
import org.springframework.context.annotation.DependsOn;
import org.springframework.context.event.SimpleApplicationEventMulticaster;
import org.springframework.context.support.AbstractApplicationContext;
import org.springframework.scheduling.concurrent.ThreadPoolTaskExecutor;
import org.springframework.util.ErrorHandler;import java.util.concurrent.ThreadPoolExecutor;/*** @Author: DI.YIN* @Date: 2024/3/6 9:39* @Version: 1.0.0* @Description: 线程池配置**/
@Configuration
public class ThreadPoolTaskExecutorConfig {//核心线程@Value("${thread.executor.corePoolSize}")private Integer corePoolSize;//存活时间@Value("${thread.executor.keepAliveSeconds}")private Integer keepAliveSeconds;//最大线程数@Value("${thread.executor.maxPoolSize}")private Integer maxPoolSize;//最大队列长度@Value("${thread.executor.queueCapacity}")private Integer queueCapacity;@Beanpublic ThreadPoolTaskExecutor taskExecutor() {ThreadPoolTaskExecutor threadPoolTaskExecutor = new ThreadPoolTaskExecutor();threadPoolTaskExecutor.setAllowCoreThreadTimeOut(true);threadPoolTaskExecutor.setCorePoolSize(corePoolSize);threadPoolTaskExecutor.setKeepAliveSeconds(keepAliveSeconds);threadPoolTaskExecutor.setMaxPoolSize(maxPoolSize);threadPoolTaskExecutor.setQueueCapacity(queueCapacity);//设置拒绝策略,直接运行,不采用异步threadPoolTaskExecutor.setRejectedExecutionHandler(new ThreadPoolExecutor.CallerRunsPolicy());threadPoolTaskExecutor.setThreadNamePrefix("Thread-Pool-Task-");return threadPoolTaskExecutor;}@DependsOn(value = "taskExecutor")@Bean(AbstractApplicationContext.APPLICATION_EVENT_MULTICASTER_BEAN_NAME)public SimpleApplicationEventMulticaster eventMulticaster() {SimpleApplicationEventMulticaster simpleApplicationEventMulticaster = new SimpleApplicationEventMulticaster();simpleApplicationEventMulticaster.setTaskExecutor(taskExecutor());//设置错误处理器simpleApplicationEventMulticaster.setErrorHandler(new ErrorHandler() {@Overridepublic void handleError(Throwable throwable) {System.out.println("抛出异常:" + JsonUtils.writeObjectAsBeautifulJson(throwable));}});return simpleApplicationEventMulticaster;}
}可以看到除了注入线程池之外,还注入了自定义的SimpleApplicationEventMulticaster 对象并将创建的线程池设置到SimpleApplicationEventMulticaster中。因为SimpleApplicationEventMulticaster是处理发布订阅的核心类,通过multicastEvent方法进行事件发布。可以看到multicastEvent中,循环遍历订阅该事件的所有监听器,并判断是否配置了线程池Executor,如果配置了则将发布操作扔入线程池中异步处理,否则将同步处理发布事件操作。很多情况发现我们的事件发布与监听处理是在一个线程中执行,就是因为我们未设置线程池,导致发布订阅无法异步实现。
@Overridepublic void multicastEvent(final ApplicationEvent event, @Nullable ResolvableType eventType) {ResolvableType type = (eventType != null ? eventType : resolveDefaultEventType(event));//获取线程池Executor executor = getTaskExecutor();for (ApplicationListener<?> listener : getApplicationListeners(event, type)) {if (executor != null) {//如果配置了线程池,则放入线程池中异步处理executor.execute(() -> invokeListener(listener, event));}else {//未配置线程池,则同步处理invokeListener(listener, event);}}}
完成以上配置后,就可以定义发布者、订阅者和发布事件了。现在我们定义一个类MessageSource作为发布者发布的事件,结构如下:
import lombok.Data;/*** @Author: DI.YIN* @Date: 2024/3/6 13:41* @Version:* @Description: 消息实体**/
@Data
public class MessageSource {private String id;private String msg;private String title;
}
定义好发布事件后,我们定义一个事件发布者MessageEvent,并指定其发布的事件类型是MessageSource 或MessageSource 的子类,结构如下:
import org.springframework.context.ApplicationEvent;/*** @Author: DI.YIN* @Date: 2024/3/6 13:39* @Version: 1.0.0* @Description: 消息事件**/
public class MessageEvent<T extends MessageSource> extends ApplicationEvent {/*** Create a new {@code ApplicationEvent}.** @param source the object on which the event initially occurred or with*               which the event is associated (never {@code null})*/public MessageEvent(MessageSource source) {super(source);}
}现在已经定义好了发布事件MessageSource,事件发布者MessageEvent,此时我们可以定义一个事件订阅者MessageListener,用于监听事件发布者MessageEvent发布的事件。代码如下:
import com.alibaba.fastjson.JSONObject;
import org.springframework.context.ApplicationListener;
import org.springframework.stereotype.Component;/*** @Author: DI.YIN* @Date: 2024/3/6 10:19* @Version:* @Description:**/
@Component
public class MessageListener implements ApplicationListener<MessageEvent> {@Overridepublic void onApplicationEvent(MessageEvent event) {MessageSource source = (MessageSource)event.getSource();System.out.println("消息监听器监听到消息:===>"+ JSONObject.toJSONString(source));}
}
现在我们就实现了一个订阅发布模式,事件对象MessageSource,事件发布者MessageEvent专门用于发布MessageSource类型的事件,事件监听者MessageListener 则专门监听MessageEvent发布的事件。可以创建一个接口用于测试发布订阅是否成功。
import org.springframework.beans.factory.annotation.Autowired;
import org.springframework.context.ApplicationContext;
import org.springframework.http.MediaType;
import org.springframework.web.bind.annotation.RequestMapping;
import org.springframework.web.bind.annotation.RequestMethod;
import org.springframework.web.bind.annotation.RestController;/*** @Author: Greyfus* @Create: 2024-03-02 14:08* @Version:* @Description:*/
@RestController
@RequestMapping("/mock")
public class TestController {@Autowiredprivate ApplicationContext applicationContext;@RequestMapping(method = RequestMethod.POST, value = "/publishMessage", consumes = MediaType.APPLICATION_JSON_VALUE)public void publishMessage() throws Exception {//构建信息实体MessageSource messageSource = new MessageSource();messageSource.setId(String.valueOf(1));messageSource.setTitle("日志消息");messageSource.setMsg("调用了接口publishMessage");//构建消息事件MessageEvent<MessageSource> messageEvent = new MessageEvent(messageSource);//发布事件applicationContext.publishEvent(messageEvent);}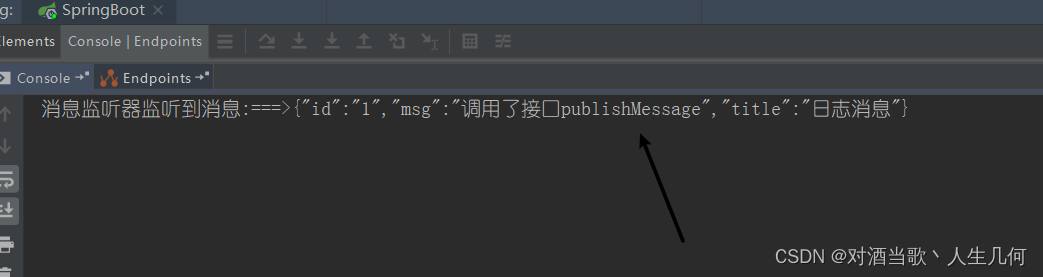
}通过用postman调用接口/mock/feign可以看到MessageListener 成功接受到了MessageEvent发布的MessageSource事件。
这篇关于SpringBoot ApplicationListener实现发布订阅模式的文章就介绍到这儿,希望我们推荐的文章对编程师们有所帮助!


