本文主要是介绍(五)Android布局类型(相对布局RelativeLayout),希望对大家解决编程问题提供一定的参考价值,需要的开发者们随着小编来一起学习吧!
相对布局(RelativeLayout)相比线性布局来说,要记忆的东西比较多,看似比较复杂,但是掌握技巧后,还是比较好用。该种布局方式比较灵活,可以根据容器来定自己的位置,也可根据其他组件来定自己的位置。总之,要有参考物。
相对容器
知识点1:组件在父容器的放置位置
把一个布局或者一个组件放在父容器的什么方位,参考的对象是容器,例如,假设容器是一个线性布局,将一个按钮放在布局的底部。用图表达,即:红色区域为容器,蓝色区域表示按钮所在区域,无论按钮在蓝色区域的左边、中间、右边,整体来说,蓝色区域都在红色区域的底部。

如何表达蓝色部分在红色区域的底部,这就需要设置属性了。在父容器的方位表达可以有4种:
在父容器的顶部:android:layout_alignParentTop="true"
在父容器的底部:android:layout_alignParentBottom="true"
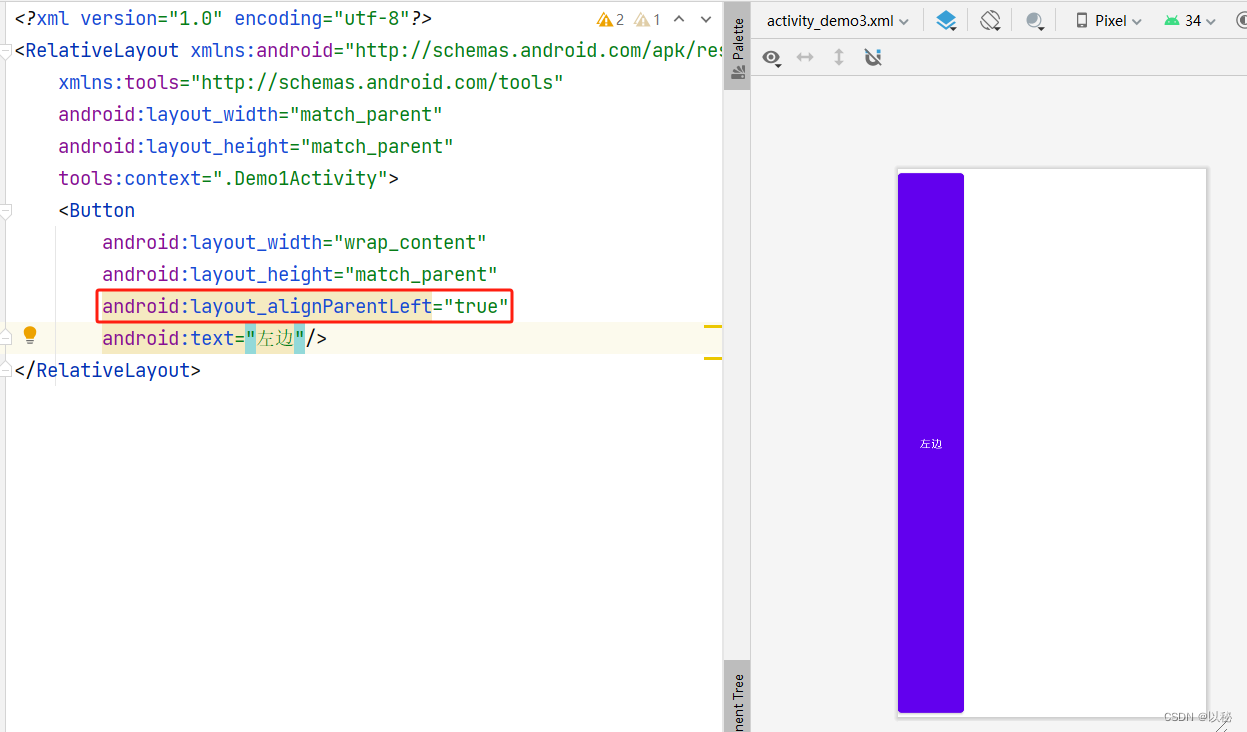
在父容器的左边:android:layout_alignParentLeft="true"
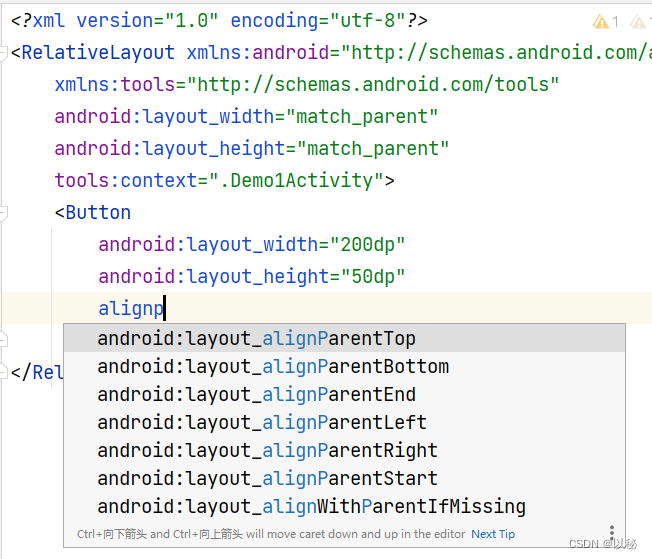
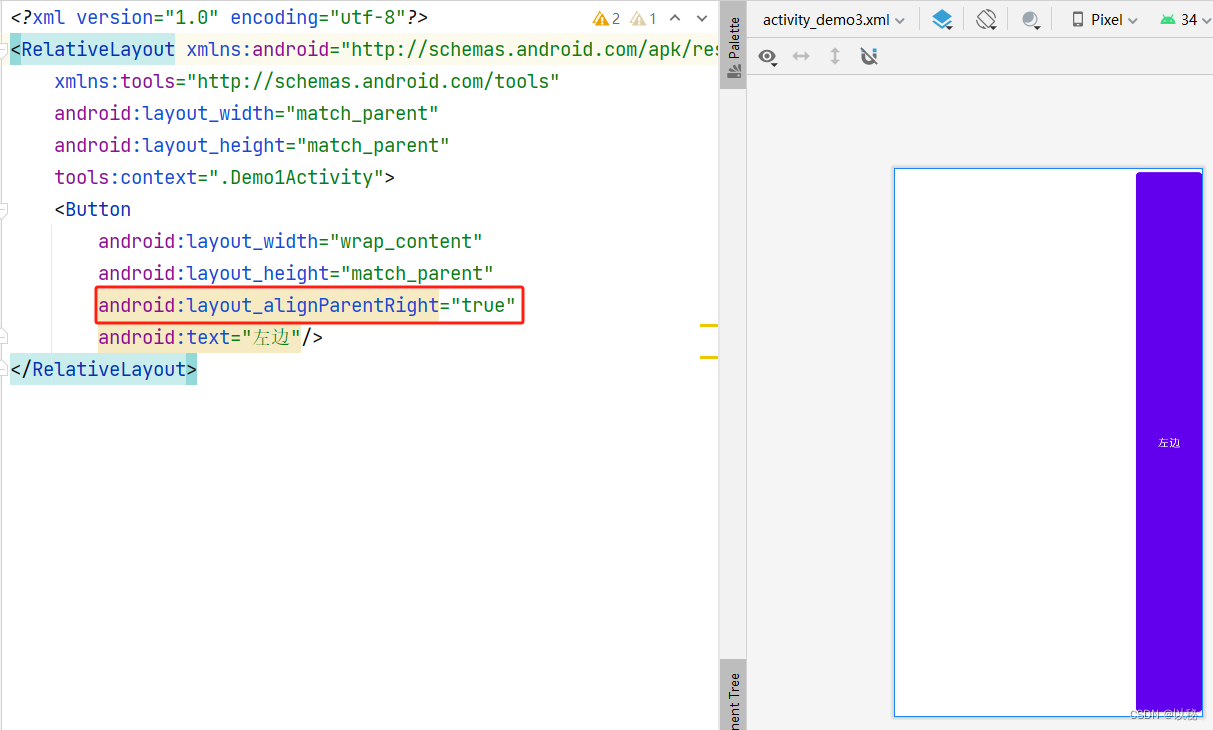
在父容器的右边:android:layout_alignParentRight="true"大家看到这么多的时候,发现自己很容易记混淆或者根本就记不住
【记忆技巧】:相同的都是android:layout_alignParent,所以写代码的时候,直接从alignp开始写。对齐父容器,后面接上Top,则表示对齐父容器的顶部,后面接的是Bottom,则表示对齐父容器的底部,左右的表达通常都是Left和Right,所以这两个不易记错。
案例1:在父容器的底部、顶部、左边、右边
<?xml version="1.0" encoding="utf-8"?>
<RelativeLayout xmlns:android="http://schemas.android.com/apk/res/android"xmlns:tools="http://schemas.android.com/tools"android:layout_width="match_parent"android:layout_height="match_parent"tools:context=".Demo1Activity"><Buttonandroid:layout_width="match_parent"android:layout_height="50dp"android:layout_alignParentBottom="true"android:text="底部"/>
</RelativeLayout> 
核心代码:设置按钮对齐父容器的底部
android:layout_alignParentBottom="true"如果想要设置按钮对齐父容器的顶部、左边、右边,则只需要替换属性即可。

知识点2:组件在父容器中的对齐方式
上面的案例,仅仅是把组件放置在了容器的几个方位中,为了表达出方向感,我刻意将有些案例的宽和高设置为match_parent,如果都是wrap_content,意味着组件可能填不满区域,那么,就会设置容器在父容器中的对齐方式
组件在父容器中水平居中:android:layout_centerHorizontal
组件在父容器中垂直居中:android:layout_centerVertical
组件在父容器中水平居中且垂直居中:android:layout_centerInParent
【记忆技巧】 android:layout_center是相同的,所以,写代码的时候,直接从center开始写,后方接的是水平,则表示在父容器中水平居中,同理,就还有垂直居中,还有一种综合对齐,即:既水平又垂直。

案例2:将按钮放置在页面的垂直居中位置
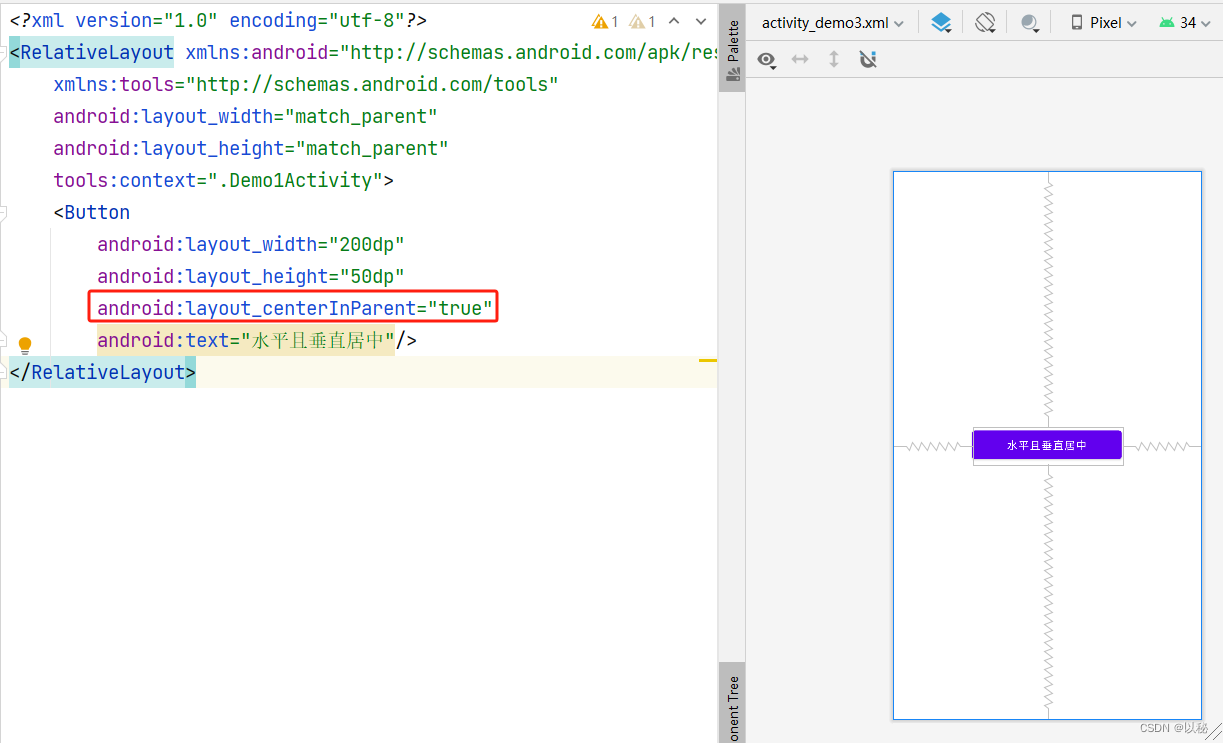
同理,也可以设置按钮水平居中和垂直居中


相对组件
上面的案例,参考物是容器。如果参考物是组件,则组件必须要设置id属性,这样才能找到参考的组件。例如:B组件在A组件的左边,则A组件为参考组件,必须设置id属性。在下图中,绿色组件为A组件,需要设置id,其次,虚线左侧的5个组件,均处于A组件的左边。

知识点3:可以设置新组件在参考组件的左边、右边、上方、下方。
具体设置方法如下:
在参考组件的上方:android:layout_above
在参考组件的下方:android:layout_below
在参考组件的左边:android:layout_toLeftOf
在参考组件的右方:android:layout_toRightOf
【记忆技巧】 上下分别是ab开头,左右带to,所以在写代码的时候,写上下,就先写字母a或b,写左右的时候先写to。


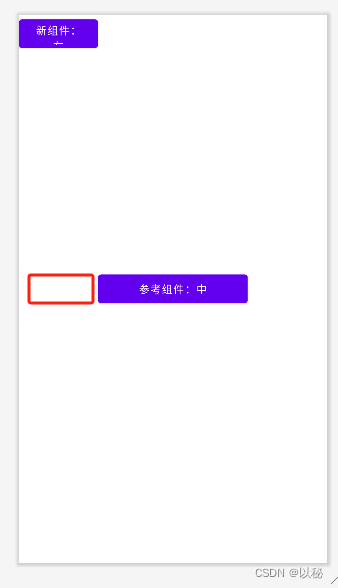
案例3:设置组件在参考组件的左方(右方、上方、下方,大家可以自行测试)
第一步:首先设置参考组件的位置,设置参考组件在父容器中垂直水平居中,其次,还要设置id

然后放新的组件在参考组件的左边
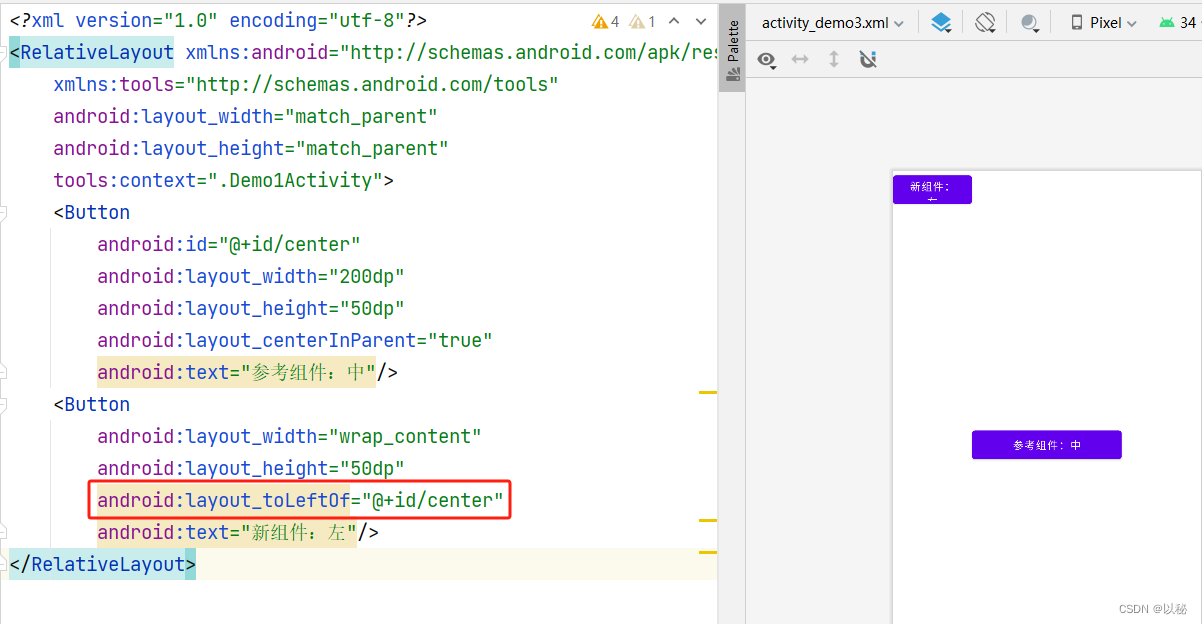
核心代码:
android:layout_toLeftOf="@+id/center"center是参考组件的id值。从效果图可以看出,确实是在参考组件的左边,如果想要将新组件放置在红色位置,则还需要设置新组件与参考组件顶部对齐
知识点2:设置新组件与参考组件的对齐方式
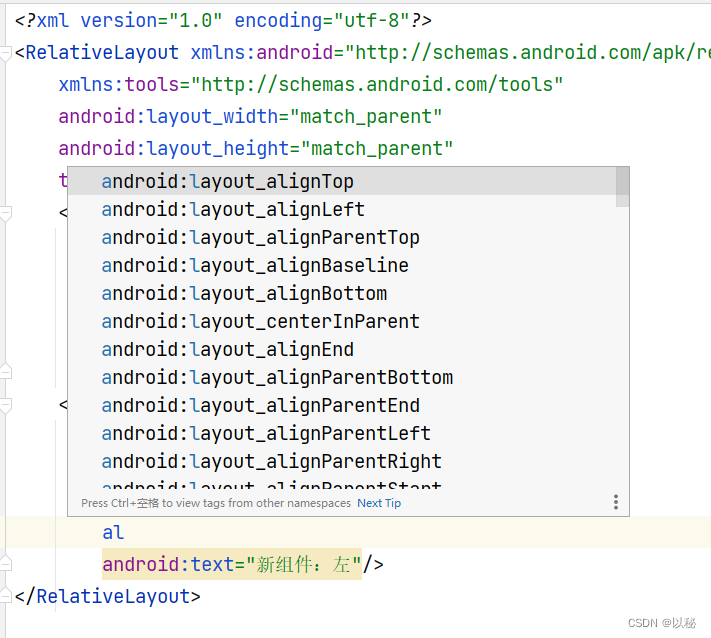
新组件与参考组件顶部对齐:android:layout_alignTop
新组件与参考组件底部对齐:android:layout_alignBottom
新组件与参考组件左边对齐:android:layout_alignLeft
新组件与参考组件右边对齐:android:layout_alignRight【记忆技巧】发现相同点都是android:layout_align,所以写代码的时候,直接从al开始写
案例4:在案例三基础上,设置新组件不仅在参考组件的左边,还和参考组件是顶部对齐关系
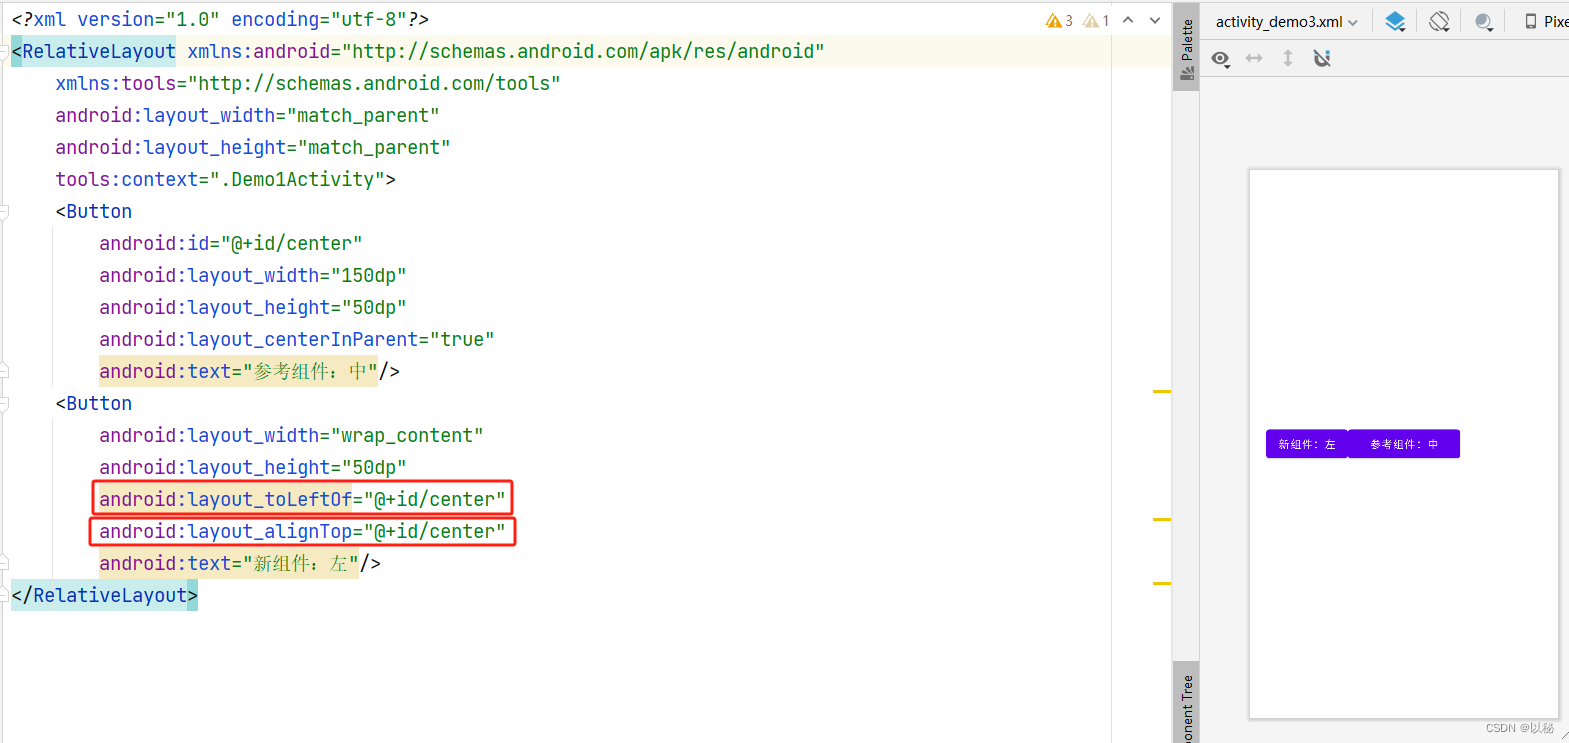
核心代码:
在参考组件的左方:android:layout_toLeftOf="@+id/center"
与参考组件顶部对齐:android:layout_alignTop="@+id/center"
你学会了吗? 试试看
检测案例1:实现“十字架”图案
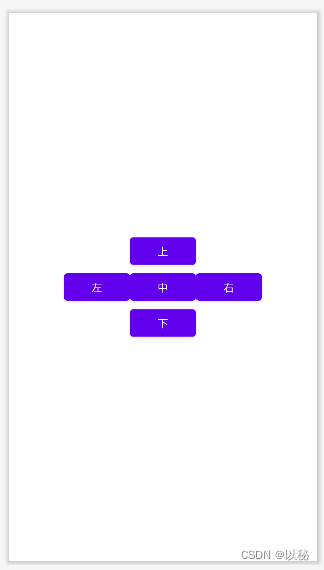
参考代码:
<?xml version="1.0" encoding="utf-8"?>
<RelativeLayout xmlns:android="http://schemas.android.com/apk/res/android"xmlns:tools="http://schemas.android.com/tools"android:layout_width="match_parent"android:layout_height="match_parent"tools:context=".Demo1Activity"><Buttonandroid:id="@+id/center"android:layout_width="wrap_content"android:layout_height="wrap_content"android:layout_centerInParent="true"android:text="中"/><Buttonandroid:layout_width="wrap_content"android:layout_height="wrap_content"android:layout_toLeftOf="@+id/center"android:layout_alignTop="@+id/center"android:text="左"/><Buttonandroid:layout_width="wrap_content"android:layout_height="wrap_content"android:layout_toRightOf="@+id/center"android:layout_alignTop="@+id/center"android:text="右"/><Buttonandroid:layout_width="wrap_content"android:layout_height="wrap_content"android:layout_above="@+id/center"android:layout_alignLeft="@+id/center"android:text="上"/><Buttonandroid:layout_width="wrap_content"android:layout_height="wrap_content"android:layout_below="@+id/center"android:layout_alignLeft="@+id/center"android:text="下"/>
</RelativeLayout>
检测案例2:实现“王”字图案
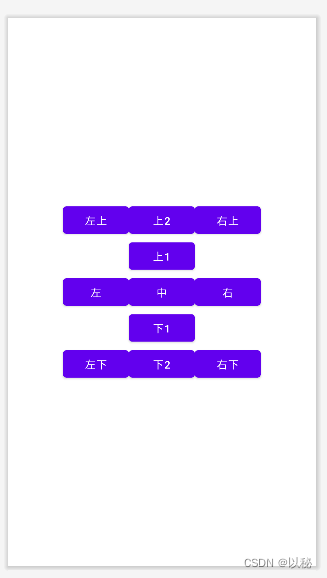
参考代码:
<?xml version="1.0" encoding="utf-8"?>
<RelativeLayout xmlns:android="http://schemas.android.com/apk/res/android"xmlns:tools="http://schemas.android.com/tools"android:layout_width="match_parent"android:layout_height="match_parent"tools:context=".Demo1Activity"><Buttonandroid:id="@+id/center"android:layout_width="wrap_content"android:layout_height="wrap_content"android:layout_centerInParent="true"android:text="中"/><Buttonandroid:id="@+id/up"android:layout_width="wrap_content"android:layout_height="wrap_content"android:layout_above="@+id/center"android:layout_alignLeft="@+id/center"android:text="上1"/><Buttonandroid:id="@+id/up2"android:layout_width="wrap_content"android:layout_height="wrap_content"android:layout_above="@+id/up"android:layout_alignLeft="@+id/up"android:text="上2"/><Buttonandroid:id="@+id/down"android:layout_width="wrap_content"android:layout_height="wrap_content"android:layout_below="@+id/center"android:layout_alignLeft="@+id/center"android:text="下1"/><Buttonandroid:id="@+id/down2"android:layout_width="wrap_content"android:layout_height="wrap_content"android:layout_below="@+id/down"android:layout_alignLeft="@+id/down"android:text="下2"/><Buttonandroid:layout_width="wrap_content"android:layout_height="wrap_content"android:layout_toRightOf="@+id/center"android:layout_alignTop="@+id/center"android:text="右"/><Buttonandroid:layout_width="wrap_content"android:layout_height="wrap_content"android:layout_toLeftOf="@+id/center"android:layout_alignTop="@+id/center"android:text="左"/><Buttonandroid:layout_width="wrap_content"android:layout_height="wrap_content"android:layout_toRightOf="@+id/up2"android:layout_alignTop="@+id/up2"android:text="右上"/><Buttonandroid:layout_width="wrap_content"android:layout_height="wrap_content"android:layout_toLeftOf="@+id/up2"android:layout_alignTop="@+id/up2"android:text="左上"/><Buttonandroid:layout_width="wrap_content"android:layout_height="wrap_content"android:layout_toRightOf="@+id/down2"android:layout_alignTop="@+id/down2"android:text="右下"/><Buttonandroid:layout_width="wrap_content"android:layout_height="wrap_content"android:layout_toLeftOf="@+id/down2"android:layout_alignTop="@+id/down2"android:text="左下"/>
</RelativeLayout>
这篇关于(五)Android布局类型(相对布局RelativeLayout)的文章就介绍到这儿,希望我们推荐的文章对编程师们有所帮助!


