本文主要是介绍Python Web开发记录 Day11:Django part5 管理员管理,希望对大家解决编程问题提供一定的参考价值,需要的开发者们随着小编来一起学习吧!
名人说:莫道桑榆晚,为霞尚满天。——刘禹锡(刘梦得,诗豪)
创作者:Code_流苏(CSDN)(一个喜欢古诗词和编程的Coder😊)目录
- 1、创建管理员表
- 2、管理员列表
- 3、添加管理员
- ①添加管理员
- ②密码一致检验
- ③密码加密(采用md5加密)
- 4、编辑管理员
- 5、删除管理员
- 6、重置密码(重置成新密码)
1、创建管理员表
在models.py中添加Admin类。
class Admin(models.Model):"""管理员"""username = models.CharField(verbose_name="用户名",max_length=32)password = models.CharField(verbose_name="密码",max_length=64)
之后终端运行数据库生成转移
python manage.py makemigrations
python manage.py migrate

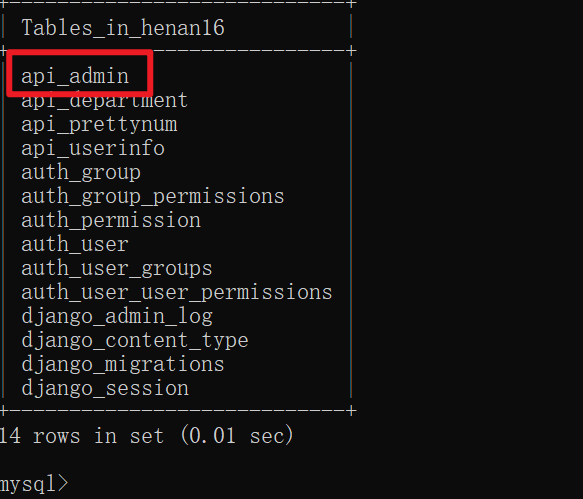
登录mysql,然后查看数据库中的表,可以发现admin数据表已经创建。
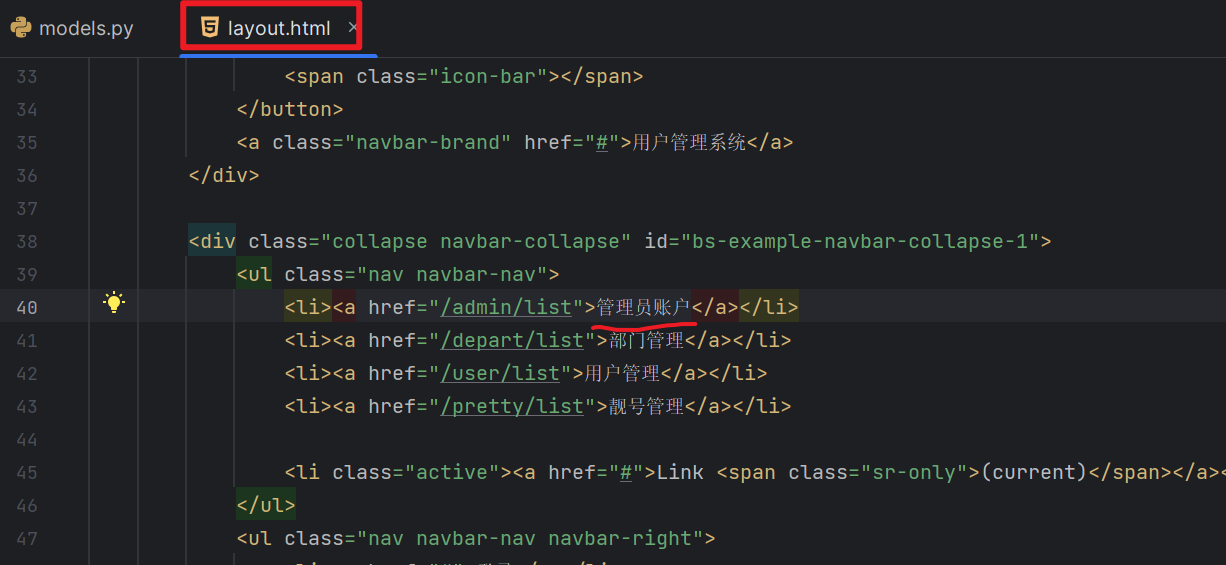
在layout.html加入管理员账户。
<li><a href="/admin/list">管理员账户</a></li>
往admin表中插入数据
insert into api_admin(username, password) values("张三", "123456");
insert into api_admin(username, password) values("李四", "123456");
insert into api_admin(username, password) values("王五", "123456");mysql> insert into api_admin(username, password) values("王五", "123456");
Query OK, 1 row affected (0.05 sec)mysql> select * from api_admin;
+----+----------+----------+
| id | username | password |
+----+----------+----------+
|  1 | 张三     | 123456   |
|  2 | 李四     | 123456   |
|  3 | 王五     | 123456   |
+----+----------+----------+
3 rows in set (0.01 sec)
2、管理员列表
这一部分仍然和咱们之前所实践过的用户管理、靓号管理等相似。
1.在urls.py中添加用户列表的路径
admin/list/,并告诉该路径指向的视图view.admin_list
urls.py
from django.urls import path
from api.views import depart,user,prettyurlpatterns = [# 部门管理path("depart/list/", depart.depart_list),path("depart/add/", depart.depart_add),path("depart/delete/", depart.depart_delete),path("depart/<int:nid>/edit/", depart.depart_edit),# 用户管理path("user/list/", user.user_list),path("user/add/", user.user_add),path("user/model/form/add/", user.user_model_form_add),path('user/<int:nid>/edit/', user.user_edit),path("user/<int:nid>/delete/", user.user_delete),# 靓号管理path("pretty/list/", pretty.pretty_list),path("pretty/add/", pretty.pretty_add),path("pretty/<int:nid>/edit/", pretty.pretty_edit),path("pretty/<int:nid>/delete/", pretty.pretty_delete),# 管理员管理path('admin/list/', admin.admin_list),
]2.在views.py中写出对应的函数,发出请求,并返回响应
admin_list.html
views.py
from django.shortcuts import render, redirect
from api.models import Admin
from api.utils.pagination import Pagination
from api.utils.form import BootStrapModelForm
from api.utils.form import AdminModelForm, AdminEditModelForm, AdminResetModelFormdef admin_list(request):"""管理员列表"""data_dict = {}# 不加后面的 "", 首次访问浏览器,搜索框中不会显示前端页面中的 placeholder="Search for..." 属性search_data = request.GET.get('query', "")if search_data:data_dict["username__contains"] = search_dataqueryset = Admin.objects.filter(**data_dict).order_by("id")# queryset = Admin.objects.all()page_object = Pagination(request, queryset, page_size=2)page_queryset = page_object.page_querysetpage_object.html()page_string = page_object.page_stringcontext = {"page_queryset": page_queryset,"page_string": page_string,"search_data": search_data,}return render(request, 'admin_list.html', context)
3.创建templates目录下模版html文件
admin_list.html,以此定义部门列表的网页结构和布局。
修改之前的layout.html模板,增加管理员板块。
{% load static %}
<!DOCTYPE html>
<html lang="en">
<head><meta charset="UTF-8"><title>Title</title><!--Bootstrap框架--><link rel="stylesheet" href="{% static 'plugins/bootstrap-3.4.1/css/bootstrap.min.css' %}"><link rel="stylesheet" href="{% static 'plugins/font-awesome-4.7.0/css/font-awesome.css' %}"><!--datetimepicker插件--><link rel="stylesheet" type="text/css"href="{% static 'plugins/bootstrap-datetimepicker/css/bootstrap-datetimepicker.css' %}"><style>.navbar {border-radius: 0;}</style>{% block css %}{% endblock %}
</head>
<body>
<nav class="navbar navbar-default"><div class="container"><div class="navbar-header"><button type="button" class="navbar-toggle collapsed" data-toggle="collapse"data-target="#bs-example-navbar-collapse-1" aria-expanded="false"><span class="sr-only">Toggle navigation</span><span class="icon-bar"></span><span class="icon-bar"></span><span class="icon-bar"></span></button><a class="navbar-brand" href="#">用户管理系统</a></div><div class="collapse navbar-collapse" id="bs-example-navbar-collapse-1"><ul class="nav navbar-nav"><li><a href="/admin/list">管理员账户</a></li><li><a href="/depart/list">部门管理</a></li><li><a href="/user/list">用户管理</a></li><li><a href="/pretty/list">靓号管理</a></li><li class="active"><a href="#">Link <span class="sr-only">(current)</span></a></li></ul><ul class="nav navbar-nav navbar-right"><li><a href="#">登录</a></li><li class="dropdown"><a href="#" class="dropdown-toggle" data-toggle="dropdown" role="button" aria-haspopup="true"aria-expanded="false">张三 <span class="caret"></span></a><ul class="dropdown-menu"><li><a href="#">个人资料</a></li><li><a href="#">我的信息</a></li><li><a href="#">Something else here</a></li><li role="separator" class="divider"></li><li><a href="#">注销</a></li></ul></li></ul></div></div>
</nav><div><div class="container">{% block content %}{% endblock %}</div>
</div>{% block js %}<script src="{% static 'js/jquery.min.js' %}"></script><!-- 加载 Bootstrap DateTimePicker JS --><script src="{% static 'plugins/bootstrap-datetimepicker/js/bootstrap-datetimepicker.min.js' %}"></script><script src="{% static 'plugins/bootstrap-datetimepicker/js/locales/bootstrap-datetimepicker.zh-CN.js' %}"></script><script type="text/javascript">$(function () {//当容器加载完成,对容器调用工具函数$("#dt").datetimepicker({language: 'zh-CN', //语言format: 'yyyy-mm-dd',//日期的格式minView: 'month', //可以选择的最小视图initialDate: new Date(),//初始化显示的日期autoclose: true,//设置选择完日期或者时间之后,日否自动关闭日历todayBtn: true,//设置自动显示为今天clearBtn: false//设置是否清空按钮,默认为false});});</script>
{% endblock %}
admin_list.html
{% extends 'layout.html' %}{% block content %}
<div class="container"><div><div style="margin-bottom: 10px; "><a class="btn btn-primary" href="/admin/add/" target="_blank">新建管理员</a><div style="float: right; width: 300px;"><form method="get"><div class="input-group"><input type="text" name="query" class="form-control" placeholder="Search for..."value="{{ search_data }}"><span class="input-group-btn"><button class="btn btn-default" type="submit"><span class="glyphicon glyphicon-search" aria-hidden="true"></span></button></span></div></form></div></div></div><div><div class="panel panel-default"><!-- Default panel contents --><div class="panel-heading"><span class="glyphicon glyphicon-th-list" aria-hidden="true" style="margin-right: 5px;"></span><span>管理员列表</span></div><!-- Table --><table class="table table-bordered"><thead><tr><th>ID</th><th>姓名</th><th>密码</th><th>重置密码</th><th>操作</th></tr></thead><tbody>{% for obj in page_queryset %}<tr><th>{{ obj.id }}</th><td>{{ obj.username }}</td><td>{{ obj.password }}</td><td><a href="/admin/{{ obj.id }}/reset/">重置密码</a></td><td><a class="btn btn-primary btn-xs" href="/admin/{{ obj.id }}/edit/">编辑</a><a class="btn btn-danger btn-xs" href="/admin/{{ obj.id }}/delete/">删除</a></td></tr>{% endfor %}</tbody></table></div></div><ul class="pagination">{{ page_string }}</ul><br><form method="get"><div style="display:inline-block; width: 150px;"><div class="input-group"><span> <input type="text" class="form-control" placeholder="请输入页码" name="page"></span><span class="input-group-btn"><button class="btn btn-primary" type="submit">跳转</button></span></div></div></form>
</div>{% endblock %}
效果:

3、添加管理员
同样地我们来实现添加管理员。
①添加管理员
1.在urls.py中添加用户列表的路径
admin/add/,并告诉该路径指向的视图view.admin_add
urls.py
from django.urls import pathfrom api.views import depart,user,prettyurlpatterns = [# 部门管理path("depart/list/", depart.depart_list),path("depart/add/", depart.depart_add),path("depart/delete/", depart.depart_delete),path("depart/<int:nid>/edit/", depart.depart_edit),# 用户管理path("user/list/", user.user_list),path("user/add/", user.user_add),path("user/model/form/add/", user.user_model_form_add),path('user/<int:nid>/edit/', user.user_edit),path("user/<int:nid>/delete/", user.user_delete),# 靓号管理path("pretty/list/", pretty.pretty_list),path("pretty/add/", pretty.pretty_add),path("pretty/<int:nid>/edit/", pretty.pretty_edit),path("pretty/<int:nid>/delete/", pretty.pretty_delete),# 管理员管理path('admin/list/', admin.admin_list),path('admin/add/', admin.admin_add),]2.在views.py中写出对应的函数,发出请求,并返回响应
admin_add.html
views.py
def admin_add(request):"""添加管理员"""title = "新建管理员"if request.method == "GET":form = AdminModelForm()return render(request, "admin_add.html", {"form": form, "title": title})# 如果是POST请求form = AdminModelForm(data=request.POST)context = {"form": form,"title": title,}if form.is_valid():form.save()return redirect("/admin/list")return render(request, "admin_add.html", context)
3.创建templates目录下模版html文件
admin_add.html,以此实现用户信息的新增。
admin_add.html
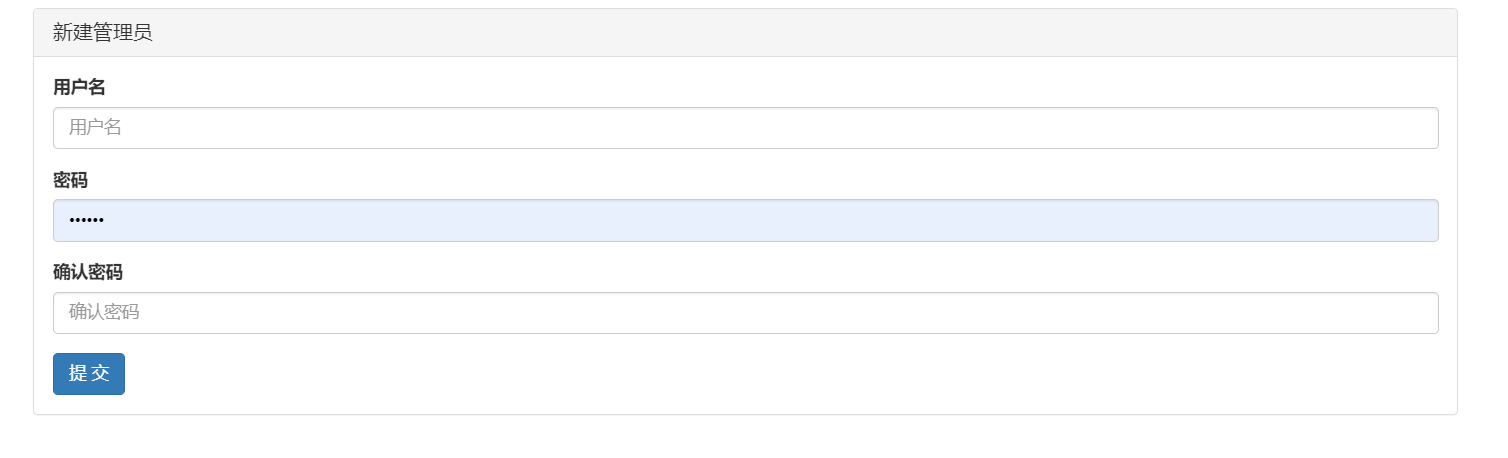
{% extends 'layout.html' %}{% block content %}<div class="container"><div class="panel panel-default"><div class="panel-heading"><h3 class="panel-title"> {{ title }} </h3></div><div class="panel-body"><form method="post" novalidate>{% csrf_token %}{% for field in form %}<div class="form-group"><label>{{ field.label }}</label>{{ field }}<span style="color: red;">{{ field.errors.0 }}</span></div>{% endfor %}<button type="submit" class="btn btn-primary">提 交</button></form></div></div></div>{% endblock %}
效果:
②密码一致检验
在form.py中添加管理员类,并增加钩子函数用作密码一致检验:
class AdminModelForm(BootStrapModelForm):confirm_password = forms.CharField(label="确认密码",widget=forms.PasswordInput,)class Meta:model = Adminfields = ["username", "password", "confirm_password"]widgets = {"password": forms.PasswordInput}# 钩子函数def clean_confirm_password(self):pwd = self.cleaned_data.get("password")confirm = self.cleaned_data.get("confirm_password")if confirm != pwd:raise ValidationError("密码不一致!")return confirm
效果:
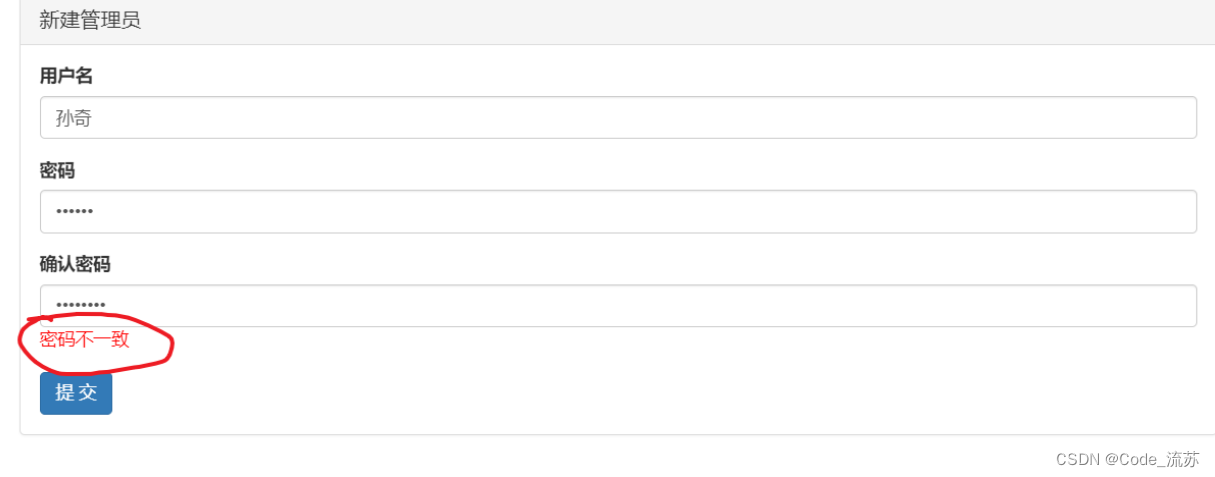
密码一致检验的问题是解决了,但密码这样存储进数据库,很不安全。因此我们需要对其进行加密后,再进行保存,以确保数据安全。
③密码加密(采用md5加密)
在实现之前,我们首先先了解一下什么是md5加密:
MD5加密是一种广泛使用的加密方式,而且在Python中进行MD5加密非常简单,可以使用内置的hashlib模块来完成这个任务。以下是一个示例代码,展示了如何将字符串进行MD5加密:
import hashlib# 要加密的字符串
text = "你要加密的字符串"# 使用MD5加密
md5 = hashlib.md5(text.encode()).hexdigest()print(md5)
这段代码首先导入了hashlib模块,然后定义了一个要加密的字符串text。使用hashlib.md5()方法对字符串进行加密,由于hashlib.md5()需要的是字节类型的参数,所以我们使用encode()方法将字符串转换成字节。hexdigest()方法将加密后的字节结果转换为十六进制的字符串形式。
但需要注意的是,由于其安全性已经不被完全信任,对于需要高安全性的应用场景,建议使用更安全的加密算法,如SHA-256等。
在上面的基础上,在utils文件夹下新建encrypt.py文件
# hashlib包用于提供常见的哈希算法。
# hashlib支持多种算法,如MD5、SHA1、SHA224、SHA256、SHA384和SHA512等。
import hashlib
from django.conf import settingsdef md5(data_string):obj = hashlib.md5(settings.SECRET_KEY.encode('utf-8'))obj.update(data_string.encode('utf-8'))return obj.hexdigest()
之后在form.py中修改管理员类:
class AdminModelForm(BootStrapModelForm):confirm_password = forms.CharField(label="确认密码",# 点击提交后,密码和密码确认框中的数据清空了,这也是个问题,加上render_value=True之后问题解决widget=forms.PasswordInput(render_value=True))class Meta:model = Adminfields = ["username", "password", "confirm_password"]widgets = {"password": forms.PasswordInput(render_value=True)}def clean_password(self):pwd = self.cleaned_data.get("password")md5_pwd = md5(pwd)# 去数据库校验当前密码和新输入的密码是否一致exists = models.Admin.objects.filter(id=self.instance.pk, password=md5_pwd).exists()if exists:raise ValidationError("不能与以前的密码相同")return md5_pwddef clean_confirm_password(self):pwd = self.cleaned_data.get("password")confirm = md5(self.cleaned_data.get("confirm_password"))if confirm != pwd:raise ValidationError("密码不一致")# 返回什么,此字段以后保存到数据库就是什么。return confirm
修改之后,原来的密码123456就被加密成了如下格式:
效果如下:

4、编辑管理员
实现完列表和添加功能后,我们来实现编辑功能,方便修改信息。
1.在urls.py中添加用户列表的路径
admin/<int:nid>/edit/,并告诉该路径指向的视图view.admin_edit
urls.py
from django.urls import pathfrom api.views import depart,user,prettyurlpatterns = [# 部门管理path("depart/list/", depart.depart_list),path("depart/add/", depart.depart_add),path("depart/delete/", depart.depart_delete),path("depart/<int:nid>/edit/", depart.depart_edit),# 用户管理path("user/list/", user.user_list),path("user/add/", user.user_add),path("user/model/form/add/", user.user_model_form_add),path('user/<int:nid>/edit/', user.user_edit),path("user/<int:nid>/delete/", user.user_delete),# 靓号管理path("pretty/list/", pretty.pretty_list),path("pretty/add/", pretty.pretty_add),path("pretty/<int:nid>/edit/", pretty.pretty_edit),path("pretty/<int:nid>/delete/", pretty.pretty_delete),# 管理员管理path('admin/list/', admin.admin_list),path('admin/add/', admin.admin_add),path('admin/<int:nid>/edit/',admin.admin_edit),]2.在form.py中添加管理员编辑类,在views.py中写出对应的函数,发出请求,并返回响应
admin_add.html
在form.py中添加管理员编辑类:
class AdminEditModelForm(BootStrapModelForm):class Meta:model = Adminfields = ["username"]
views.py
def admin_edit(request, nid):# 判断nid是否存在row_object = Admin.objects.filter(id=nid).first()if not row_object:return render(request, "error.html", {"msg": "数据不存在!"})"""编辑管理员"""title = "编辑管理员"if request.method == "GET":form = AdminEditModelForm(instance=row_object)return render(request, "admin_add.html", {"form": form, "title": title})form = AdminEditModelForm(data=request.POST, instance=row_object)if form.is_valid():form.save()return redirect('/admin/list')return render(request, "admin_add.html", {"form": form, "title": title})
3.修改
admin_add.html
修改admin_list.html中的,设置编辑功能href=“URL路径”。
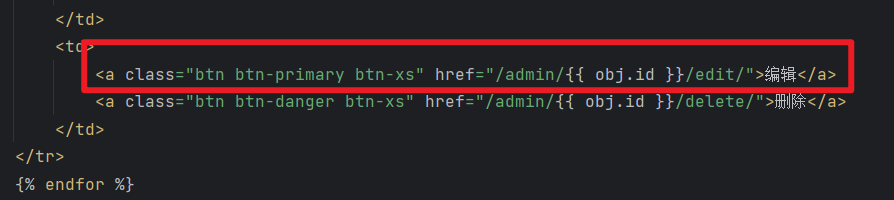
修改admin_add.html
{% extends 'layout.html' %}{% block content %}<div class="container"><div class="panel panel-default"><div class="panel-heading"><h3 class="panel-title"> {{ title }} </h3></div><div class="panel-body"><form method="post" novalidate>{% csrf_token %}{% for field in form %}<div class="form-group"><label>{{ field.label }}</label>{{ field }}<span style="color: red;">{{ field.errors.0 }}</span></div>{% endfor %}<button type="submit" class="btn btn-primary">提 交</button></form></div></div></div>{% endblock %}
效果:
5、删除管理员
与上述步骤相仿,我们继续来实现删除管理员,删除管理员的基础是建立在管理员列表的实现和新增管理员的功能之上的。
1.在urls.py中添加用户列表的路径
admin/<int:nid>/delete/,并告诉该路径指向的视图view.admin_delete
urls.py
from django.urls import path
from api.views import depart, user, pretty, adminurlpatterns = [# 部门管理path("depart/list/", depart.depart_list),path("depart/add/", depart.depart_add),path("depart/delete/", depart.depart_delete),path("depart/<int:nid>/edit/", depart.depart_edit),# 用户管理path("user/list/", user.user_list),path("user/add/", user.user_add),path("user/model/form/add/", user.user_model_form_add),path('user/<int:nid>/edit/', user.user_edit),path("user/<int:nid>/delete/", user.user_delete),# 靓号管理path("pretty/list/", pretty.pretty_list),path("pretty/add/", pretty.pretty_add),path("pretty/<int:nid>/edit/", pretty.pretty_edit),path("pretty/<int:nid>/delete/", pretty.pretty_delete),# 管理员管理path('admin/list/', admin.admin_list),path('admin/add/', admin.admin_add),path('admin/<int:nid>/edit/',admin.admin_edit),path('admin/<int:nid>/delete/', admin.admin_delete),path('admin/<int:nid>/reset/',admin.admin_reset),
]
2.在views.py中写出对应的函数,发出请求,并返回响应
admin_list.html
views.py
def admin_delete(request, nid):"""删除管理员"""Admin.objects.filter(id=nid).delete()return redirect("/admin/list/")
3.操作templates目录下模版html文件
admin_list.html,以此实现用户信息的删除。
admin_list.html
{% extends 'layout.html' %}{% block content %}
<div class="container"><div><div style="margin-bottom: 10px; "><a class="btn btn-primary" href="/admin/add/" target="_blank">新建管理员</a><div style="float: right; width: 300px;"><form method="get"><div class="input-group"><input type="text" name="query" class="form-control" placeholder="Search for..."value="{{ search_data }}"><span class="input-group-btn"><button class="btn btn-default" type="submit"><span class="glyphicon glyphicon-search" aria-hidden="true"></span></button></span></div></form></div></div></div><div><div class="panel panel-default"><!-- Default panel contents --><div class="panel-heading"><span class="glyphicon glyphicon-th-list" aria-hidden="true" style="margin-right: 5px;"></span><span>管理员列表</span></div><!-- Table --><table class="table table-bordered"><thead><tr><th>ID</th><th>姓名</th><th>密码</th><th>重置密码</th><th>操作</th></tr></thead><tbody>{% for obj in page_queryset %}<tr><th>{{ obj.id }}</th><td>{{ obj.username }}</td><td>{{ obj.password }}</td><td><a href="/admin/{{ obj.id }}/reset/">重置密码</a></td><td><a class="btn btn-primary btn-xs" href="/admin/{{ obj.id }}/edit/">编辑</a><a class="btn btn-danger btn-xs" href="/admin/{{ obj.id }}/delete/">删除</a></td></tr>{% endfor %}</tbody></table></div></div><ul class="pagination">{{ page_string }}</ul><br><form method="get"><div style="display:inline-block; width: 150px;"><div class="input-group"><span> <input type="text" class="form-control" placeholder="请输入页码" name="page"></span><span class="input-group-btn"><button class="btn btn-primary" type="submit">跳转</button></span></div></div></form>
</div>{% endblock %}
效果:

6、重置密码(重置成新密码)
除了上述常见功能外,考虑到忘记密码需要重置密码的需求,在管理员模块中增加此功能,实现方法与上述几个功能相似,实现思路关键在于怎么理解上面的编辑功能,将编辑功能中修改密码那一块提取出来,并在数据库中实时响应即可。
1.在urls.py中添加用户列表的路径
admin/<int:nid>/reset/,并告诉该路径指向的视图view.admin_reset
urls.py
from django.urls import path
from api.views import depart, user, pretty, adminurlpatterns = [# 部门管理path("depart/list/", depart.depart_list),path("depart/add/", depart.depart_add),path("depart/delete/", depart.depart_delete),path("depart/<int:nid>/edit/", depart.depart_edit),# 用户管理path("user/list/", user.user_list),path("user/add/", user.user_add),path("user/model/form/add/", user.user_model_form_add),path('user/<int:nid>/edit/', user.user_edit),path("user/<int:nid>/delete/", user.user_delete),# 靓号管理path("pretty/list/", pretty.pretty_list),path("pretty/add/", pretty.pretty_add),path("pretty/<int:nid>/edit/", pretty.pretty_edit),path("pretty/<int:nid>/delete/", pretty.pretty_delete),# 管理员管理path('admin/list/', admin.admin_list),path('admin/add/', admin.admin_add),path('admin/<int:nid>/edit/',admin.admin_edit),path('admin/<int:nid>/delete/', admin.admin_delete),path('admin/<int:nid>/reset/',admin.admin_reset),
]
2.在views.py中写出对应的函数,发出请求,并返回响应
admin_list.html
在form.py中新增重置模块:
class AdminResetModelForm(BootStrapModelForm):confirm_password = forms.CharField(label="确认密码",widget=forms.PasswordInput(render_value=True),)class Meta:model = Adminfields = ["password", "confirm_password"]widgets = {"password": forms.PasswordInput(render_value=True)}# clean_字段名def clean_password(self):pwd = self.cleaned_data.get("password")# 校验当前数据库中的密码与用户输入的新密码是否一致exists = Admin.objects.filter(id=self.instance.pk, password=md5(pwd))if exists:raise ValidationError("密码不能与当前密码一致!")# return什么.password字段保存什么return md5(pwd)# 钩子函数def clean_confirm_password(self):pwd = self.cleaned_data.get("password")confirm = self.cleaned_data.get("confirm_password")if md5(confirm) != pwd:raise ValidationError("密码不一致!")# return返回什么,字段 confirm_password 保存至数据库的值就是什么return md5(confirm)
views.py
def admin_reset(request, nid):"""重置管理员密码"""# 判断nid是否存在"""在Admin表中查找id等于nid的第一条记录,并将这条记录赋值给row_object变量。如果没有找到符合条件的记录,row_object将会是None。"""row_object = Admin.objects.filter(id=nid).first()if not row_object:return render(request, "error.html", {"msg": "数据不存在!"})title = "重置密码 - {}".format(row_object.username)if request.method == "GET":form = AdminResetModelForm(instance=row_object)return render(request, "admin_add.html", {"title": title, "form": form})form = AdminResetModelForm(data=request.POST, instance=row_object)if form.is_valid():form.save()return redirect("/admin/list/")return render(request, "admin_add.html", {"title": title, "form": form})
3.操作templates目录下模版html文件
admin_list.html,以此实现用户信息的删除。
admin_list.html
{% extends 'layout.html' %}{% block content %}
<div class="container"><div><div style="margin-bottom: 10px; "><a class="btn btn-primary" href="/admin/add/" target="_blank">新建管理员</a><div style="float: right; width: 300px;"><form method="get"><div class="input-group"><input type="text" name="query" class="form-control" placeholder="Search for..."value="{{ search_data }}"><span class="input-group-btn"><button class="btn btn-default" type="submit"><span class="glyphicon glyphicon-search" aria-hidden="true"></span></button></span></div></form></div></div></div><div><div class="panel panel-default"><!-- Default panel contents --><div class="panel-heading"><span class="glyphicon glyphicon-th-list" aria-hidden="true" style="margin-right: 5px;"></span><span>管理员列表</span></div><!-- Table --><table class="table table-bordered"><thead><tr><th>ID</th><th>姓名</th><th>密码</th><th>重置密码</th><th>操作</th></tr></thead><tbody>{% for obj in page_queryset %}<tr><th>{{ obj.id }}</th><td>{{ obj.username }}</td><td>{{ obj.password }}</td><td><a href="/admin/{{ obj.id }}/reset/">重置密码</a></td><td><a class="btn btn-primary btn-xs" href="/admin/{{ obj.id }}/edit/">编辑</a><a class="btn btn-danger btn-xs" href="/admin/{{ obj.id }}/delete/">删除</a></td></tr>{% endfor %}</tbody></table></div></div><ul class="pagination">{{ page_string }}</ul><br><form method="get"><div style="display:inline-block; width: 150px;"><div class="input-group"><span> <input type="text" class="form-control" placeholder="请输入页码" name="page"></span><span class="input-group-btn"><button class="btn btn-primary" type="submit">跳转</button></span></div></div></form>
</div>{% endblock %}
效果:
整体效果:
在这篇博客之后,管理板块将暂时告一段落,下篇内容我们将继续一起实现账户板块,实现用户注册、登录、图片验证码等功能。
很感谢你能看到这里,如有相关疑问,还请下方评论留言。
Code_流苏(CSDN)(一个喜欢古诗词和编程的Coder😊)
希望本篇内容能对大家有所帮助,如果大家喜欢的话,请动动手点个赞和关注吧,非常感谢你们的支持!
这篇关于Python Web开发记录 Day11:Django part5 管理员管理的文章就介绍到这儿,希望我们推荐的文章对编程师们有所帮助!


