本文主要是介绍PIG 代码生成器独立模块部署 欢迎来喷,希望对大家解决编程问题提供一定的参考价值,需要的开发者们随着小编来一起学习吧!
Pig 代码生成器代码部署
创建表
执行脚本
CREATE TABLE `sys_tenancy` (
`id` varchar(32) NOT NULL COMMENT '主键ID',
`tenancy_name` varchar(64) NOT NULL COMMENT '租户名称',
`valid_time` datetime NOT NULL COMMENT '承租生效时间',
`invalid_time` datetime NOT NULL COMMENT '承租失效时间',
`app_key` varchar(64) NOT NULL COMMENT '租户访问令牌',
`is_del` tinyint(4) DEFAULT '0',
`create_time` datetime NOT NULL DEFAULT CURRENT_TIMESTAMP COMMENT '创建时间',
`update_time` datetime DEFAULT NULL COMMENT '更新时间',
`is_encrypt` tinyint(4) NOT NULL DEFAULT '0' COMMENT '是否加密传输:0否 1是',
`max_fill_month_limit` int(11) NOT NULL DEFAULT '2' COMMENT '最大填报期限(月份)',
PRIMARY KEY (`id`)
) ENGINE=InnoDB DEFAULT CHARSET=utf8 COMMENT='租户信息';
生成代码

导入数据库脚本
-- 该脚本不要执行,请完善 ID 对应关系,注意层级关系 !!!!
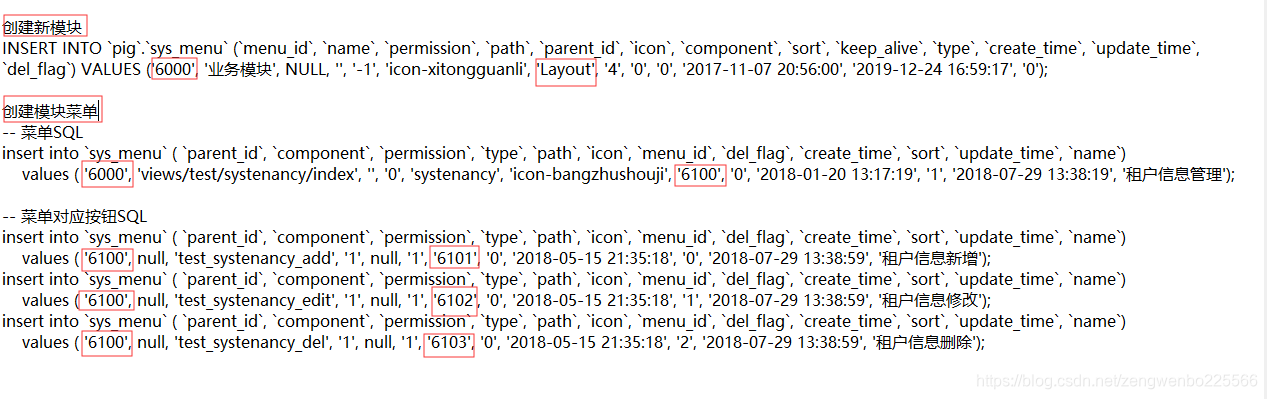
创建新模块
INSERT INTO `pig`.`sys_menu` (`menu_id`, `name`, `permission`, `path`, `parent_id`, `icon`, `component`, `sort`, `keep_alive`, `type`, `create_time`, `update_time`, `del_flag`) VALUES ('6000', '业务模块', NULL, '', '-1', 'icon-xitongguanli', 'Layout', '4', '0', '0', '2017-11-07 20:56:00', '2019-12-24 16:59:17', '0');
创建模块菜单
-- 菜单SQL
insert into `sys_menu` ( `parent_id`, `component`, `permission`, `type`, `path`, `icon`, `menu_id`, `del_flag`, `create_time`, `sort`, `update_time`, `name`)
values ( '6000', 'views/test/systenancy/index', '', '0', 'systenancy', 'icon-bangzhushouji', '6100', '0', '2018-01-20 13:17:19', '1', '2018-07-29 13:38:19', '租户信息管理');
-- 菜单对应按钮SQL
insert into `sys_menu` ( `parent_id`, `component`, `permission`, `type`, `path`, `icon`, `menu_id`, `del_flag`, `create_time`, `sort`, `update_time`, `name`)
values ( '6100', null, 'test_systenancy_add', '1', null, '1', '6101', '0', '2018-05-15 21:35:18', '0', '2018-07-29 13:38:59', '租户信息新增');
insert into `sys_menu` ( `parent_id`, `component`, `permission`, `type`, `path`, `icon`, `menu_id`, `del_flag`, `create_time`, `sort`, `update_time`, `name`)
values ( '6100', null, 'test_systenancy_edit', '1', null, '1', '6102', '0', '2018-05-15 21:35:18', '1', '2018-07-29 13:38:59', '租户信息修改');
insert into `sys_menu` ( `parent_id`, `component`, `permission`, `type`, `path`, `icon`, `menu_id`, `del_flag`, `create_time`, `sort`, `update_time`, `name`)
values ( '6100', null, 'test_systenancy_del', '1', null, '1', '6103', '0', '2018-05-15 21:35:18', '2', '2018-07-29 13:38:59', '租户信息删除');
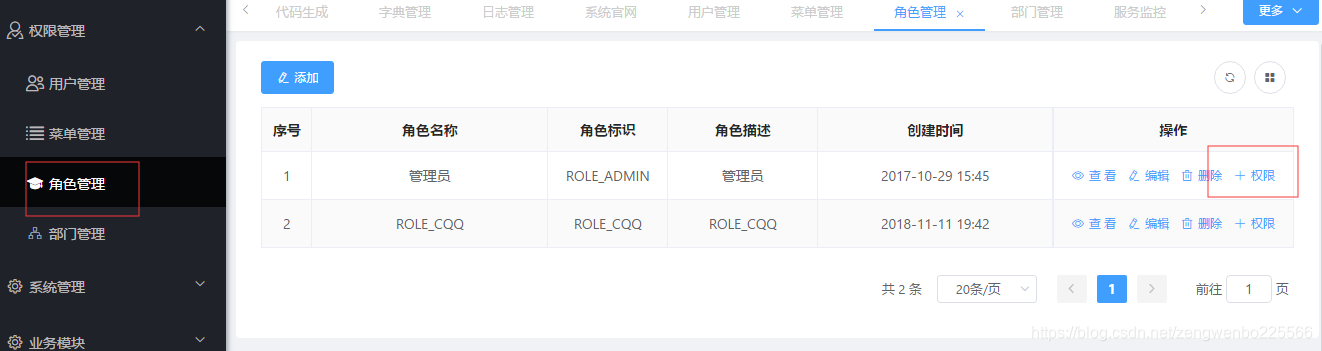
菜单角色授权
分配新模块权限
后端独立模块部署
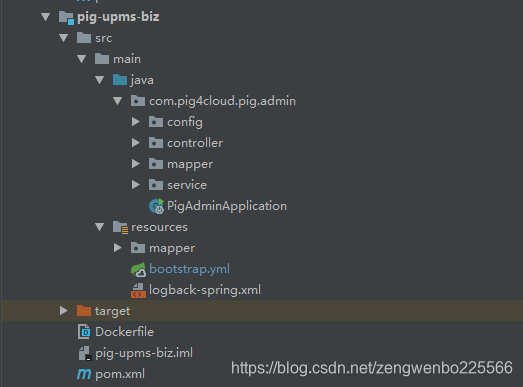
拷贝 pig-upms-biz 工程,创建 pig-upms-test 工程,导入 module,删除无用包,导入生成的代码文件,补充修改缺失文件

添加 mybatis 扫描配置类,注意 扫描包配置,创建Appliaction 自定, 修改 Dockerfile、pom.xml 相关模块名称。bootstrap.yml 配置文件 端口修改 4001。
修改配置文件
登入 http://127.0.0.1:8848/nacos 
账号密码: nacos/nacos, 创建配置文件,拷贝 pig-upms-biz.yml ,创建 pig-upms-test.yml
security:
oauth2:
client:
client-id: ENC(imENTO7M8bLO38LFSIxnzw==)
client-secret: ENC(i3cDFhs26sa2Ucrfz2hnQw==)
scope: server
# 数据源
spring:
datasource:
type: com.zaxxer.hikari.HikariDataSource
driver-class-name: com.mysql.cj.jdbc.Driver
username: root
password: mysqladmin
url: jdbc:mysql://pig-mysql:3306/pig?characterEncoding=utf8&zeroDateTimeBehavior=convertToNull&useSSL=false&allowMultiQueries=true&useJDBCCompliantTimezoneShift=true&useLegacyDatetimeCode=false&serverTimezone=Asia/Shanghai
# 直接放行URL
ignore:
urls:
- /v2/api-docs
- /actuator/**
- /user/info/*
- /log/**
mybatis-plus:
configuration:
log-impl: org.apache.ibatis.logging.stdout.StdOutImpl
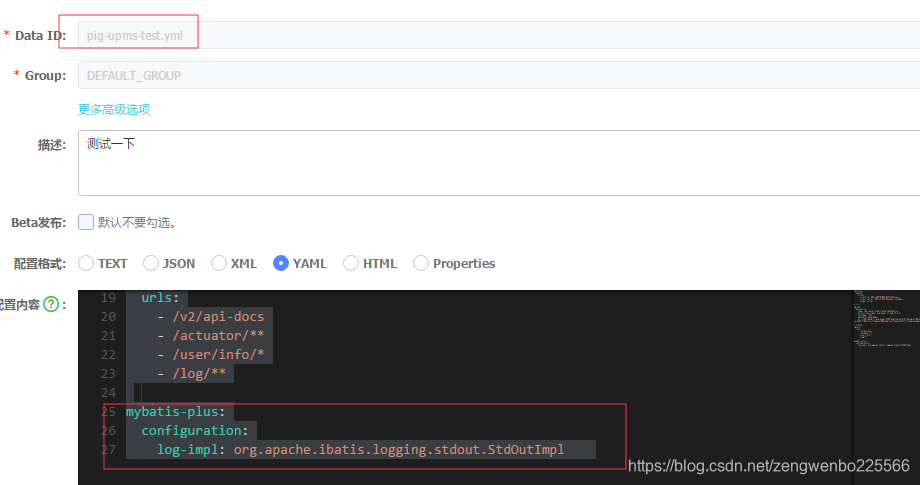
打开 mybtais-plus SQL 语句输出(方便调试)
启动服务状态监控
查看服务是否正常启动 http://127.0.0.1:5001/login ,账号密码 pig/pig 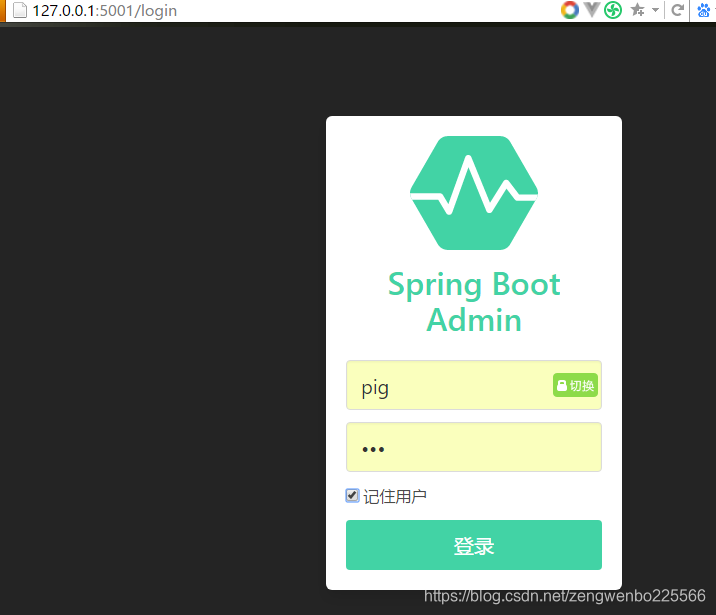
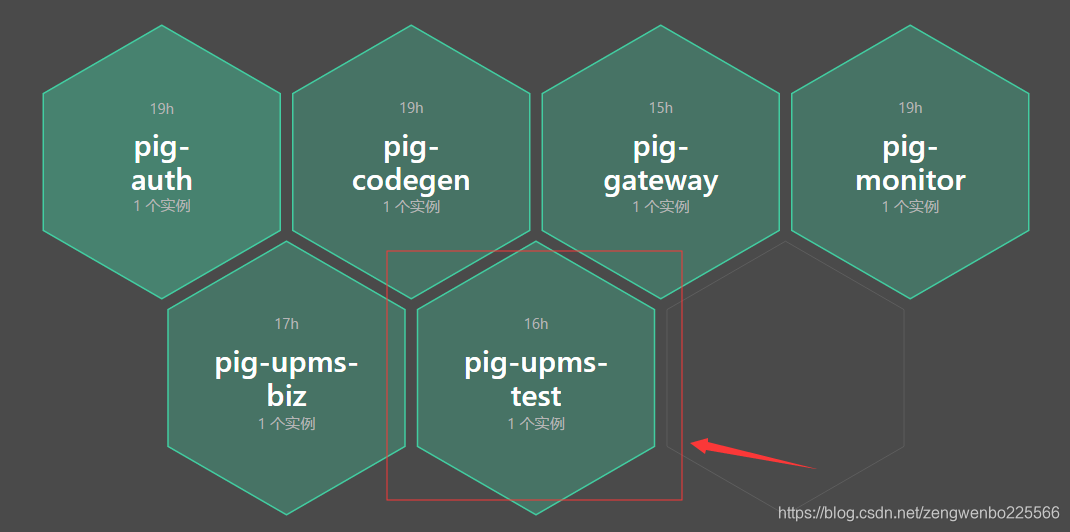
显示 正常启动模块
前端部署
导入文件
拷贝生成的前端文件到指定目录
修改配置文件
前端文件放置到对应的文件夹下,修改 ![]() vue.config.js
vue.config.js
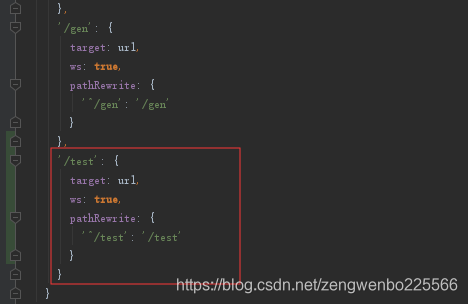
添加配置
后端网关修改
修改网关配置文件
修改配置文件,nacos 配置控制台修改,(处理前端访问后台资源无法访问问题)
添加 网关配置
- id: pig-upms-test
uri: lb://pig-upms-test
predicates:
- Path=/test/**
filters:
# 限流配置
- name: RequestRateLimiter
args:
key-resolver: '#{@remoteAddrKeyResolver}'
redis-rate-limiter.replenishRate: 10
redis-rate-limiter.burstCapacity: 20
# 降级配置
- name: Hystrix
args:
name: default
fallbackUri: 'forward:/fallback'
# 代码生成模块
扩展
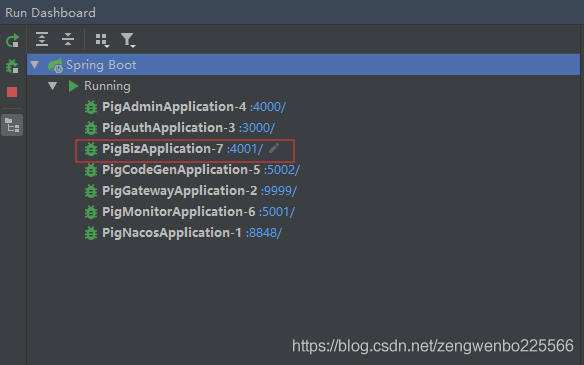
修改Run Dashboard 配置
修改目录\pig\.idea\workspace.xml,,方便项目本地启动运行
<component name="RunDashboard">
<option name="configurationTypes">
<set>
<option value="SpringBootApplicationConfigurationType" />
</set>
</option>
<option name="ruleStates">
<list>
<RuleState>
<option name="name" value="ConfigurationTypeDashboardGroupingRule" />
</RuleState>
<RuleState>
<option name="name" value="StatusDashboardGroupingRule" />
</RuleState>
</list>
</option>
</component>
<component name="RunManager" selected="Spring Boot.PigAdminApplication-4">
<configuration name="PigAdminApplication-4" type="SpringBootApplicationConfigurationType" factoryName="Spring Boot">
<module name="pig-upms-biz" />
<option name="SPRING_BOOT_MAIN_CLASS" value="com.pig4cloud.pig.admin.PigAdminApplication" />
<method v="2">
<option name="Make" enabled="true" />
</method>
</configuration>
<configuration name="PigAuthApplication-3" type="SpringBootApplicationConfigurationType" factoryName="Spring Boot">
<module name="pig-auth" />
<option name="SPRING_BOOT_MAIN_CLASS" value="com.pig4cloud.pig.auth.PigAuthApplication" />
<method v="2">
<option name="Make" enabled="true" />
</method>
</configuration>
<configuration name="PigBizApplication-7" type="SpringBootApplicationConfigurationType" factoryName="Spring Boot">
<module name="pig-upms-test" />
<option name="SPRING_BOOT_MAIN_CLASS" value="com.pig4cloud.pig.test.PigBizApplication" />
<method v="2">
<option name="Make" enabled="true" />
</method>
</configuration>
<configuration name="PigCodeGenApplication-5" type="SpringBootApplicationConfigurationType" factoryName="Spring Boot">
<module name="pig-codegen" />
<option name="SPRING_BOOT_MAIN_CLASS" value="com.pig4cloud.pig.codegen.PigCodeGenApplication" />
<method v="2">
<option name="Make" enabled="true" />
</method>
</configuration>
<configuration name="PigGatewayApplication-2" type="SpringBootApplicationConfigurationType" factoryName="Spring Boot">
<module name="pig-gateway" />
<option name="SPRING_BOOT_MAIN_CLASS" value="com.pig4cloud.pig.gateway.PigGatewayApplication" />
<method v="2">
<option name="Make" enabled="true" />
</method>
</configuration>
<configuration name="PigMonitorApplication-6" type="SpringBootApplicationConfigurationType" factoryName="Spring Boot">
<module name="pig-monitor" />
<option name="SPRING_BOOT_MAIN_CLASS" value="com.pig4cloud.pig.monitor.PigMonitorApplication" />
<method v="2">
<option name="Make" enabled="true" />
</method>
</configuration>
<configuration name="PigNacosApplication-1" type="SpringBootApplicationConfigurationType" factoryName="Spring Boot">
<module name="pig-register" />
<option name="SPRING_BOOT_MAIN_CLASS" value="com.alibaba.nacos.PigNacosApplication" />
<method v="2">
<option name="Make" enabled="true" />
</method>
</configuration>
</component>
RunDashboard启动顺序编号效果
这篇关于PIG 代码生成器独立模块部署 欢迎来喷的文章就介绍到这儿,希望我们推荐的文章对编程师们有所帮助!


