本文主要是介绍nginx反向代理工具的简单使用,nginx -v; start nginx; nginx -s reload; nginx -s quit ; nginx -s stop;,希望对大家解决编程问题提供一定的参考价值,需要的开发者们随着小编来一起学习吧!
应用场景:前后端分离的开发模式,解决前端访问后台接口的跨域问题。
step1:
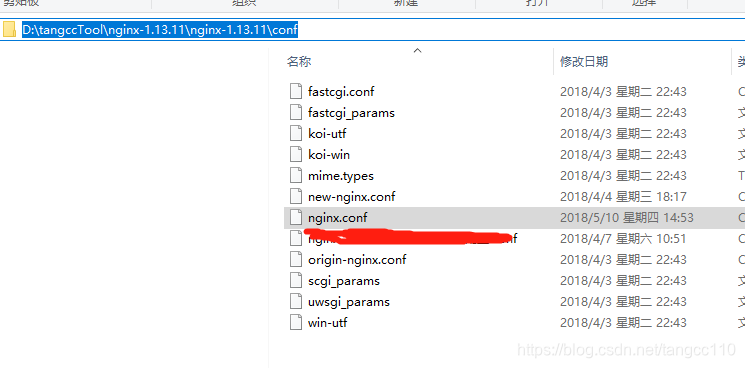
下载nginx 安装包。安装后,将.conf文件更改一下。
更改后的文件如下:
worker_processes 1;
#error_log logs/error.log;
#error_log logs/error.log notice;
#error_log logs/error.log info;
#pid logs/nginx.pid;
events {
worker_connections 1024;
}
http {
include mime.types;
default_type application/octet-stream;
#log_format main '$remote_addr - $remote_user [$time_local] "$request" '
# '$status $body_bytes_sent "$http_referer" '
# '"$http_user_agent" "$http_x_forwarded_for"';
#access_log logs/access.log main;
sendfile on;
#tcp_nopush on;
#keepalive_timeout 0;
keepalive_timeout 65;
gzip on;
gzip_min_length 1k; #压缩阈值
gzip_buffers 4 16k; #buffer 不用修改
gzip_comp_level 2; #压缩级别:1-10,数字越大压缩的越好,时间也越长
gzip_types text/plain application/x-javascript text/css application/xml text/javascript application/x-httpd-php image/jpeg image/gif image/png; # 压缩文件类型
gzip_vary off; #跟Squid等缓存服务有关,on的话会在Header里增加 "Vary: Accept-Encoding"
gzip_disable "MSIE [1-6]\."; #IE1-6版本不支持gzip压缩
upstream tomcat{
#server 127.0.0.1:8080 max_fails=1 fail_timeout=30s; #并且可以分配权重weight,这样来配置集群服务器的访问优先权
server 192.168.1.149:8088 max_fails=1 fail_timeout=30s;
#...
}
server {
listen 80;
server_name localhost;
#charset koi8-r;
#access_log logs/host.access.log main;
#缓存相应的文件(静态文件)
location ~ \.(gif|jpg|png|htm|html|css|js|flv|ico|swf|woff2|woff|ttf|otf|eot|svg)(.*) {
root D:\ogmallfrontend201804\dist; #如果没有缓存则通过proxy_pass转向请求
proxy_redirect off;
proxy_set_header Host $host;
#proxy_cache cache_one;
#proxy_cache_valid 200 302 1h; #对不同的HTTP状态码设置不同的缓存时间,h小时,d天数
#proxy_cache_valid 301 1d;
#proxy_cache_valid any 1m;
#如果不想让代理或浏览器缓存,加no-cache参数
add_header Cache-Control no-cache;
#expires 30d; #本地测试环境 静态资源不缓存
}
location ~ ^/$ {
root D:\ogmallfrontend201804\dist;
}
location / {
proxy_connect_timeout 2s; #默认值60s, nginx连接到后端服务器的连接超时时间
proxy_send_timeout 1;
proxy_read_timeout 10; #默认值为10分钟,nginx接收后端服务器的响应超时时间
proxy_pass http://tomcat;
}
#error_page 404 /404.html;
# redirect server error pages to the static page /50x.html
#
error_page 500 502 503 504 /50x.html;
location = /50x.html {
root html;
}
# proxy the PHP scripts to Apache listening on 127.0.0.1:80
#
#location ~ \.php$ {
# proxy_pass http://127.0.0.1;
#}
# pass the PHP scripts to FastCGI server listening on 127.0.0.1:9000
#
#location ~ \.php$ {
# root html;
# fastcgi_pass 127.0.0.1:9000;
# fastcgi_index index.php;
# fastcgi_param SCRIPT_FILENAME /scripts$fastcgi_script_name;
# include fastcgi_params;
#}
# deny access to .htaccess files, if Apache's document root
# concurs with nginx's one
#
#location ~ /\.ht {
# deny all;
#}
}
# another virtual host using mix of IP-, name-, and port-based configuration
#
#server {
# listen 8000;
# listen somename:8080;
# server_name somename alias another.alias;
# location / {
# root html;
# index index.html index.htm;
# }
#}
# HTTPS server
#
#server {
# listen 443 ssl;
# server_name localhost;
# ssl_certificate cert.pem;
# ssl_certificate_key cert.key;
# ssl_session_cache shared:SSL:1m;
# ssl_session_timeout 5m;
# ssl_ciphers HIGH:!aNULL:!MD5;
# ssl_prefer_server_ciphers on;
# location / {
# root html;
# index index.html index.htm;
# }
#}
}
画重点了:

step2:
首先,启动nginx(有些同学喜欢用cmd启动nginx,有时会报不支持,这时我们直接点nginx 的chort cut启动)。
然后input the project url in browser, e.g: localhost/index.html (不用加port,不能点ide直接运行项目,否则nginx无效).
nginx的常用命令:
验证配置是否正确:
nginx -t
查看Nginx的版本号:
nginx -V
启动Nginx:
start nginx
快速停止或关闭Nginx:
nginx -s stop
完整有序的停止nginx:
nginx -s quit
配置文件修改重装载命令,修改配置后重新加载生效
nginx -s reload
nginx -s reopen :重新打开日志文件
nginx -t -c /path/to/nginx.conf 测试nginx配置文件是否正确
其他的停止nginx 方式:
ps -ef | grep nginx
kill -QUIT 主进程号 :从容停止Nginx
kill -TERM 主进程号 :快速停止Nginx
pkill -9 nginx :强制停止Nginx
启动nginx:
nginx -c /path/to/nginx.conf
平滑重启nginx:
kill -HUP 主进程号
经常遇到这个错
nginx: [error] CreateFile() "D:\nginx-1.14.1/logs/nginx.pid" failed (2: The system cannot find the file specified)
只能强制关掉再启动。
打开cmd,cd D:\nginx-1.14.1;再start nginx
这篇关于nginx反向代理工具的简单使用,nginx -v; start nginx; nginx -s reload; nginx -s quit ; nginx -s stop;的文章就介绍到这儿,希望我们推荐的文章对编程师们有所帮助!


