本文主要是介绍SpringCloud微服务-SpringAMQP(RabbitMQ),希望对大家解决编程问题提供一定的参考价值,需要的开发者们随着小编来一起学习吧!
MQ学习-SpringAMQP
文章目录
- MQ学习-SpringAMQP
- SpringAMQP
- 1、什么是SpringAMQP?
- 2、利用SpringAMQP实现HelloWorld中的基础消息队列功能
- 3、Work Queue工作队列(注解声明队列)
- 4、发布( Publish )、订阅( Subscribe )
- 5、发布订阅-Fanout Exchange(配置Bean声明队列)
- 6、发布订阅-DirectExchange
- 7、发布订阅-TopicExchange
- 8、SpringAMQP-消息转换器
SpringAMQP
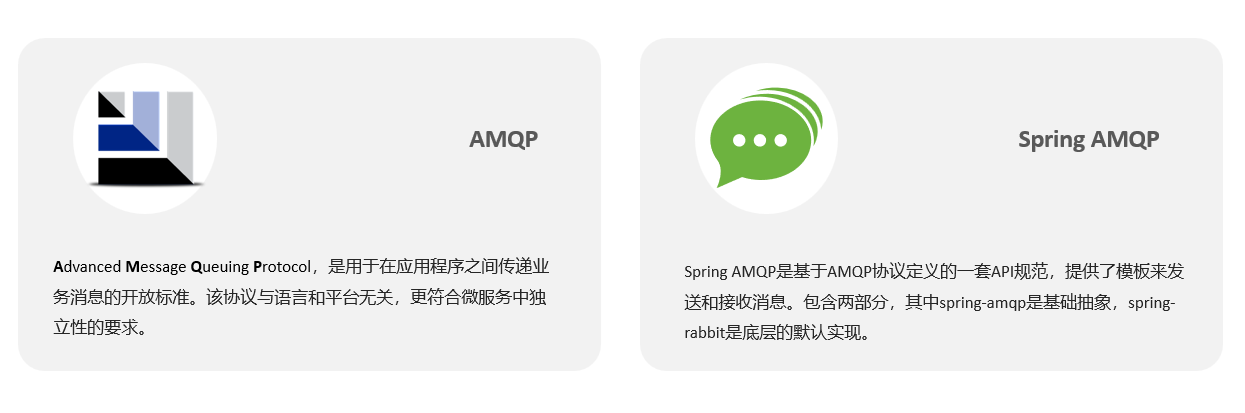
1、什么是SpringAMQP?
Spring AMQP是Spring框架对AMQP(Advanced Message Queuing Protocol)的支持库,用于简化在Java应用程序中使用消息队列的开发。通过Spring AMQP,开发人员可以更轻松地与消息代理进行交互,发送和接收消息,以实现异步通信和解耦应用程序组件。Spring AMQP提供了一组丰富的功能和API,使得在使用AMQP消息队列时更加便捷和高效。
SpringAmqp的官方地址:https://spring.io/projects/spring-amqp
2、利用SpringAMQP实现HelloWorld中的基础消息队列功能
发送:
步骤1:引入AMQP依赖
因为publisher和consumer服务都需要amqp依赖,因此这里把依赖直接放到父工程mq-demo中:
<!--AMQP依赖,包含RabbitMQ--><dependency><groupId>org.springframework.boot</groupId><artifactId>spring-boot-starter-amqp</artifactId></dependency>
步骤2:在publisher中编写测试方法,向simple.queue发送消息
1.在publisher服务中编写application.yml,添加mq连接信息:
logging:pattern:dateformat: MM-dd HH:mm:ss:SSS
spring:rabbitmq:host: 192.168.12.131 #主机名port: 5672 #端口username: mannor  #用户名password: 123321 #密码virtual-host: / #虚拟主机
2.在publisher服务中新建一个测试类,编写测试方法:
package cn.itcast.mq.spring;import org.junit.Test;
import org.junit.runner.RunWith;
import org.springframework.amqp.rabbit.core.RabbitTemplate;
import org.springframework.beans.factory.annotation.Autowired;
import org.springframework.boot.test.context.SpringBootTest;
import org.springframework.test.context.junit4.SpringRunner;@RunWith(SpringRunner.class)
@SpringBootTest
public class SpringAmqpTest {@Autowiredprivate RabbitTemplate rabbitTemplate;@Testpublic void testSimpleQueue(){String queueName = "simple.queue";String message = "hello , spring amqp";rabbitTemplate.convertAndSend(queueName,message);}
}
SpringAMQP如何发送消息?
引入amqp的starter依赖。
配置RabbitMQ地址。
利用RabbitTemplate的convertAndSend方法。
[测试demo](https://gitee.com/rediaz/note-management-2/tree/master/SpringCloud/mq-demo - spring)
接收:
-
依赖导入(发送demo导入过了)
<!--AMQP依赖,包含RabbitMQ--><dependency><groupId>org.springframework.boot</groupId><artifactId>spring-boot-starter-amqp</artifactId></dependency>-
配置文件:
logging:pattern:dateformat: MM-dd HH:mm:ss:SSS spring:rabbitmq:host: 192.168.12.131 #主机名port: 5672 #端口username: mannor #用户名password: 123321 #密码virtual-host: / #虚拟主机 -
编写监听类:
package cn.itcast.mq.listener;import org.springframework.amqp.rabbit.annotation.RabbitListener;
import org.springframework.stereotype.Component;@Component
public class SpringRabbitListener {@RabbitListener(queues = "simple.queue")public void listenSimpleQueue(String msg) {System.out.println("消费者接受到的simple.queue的消息为:【" + msg + "】");}
}
-
3、Work Queue工作队列(注解声明队列)
-
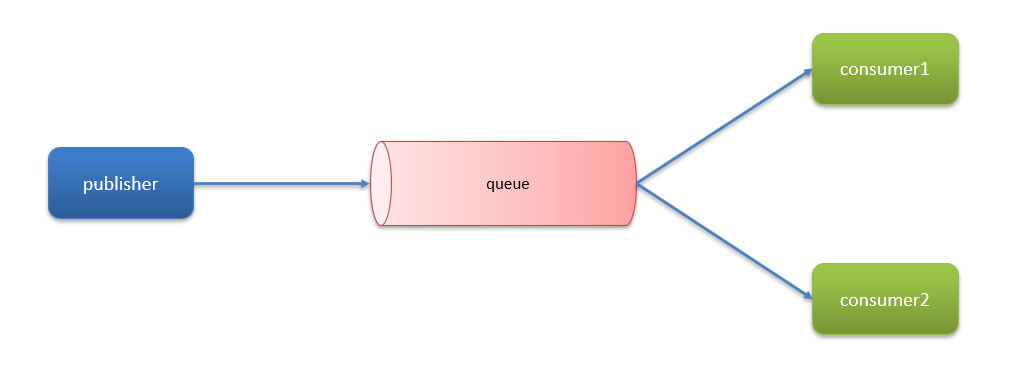
Work queue,工作队列,可以提高消息处理速度,避免队列消息堆积
案例实现:
模拟WorkQueue,实现一个队列绑定多个消费者
基本思路如下:
-
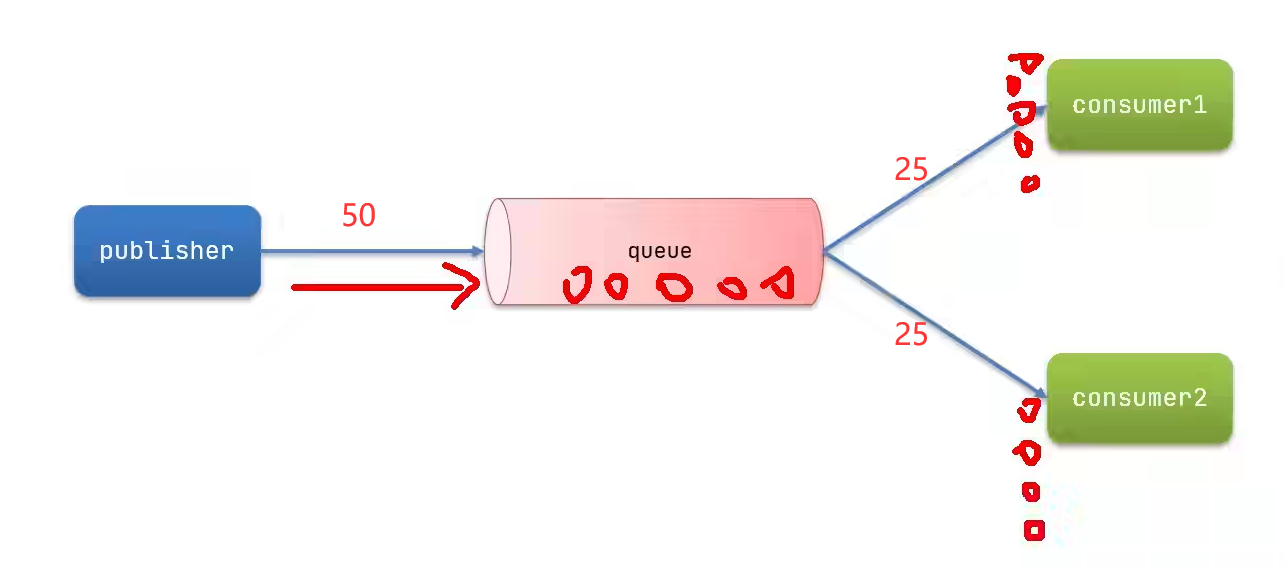
在publisher服务中定义测试方法,每秒产生50条消息,发送到simple.queue
@RunWith(SpringRunner.class) @SpringBootTest public class SpringAmqpTest {@Autowiredprivate RabbitTemplate rabbitTemplate;@Testpublic void testSimpleQueue() throws InterruptedException {String queueName = "simple.queue";String message = "hello , spring__";for (int i = 0; i < 50; i++) { //模拟每秒接受50条消息rabbitTemplate.convertAndSend(queueName,message+i);Thread.sleep(20);}} } -
在consumer服务中定义两个消息监听者,都监听simple.queue队列
@Component public class SpringRabbitListener {@RabbitListener(queues = "simple.queue")public void listenWorkQueue1(String msg) throws InterruptedException {System.out.println("consumer1 reserved simple.queue's message is :{" + msg + "}" + LocalTime.now());Thread.sleep(20);}@RabbitListener(queues = "simple.queue")public void listenWorkQueue2(String msg) throws InterruptedException {System.err.println("consumer2 ...... reserved simple.queue's message is :{" + msg + "}" + LocalTime.now());Thread.sleep(200);} } -
消费者1每秒处理50条消息,消费者2每秒处理10条消息(预期结果)
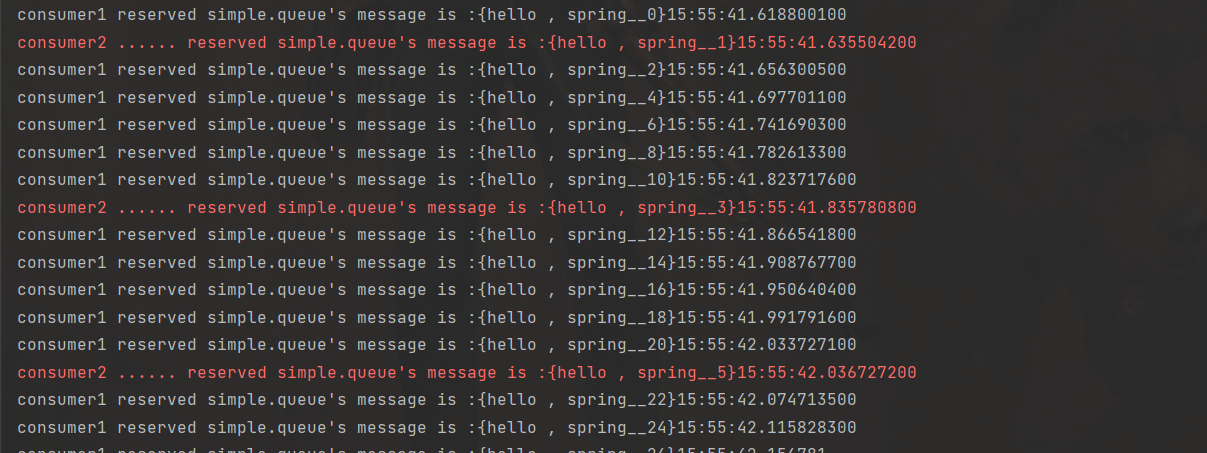
测试结果:
consumer1 reserved simple.queue's message is :{hello , spring__0}15:47:54.547147400
consumer2 ...... reserved simple.queue's message is :{hello , spring__1}15:47:54.563943200
consumer1 reserved simple.queue's message is :{hello , spring__2}15:47:54.583777600
consumer1 reserved simple.queue's message is :{hello , spring__4}15:47:54.624799900
consumer1 reserved simple.queue's message is :{hello , spring__6}15:47:54.665670800
consumer1 reserved simple.queue's message is :{hello , spring__8}15:47:54.707454400
consumer1 reserved simple.queue's message is :{hello , spring__10}15:47:54.748139200
consumer2 ...... reserved simple.queue's message is :{hello , spring__3}15:47:54.765703700
consumer1 reserved simple.queue's message is :{hello , spring__12}15:47:54.791068600
consumer1 reserved simple.queue's message is :{hello , spring__14}15:47:54.833559700
consumer1 reserved simple.queue's message is :{hello , spring__16}15:47:54.875240300
consumer1 reserved simple.queue's message is :{hello , spring__18}15:47:54.916448300
consumer1 reserved simple.queue's message is :{hello , spring__20}15:47:54.957147500
consumer2 ...... reserved simple.queue's message is :{hello , spring__5}15:47:54.966136800
consumer1 reserved simple.queue's message is :{hello , spring__22}15:47:54.998661300
consumer1 reserved simple.queue's message is :{hello , spring__24}15:47:55.040466600
consumer1 reserved simple.queue's message is :{hello , spring__26}15:47:55.082932100
consumer1 reserved simple.queue's message is :{hello , spring__28}15:47:55.124183
consumer1 reserved simple.queue's message is :{hello , spring__30}15:47:55.166082900
consumer2 ...... reserved simple.queue's message is :{hello , spring__7}15:47:55.166587700
consumer1 reserved simple.queue's message is :{hello , spring__32}15:47:55.209400800
consumer1 reserved simple.queue's message is :{hello , spring__34}15:47:55.252836400
consumer1 reserved simple.queue's message is :{hello , spring__36}15:47:55.295680300
consumer1 reserved simple.queue's message is :{hello , spring__38}15:47:55.337493100
consumer2 ...... reserved simple.queue's message is :{hello , spring__9}15:47:55.367486100
consumer1 reserved simple.queue's message is :{hello , spring__40}15:47:55.378067700
consumer1 reserved simple.queue's message is :{hello , spring__42}15:47:55.419311400
consumer1 reserved simple.queue's message is :{hello , spring__44}15:47:55.460464100
consumer1 reserved simple.queue's message is :{hello , spring__46}15:47:55.503671500
consumer1 reserved simple.queue's message is :{hello , spring__48}15:47:55.546108800
consumer2 ...... reserved simple.queue's message is :{hello , spring__11}15:47:55.568499600
consumer2 ...... reserved simple.queue's message is :{hello , spring__13}15:47:55.770209700
consumer2 ...... reserved simple.queue's message is :{hello , spring__15}15:47:55.971745800
consumer2 ...... reserved simple.queue's message is :{hello , spring__17}15:47:56.172948
consumer2 ...... reserved simple.queue's message is :{hello , spring__19}15:47:56.373905800
consumer2 ...... reserved simple.queue's message is :{hello , spring__21}15:47:56.574553500
consumer2 ...... reserved simple.queue's message is :{hello , spring__23}15:47:56.777450500
consumer2 ...... reserved simple.queue's message is :{hello , spring__25}15:47:56.978813400
consumer2 ...... reserved simple.queue's message is :{hello , spring__27}15:47:57.180563800
consumer2 ...... reserved simple.queue's message is :{hello , spring__29}15:47:57.381982500
consumer2 ...... reserved simple.queue's message is :{hello , spring__31}15:47:57.583055500
consumer2 ...... reserved simple.queue's message is :{hello , spring__33}15:47:57.784108400
consumer2 ...... reserved simple.queue's message is :{hello , spring__35}15:47:57.985132900
consumer2 ...... reserved simple.queue's message is :{hello , spring__37}15:47:58.186041300
consumer2 ...... reserved simple.queue's message is :{hello , spring__39}15:47:58.386980
consumer2 ...... reserved simple.queue's message is :{hello , spring__41}15:47:58.587764400
consumer2 ...... reserved simple.queue's message is :{hello , spring__43}15:47:58.788255700
consumer2 ...... reserved simple.queue's message is :{hello , spring__45}15:47:58.989382300
consumer2 ...... reserved simple.queue's message is :{hello , spring__47}15:47:59.190647300
consumer2 ...... reserved simple.queue's message is :{hello , spring__49}15:47:59.392211400
最终发现测试结果与我们的预期 结果不相符合。
这是由于RabbitMq中的消息预取机制造成的:
解决方法:修改application.yml文件,设置preFetch这个值,可以控制预取消息的上限
spring:
rabbitmq:listener:simple:prefetch: 1 #每次只能获取一条消息,处理完成才能获取下一个消息
修改后结果:
4、发布( Publish )、订阅( Subscribe )
发布订阅模式与之前案例的区别就是允许将同一消息发送给多个消费者。实现方式是加入了exchange(交换机)。
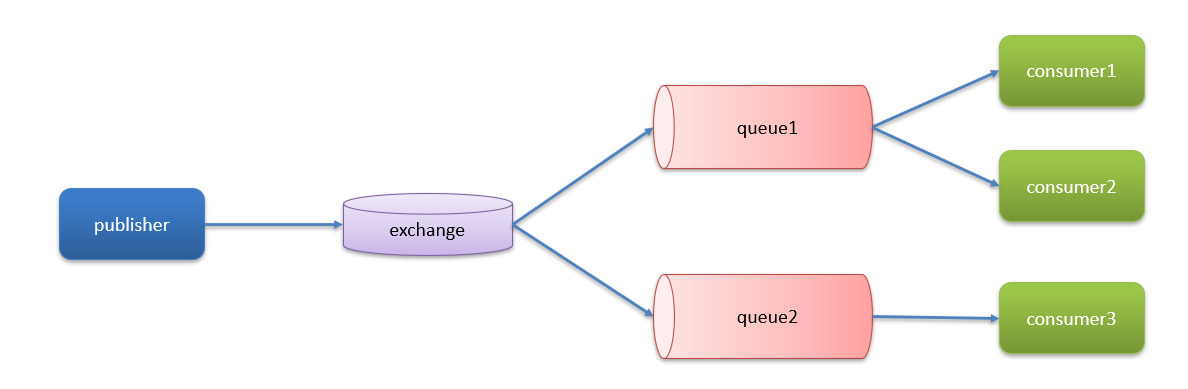
常见exchange类型包括:
-
Fanout:广播
-
Direct:路由
-
Topic:话题
注意:exchange负责消息路由,而不是存储,路由失败则消息丢失
5、发布订阅-Fanout Exchange(配置Bean声明队列)
Fanout Exchange 会将接收到的消息广播到每一个跟其绑定的queue
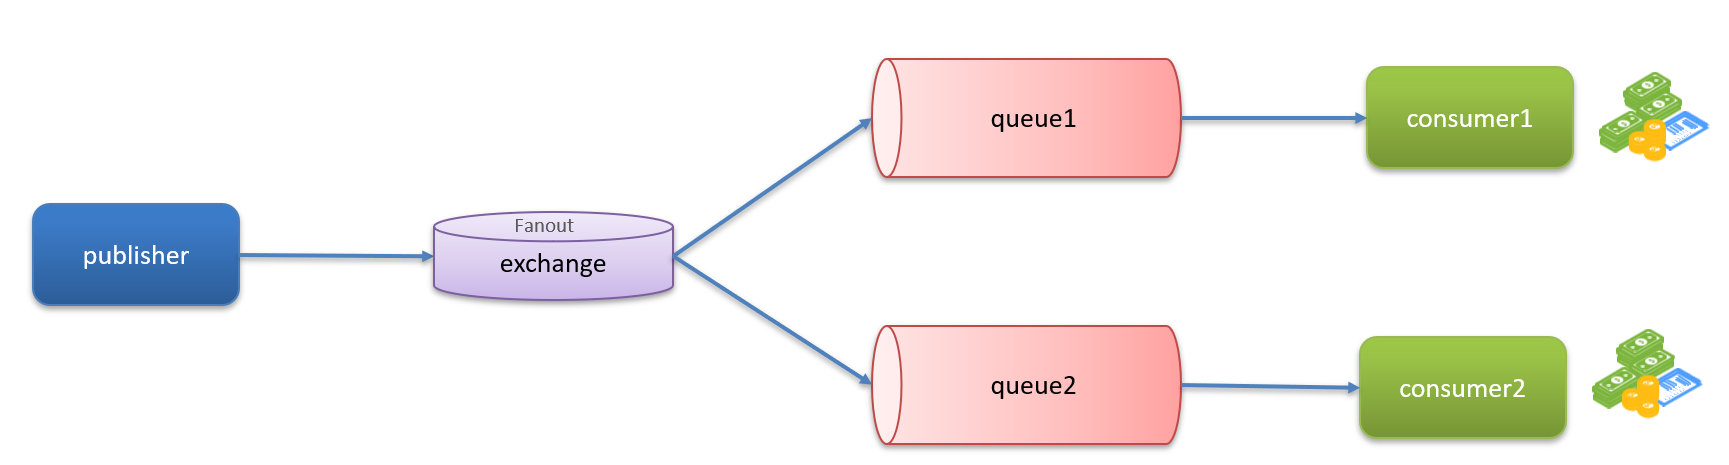
利用SpringAMQP演示FanoutExchange的使用
实现思路如下:
-
在consumer服务声明Exchange、Queue、Binding
SpringAMQP提供了声明交换机、队列、绑定关系的API:
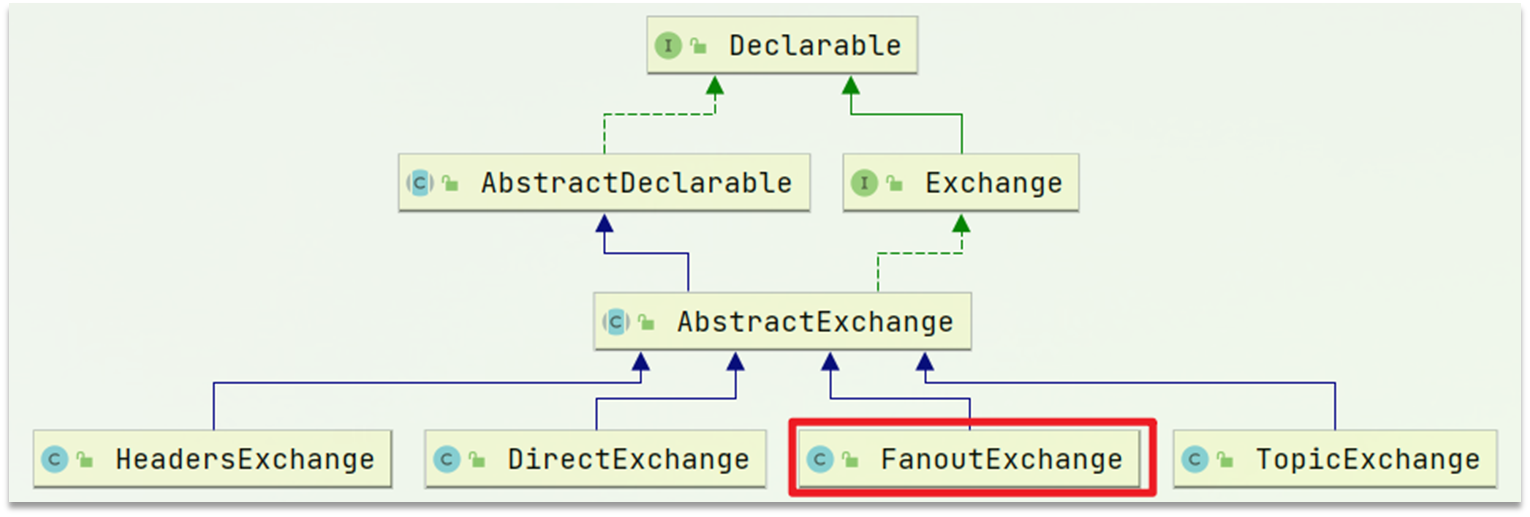
在consumer服务上建一个类,添加@Configuration注解,并声明FanoutExchange、Queue和绑定关系对象Binding,代码如下:
package cn.itcast.mq.config;import org.springframework.amqp.core.Binding;
import org.springframework.amqp.core.BindingBuilder;
import org.springframework.amqp.core.FanoutExchange;
import org.springframework.amqp.core.Queue;
import org.springframework.context.annotation.Bean;
import org.springframework.context.annotation.Configuration;@Configuration
public class FanoutConfig {//    mannor.fanout 交换机@Beanpublic FanoutExchange fanoutExchange() {return new FanoutExchange("mannor.fanout");}//    fanout.queue1 队列1@Beanpublic Queue fanoutQueue1() {return new Queue("fanout.queue1");}// 绑定队列1到交换机@Beanpublic Binding fanoutBinding1(FanoutExchange fanoutExchange, Queue fanoutQueue1) {return BindingBuilder.bind(fanoutQueue1).to(fanoutExchange);}//    fanout.queue2 队列2@Beanpublic Queue fanoutQueue2() {return new Queue("fanout.queue2");}// 绑定队列2到交换机@Beanpublic Binding fanoutBinding2(FanoutExchange fanoutExchange, Queue fanoutQueue2) {return BindingBuilder.bind(fanoutQueue2).to(fanoutExchange);}
}
启动demo项目,就可以在RabbitMQ的控制台中显示新建的交换机和队列的信息。
-
在consumer服务中,编写两个消费者方法,分别监听fanout.queue1和fanout.queue2
package cn.itcast.mq.listener;import org.springframework.amqp.rabbit.annotation.RabbitListener; import org.springframework.stereotype.Component;import java.time.LocalTime;@Component public class SpringRabbitListener {@RabbitListener(queues = "fanout.queue1")public void listenFanoutQueue1(String msg) {System.out.println("consumer reserved simple.queue's message is :【" + msg + "】");}@RabbitListener(queues = "fanout.queue2")public void listenFanoutQueue2(String msg) {System.out.println("consumer reserved simple.queue's message is :【" + msg + "】");} } -
在publisher中编写测试方法,向mannor.fanout发送消息
@RunWith(SpringRunner.class)
@SpringBootTest
public class SpringAmqpTest {@Autowiredprivate RabbitTemplate rabbitTemplate;@Testpublic void testSendFanoutExchange() {//交换机名称String exchangeName = "mannor.fanout";//消息String message = "hello,every queue!";//发送rabbitTemplate.convertAndSend(exchangeName, "", message);}
}
控制台输出: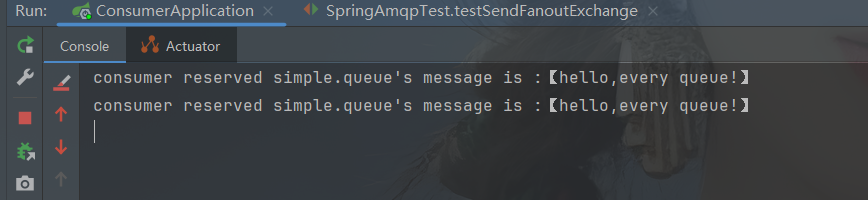
6、发布订阅-DirectExchange
Direct Exchange 会将接收到的消息根据规则路由到指定的Queue,因此称为路由模式(routes)。
-
每一个Queue都与Exchange设置一个BindingKey
-
发布者发送消息时,指定消息的RoutingKey
-
Exchange将消息路由到BindingKey与消息RoutingKey一致的队列
利用SpringAMQP演示DirectExchange的使用:
实现思路如下:
-
利用@RabbitListener声明Exchange、Queue、RoutingKey
-
在consumer服务中,编写两个消费者方法,分别监听direct.queue1和direct.queue2
@Component public class SpringRabbitListener {@RabbitListener(bindings = @QueueBinding(value = @Queue(name = "direct.queue1"),exchange = @Exchange(name = "mannor.direct", type = ExchangeTypes.DIRECT),key = {"red", "blue"}))public void listenDirectQueue1(String msg) {System.out.println("consumer reserved direct.queue's message is :【" + msg + "】");}@RabbitListener(bindings = @QueueBinding(value = @Queue(name = "direct.queue2"),exchange = @Exchange(name = "mannor.direct", type = ExchangeTypes.DIRECT),key = {"red", "yellow"}))public void listenDirectQueue2(String msg) {System.out.println("consumer reserved direct.queue's message is :【" + msg + "】");} } -
在publisher中编写测试方法,向itcast. direct发送消息
@RunWith(SpringRunner.class)
@SpringBootTest
public class SpringAmqpTest {@Autowiredprivate RabbitTemplate rabbitTemplate;@Testpublic void testSendDirectExchange() {//交换机名称String exchangeName = "mannor.direct";//消息String message = "hello,every queue!";//发送rabbitTemplate.convertAndSend(exchangeName, "blue", message);}}
7、发布订阅-TopicExchange
TopicExchange与DirectExchange类似,区别在于routingKey必须是多个单词的列表,并且以 . 分割。
Queue与Exchange指定BindingKey时可以使用通配符:
#:代指0个或多个单词
*:代指一个单词
例如:
china.news 代表有中国的新闻消息;
china.weather 代表中国的天气消息;
japan.news 则代表日本新闻
japan.weather 代表日本的天气消息;
利用SpringAMQP演示TopicExchange的使用
实现思路如下:
-
并利用@RabbitListener声明Exchange、Queue、RoutingKey
-
在consumer服务中,编写两个消费者方法,分别监听topic.queue1和topic.queue2
@Component public class SpringRabbitListener {@RabbitListener(bindings = @QueueBinding(value = @Queue(name = "topic.queue1"),exchange = @Exchange(name = "mannor.topic", type = ExchangeTypes.TOPIC),key = {"china.#"} //收到来自china的所有信息))public void listenTopicQueue1(String msg) {System.out.println("消费者收到来自 topic.queue 的信息 :【" + msg + "】");}@RabbitListener(bindings = @QueueBinding(value = @Queue(name = "topic.queue2"),exchange = @Exchange(name = "mannor.topic", type = ExchangeTypes.TOPIC),key = {"#.news"}))public void listenTopicQueue2(String msg) {System.out.println("消费者收到来自 topic.queue 的信息 :【" + msg + "】");} } -
在publisher中编写测试方法,向amnnor. topic发送消息
@Test
public void testSendTopicExchange() {//交换机名称String exchangeName = "mannor.topic";//消息String message = "曼诺尔雷迪亚兹入驻抖音啦!";//发送rabbitTemplate.convertAndSend(exchangeName, "china.news", message);
}
具体看的是前缀和后缀,主要
#:代指0个或多个单词 ;*:代指一个单词。
8、SpringAMQP-消息转换器
测试发送Object类型消息
正如我们之前所学习的那样,其实SpringAMQP通过队列传输的数据都是Object类型的,如下图所示:
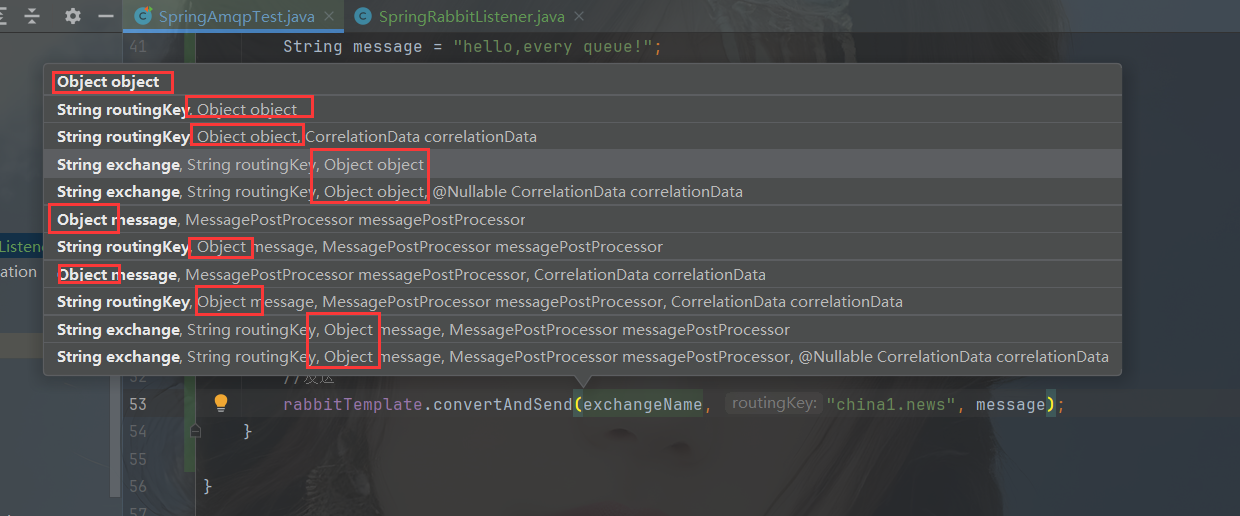
所以我们现在就来尝试一下对象的传输。
-
首先创建一个queue的消息队列:(创还能队列有两种方式,之前案例中两种都有涉及到,下面这种是通过配置文件创建)
@Configuration public class FanoutConfig {@Beanpublic Queue objectQueue(){return new Queue("object.queue");} } -
在发送者这里编写测试类:
@RunWith(SpringRunner.class) @SpringBootTest public class SpringAmqpTest {@Autowiredprivate RabbitTemplate rabbitTemplate;@Testpublic void testSendObjectQueue() {Map<String, Object> obj = new HashMap<>();obj.put("姓名", "曼诺尔雷迪亚兹");obj.put("性别", "男");obj.put("年龄", "45");rabbitTemplate.convertAndSend("object.queue", obj);} } -
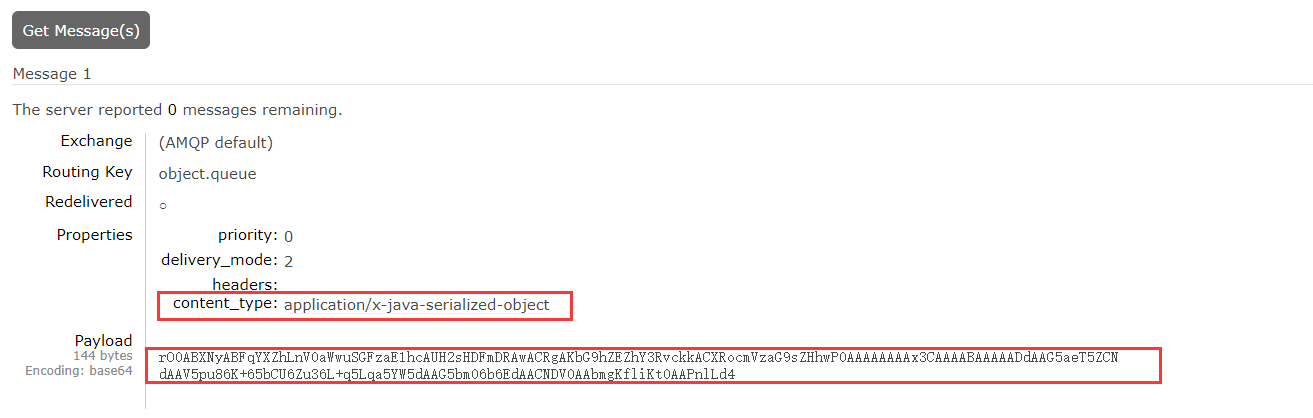
查看RabbitMQ控制台中发送的消息如下图所示,我们会发现原生api只支持字节的形式,而SpringAMQP支持我们发送Object对象,说明传输方式会将我们的对象进行java序列化来传输。
这种传输会出现一些问题,就是性能较差;安全性不高,容易注入;数据长度太长,不利于传输消息。
所以这里需要使用到消息转换器的知识。
Spring的对消息对象的处理是由org.springframework.amqp.support.converter.MessageConverter来处理的。而默认实现是
SimpleMessageConverter,基于JDK的ObjectOutputStream完成序列化。
如果要修改只需要定义一个MessageConverter 类型的Bean即可解决上面的问题。推荐用JSON方式序列化,步骤如下:
-
我们在publisher服务引入依赖
<!-- json 序列化工具 --> <dependency><groupId>com.fasterxml.jackson.core</groupId><artifactId>jackson-databind</artifactId> </dependency> -
声明Bean(在启动类或者配置类上声明)
@SpringBootApplication public class PublisherApplication {public static void main(String[] args) {SpringApplication.run(PublisherApplication.class);}@Beanpublic MessageConverter messageConverter() {return new Jackson2JsonMessageConverter();} } -
由于消息转换是底层实现的,所以我们无序额外的操作,查看RabbitMQ的消息情况,发现现在传输的就是JSON对象。

测试发送Object类型消息
-
在接收者中引入Jackson依赖
<!-- json 序列化工具 --> <dependency><groupId>com.fasterxml.jackson.core</groupId><artifactId>jackson-databind</artifactId> </dependency> -
配置转换器的Bean对象
@SpringBootApplication public class ConsumerApplication {public static void main(String[] args) {SpringApplication.run(ConsumerApplication.class, args);}@Beanpublic MessageConverter messageConverter() {return new Jackson2JsonMessageConverter();} } -
定义一个消费者监听类,监听队列中的消息
@Component public class SpringRabbitListener {@RabbitListener(queues = "object.queue")public void listenObjectQueue(Map<String,Object> obj){System.out.println("消费者收到来自发送者发送的对象:" + obj );} } -
运行结果

SpringAMQP中消息的序列化和反序列化是怎么实现的?
- 利用MessageConverter实现的,默认是JDK的序列化
- 注意发送方与接收方必须使用相同的MessageConverter
测试项目源码:RabbitMq demo源码
这篇关于SpringCloud微服务-SpringAMQP(RabbitMQ)的文章就介绍到这儿,希望我们推荐的文章对编程师们有所帮助!


