本文主要是介绍二、identityserver4保护api,并使用控制台应用程序访问,希望对大家解决编程问题提供一定的参考价值,需要的开发者们随着小编来一起学习吧!
一、创建webapi项目
(一)分别创建2个webapi项目,分别是3.1(3.0)版本和2.2(2.1)版本。
先在3.1版本中做测试
1、将Core3.1API应用程序配置URL为http://localhost:5001。
2、在打开Properties→launchSettings.json配置文件将iis相关配置信息删除。
删除后的launchSettings.json
{"$schema": "http://json.schemastore.org/launchsettings.json","profiles": {    "WebApi3.x": {"commandName": "Project","launchBrowser": true,"launchUrl": "weatherforecast","applicationUrl": "http://localhost:5001","environmentVariables": {"ASPNETCORE_ENVIRONMENT": "Development"}}}
}
3、将创建项目时默认添加的WeatherForecastController进行代码修改。
在控制器上方添加 [Authorize]特性,用于授权测试。
[ApiController][Route("[controller]")][Authorize]public class WeatherForecastController : ControllerBase{private static readonly string[] Summaries = new[]{"Freezing", "Bracing", "Chilly", "Cool", "Mild", "Warm", "Balmy", "Hot", "Sweltering", "Scorching"};private readonly ILogger<WeatherForecastController> _logger;public WeatherForecastController(ILogger<WeatherForecastController> logger){_logger = logger;}[HttpGet]public IEnumerable<WeatherForecast> Get(){var rng = new Random();return Enumerable.Range(1, 5).Select(index => new WeatherForecast{Date = DateTime.Now.AddDays(index),TemperatureC = rng.Next(-20, 55),Summary = Summaries[rng.Next(Summaries.Length)]}).ToArray();}}4、在Nuget中添加Microsoft.AspNetCore.Authentication.JwtBearer包

5、最后一步是将身份验证服务添加到DI(依赖注入),并将身份验证中间件添加到管道。这些将:
- 验证传入令牌以确保它来自受信任的发行者
- 验证令牌是否可以与此API一起使用
修改Startup文件
public class Startup{public Startup(IConfiguration configuration){Configuration = configuration;}public IConfiguration Configuration { get; }public void ConfigureServices(IServiceCollection services){services.AddControllers();//将身份验证服务添加到DI并配置Bearer为默认方案。services.AddAuthentication("Bearer").AddJwtBearer("Bearer", options =>{//配置id4授权服务器Urloptions.Authority = "http://localhost:5000";options.RequireHttpsMetadata = false;//设置当前webapi项目的资源名称为api1options.Audience = "api1";});}public void Configure(IApplicationBuilder app, IWebHostEnvironment env){if (env.IsDevelopment()){app.UseDeveloperExceptionPage();}app.UseHttpsRedirection();app.UseRouting();//将身份验证中间件添加到管道中,以便对主机的每次调用都将自动执行身份验证。app.UseAuthentication();//添加了授权中间件,以确保匿名客户端无法访问我们的API端点。app.UseAuthorization();app.UseEndpoints(endpoints =>{endpoints.MapControllers();});}}http://localhost:5001/identity在浏览器上导航至控制器应返回401状态代码。这意味着您的API需要凭据,并且现在受IdentityServer保护。
二、创建控制台客户端,用于API资源访问
1、Nuget安装IdentityModel库
2、修改Program.cs文件
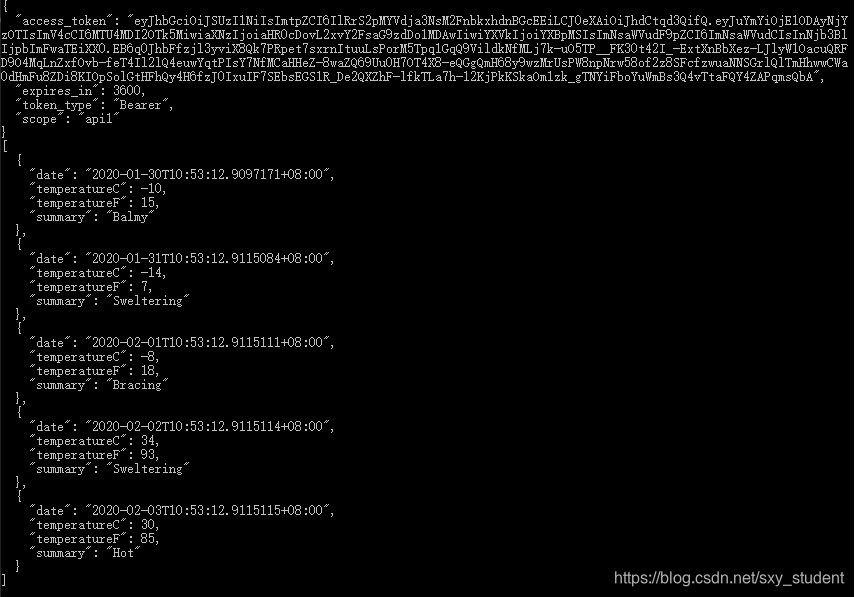
class Program{static async Task Main(string[] args){// IdentityModel包括一个与发现端点一起使用的客户端库。这样,您只需要知IdentityServer的基地址-可以从元数据中读取实际的端点地址。http://localhost:5000identityserver4的Url地址var client = new HttpClient();var disco = await client.GetDiscoveryDocumentAsync("http://localhost:5000");if (disco.IsError){Console.WriteLine(disco.Error);return;}//接下来,您可以使用发现文档中的信息向IdentityServer请求令牌以访问api1var tokenResponse = await client.RequestClientCredentialsTokenAsync(new ClientCredentialsTokenRequest{Address = disco.TokenEndpoint,ClientId = "client",//Secret在id4项目中Config.cs文件中配置的AllowedGrantTypes = GrantTypes.ClientCredentials客户端中的ClientSecretsClientSecret = "511536EF-F270-4058-80CA-1C89C192F69A",Scope = "api1"});if (tokenResponse.IsError){Console.WriteLine(tokenResponse.Error);return;}Console.WriteLine(tokenResponse.Json);//要将访问令牌发送到API。这是使用SetBearerToken扩展方法完,设置HTTP授权标头:var clientapi = new HttpClient();clientapi.SetBearerToken(tokenResponse.AccessToken);//访问webapi资源地址var response = await clientapi.GetAsync("http://localhost:5001/WeatherForecast");if (!response.IsSuccessStatusCode){Console.WriteLine(response.StatusCode);}else{var content = await response.Content.ReadAsStringAsync();Console.WriteLine(JArray.Parse(content));}Console.ReadKey();}}3、先后运行id4项目、webapi项目和客户端项目
客户端项目中打印出webapi项目中WeatherForecast控制器返回的api资源。
Core3.x测试完毕。接下来我们测试2.x版本的webapi保护
三、创建Core2.xwepi项目
1、将创建项目时默认添加的WeatherForecastController进行代码修改。
在控制器上方添加 [Authorize]特性,用于授权测试。
[Route("api/[controller]")][ApiController][Authorize]public class ValuesController : ControllerBase{// GET api/values[HttpGet]public ActionResult<IEnumerable<string>> Get(){return new string[] { "value1", "value2" };}// GET api/values/5[HttpGet("{id}")]public ActionResult<string> Get(int id){return "value";}// POST api/values[HttpPost]public void Post([FromBody] string value){}// PUT api/values/5[HttpPut("{id}")]public void Put(int id, [FromBody] string value){}// DELETE api/values/5[HttpDelete("{id}")]public void Delete(int id){}}2、修改Startup.cs文件
public class Startup{public Startup(IConfiguration configuration){Configuration = configuration;}public IConfiguration Configuration { get; }// This method gets called by the runtime. Use this method to add services to the container.public void ConfigureServices(IServiceCollection services){services.AddMvc().SetCompatibilityVersion(CompatibilityVersion.Version_2_1);//添加认证services.AddMvcCore().AddAuthorization().AddJsonFormatters();services.AddAuthentication("Bearer").AddJwtBearer("Bearer", options =>{options.Authority = "http://localhost:5000";options.RequireHttpsMetadata = false;options.Audience = "api2";});}// This method gets called by the runtime. Use this method to configure the HTTP request pipeline.public void Configure(IApplicationBuilder app, IHostingEnvironment env){if (env.IsDevelopment()){app.UseDeveloperExceptionPage();}else{app.UseHsts();}//添加认证中间件app.UseAuthentication();app.UseHttpsRedirection();app.UseMvc();}}注意:2.x版本不需要像3.x版本一样添加Microsoft.AspNetCore.Authentication.JwtBearer依赖库
3、在打开Properties→launchSettings.json配置文件将iis相关配置信息删除。
删除后的launchSettings.json
{"$schema": "http://json.schemastore.org/launchsettings.json","profiles": {   "WebApi2.x": {"commandName": "Project","launchBrowser": true,"launchUrl": "api/values","applicationUrl": "http://localhost:5002","environmentVariables": {"ASPNETCORE_ENVIRONMENT": "Development"}}}
}
4、在id4项目的Config.cs文件中添加ApiResource
public static IEnumerable<ApiResource> Apis =>new ApiResource[]{new ApiResource("api1", "My API #1"),new ApiResource("api2", "My API #2")};5、将client客户端AllowedScopes修改为api2。
new Client{ClientId = "client",ClientName = "Client Credentials Client",AllowedGrantTypes = GrantTypes.ClientCredentials,ClientSecrets = { new Secret("511536EF-F270-4058-80CA-1C89C192F69A".Sha256()) },AllowedScopes = { "api2" }},6、修改ConsoleClient客户端Program.cs文件
class Program{static async Task Main(string[] args){// IdentityModel包括一个与发现端点一起使用的客户端库。这样,您只需要知IdentityServer的基地址-可以从元数据中读取实际的端点地址。http://localhost:5000identityserver4的Url地址var client = new HttpClient();var disco = await client.GetDiscoveryDocumentAsync("http://localhost:5000");if (disco.IsError){Console.WriteLine(disco.Error);return;}//接下来,您可以使用发现文档中的信息向IdentityServer请求令牌以访问api1var tokenResponse = await client.RequestClientCredentialsTokenAsync(new ClientCredentialsTokenRequest{Address = disco.TokenEndpoint,ClientId = "client",//Secret在id4项目中Config.cs文件中配置的AllowedGrantTypes = GrantTypes.ClientCredentials客户端中的ClientSecretsClientSecret = "511536EF-F270-4058-80CA-1C89C192F69A",//将原来的api1修改为 api2Scope = "api2"});if (tokenResponse.IsError){Console.WriteLine(tokenResponse.Error);return;}Console.WriteLine(tokenResponse.Json);//要将访问令牌发送到API。这是使用SetBearerToken扩展方法完,设置HTTP授权标头:var clientapi = new HttpClient();clientapi.SetBearerToken(tokenResponse.AccessToken);//var response = await clientapi.GetAsync("http://localhost:5001/WeatherForecast");//修改api请求地址var response = await clientapi.GetAsync("http://localhost:5002/api/Values");if (!response.IsSuccessStatusCode){Console.WriteLine(response.StatusCode);}else{var content = await response.Content.ReadAsStringAsync();Console.WriteLine(JArray.Parse(content));}Console.ReadKey();}}7、依次运行id4项目、core2.1webapi项目和控制台客户端项目

正确的获取到了core2.x被保护资源。
四、小结
保护Core3.x与2.x的区别就在与Startup文件的配置上。
1、core3.x需要添加Microsoft.AspNetCore.Authentication.JwtBearer包依赖 ,2.x则不需要。
2、core3.x webapi项目 Startup添加文件配置
//ConfigureServices方法中添加
//将身份验证服务添加到DI并配置Bearer为默认方案。services.AddAuthentication("Bearer").AddJwtBearer("Bearer", options =>{//配置id4授权服务器Urloptions.Authority = "http://localhost:5000";options.RequireHttpsMetadata = false;//设置当前webapi项目的资源名称为api1options.Audience = "api1";});
//Configure方法中添加app.UseAuthentication();app.UseAuthorization();
3、core2.x webapi项目 Startup添加文件配置
//ConfigureServices方法中添加
//添加认证services.AddMvcCore().AddAuthorization().AddJsonFormatters();services.AddAuthentication("Bearer").AddJwtBearer("Bearer", options =>{options.Authority = "http://localhost:5000";options.RequireHttpsMetadata = false;options.Audience = "api2";});
//Configure方法中添加//添加认证中间件
app.UseAuthentication();
一、identityerver4Demo项目建立
这篇关于二、identityserver4保护api,并使用控制台应用程序访问的文章就介绍到这儿,希望我们推荐的文章对编程师们有所帮助!


