本文主要是介绍Electron通过预加载脚本从渲染器访问Node.js,希望对大家解决编程问题提供一定的参考价值,需要的开发者们随着小编来一起学习吧!
问题:如何实现输出Electron的版本号和它的依赖项到你的web页面上?
答案:在主进程通过Node的全局 process 对象访问这个信息是微不足道的。 然而,你不能直接在主进程中编辑DOM,因为它无法访问渲染器 文档 上下文。 它们存在于完全不同的进程!这是将 预加载 脚本连接到渲染器时派上用场的地方。预加载脚本在渲染器进程加载之前加载,并有权访问两个 渲染器全局 (例如 window 和 document) 和 Node.js 环境。
1.创建预加载脚本
在项目的src/preload/目录下创建一个名为 preload.js 的新脚本如下:
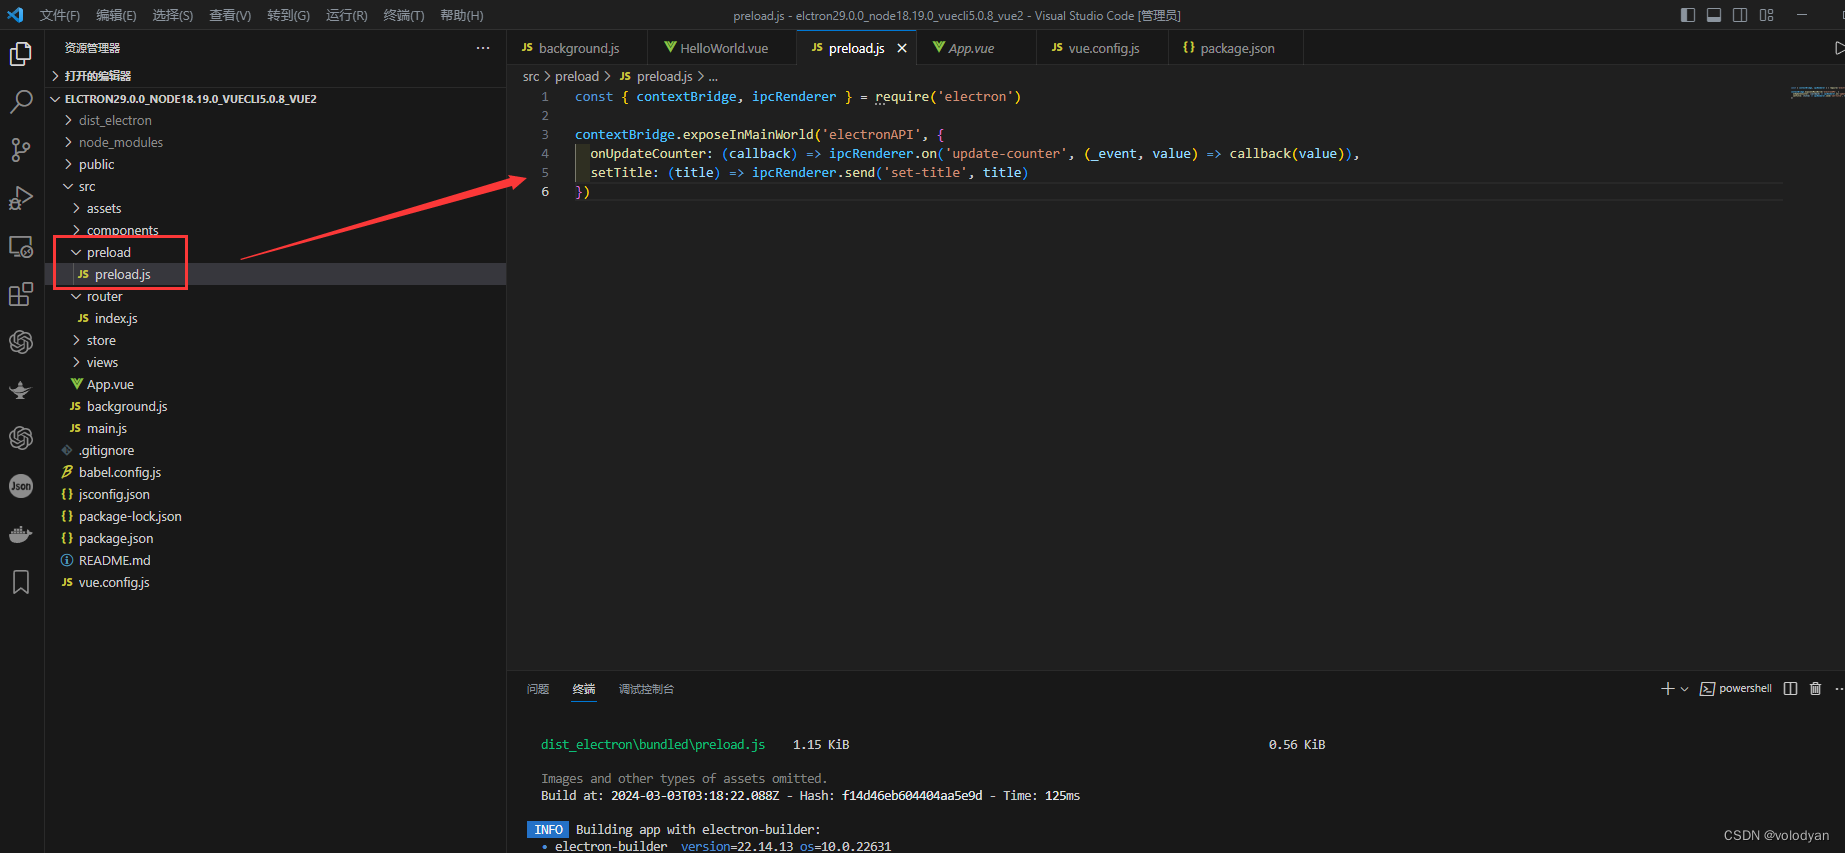
const { contextBridge, ipcRenderer } = require('electron')contextBridge.exposeInMainWorld('electronAPI', {onUpdateCounter: (callback) => ipcRenderer.on('update-counter', (_event, value) => callback(value)),setTitle: (title) => ipcRenderer.send('set-title', title)
})
2.在主进程中引入
在主进程的background.js文件中,引入预加载脚本如下:
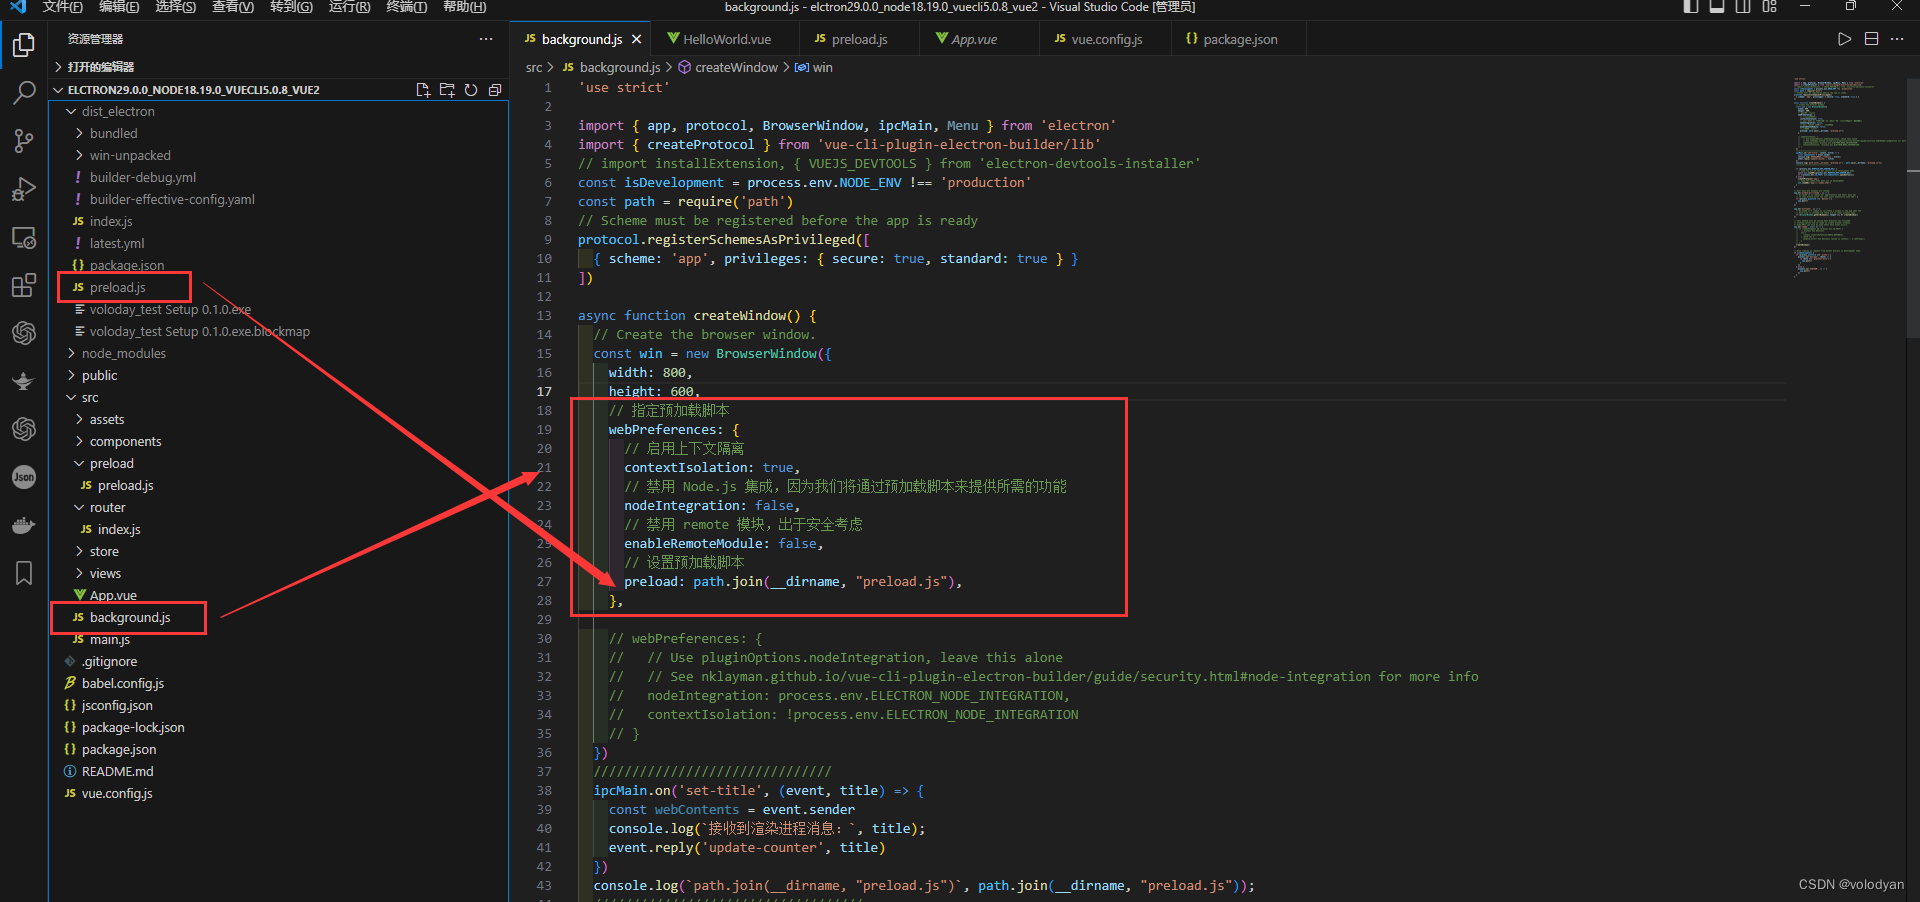
// 指定预加载脚本webPreferences: {// 启用上下文隔离contextIsolation: true,// 禁用 Node.js 集成,因为我们将通过预加载脚本来提供所需的功能nodeIntegration: false,// 禁用 remote 模块,出于安全考虑enableRemoteModule: false,// 设置预加载脚本preload: path.join(__dirname, "preload.js"),},这里使用了两个Node.js概念:
- __dirname 字符串指向当前正在执行脚本的路径 (在本例中,它指向你的项目的根文件夹)。
- path.join API 将多个路径联结在一起,创建一个跨平台的路径字符串。
我们使用一个相对当前正在执行JavaScript文件的路径,这样您的相对路径将在开发模式和打包模式中都将有效。
background.js文件
'use strict'import { app, protocol, BrowserWindow, ipcMain, Menu } from 'electron'
import { createProtocol } from 'vue-cli-plugin-electron-builder/lib'
// import installExtension, { VUEJS_DEVTOOLS } from 'electron-devtools-installer'
const isDevelopment = process.env.NODE_ENV !== 'production'
const path = require('path')
// Scheme must be registered before the app is ready
protocol.registerSchemesAsPrivileged([{ scheme: 'app', privileges: { secure: true, standard: true } }
])async function createWindow() {// Create the browser window.const win = new BrowserWindow({width: 800,height: 600,// 指定预加载脚本webPreferences: {// 启用上下文隔离contextIsolation: true,// 禁用 Node.js 集成,因为我们将通过预加载脚本来提供所需的功能nodeIntegration: false,// 禁用 remote 模块,出于安全考虑enableRemoteModule: false,// 设置预加载脚本preload: path.join(__dirname, "preload.js"),},// webPreferences: {//   // Use pluginOptions.nodeIntegration, leave this alone//   // See nklayman.github.io/vue-cli-plugin-electron-builder/guide/security.html#node-integration for more info//   nodeIntegration: process.env.ELECTRON_NODE_INTEGRATION,//   contextIsolation: !process.env.ELECTRON_NODE_INTEGRATION// }})///ipcMain.on('set-title', (event, title) => {const webContents = event.senderconsole.log(`接收到渲染进程消息:`, title);event.reply('update-counter', title)})console.log(`path.join(__dirname, "preload.js")`, path.join(__dirname, "preload.js"));///if (process.env.WEBPACK_DEV_SERVER_URL) {// Load the url of the dev server if in development modeawait win.loadURL(process.env.WEBPACK_DEV_SERVER_URL)if (!process.env.IS_TEST) win.webContents.openDevTools()} else {createProtocol('app')// Load the index.html when not in developmentwin.loadURL('app://./index.html')}
}// Quit when all windows are closed.
app.on('window-all-closed', () => {// On macOS it is common for applications and their menu bar// to stay active until the user quits explicitly with Cmd + Qif (process.platform !== 'darwin') {app.quit()}
})app.on('activate', () => {// On macOS it's common to re-create a window in the app when the// dock icon is clicked and there are no other windows open.if (BrowserWindow.getAllWindows().length === 0) createWindow()
})// This method will be called when Electron has finished
// initialization and is ready to create browser windows.
// Some APIs can only be used after this event occurs.
app.on('ready', async () => {// if (isDevelopment && !process.env.IS_TEST) {//   // Install Vue Devtools//   try {//     //await installExtension(VUEJS_DEVTOOLS)//   } catch (e) {//     console.error('Vue Devtools failed to install:', e.toString())//   }// }createWindow()
})// Exit cleanly on request from parent process in development mode.
if (isDevelopment) {if (process.platform === 'win32') {process.on('message', (data) => {if (data === 'graceful-exit') {app.quit()}})} else {process.on('SIGTERM', () => {app.quit()})}
}
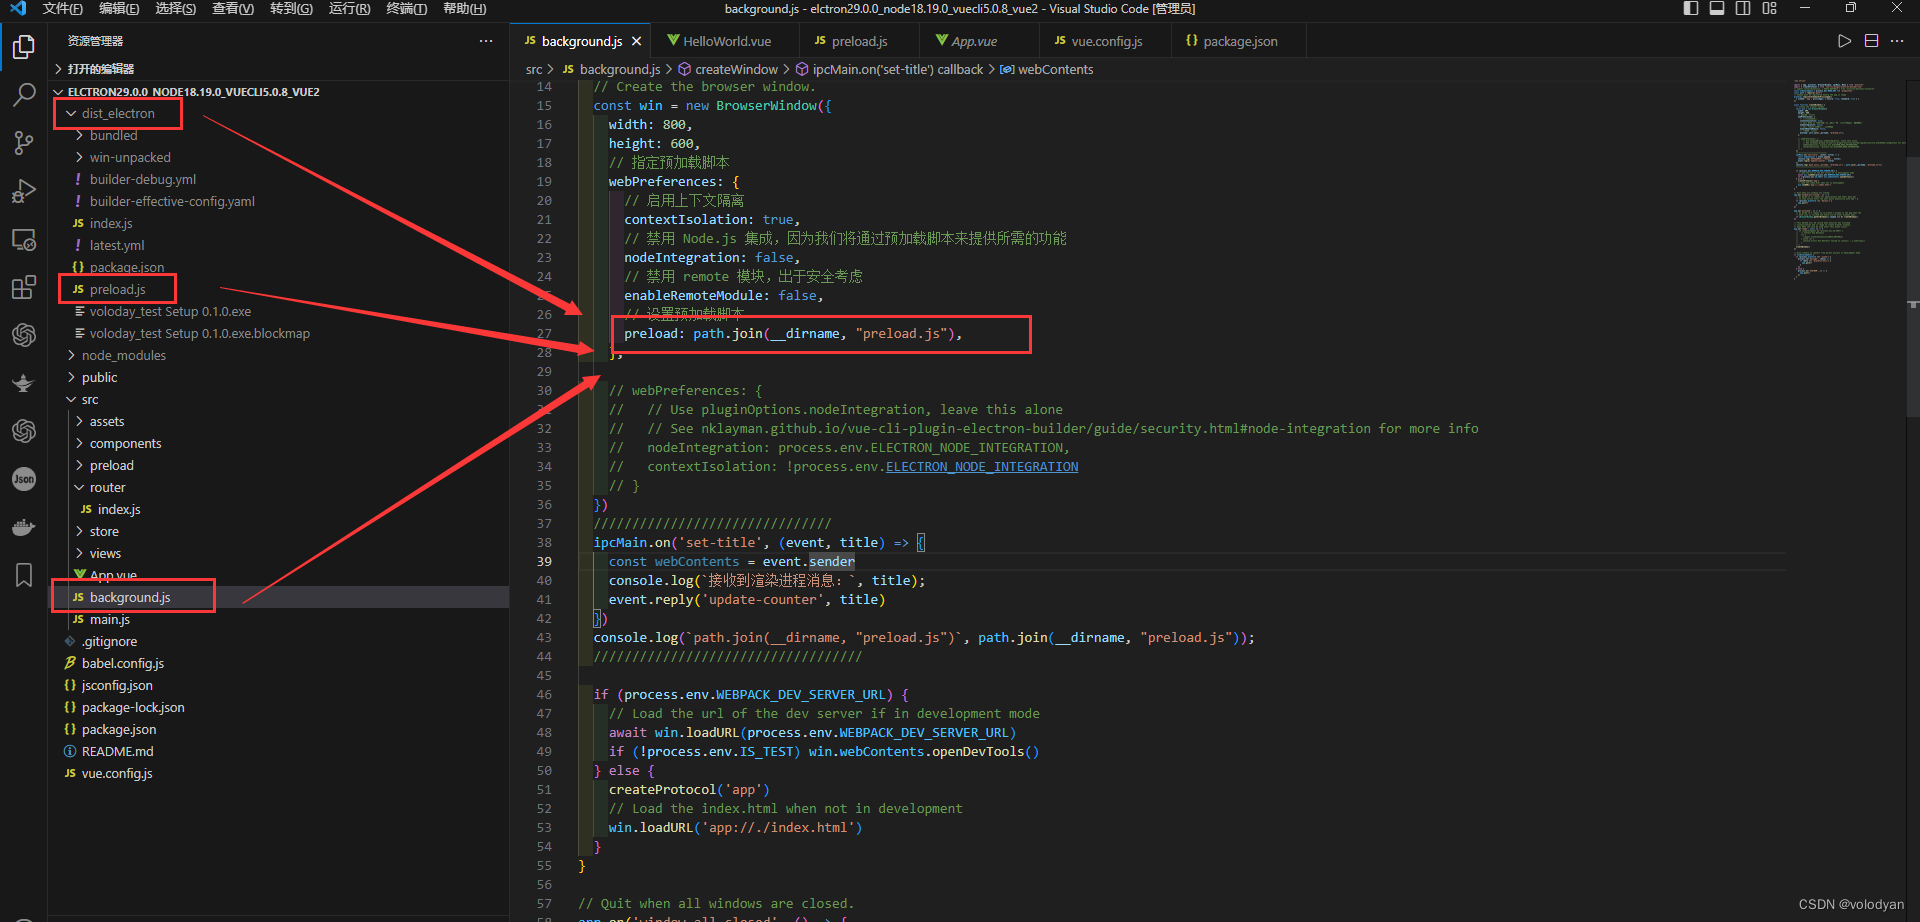
3.在主进程和渲染进程中使用预加载脚本
主进程中使用:

ipcMain.on('set-title', (event, title) => {const webContents = event.senderconsole.log(`接收到渲染进程消息:`, title);event.reply('update-counter', title)})主进程完整脚本文件
'use strict'import { app, protocol, BrowserWindow, ipcMain, Menu } from 'electron'
import { createProtocol } from 'vue-cli-plugin-electron-builder/lib'
// import installExtension, { VUEJS_DEVTOOLS } from 'electron-devtools-installer'
const isDevelopment = process.env.NODE_ENV !== 'production'
const path = require('path')
// Scheme must be registered before the app is ready
protocol.registerSchemesAsPrivileged([{ scheme: 'app', privileges: { secure: true, standard: true } }
])async function createWindow() {// Create the browser window.const win = new BrowserWindow({width: 800,height: 600,// 指定预加载脚本webPreferences: {// 启用上下文隔离contextIsolation: true,// 禁用 Node.js 集成,因为我们将通过预加载脚本来提供所需的功能nodeIntegration: false,// 禁用 remote 模块,出于安全考虑enableRemoteModule: false,// 设置预加载脚本preload: path.join(__dirname, "preload.js"),},// webPreferences: {//   // Use pluginOptions.nodeIntegration, leave this alone//   // See nklayman.github.io/vue-cli-plugin-electron-builder/guide/security.html#node-integration for more info//   nodeIntegration: process.env.ELECTRON_NODE_INTEGRATION,//   contextIsolation: !process.env.ELECTRON_NODE_INTEGRATION// }})///ipcMain.on('set-title', (event, title) => {const webContents = event.senderconsole.log(`接收到渲染进程消息:`, title);event.reply('update-counter', title)})console.log(`path.join(__dirname, "preload.js")`, path.join(__dirname, "preload.js"));///if (process.env.WEBPACK_DEV_SERVER_URL) {// Load the url of the dev server if in development modeawait win.loadURL(process.env.WEBPACK_DEV_SERVER_URL)if (!process.env.IS_TEST) win.webContents.openDevTools()} else {createProtocol('app')// Load the index.html when not in developmentwin.loadURL('app://./index.html')}
}// Quit when all windows are closed.
app.on('window-all-closed', () => {// On macOS it is common for applications and their menu bar// to stay active until the user quits explicitly with Cmd + Qif (process.platform !== 'darwin') {app.quit()}
})app.on('activate', () => {// On macOS it's common to re-create a window in the app when the// dock icon is clicked and there are no other windows open.if (BrowserWindow.getAllWindows().length === 0) createWindow()
})// This method will be called when Electron has finished
// initialization and is ready to create browser windows.
// Some APIs can only be used after this event occurs.
app.on('ready', async () => {// if (isDevelopment && !process.env.IS_TEST) {//   // Install Vue Devtools//   try {//     //await installExtension(VUEJS_DEVTOOLS)//   } catch (e) {//     console.error('Vue Devtools failed to install:', e.toString())//   }// }createWindow()
})// Exit cleanly on request from parent process in development mode.
if (isDevelopment) {if (process.platform === 'win32') {process.on('message', (data) => {if (data === 'graceful-exit') {app.quit()}})} else {process.on('SIGTERM', () => {app.quit()})}
}
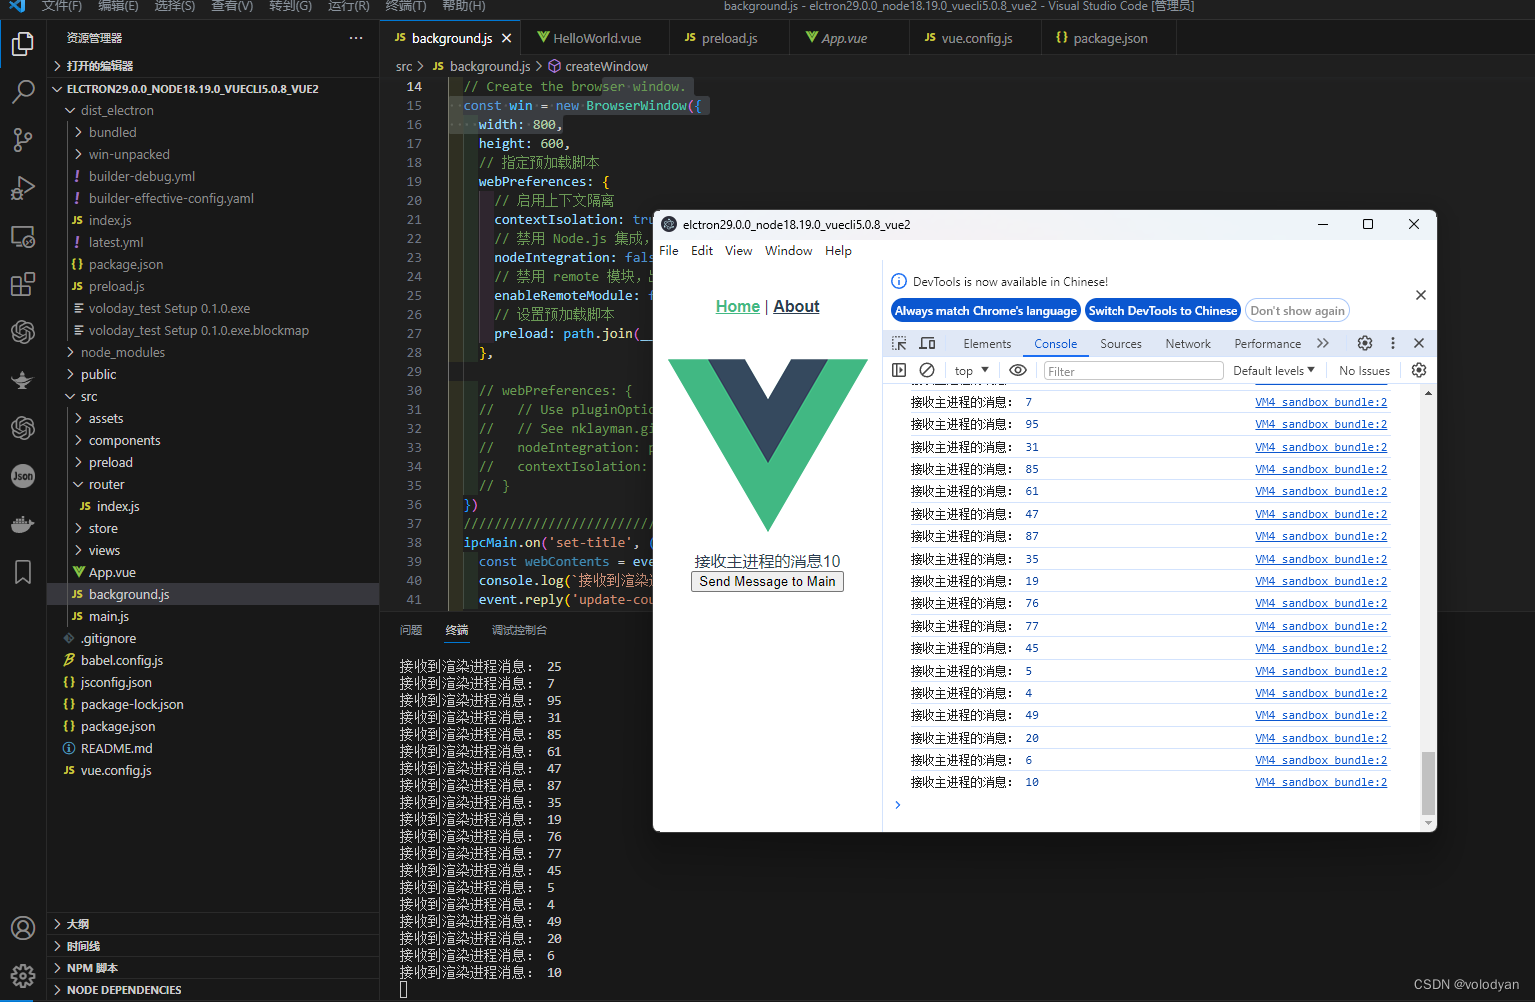
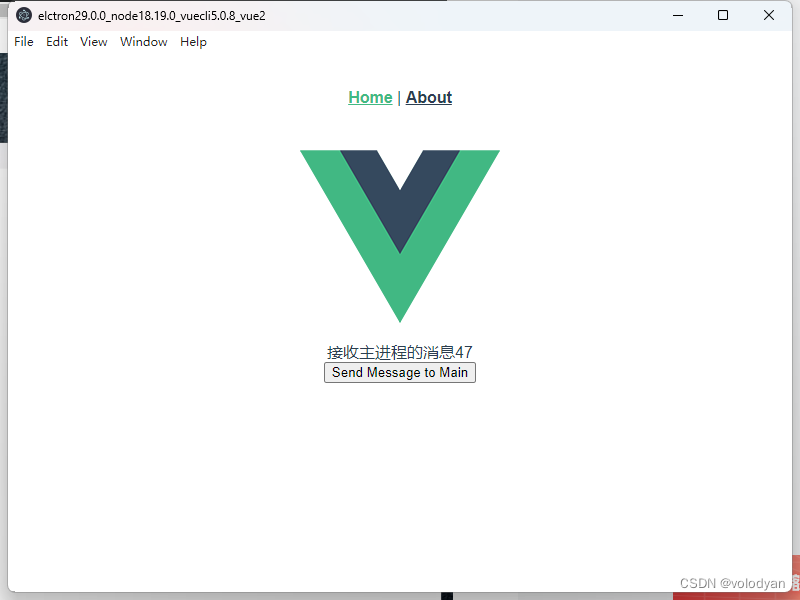
渲染进程中使用:

<template><div><div>接收主进程的消息{{ ShowData }}</div><button @click="sendToMain">Send Message to Main</button></div>
</template><script>
export default {data() {return {ShowData: 0,};},methods: {sendToMain() {const title = Math.round(Math.random() * 100);window.electronAPI.setTitle(title);},},mounted() {// 监听主进程的回复window.electronAPI.onUpdateCounter((value) => {console.log(`接收主进程的消息:`, value);this.ShowData = value;});},//   beforeDestroy() {//     // 在组件销毁前,移除事件监听器//  window.ipcRenderer.removeAllListeners("reply-from-main");//   },
};
</script>
注意:开发环境时主进程使用的是软件编译后dist_electron目录下的
preload.js预加载文件
到这里在开发环境就能使用预加载脚本实现主进程和渲染进程通信了。
4.在vue.config.js中进行electron打包配置
如果想在electron打包后的软件中仍然可以正常使用预加载脚本文件的话,必须在vue.config.js文件中进行相应的打包配置。

pluginOptions: {electronBuilder: {removeElectronJunk: false,preload: './src/preload/preload.js',builderOptions: {"appId": "voloday_test","productName": "voloday_test",//项目名,也是生成的安装文件名,即.exe"copyright": "Copyright © 2024",//版权信息"win": {//win相关配置// "icon": "./src/assets/icon.ico",//图标,当前图标在根目录下"target": [{"target": "nsis",//利用nsis制作安装程序"arch": ["x64",//64位]}]},"nsis": {"oneClick": false, // 是否一键安装"allowElevation": true, // 允许请求提升。 如果为false,则用户必须使用提升的权限重新启动安装程序。"allowToChangeInstallationDirectory": true, // 允许修改安装目录// "installerIcon": "./src/assets/icon.ico",// 安装图标// "uninstallerIcon": "./src/assets/icon.ico",//卸载图标// "installerHeaderIcon": "./src/assets/icon.ico", // 安装时头部图标"createDesktopShortcut": true, // 创建桌面图标"createStartMenuShortcut": true,// 创建开始菜单图标"shortcutName": "voloday_test", // 图标名称},}},},vue.config.js文件
const { defineConfig } = require('@vue/cli-service')
const path = require("path");
console.log(`path.join(__dirname,'preload.js')`, path.join(__dirname,'preload.js'));
module.exports = defineConfig({transpileDependencies: true,publicPath: './',pluginOptions: {electronBuilder: {removeElectronJunk: false,preload: './src/preload/preload.js',builderOptions: {"appId": "voloday_test","productName": "voloday_test",//项目名,也是生成的安装文件名,即.exe"copyright": "Copyright © 2024",//版权信息"win": {//win相关配置// "icon": "./src/assets/icon.ico",//图标,当前图标在根目录下"target": [{"target": "nsis",//利用nsis制作安装程序"arch": ["x64",//64位]}]},"nsis": {"oneClick": false, // 是否一键安装"allowElevation": true, // 允许请求提升。 如果为false,则用户必须使用提升的权限重新启动安装程序。"allowToChangeInstallationDirectory": true, // 允许修改安装目录// "installerIcon": "./src/assets/icon.ico",// 安装图标// "uninstallerIcon": "./src/assets/icon.ico",//卸载图标// "installerHeaderIcon": "./src/assets/icon.ico", // 安装时头部图标"createDesktopShortcut": true, // 创建桌面图标"createStartMenuShortcut": true,// 创建开始菜单图标"shortcutName": "voloday_test", // 图标名称},}},},})
源码:GitHub - 1t1824d/elctron29.0.0_node18.19.0_vuecli5.0.8_vue2
这篇关于Electron通过预加载脚本从渲染器访问Node.js的文章就介绍到这儿,希望我们推荐的文章对编程师们有所帮助!


