本文主要是介绍MacOS Catalina上的颤振安装,希望对大家解决编程问题提供一定的参考价值,需要的开发者们随着小编来一起学习吧!
System Requirements:Operating Systems: macOS (64-bit)Disk Space: 2.8 GB (does not include disk space for IDE/tools).Tools: bash, curl, git 2.x, mkdir, rm, unzip, which, zip
系统需求:作业系统:macOS(64位元)磁碟空间:2.8 GB(不包含IDE /工具的磁碟空间)工具:bash,curl,git 2.x,mkdir,rm,解压缩,其中,zip
download Flutter from https://flutter.dev/docs/get-started/install/macos
从https://flutter.dev/docs/get-started/install/macos下载Flutter


Unzip the folder
解压缩文件夹
for the following steps please turn on the path bar ( finder->view-> show path bar/ option+ cmd+p)
对于以下步骤,请打开路径栏(finder-> view-> show path bar / option + cmd + p )

go to Users/YourUsername and create a new folder called “Dev” for example
转到Users / YourUsername并创建一个名为“ Dev”的新文件夹

copy the unzipped Flutter folder to the new “Dev” folder
将解压缩的Flutter文件夹复制到新的“ Dev”文件夹

open Spotlight (cmd+ spacebar) and search “terminal”,click enter to open it
打开Spotlight( cmd +空格键 )并搜索“终端”,单击Enter将其打开

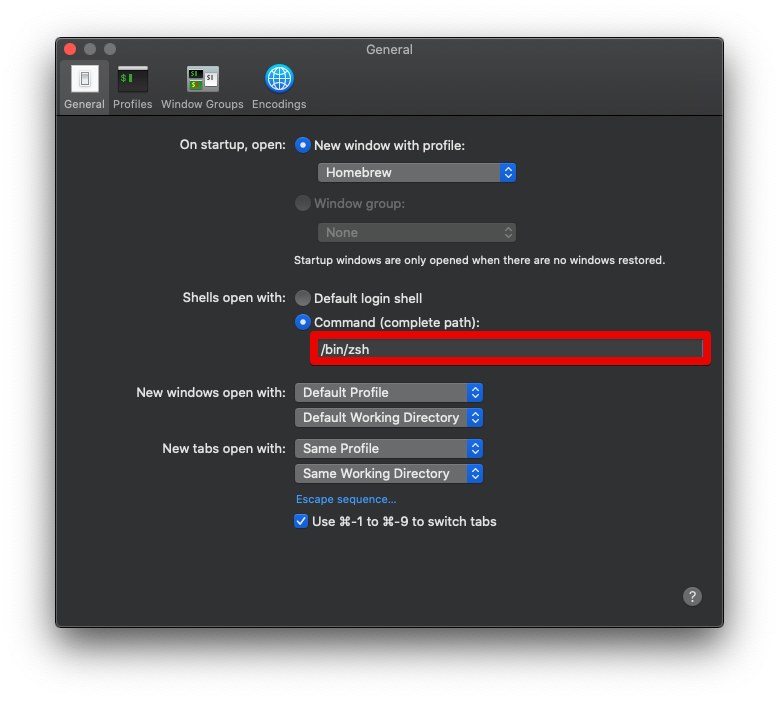
open the terminal and go to the preferences cmd+ ,change Shells open with to /bin/zshI use the Homebrew profile, to have a better contrast
打开终端并转到首选项cmd +,将Shells open with更改为/ bin / zsh我使用Homebrew配置文件,以获得更好的对比度
open the terminal, type: vim~/ .zshrc (enter)
打开终端,输入: vim〜/ .zshrc(输入)

open the flutter website, and copy the following line: export PATH=”$PATH[PATH_TO_FLUTTER_GIT_DIRECTORY]/flutter/bin”
打开flutter网站,然后复制以下行: export PATH =“ $ PATH [PATH_TO_FLUTTER_GIT_DIRECTORY] / flutter / bin”

Open the terminal window and type “i” to edit and insert a new linedelete everything in […..] -> export PATH=”$PATH: …/flutter/bin”
打开终端窗口,输入“ i”以编辑并插入新行,删除[…..]-> export PATH =“ $ PATH:…/ flutter / bin ”中的所有内容

we have extracted the flutter folder into the Users/Username/Dev folder beforenow open the terminal and point to the flutter/bin folder -> $Home/Dev/flutter/bin
我们先将flutter文件夹解压缩到Users / Username / Dev文件夹中,然后再打开终端并指向flutter / bin文件夹-> $ Home / Dev / flutter / bin

hit the Esc key, and type: wq!
按Esc键 ,然后键入:wq!

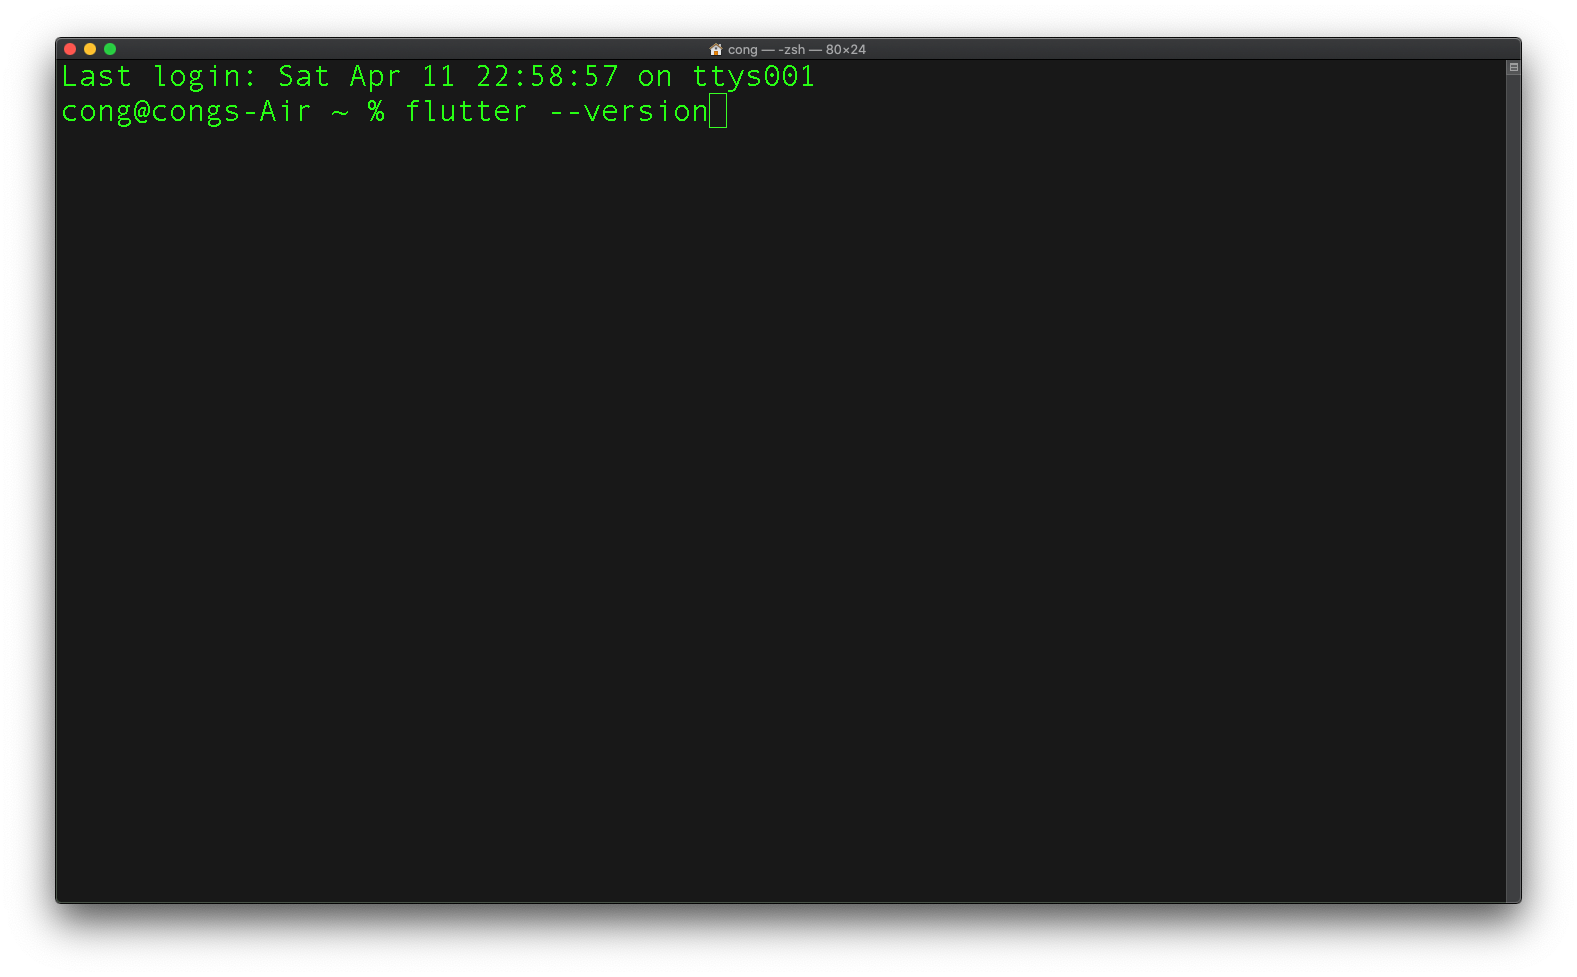
close the current terminal window, and create a new one (cmd+n)run flutter — version, to check if flutter is installed
关闭当前的终端窗口,并创建一个新的( cmd + n )运行flutter — version ,以检查是否已安装flutter

now download Android Studio from https://developer.android.com/studio and install the dmg
现在从https://developer.android.com/studio下载Android Studio并安装dmg


now run Android Studio ( standard setup)
现在运行Android Studio(标准设置)

after installation, click on the configure button and open the Preferences
安装后,单击配置按钮并打开首选项

Go to Plugins and install the Flutter Plugin
转到插件并安装Flutter插件

I changed the font size (Font) so that the code will be more readable and also the theme to Darcula
我更改了字体大小( Font ),以使代码更具可读性,并且使Darcula的主题更清晰

IMPORTANT STEP:Go to System Settings-> Android SDK -> SDK Tools and UNCHECK “HIDE OBSOLETE PACKAGES”Install the Android SDK Tools (Obsolete)
重要步骤:转到系统设置-> Android SDK-> SDK工具,然后取消选中“隐藏过时的软件包”安装Android SDK工具(已淘汰)

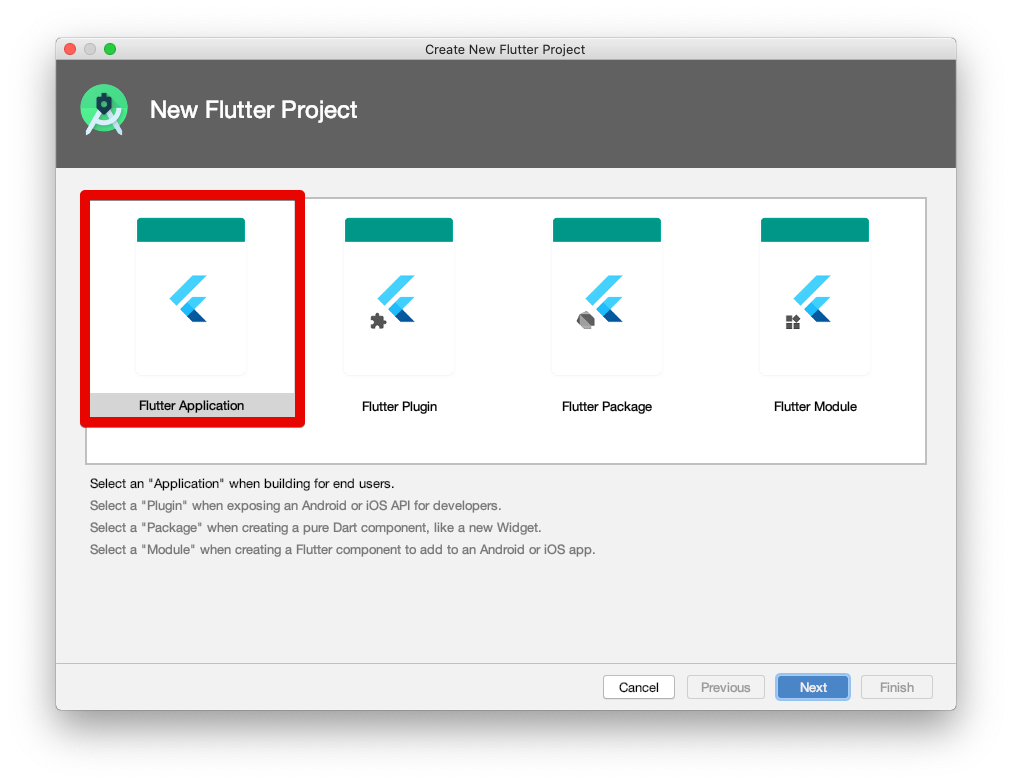
restart Android Studio and start new Flutter project
重新启动Android Studio并启动新的Flutter项目

choose Flutter Application
选择Flutter应用程序
check if the Flutter SDK path is correct
检查Flutter SDK路径是否正确


click on finish and run the AVD Manager -> Tools/AVD Manager
单击完成并运行AVD Manager->工具/ AVD Manager

Create a new device
创建一个新设备


Select an Android Version and download it
选择一个Android版本并下载


Run your virtual device with the triangle button under Actions
使用“操作”下的三角形按钮运行虚拟设备

good job! we are done with the android part, go to Android Studio and run the program (^R)
做得好! 我们已经完成了android部分,转到Android Studio并运行程序(^ R)


Install Xcode and run it afterwards at least one time ( Appstore)
安装Xcode并随后至少运行一次(Appstore)

create a new terminal and insert following lines:sudo xcode-select — switch/Applications/Xcode.app/Contents/Developer sudo xcodebuild -runFirstLaunch
创建一个新终端并插入以下行: sudo xcode-select —开关/Applications/Xcode.app/Contents/Developer sudo xcodebuild -runFirstLaunch

you might need to install cocoapods: $ sudo gem install cocoapods
您可能需要安装cocoapods: $ sudo gem install cocoapods

open the ios simulator with the terminal, type :open -a Simulator
使用终端打开ios模拟器,输入:open -a Simulator
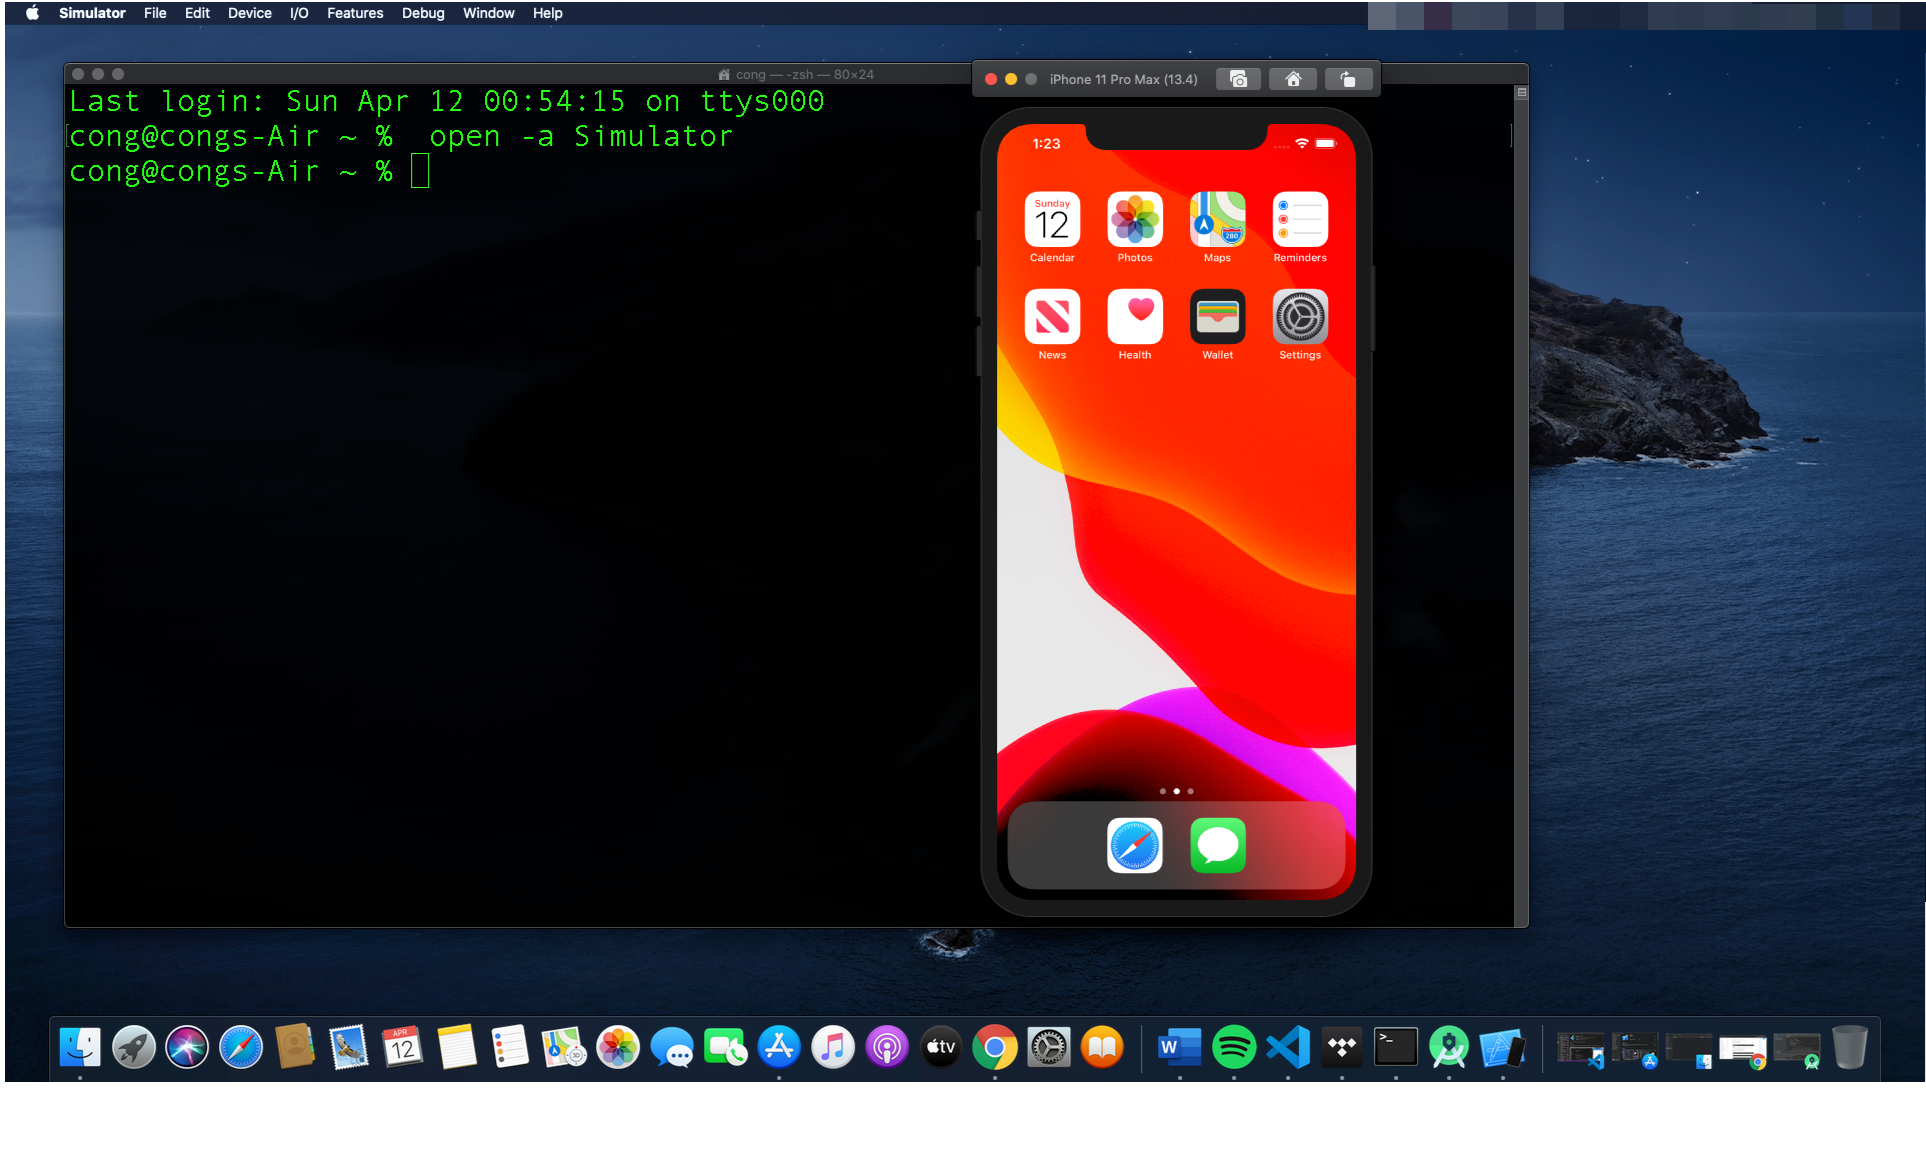
run the simulator and start the application in Android Studio
运行模拟器并在Android Studio中启动应用程序

if you want you can install Flutter in VSCode
如果您愿意,可以在VSCode中安装Flutter

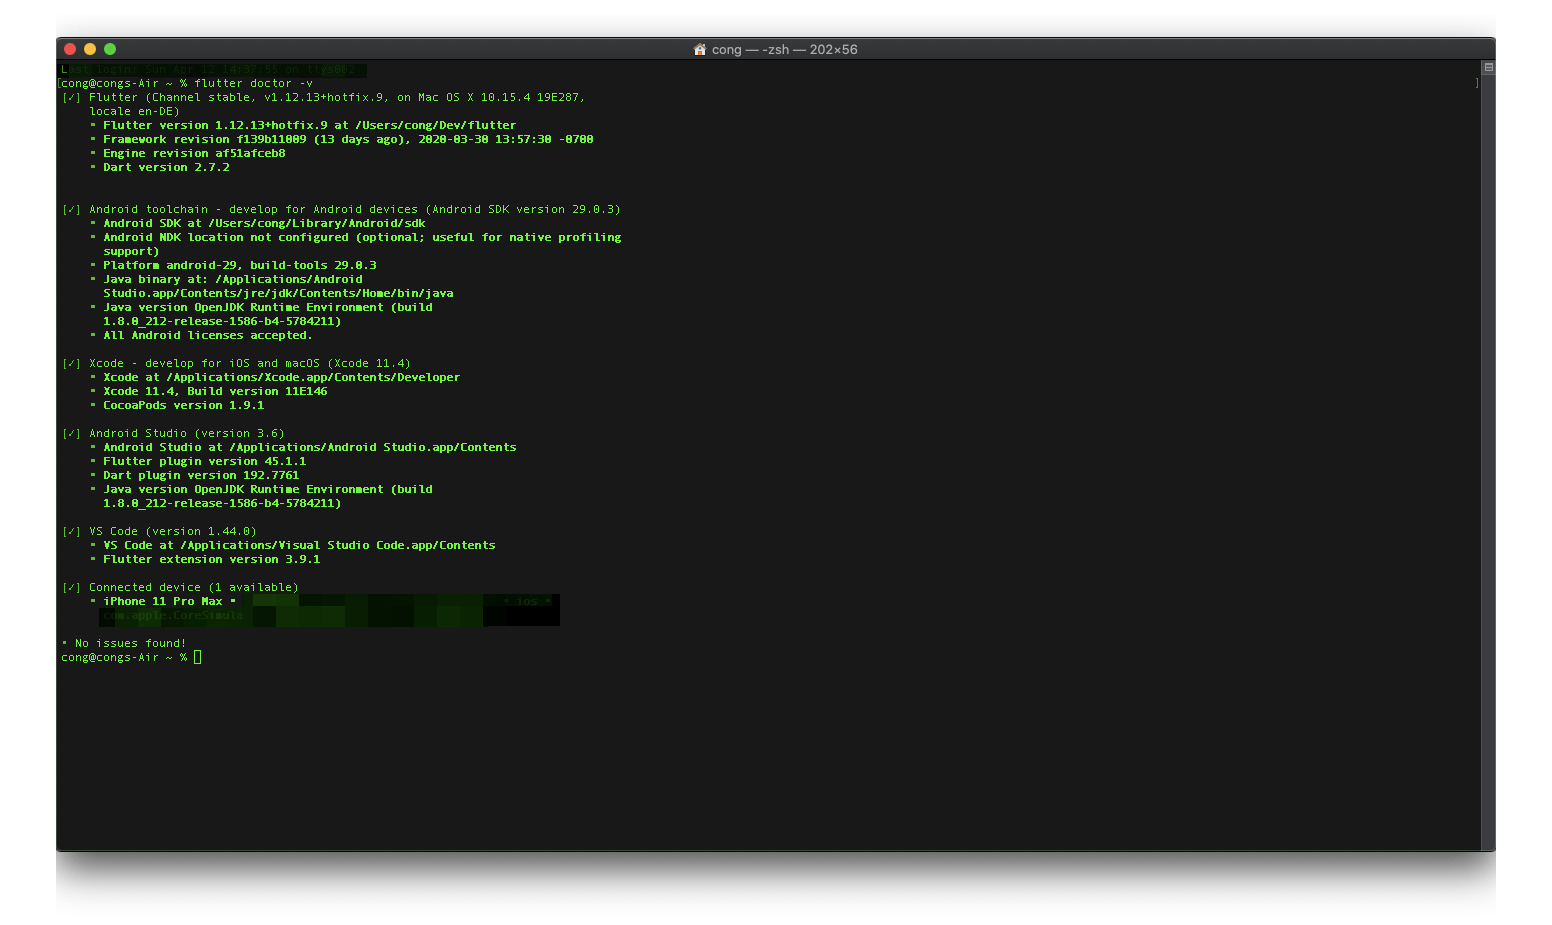
now open the terminal and run flutter doctor -v to if everything works fine
现在打开终端并运行flutter doctor -v到一切正常
故障排除 (Trouble shooting)
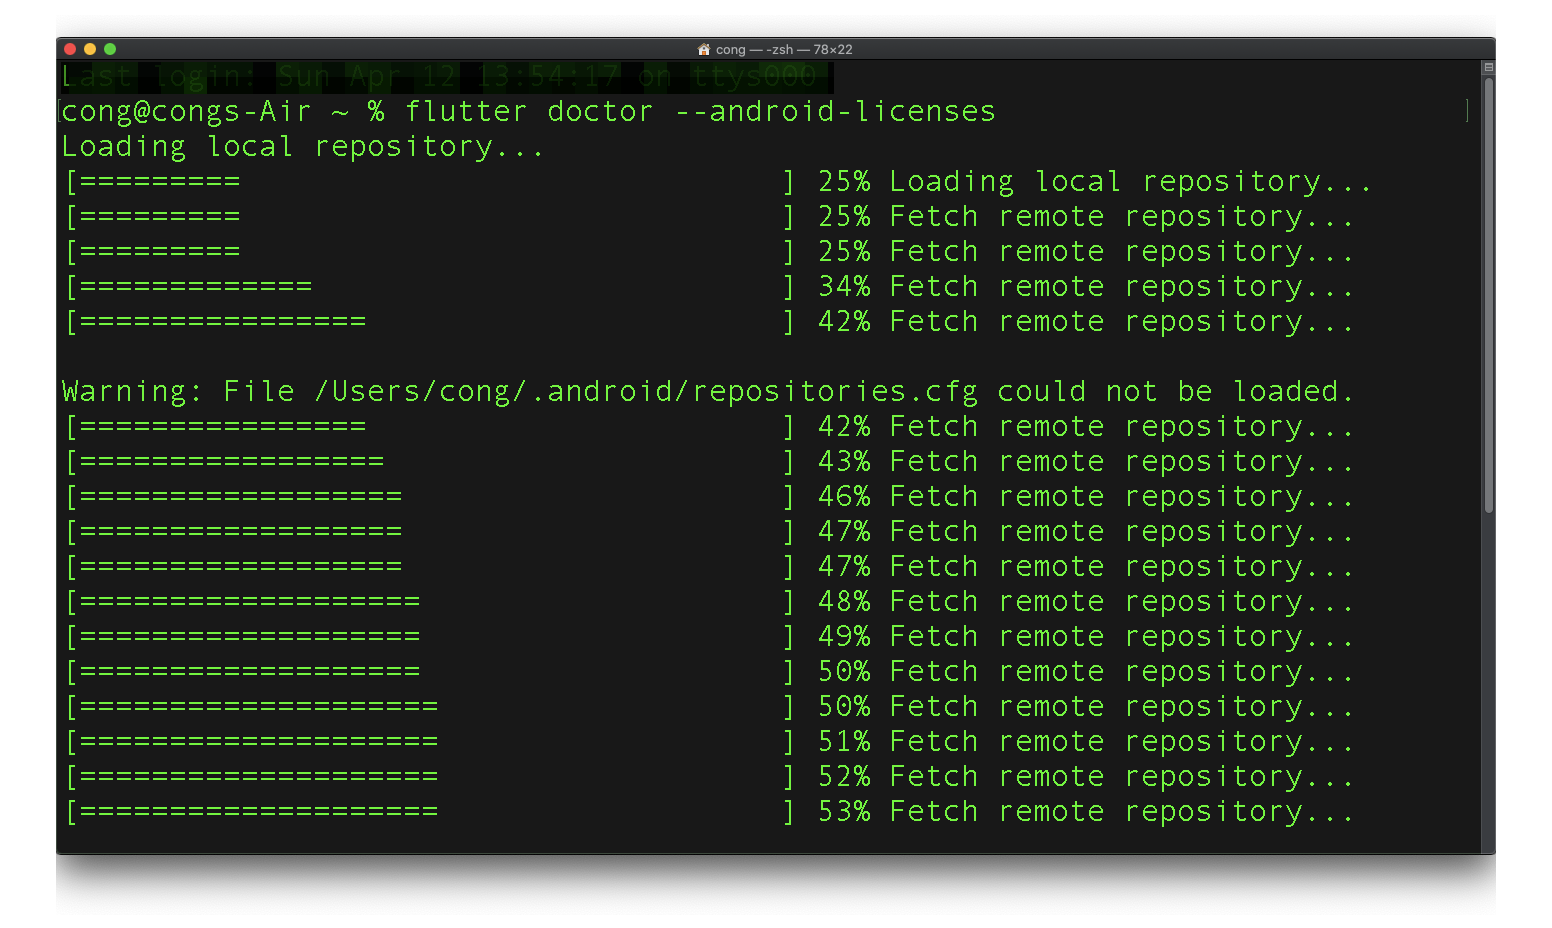
you might need to accept the android licenses :
您可能需要接受android许可证:
you might need to accept the android licenses : flutter doctor — android-licenses
您可能需要接受android许可证: flutter doctor — android-licenses
谢谢阅读, (Thanks for reading,)
https://github.com/congnguyendinh0
https://github.com/congnguyendinh0
https://www.linkedin.com/in/congnguyendinh0/
https://www.linkedin.com/in/congnguyendinh0/
翻译自: https://medium.com/swlh/flutter-installation-on-macos-catalina-dfcbbbec09c9
相关文章:
这篇关于MacOS Catalina上的颤振安装的文章就介绍到这儿,希望我们推荐的文章对编程师们有所帮助!


