本文主要是介绍在原有的vue(react)项目中引入electron打包成桌面应用(全网最新!),希望对大家解决编程问题提供一定的参考价值,需要的开发者们随着小编来一起学习吧!
基于原有的项目中使用electron打包成桌面应用
首先了解electron是什么?
软件简介
Electron 是一个使用 JavaScript、HTML 和 CSS 构建跨平台的桌面应用程序。它基于 Node.js 和 Chromium,被 Atom 编辑器和许多其他应用程序使用。
Electron 兼容 Mac、Windows 和 Linux,可以构建出三个平台的应用程序。

进入主题:
- vue添加electron包(使用npm命名全局安装)
npm install electron -g
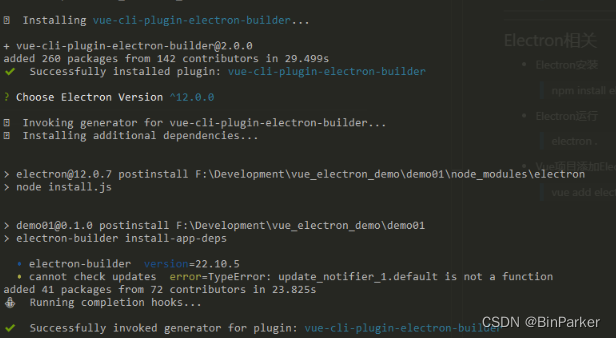
- Vue项目添加Electron-builder打包工具
vue add electron-builder
注意: 如果出现electron安装失败,或者后面使用electron-builder打包时,出现从github down包失败,请设置electron镜像。
设置镜像方法:
npm config edit
解释:使用该命令会弹出npm的配置文档,将以下类容复制到文件末尾。
electron_mirror=https://npm.taobao.org/mirrors/electron/
electron-builder-binaries_mirror=https://npm.taobao.org/mirrors/electron-builder-binaries/
- 在项目根目录加入background.js(自己命名即可),然后写入以下代码:
"use strict";import { app, protocol, BrowserWindow, Menu } from "electron";
import { createProtocol } from "vue-cli-plugin-electron-builder/lib";
import installExtension, { VUEJS_DEVTOOLS } from "electron-devtools-installer";
const isDevelopment = process.env.NODE_ENV !== "production";// Scheme must be registered before the app is ready
protocol.registerSchemesAsPrivileged([{ scheme: "app", privileges: { secure: true, standard: true } },
]);async function createWindow() {// Create the browser window.const win = new BrowserWindow({width: 1260,height: 800,// frame: false, // 如果需要去除窗口边框webPreferences: {// Use pluginOptions.nodeIntegration, leave this alone// See nklayman.github.io/vue-cli-plugin-electron-builder/guide/security.html#node-integration for more infonodeIntegration: process.env.ELECTRON_NODE_INTEGRATION, // 在向导页面中使用 Node.js 模块contextIsolation: !process.env.ELECTRON_NODE_INTEGRATION,},});if (process.env.WEBPACK_DEV_SERVER_URL) {// Load the url of the dev server if in development modeawait win.loadURL(process.env.WEBPACK_DEV_SERVER_URL);if (!process.env.IS_TEST) win.webContents.openDevTools();} else {createProtocol("app");// Load the index.html when not in developmentwin.loadURL("app://./index.html");}
}// 隐藏客户端默认菜单
Menu.setApplicationMenu(null);// Quit when all windows are closed.
app.on("window-all-closed", () => {// On macOS it is common for applications and their menu bar// to stay active until the user quits explicitly with Cmd + Qif (process.platform !== "darwin") {app.quit();}
});app.on("activate", () => {// On macOS it's common to re-create a window in the app when the// dock icon is clicked and there are no other windows open.if (BrowserWindow.getAllWindows().length === 0) createWindow();
});// This method will be called when Electron has finished
// initialization and is ready to create browser windows.
// Some APIs can only be used after this event occurs.
app.on("ready", async () => {if (isDevelopment && !process.env.IS_TEST) {// Install Vue Devtoolstry {await installExtension(VUEJS_DEVTOOLS);} catch (e) {console.error("Vue Devtools failed to install:", e.toString());}}createWindow();
});// Exit cleanly on request from parent process in development mode.
if (isDevelopment) {if (process.platform === "win32") {process.on("message", (data) => {if (data === "graceful-exit") {app.quit();}});} else {process.on("SIGTERM", () => {app.quit();});}
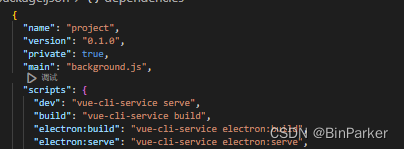
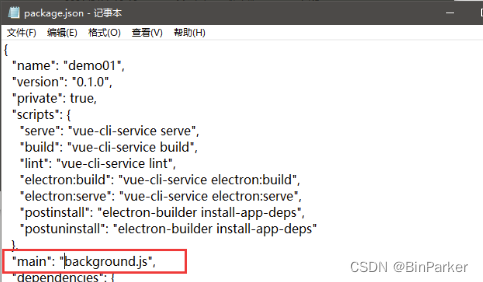
}- 在package.json文件里面加入
"main": "background.js",
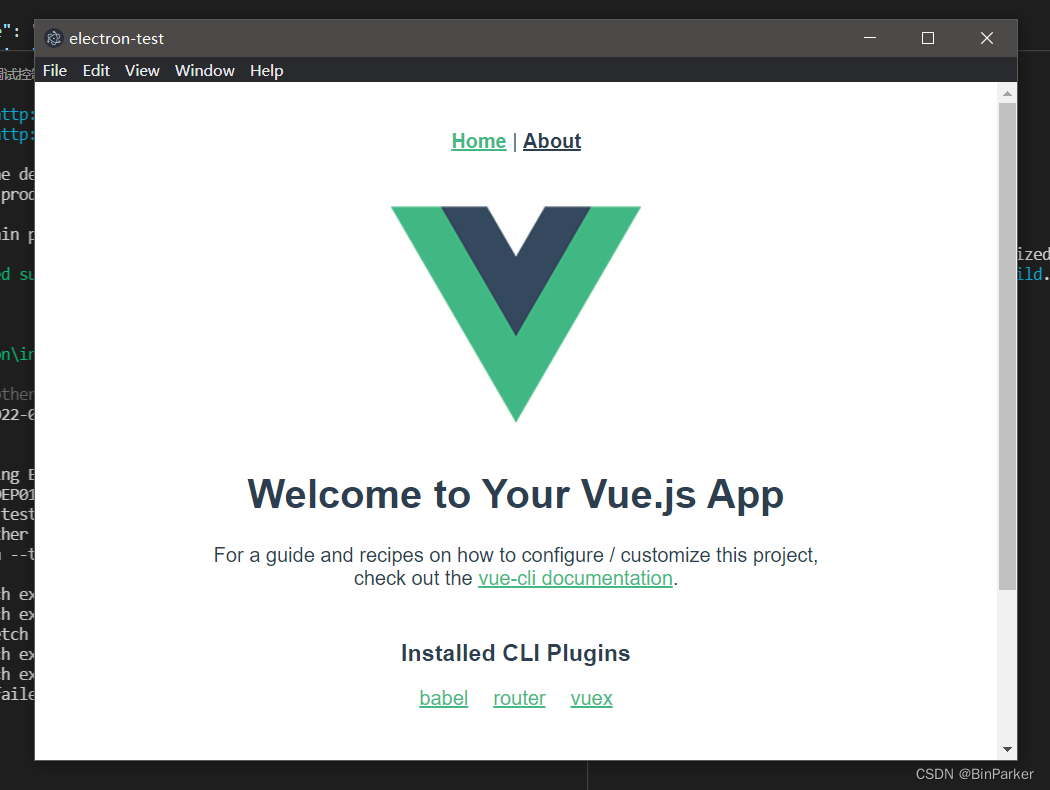
运行测试:
npm run serve--网页
npm run electron:serve--客户端
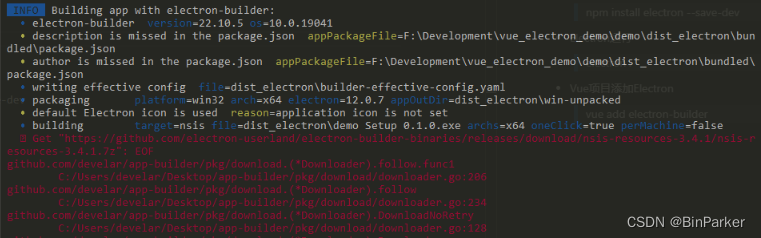
项目打包:
npm run electron:build
注意:如果打包报错!!!
Node.js v19.x.x 版本时可能会遇到Error: error:0308010C:digital envelope routines::unsupported
原因:使用的 OpenSSL 版本不受支持导致的
解决方法:
检查自己node版本 尽量使用v16版本的!!
其他可能出现问题解决办法:
打开 node_module/app-builder-lib/out/targets/nsis/NsisTarget.js文件,在 executeMakensis 方法中加入我们所需的参数
{
args.push("-INPUTCHARSET", "UTF8");
}
附加1 替换客户端图标及配置安装程序
进入项目路径,查看是否存在vue.config.js同名文件(好像是vue3没有,vue2会有),没有则创建一个空文件。加入以下代码:
module.exports = {pluginOptions: {electronBuilder: {customFileProtocol: "/",  //解决element图标问题(起因:因为打包,element-ui的样式没有当做静态资源引用)builderOptions: {"appId": "com.tomatoLRX.app","productName": "SPTSystem",//项目名,也是生成的安装文件名,即aDemo.exe"copyright": "Copyright © 2023",//版权信息"directories": {"output": "./dist"//输出文件路径,之前编译的默认是dist_electron},win: {icon: "vueApp.ico", //这里注意配好图标路径target: [{target: "nsis", //利用nsis制作安装程序,打包文件的后缀为exearch: ["x64", //64位"ia32", //32位],},], //添加自定义安装向导},nsis: {oneClick: false, //创建一键式安装程序还是辅助安装程序language: "2052", //安装语言perMachine: true, //应用所有用户allowToChangeInstallationDirectory: true, //用户可以选择路径},// options placed here will be merged with default configuration and passed to electron-builder}}}
}
更多配置可参考electron-builder的配置:
"build": {"productName":"xxxx", //项目名 这也是生成的exe文件的前缀名"appId": "com.xxx.xxxxx", //包名 "copyright":"xxxx", //版权信息"directories": { //输出文件夹"output": "build"}, "nsis": { //nsis相关配置,打包方式为nsis时生效"oneClick": false, // 是否一键安装"allowElevation": true, // 允许请求提升,如果为false,则用户必须使用提升的权限重新启动安装程序。"allowToChangeInstallationDirectory": true, // 允许修改安装目录"installerIcon": "./build/icons/aaa.ico", // 安装图标"uninstallerIcon": "./build/icons/bbb.ico", //卸载图标"installerHeaderIcon": "./build/icons/aaa.ico", // 安装时头部图标"createDesktopShortcut": true, // 创建桌面图标"createStartMenuShortcut": true, // 创建开始菜单图标"shortcutName": "xxxx", // 图标名称"include": "build/script/installer.nsh", // 包含的自定义nsis脚本},"publish": [{"provider": "generic", // 服务器提供商,也可以是GitHub等等"url": "http://xxxxx/" // 服务器地址}],"win": {"icon": "build/icons/aims.ico","target": [{"target": "nsis", //使用nsis打成安装包,"portable"打包成免安装版"arch": ["ia32", //32位"x64" //64位]}]},"mac": {"icon": "build/icons/icon.icns"},"linux": {"icon": "build/icons"}}附加2 隐藏客户端默认菜单
程序的main是background.js,找到它打开编辑
里面是electron代码,直接修改,添加Menu引用,然后设置程序菜单为null,运行发现菜单已经没有了,重新打包即可。
import {  Menu } from "electron";
// 隐藏客户端默认菜单
Menu.setApplicationMenu(null);
这篇关于在原有的vue(react)项目中引入electron打包成桌面应用(全网最新!)的文章就介绍到这儿,希望我们推荐的文章对编程师们有所帮助!


