本文主要是介绍Kubernetes(k8s)-v1.22.3版本证书有效期修改,希望对大家解决编程问题提供一定的参考价值,需要的开发者们随着小编来一起学习吧!
用了一段时间k8s发现这个SSL证书的一年有效期时间的坑还是迈不过去,问题 来了,我们就要去解决
一、环境
CentOS Linux release 7.7.1908 (Core) 5.4.159-1.el7.elrepo.x86_64
kubeadm-1.22.3-0.x86_64
kubelet-1.22.3-0.x86_64
kubectl-1.22.3-0.x86_64
kubernetes-cni-0.8.7-0.x86_64
| 主机名 | IP | VIP |
| k8s-master01 | 192.168.30.106 | 192.168.30.115 |
| k8s-master02 | 192.168.30.107 | |
| k8s-master03 | 192.168.30.108 | |
| k8s-node01 | 192.168.30.109 | |
| k8s-node02 | 192.168.30.110 |
二、查看证书有的效期
#下面我们有2种方法可以查看证书有效期
#第一种方法
cd /etc/kubernetes/pki
for i in $(ls *.crt); do echo "===== $i ====="; openssl x509 -in $i -text -noout | grep -A 3 'Validity' ; done
#结果
===== apiserver-etcd-client.crt =====ValidityNot Before: Nov 18 07:47:20 2021 GMTNot After : Nov 18 07:47:21 2022 GMTSubject: O=system:masters, CN=kube-apiserver-etcd-client
===== apiserver-kubelet-client.crt =====ValidityNot Before: Nov 18 07:47:18 2021 GMTNot After : Nov 18 07:47:19 2022 GMTSubject: O=system:masters, CN=kube-apiserver-kubelet-client
===== apiserver.crt =====ValidityNot Before: Nov 18 07:47:18 2021 GMTNot After : Nov 18 07:47:19 2022 GMTSubject: CN=kube-apiserver
===== ca.crt =====ValidityNot Before: Nov 18 07:47:18 2021 GMTNot After : Nov 16 07:47:18 2031 GMTSubject: CN=kubernetes
===== front-proxy-ca.crt =====ValidityNot Before: Nov 18 07:47:19 2021 GMTNot After : Nov 16 07:47:19 2031 GMTSubject: CN=front-proxy-ca
===== front-proxy-client.crt =====ValidityNot Before: Nov 18 07:47:19 2021 GMTNot After : Nov 18 07:47:20 2022 GMTSubject: CN=front-proxy-client
#第2种方法
kubeadm certs check-expiration#结果
但是我这个结果的证书时间已经是被更新过了,如果没有更新,看到是1年的有效期,跟上面第一种方法得出的结果是一样的
[check-expiration] Reading configuration from the cluster...
[check-expiration] FYI: You can look at this config file with 'kubectl -n kube-system get cm kubeadm-config -o yaml'CERTIFICATE                EXPIRES                  RESIDUAL TIME   CERTIFICATE AUTHORITY   EXTERNALLY MANAGED
admin.conf                 Dec 20, 2121 08:45 UTC   99y                                     no
apiserver                  Dec 20, 2121 08:45 UTC   99y             ca                      no
apiserver-etcd-client      Dec 20, 2121 08:45 UTC   99y             etcd-ca                 no
apiserver-kubelet-client   Dec 20, 2121 08:45 UTC   99y             ca                      no
controller-manager.conf    Dec 20, 2121 08:45 UTC   99y                                     no
etcd-healthcheck-client    Dec 20, 2121 08:45 UTC   99y             etcd-ca                 no
etcd-peer                  Dec 20, 2121 08:45 UTC   99y             etcd-ca                 no
etcd-server                Dec 20, 2121 08:45 UTC   99y             etcd-ca                 no
front-proxy-client         Dec 20, 2121 08:45 UTC   99y             front-proxy-ca          no
scheduler.conf             Dec 20, 2121 08:45 UTC   99y                                     noCERTIFICATE AUTHORITY   EXPIRES                  RESIDUAL TIME   EXTERNALLY MANAGED
ca                      Nov 16, 2031 07:47 UTC   9y              no
etcd-ca                 Nov 16, 2031 07:47 UTC   9y              no
front-proxy-ca          Nov 16, 2031 07:47 UTC   9y              no
三、证书有效期修改方法
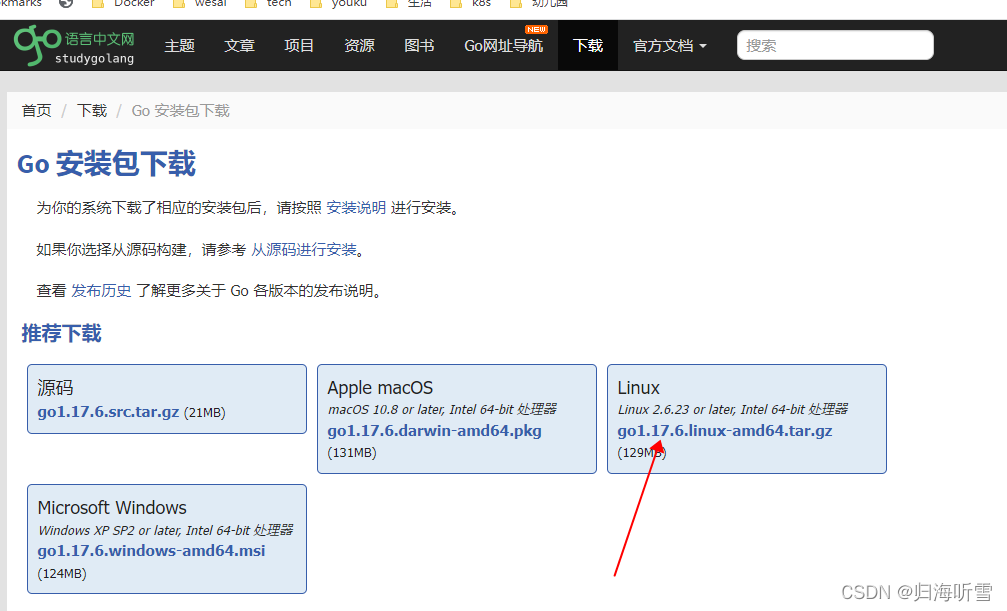
1、部署go环境
#打开Go下载 - Go语言中文网 - Golang中文社区(https://studygolang.com/dl)网站,下载一个最新版的
#在linux执行以下命令,不可以下载
mkdir /opt/data
cd /opt/data
wget  https://studygolang.com/dl/golang/go1.17.6.linux-amd64.tar.gz
tar -xvf go1.17.6.linux-amd64.tar.gz -C /usr/local/
#配置环境变量
echo "export PATH=$PATH:/usr/local/go/bin" >>/etc/profile
source /etc/profile
#验证go环境
go version
go version go1.17.6 linux/amd64
2、Kubernetes源码下载
#首先查看一下k8s的版本,源码要下载跟你当前系统对应的版本,所以我这边下载v1.22.3,就可以
#kubectl version
Client Version: version.Info{Major:"1", Minor:"22", GitVersion:"v1.22.3", GitCommit:"c92036820499fedefec0f847e2054d824aea6cd1", GitTreeState:"clean", BuildDate:"2021-10-27T18:41:28Z", GoVersion:"go1.16.9", Compiler:"gc", Platform:"linux/amd64"}
Server Version: version.Info{Major:"1", Minor:"22", GitVersion:"v1.22.0", GitCommit:"c2b5237ccd9c0f1d600d3072634ca66cefdf272f", GitTreeState:"clean", BuildDate:"2021-08-04T17:57:25Z", GoVersion:"go1.16.6", Compiler:"gc", Platform:"linux/amd64"}
#前提你是要能够上外网,不然github登不上,就无法下载源码了

#下源代码后,进行解压
cd /opt/data
unzip kubernetes-1.22.3.zip
cd kubernetes-1.22.3
3、修改源代码文件
#证书的有效期是需要修改两个文件constants.go和cert.go
#下面我们先改constants.go
vim ./cmd/kubeadm/app/constants/constants.go#vim 下查找CertificateValidity 字段
const (// KubernetesDir is the directory Kubernetes owns for storing various configuration filesKubernetesDir = "/etc/kubernetes"// ManifestsSubDirName defines directory name to store manifestsManifestsSubDirName = "manifests"// TempDirForKubeadm defines temporary directory for kubeadm// should be joined with KubernetesDir.TempDirForKubeadm = "tmp"// CertificateValidity defines the validity for all the signed certificates generated by kubeadm//CertificateValidity = time.Hour * 24 * 365 //默认是1年CertificateValidity = time.Hour * 24 * 365 * 100 //改为100年// CACertAndKeyBaseName defines certificate authority base nameCACertAndKeyBaseName = "ca"// CACertName defines certificate nameCACertName = "ca.crt"// CAKeyName defines certificate nameCAKeyName = "ca.key"// APIServerCertAndKeyBaseName defines API's server certificate and key base nameAPIServerCertAndKeyBaseName = "apiserver"// APIServerCertName defines API's server certificate nameAPIServerCertName = "apiserver.crt"// APIServerKeyName defines API's server key nameAPIServerKeyName = "apiserver.key"// APIServerCertCommonName defines API's server certificate common name (CN)APIServerCertCommonName = "kube-apiserver"
#修改cert.go文件
cd /opt/data/kubernetes-1.22.3]
vim staging/src/k8s.io/client-go/util/cert/cert.go
// NewSelfSignedCACert creates a CA certificate
func NewSelfSignedCACert(cfg Config, key crypto.Signer) (*x509.Certificate, error) {now := time.Now()tmpl := x509.Certificate{SerialNumber: new(big.Int).SetInt64(0),Subject: pkix.Name{CommonName:   cfg.CommonName,Organization: cfg.Organization,},DNSNames:              []string{cfg.CommonName},NotBefore:             now.UTC(),//NotAfter:              now.Add(duration365d * 10).UTC(), //默认是10年NotAfter:              now.Add(duration365d * 100).UTC(),  //也改为100年KeyUsage:              x509.KeyUsageKeyEncipherment | x509.KeyUsageDigitalSignature | x509.KeyUsageCertSign,BasicConstraintsValid: true,IsCA:                  true,}certDERBytes, err := x509.CreateCertificate(cryptorand.Reader, &tmpl, &tmpl, key.Public(), key)if err != nil {return nil, err}return x509.ParseCertificate(certDERBytes)
}
#编译源代码文件
cd /opt/data/kubernetes-1.22.3
make WHAT=cmd/kubeadm GOFLAGS=-v
#编译完后查看结果,就可以看到生成的kubeadm二进文件
# ls -l /opt/data/kubernetes-1.22.3/_output/bin/
total 76268
-rwxr-xr-x 1 root root  5885952 Jan 13 16:03 conversion-gen
-rwxr-xr-x 1 root root  5607424 Jan 13 16:02 deepcopy-gen
-rwxr-xr-x 1 root root  5627904 Jan 13 16:02 defaulter-gen
-rwxr-xr-x 1 root root  3376703 Jan 13 16:02 go2make
-rwxr-xr-x 1 root root 43917312 Jan 13 16:38 kubeadm
-rwxr-xr-x 1 root root  8097792 Jan 13 16:04 openapi-gen
-rwxr-xr-x 1 root root 5582848 Jan 13 16:02 prerelease-lifecycle-gen#下面准备把新的kubeadm替换旧的,所以需要把旧的备份一下,记住3台master都需要备份一下
cp /usr/bin/kubeadm /usr/bin/kubeadm.20220113#替换
cp /opt/data/kubernetes-1.22.3/_output/bin/kubeadm /usr/bin/#备份旧的证书文件,记住3台master都需要备份一下
cd /etc/kubernetes
cp -R pki pki.20220113
4、证书更新
#执行
kubeadm certs renew all#结果 ,结果告诉你,需要重启那些服务,证书才生效
[renew] Reading configuration from the cluster...
[renew] FYI: You can look at this config file with 'kubectl -n kube-system get cm kubeadm-config -o yaml'certificate embedded in the kubeconfig file for the admin to use and for kubeadm itself renewed
certificate for serving the Kubernetes API renewed
certificate the apiserver uses to access etcd renewed
certificate for the API server to connect to kubelet renewed
certificate embedded in the kubeconfig file for the controller manager to use renewed
certificate for liveness probes to healthcheck etcd renewed
certificate for etcd nodes to communicate with each other renewed
certificate for serving etcd renewed
certificate for the front proxy client renewed
certificate embedded in the kubeconfig file for the scheduler manager to use renewedDone renewing certificates. You must restart the kube-apiserver, kube-controller-manager, kube-scheduler and etcd, so that they can use the new certificates.
#我这里采用是直接重启这台master服务器
#重启后查看新的证书,看结果除了ca以外的证书都变100年了,因为我这里没有改cert.go文件,因为我看到是10年,就不动了,大家如果想改也可以一起改为100年
kubeadm certs check-expiration# kubeadm certs check-expiration
[check-expiration] Reading configuration from the cluster...
[check-expiration] FYI: You can look at this config file with 'kubectl -n kube-system get cm kubeadm-config -o yaml'CERTIFICATE EXPIRES RESIDUAL TIME CERTIFICATE AUTHORITY EXTERNALLY MANAGED
admin.conf Dec 20, 2121 08:45 UTC 99y no
apiserver Dec 20, 2121 08:45 UTC 99y ca no
apiserver-etcd-client Dec 20, 2121 08:45 UTC 99y etcd-ca no
apiserver-kubelet-client Dec 20, 2121 08:45 UTC 99y ca no
controller-manager.conf Dec 20, 2121 08:45 UTC 99y no
etcd-healthcheck-client Dec 20, 2121 08:45 UTC 99y etcd-ca no
etcd-peer Dec 20, 2121 08:45 UTC 99y etcd-ca no
etcd-server Dec 20, 2121 08:45 UTC 99y etcd-ca no
front-proxy-client Dec 20, 2121 08:45 UTC 99y front-proxy-ca no
scheduler.conf Dec 20, 2121 08:45 UTC 99y noCERTIFICATE AUTHORITY EXPIRES RESIDUAL TIME EXTERNALLY MANAGED
ca Nov 16, 2031 07:47 UTC 9y no
etcd-ca Nov 16, 2031 07:47 UTC 9y no
front-proxy-ca Nov 16, 2031 07:47 UTC 9y no
#同理另外2台的master,只需要把kubeadm文件,从第一台更新过的scp过去,然后按上面步骤,重新生成新的证书文件就可以了。记住更新过需要重启一下服务或者服务器。
这篇关于Kubernetes(k8s)-v1.22.3版本证书有效期修改的文章就介绍到这儿,希望我们推荐的文章对编程师们有所帮助!


