本文主要是介绍[深度学习]Part1 Python高级Ch25 cnocr——【DeepBlue学习笔记】,希望对大家解决编程问题提供一定的参考价值,需要的开发者们随着小编来一起学习吧!
本文仅供学习使用(ocr入门包,具体的文字识别需了解其他内容)
Python高级——Ch25 cnocr
- 25. cnocr
- 25.1 几个“简单”的例子
- 25.1.1 信用卡识别
- 25.1.2 文字截图识别
- 25.2 使用逻辑
25. cnocr
安装:pip install cnocr
调用:from cnocr import CnOcr
利用cnocr进行识别的时候:
- 需要先提取目标区域,比如说车牌识别,那就先提取车牌所在的区域
- 目标区域的灰度图或者bgr图传入接口函数中进行识别
- 如果目标区域的识别不够精准,则可以再做细粒度的分割,识别同步骤2,注意顺序问题
25.1 几个“简单”的例子
25.1.1 信用卡识别
#encoding:utf8
import cv2
import numpy as np
import myutils
from cnocr import CnOcr#from imutils import contours
def cv_show(str,thing):cv2.imshow(str, thing)cv2.waitKey(0)cv2.destroyAllWindows()
# 指定信用卡类型
FIRST_NUMBER = {"3": "American Express","4": "Visa","5": "MasterCard","6": "Discover Card"
}
img=cv2.imread("F:/datas2/number.png")
cv2.imshow('img',img)
# 灰度图
ref = cv2.cvtColor(img, cv2.COLOR_BGR2GRAY)
#二值化
ref=cv2.threshold(ref,10,255,cv2.THRESH_BINARY_INV)[1]
refCnts,hierarchy=cv2.findContours(ref.copy(), cv2.RETR_EXTERNAL,cv2.CHAIN_APPROX_SIMPLE)
cv2.drawContours(img,refCnts,-1,(0,0,255),3)
print (np.array(refCnts).shape)refCnts = myutils.sort_contours(refCnts, method="left-to-right")[0]#排序,从左到右,从上到下
digits = {}
for (i, c) in enumerate(refCnts):# 计算外接矩形并且resize成合适大小(x, y, w, h) = cv2.boundingRect(c)roi = ref[y:y + h, x:x + w]roi = cv2.resize(roi, (57, 88))# 每一个数字对应每一个模板digits[i] = roi
# 初始化卷积核
rectKernel = cv2.getStructuringElement(cv2.MORPH_RECT, (9, 3))
sqKernel = cv2.getStructuringElement(cv2.MORPH_RECT, (5, 5))#读取输入图像,预处理
image = cv2.imread("F:/datas2/testimage.png")
image = myutils.resize(image, width=300)gray = image[..., 2]gradX = cv2.Sobel(gray, ddepth=cv2.CV_32F, dx=1, dy=0, #ksize=-1相当于用3*3的ksize=-1)gradX = np.absolute(gradX)
(minVal, maxVal) = (np.min(gradX), np.max(gradX))
gradX = (255 * ((gradX - minVal) / (maxVal - minVal)))
gradX = gradX.astype("uint8")
print (np.array(gradX).shape)
cv_show('gradX',gradX)gradX = cv2.morphologyEx(gradX, cv2.MORPH_CLOSE, rectKernel)cv_show('gradX_CLOSE',gradX)
thresh = cv2.threshold(gradX, 0, 255,cv2.THRESH_BINARY | cv2.THRESH_OTSU)[1]
cv_show('thresh',thresh)# 计算轮廓
threshCnts, hierarchy = cv2.findContours(thresh.copy(), cv2.RETR_EXTERNAL,cv2.CHAIN_APPROX_SIMPLE)cnts = threshCnts
cur_img = image.copy()
cv2.drawContours(cur_img,cnts,-1,(0,0,255),3)
cv_show('img',cur_img)
locs = []
# 遍历轮廓
for (i, c) in enumerate(cnts):# 计算矩形(x, y, w, h) = cv2.boundingRect(c)ar = w / float(h)# 选择合适的区域,根据实际任务来,这里的基本都是四个数字一组if ar > 2.5 and ar < 4.0:if (w > 40 and w < 55) and (h > 10 and h < 20):#符合的留下来locs.append((x, y, w, h))
# 将符合的轮廓从左到右排序
locs = sorted(locs, key=lambda x:x[0])
output = []ocr = CnOcr()
# 遍历每一个轮廓中的数字
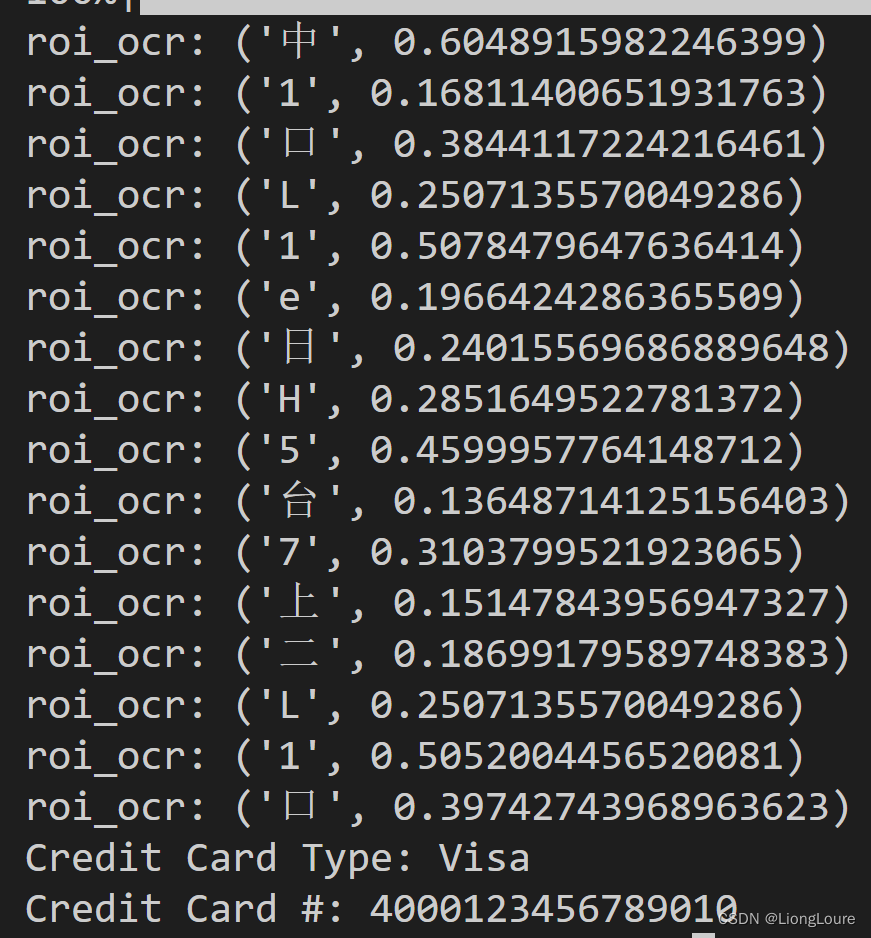
for (i, (gX, gY, gW, gH)) in enumerate(locs):# initialize the list of group digitsgroupOutput = []# 根据坐标提取每一个组group = gray[gY - 5:gY + gH + 5, gX - 5:gX + gW + 5]cv_show('group',group)# 预处理group = cv2.threshold(group, 0, 255,cv2.THRESH_BINARY | cv2.THRESH_OTSU)[1]cv_show('group',group)# 计算每一组的轮廓digitCnts,hierarchy = cv2.findContours(group.copy(), cv2.RETR_EXTERNAL,cv2.CHAIN_APPROX_SIMPLE)digitCnts = myutils.sort_contours(digitCnts,method="left-to-right")[0]# 计算每一组中的每一个数值for c in digitCnts:# 找到当前数值的轮廓,resize成合适的的大小(x, y, w, h) = cv2.boundingRect(c)roi = group[y:y + h, x:x + w]roi = cv2.resize(roi, (57, 88))result = ocr.ocr_for_single_line(roi)print('roi_ocr:', result) #cv_show('roi',roi)# 计算匹配得分scores = []# 在模板中计算每一个得分for (digit, digitROI) in digits.items():# 模板匹配result = cv2.matchTemplate(roi, digitROI,cv2.TM_CCOEFF)(_, score, _, _) = cv2.minMaxLoc(result)scores.append(score)# 得到最合适的数字groupOutput.append(str(np.argmax(scores)))# 画出来cv2.rectangle(image, (gX - 5, gY - 5),(gX + gW + 5, gY + gH + 5), (0, 0, 255), 1)cv2.putText(image, "".join(groupOutput), (gX, gY - 15),cv2.FONT_HERSHEY_SIMPLEX, 0.65, (0, 0, 255), 2)# 得到结果output.extend(groupOutput)# 打印结果
print("Credit Card Type: {}".format(FIRST_NUMBER[output[0]]))
print("Credit Card #: {}".format("".join(output)))
cv2.imshow("Image", image)
cv2.waitKey(0)'''
信用卡识别:模板匹配技术进行识别1.先检测,将目标局域扣下来
1.1获取较大的区域,一共4组*sobel边缘检测*形态学操作*轮廓查找*利用轮廓信息过滤1.2然后从每组中获取单个数字的区域*轮廓查找*利用轮廓信息过滤2.然后再进行识别
'''
25.1.2 文字截图识别
#coding=utf-8
import cv2
import numpy as np
from cnocr import CnOcr
#import requests
#s = requests.session()
#s.keep_alive = False
#pip install cnocr -i https://pypi.doubanio.com/simple
#https://gitee.com/cyahua/cnocr?utm_source=alading&utm_campaign=repo#%E8%AF%A6%E7%BB%86%E6%96%87%E6%A1%A3def get_horizontal_projection(image):'''统计图片水平位置白色像素的个数'''#图像高与宽height_image, width_image = image.shape height_projection = [0]*height_imagefor height in range(height_image):for width in range(width_image):if image[height, width] == 255:height_projection[height] += 1return height_projectiondef get_vertical_projection(image): '''统计图片垂直位置白色像素的个数'''#图像高与宽height_image, width_image = image.shape width_projection = [0]*width_imagefor width in range(width_image):for height in range(height_image):if image[height, width] == 255:width_projection[width] += 1return width_projectiondef get_text_lines(projections):text_lines = []start = 0for index, projection in enumerate(projections):# projections:每行白色像素点的个数  if projection>0 and start==0:# 白色像素点的个数>0 而且start==0 来确定行的开始位置start_location = indexstart = 1  #查找一句话的起始位置和结束位置的标志 start=0 要找的是起始位置 start=1 要找的结束位置if projection==0 and start==1:# # 白色像素点的个数==0 而且start==1 来确定行的结束位置end_location = indexstart = 0text_lines.append((start_location,end_location))return text_linesdef get_text_word(projections):text_word = [ ]start = 0for index, projection in enumerate(projections):if projection>0 and start==0:start_location = indexstart = 1if projection==0 and start==1:end_location = indexstart = 0if len(text_word)>0 and start_location-text_word[-1][1]<3:text_word[-1] = (text_word[-1][0],end_location)else:text_word.append((start_location,end_location))return text_word
def orc_text(filePath):#ocr = CnOcr()image = cv2.imread(filePath,cv2.IMREAD_GRAYSCALE)print(image)print(image.shape)result = []height_image, width_image = image.shape_, binary_image = cv2.threshold(image,150,255,cv2.THRESH_BINARY_INV)height_projection = get_horizontal_projection(binary_image)text_lines = get_text_lines(height_projection)for line_index, text_line in enumerate(text_lines):text_line_image = binary_image[text_line[0]:text_line[1], 0:width_image]vertical_projection = get_vertical_projection(text_line_image)text_words = get_text_word(vertical_projection)text_line_word_image = image[text_line[0]:text_line[1], text_words[0][0]:text_words[-1][1]]   res = ocr.ocr_for_single_line(text_line_word_image) result.append(''.join(res))return ''.join(result)if __name__ == '__main__':ocr = CnOcr()image = cv2.imread('F:/datas2/cnocrtest.png',cv2.IMREAD_GRAYSCALE)print(image)print(image.shape)# cv2.imshow('gray_image', image)# cv2.waitKey(0)# cv2.destroyAllWindows()height_image, width_image = image.shape_, binary_image = cv2.threshold(image,150,255,cv2.THRESH_BINARY_INV)height_projection = get_horizontal_projection(binary_image)text_lines = get_text_lines(height_projection)for line_index, text_line in enumerate(text_lines):# text_line :(start_location, end_location)start_location = text_line[0]end_location = text_line[1]text_line_image = binary_image[start_location:end_location]vertical_projection = get_vertical_projection(text_line_image)text_words = get_text_word(vertical_projection)# text_words:这一行的每个字的位置:(w_s,w_e)text_line_word_image = image[start_location:end_location, text_words[0][0]:text_words[-1][1]]   res = ocr.ocr_for_single_line(text_line_word_image) print(res)

25.2 使用逻辑
from cnocr import CnOcrocr = CnOcr()
path = r"cn1.png"  # 或者直接传入img
res = ocr.ocr_for_single_line(path)
print(res)
这篇关于[深度学习]Part1 Python高级Ch25 cnocr——【DeepBlue学习笔记】的文章就介绍到这儿,希望我们推荐的文章对编程师们有所帮助!


