本文主要是介绍Vue | (三)使用Vue脚手架(下)| 尚硅谷Vue2.0+Vue3.0全套教程,希望对大家解决编程问题提供一定的参考价值,需要的开发者们随着小编来一起学习吧!
文章目录
- 📚Vue 中的自定义事件
- 🐇使用方法
- 🐇案例练习
- 🐇TodoList案例优化
- 📚全局事件总线
- 🐇使用方法
- 🐇案例练习
- 🐇TodoList案例优化
- 📚消息订阅与发布
- 🐇使用方法
- 🐇TodoList案例优化
- ⭐️把删除一个todo(`deleteTodo`)改成消息订阅与发布
- ⭐️添加编辑todo效果
- ⭐️内容不为空限制
- ⭐️点击编辑按钮自动获取焦点
- 📚Vue封装的过度与动画
- 🐇使用方法
- 🐇案例练习
- 🐇TodoList案例优化
学习链接:尚硅谷Vue2.0+Vue3.0全套教程丨vuejs从入门到精通,本文对应p79-p95,博客参考尚硅谷公开笔记,补充记录实操。
📚Vue 中的自定义事件
🐇使用方法
-
区别于JS里的内置事件。
-
一种组件间通信的方式,适用于:
子组件 ===> 父组件 -
使用场景:A是父组件,B是子组件,B想给A传数据,那么就要在A中给B绑定自定义事件(事件的回调在A中)。
-
绑定自定义事件:
- 第一种方式,在父组件中:
<Demo @atguigu="test"/>或<Demo v-on:atguigu="test"/> - 第二种方式,在父组件中:
<Demo ref="demo"/>
......
mounted(){this.$refs.xxx.$on('atguigu',this.test)
}
- 第一种方式,在父组件中:
-
若想让自定义事件只能触发一次,可以使用
once修饰符,或$once方法。 -
触发自定义事件:
this.$emit('atguigu',数据) -
解绑自定义事件
this.$off('atguigu'),多个一起解绑套在一个数组里。this.$off(),解绑所有的自定义事件。 -
组件上也可以绑定原生DOM事件,需要使用
native修饰符。 -
注意:通过
this.$refs.xxx.$on('atguigu',回调)绑定自定义事件时,回调要么配置在methods中,要么用箭头函数,否则this指向会出问题!
🐇案例练习
- 案例实现,实操见真知😄
Student-Test.vue<template><div class="student"><h2>学生姓名:{{name}}</h2><h2>学生性别:{{sex}}</h2><h2>当前求和为:{{number}}</h2><button @click="add">点我number++</button><button @click="sendStudentlName">把学生名给App</button><button @click="unbind">解绑atguigu事件</button><button @click="death">销毁当前Student组件的实例(vc)</button></div> </template><script>export default {name:'Student-Test',data() {return {name:'右一',sex:'女',number:0}},methods: {add(){console.log('add回调被调用了')this.number++},sendStudentlName(){//触发Student组件实例身上的atguigu事件this.$emit('atguigu',this.name,666,888,900)// this.$emit('demo')// this.$emit('click')},unbind(){this.$off('atguigu') //解绑一个自定义事件console.log('解绑了')// this.$off(['atguigu','demo']) //解绑多个自定义事件(写在一个数组里)// this.$off() //解绑所有的自定义事件},death(){//销毁了当前Student组件的实例,销毁后所有Student实例的自定义事件全都不奏效。//和视频里展示的不一样,现在销毁后原生num++也不奏效了,不论是console还是响应式。this.$destroy() console.log('销毁了')}},} </script><style scoped>.student{background-color: pink;padding: 5px;margin-top: 30px;} </style>School-Test.vue<template><div class="school"><h2>学校名称:{{name}}</h2><h2>学校地址:{{address}}</h2><button @click="sendSchoolName">把学校名给App</button></div> </template><script>export default {name:'School-Test',props:['getSchoolName'],data() {return {name:'哔哩哔哩大学',address:'bilibili',}},methods: {sendSchoolName(){this.getSchoolName(this.name)}},} </script><style scoped>.school{background-color: skyblue;padding: 5px;} </style>App.vue<template><div class="app"><h1>{{msg}}学生姓名是:{{studentName}}</h1><!-- 通过父组件给子组件传递函数类型的props实现:子给父传递数据 --><School :getSchoolName="getSchoolName"/><!-- 通过父组件给子组件绑定一个自定义事件实现:子给父传递数据(第一种写法,使用@或v-on) --><!-- <Student @atguigu="getStudentName" @demo="m1"/> --><!-- 通过父组件给子组件绑定一个自定义事件实现:子给父传递数据(第二种写法,使用ref) --><Student ref="student" @click.native="show"/></div> </template><script>import Student from './components/Student-Test'import School from './components/School-Test'export default {name:'App',components:{School,Student},data() {return {msg:'你好啊!',studentName:''}},methods: {getSchoolName(name){console.log('App收到了学校名:',name)},getStudentName(name,...params){console.log('App收到了学生名:',name,params)this.studentName = name},m1(){console.log('demo事件被触发了!')},show(){alert(123)}},mounted() {this.$refs.student.$on('atguigu',this.getStudentName) //绑定自定义事件// this.$refs.student.$once('atguigu',this.getStudentName) //绑定自定义事件(一次性)},} </script><style scoped>.app{background-color: gray;padding: 5px;} </style>- num++
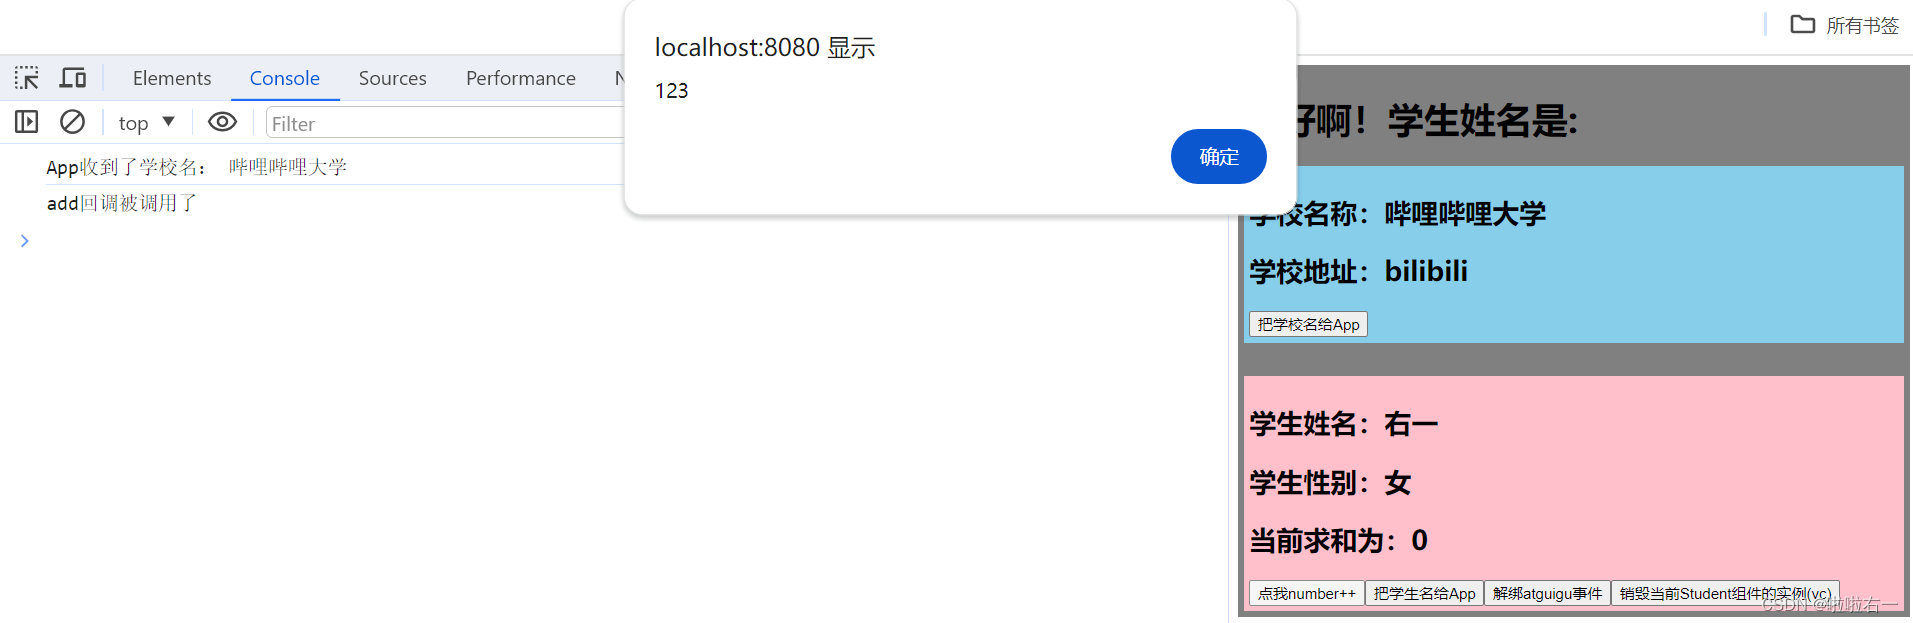
- 发送学生名
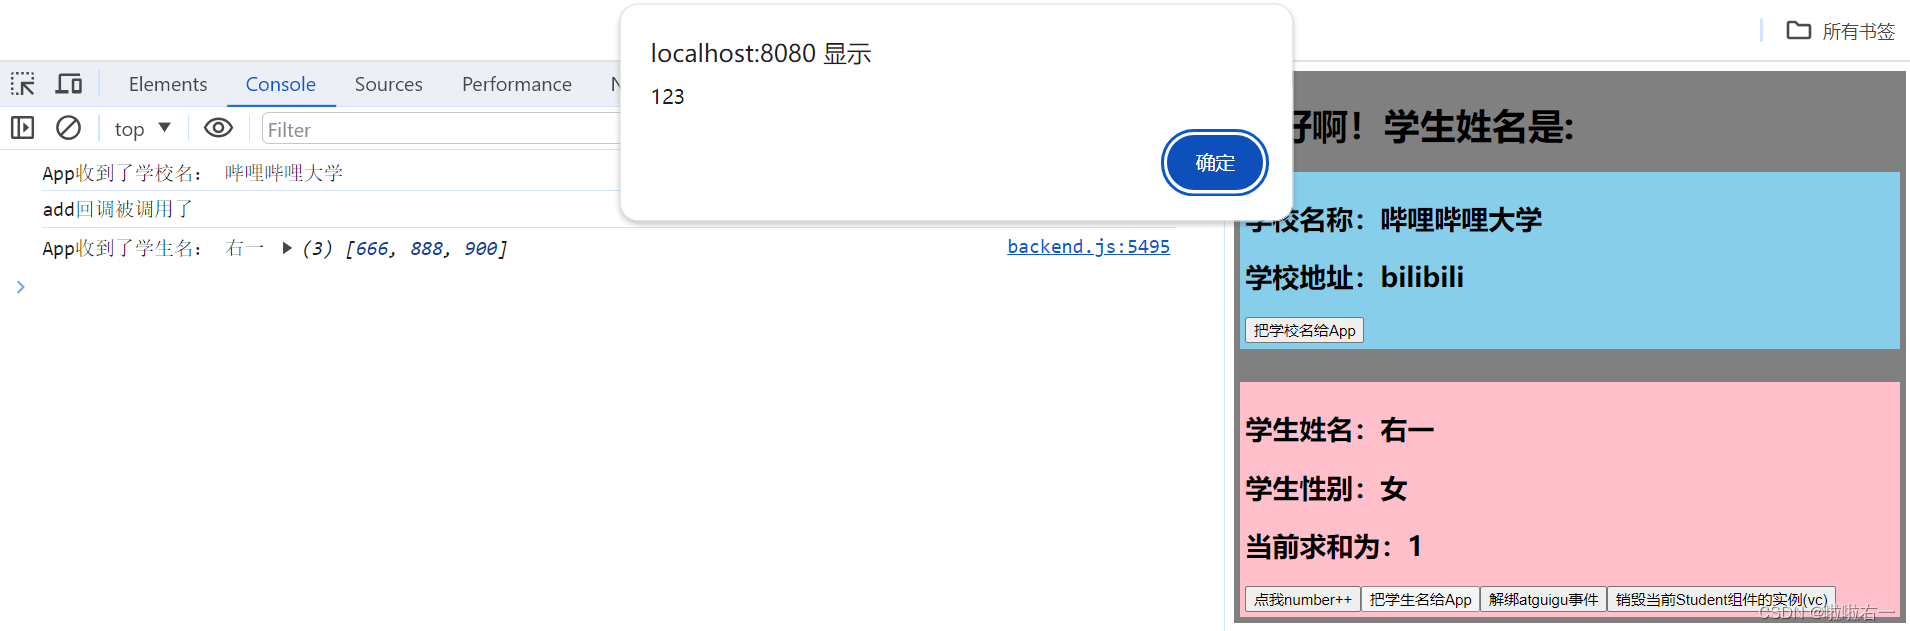
- 解绑

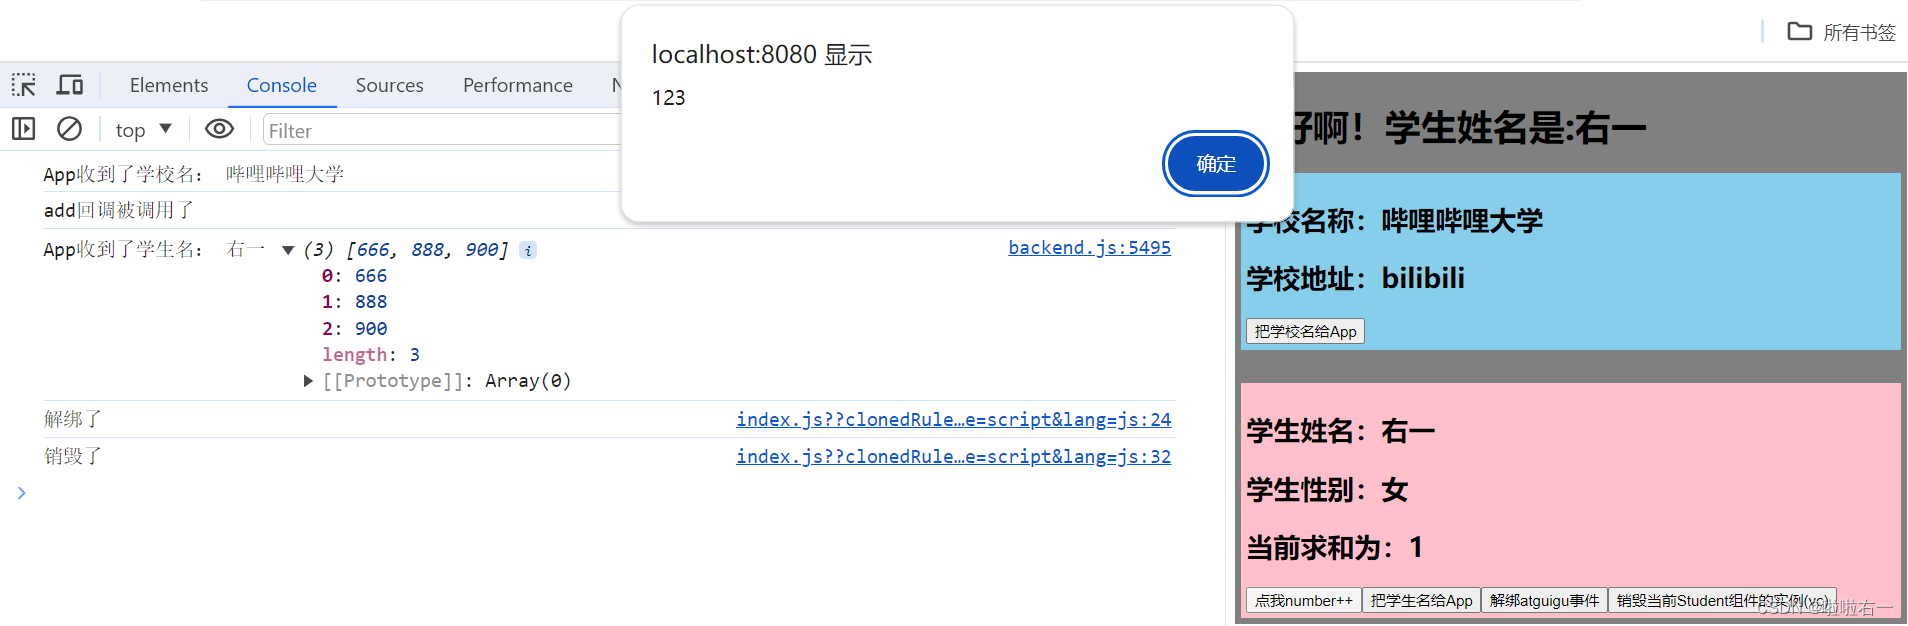
- 解绑后学生名发不出去了

- 销毁

- num++可点击,但不奏效
🐇TodoList案例优化
- 所有涉及到子组件给父组件传输的:
- 添加一个todo,
addTodo - 底部全选,
checkAllTodo - 清除已完成,
clearAllTodo - 以
addTodo为例,- 首先,在App.vue中把
:addTodo="addTodo"改为@addTodo="addTodo"。 - 而后在UserHeader中把
props去除(不用接收了)。 - 功能实现处:
// 通知APP组件去添加一个todo对象
this.$emit('addTodo',todoObj)
- 首先,在App.vue中把
- 添加一个todo,
📚全局事件总线
🐇使用方法
-
一种组件间通信的方式,适用于任意组件间通信。
-
安装全局事件总线:
new Vue({......beforeCreate() {Vue.prototype.$bus = this //安装全局事件总线,$bus就是当前应用的vm},...... }) -
使用事件总线:
-
接收数据:A组件想接收数据,则在A组件中给
$bus绑定自定义事件,事件的回调留在A组件自身。methods(){demo(data){......} } ...... mounted() {this.$bus.$on('xxxx',this.demo) } -
提供数据:
this.$bus.$emit('xxxx',数据)
-
-
最好在beforeDestroy钩子中,用
$off去解绑当前组件所用到的事件。
🐇案例练习
main.js:安装全局事件总线。//引入Vue import Vue from 'vue' //引入App import App from './App.vue' //关闭Vue的生产提示 Vue.config.productionTip = false//创建vm new Vue({el:'#app',render: h => h(App),beforeCreate() {Vue.prototype.$bus = this //安装全局事件总线}, })Student-Test.vue:提供数据。<template><div class="student"><h2>学生姓名:{{name}}</h2><h2>学生性别:{{sex}}</h2><button @click="sendStudentName">把学生名给School组件</button></div> </template><script>export default {name:'Student-Test',data() {return {name:'youyi',sex:'女',}},methods: {sendStudentName(){this.$bus.$emit('hello',this.name)}},} </script><style scoped>.student{background-color: pink;padding: 5px;margin-top: 30px;} </style>School-Test.vue:接收数据。<template><div class="school"><h2>学校名称:{{name}}</h2><h2>学校地址:{{address}}</h2></div> </template><script>export default {name:'School-Test',data() {return {name:'哔哩哔哩大学',address:'bilibili',}},mounted() {// console.log('School',this)this.$bus.$on('hello',(data)=>{console.log('我是School组件,收到了数据',data)})},beforeDestroy() {this.$bus.$off('hello')},} </script><style scoped>.school{background-color: skyblue;padding: 5px;} </style>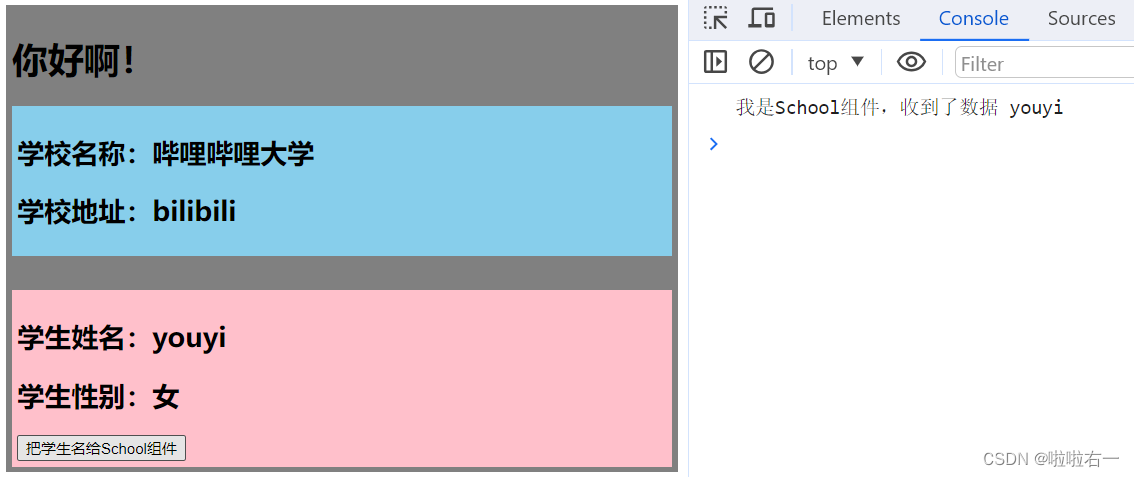
🐇TodoList案例优化
- 把“爷孙”之间的改成全局事件总线:
- 勾选一个todo,
checkTodo - 删除一个todo,
deleteTodo - 修改点:
- 在main.js安装全局事件总线
new Vue({el:'#app',render: h => h(App),beforeCreate(){Vue.prototype.$bus = this} }) checkTodo和deleteTodo不用给List传了,List对应也不用接收了。同样的,List也不用给Item,后者也不收了。也就是之前的层级传递过程删掉。- 收数据的(App.vue)绑定事件总线。
mounted(){this.$bus.$on('checkTodo',this.checkTodo)this.$bus.$on('deleteTodo',this.deleteTodo) }, beforeDestroy(){this.$bus.$off('checkTodo')this.$bus.$off('deleteTodo') } - Item提供数据。
methods:{// 勾选or取消勾选handleCheck(id){// 通知App组件将对应的todo对象的done值取反this.$bus.$emit('checkTodo',id)},// 删除handleDelete(id){if(confirm('确定删除吗?')){// 通知App组件删除this.$bus.$emit('deleteTodo',id)}}
}
- 在main.js安装全局事件总线
- 勾选一个todo,
📚消息订阅与发布
🐇使用方法
-
一种组件间通信的方式,适用于任意组件间通信。
-
使用步骤:
- 安装pubsub:
npm i pubsub-js - 引入:
import pubsub from 'pubsub-js' - 接收数据:A组件想接收数据,则在A组件中订阅消息,订阅的回调留在A组件自身。
methods(){demo(data){......}
}
......
mounted() {this.pid = pubsub.subscribe('xxx',this.demo) //订阅消息
}
-
提供数据:
pubsub.publish('xxx',数据) -
最好在beforeDestroy钩子中,用
PubSub.unsubscribe(pid)去取消订阅。
- 安装pubsub:
🐇TodoList案例优化
⭐️把删除一个todo(deleteTodo)改成消息订阅与发布
- 引入pubsub库(用到的vue都需要引入),
import pubsub from 'pubsub-js'。 App.vue需要数据,订阅消息。这里需要methods里deleteTodo(_,id)用_占个位。mounted(){this.$bus.$on('checkTodo',this.checkTodo)this.pubId = pubsub.subscribe('deleteTodo',this.deleteTodo) }, beforeDestroy(){this.$bus.$off('checkTodo')pubsub.unsubscribe(this.pubId) }UserItem.vue提供数据。methods:{// 勾选or取消勾选handleCheck(id){// 通知App组件将对应的todo对象的done值取反this.$bus.$emit('checkTodo',id)},// 删除handleDelete(id){if(confirm('确定删除吗?')){// 通知App组件删除pubsub.publish('deleteTodo',id)}} }
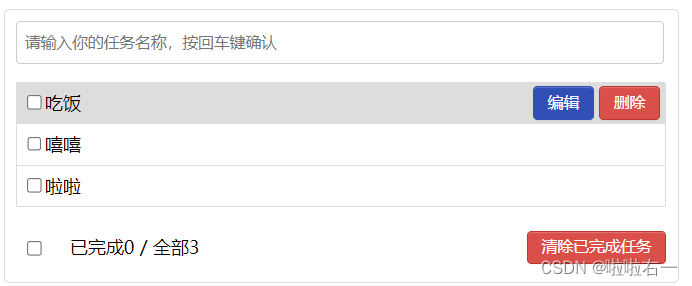
⭐️添加编辑todo效果
UserItem.vue样式添加编辑按钮。

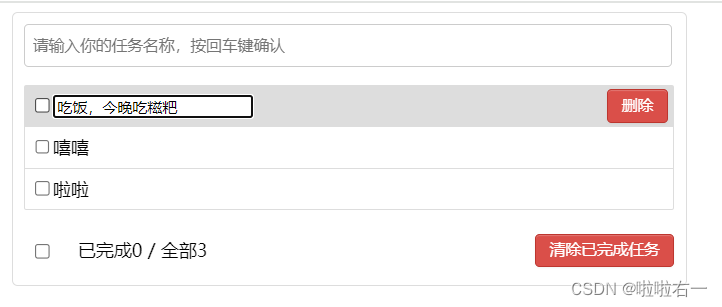
UserItem.vue<template><li><label><input type="checkbox" :checked="fasong.done" @change="handleCheck(fasong.id)"/><span v-show="!fasong.isEdit">{{fasong.title}}</span><input type="text" v-show="fasong.isEdit" :value="fasong.title"@blur="handleBlur(fasong,$event)"></label><button class="btn btn-danger" @click="handleDelete(fasong.id)">删除</button><button v-show="!fasong.isEdit" class="btn btn-edit" @click="handleEdit(fasong)">编辑</button></li> </template><script>import pubsub from 'pubsub-js'export default {name:'UserItem',// 声明接收发送内容props:['fasong'],methods:{// 勾选or取消勾选handleCheck(id){// 通知App组件将对应的todo对象的done值取反this.$bus.$emit('checkTodo',id)},// 删除handleDelete(id){if(confirm('确定删除吗?')){// 通知App组件删除pubsub.publish('deleteTodo',id)}},//编辑handleEdit(fasong){// 已经有了isEditif(fasong.hasOwnProperty.call('isEdit')){fasong.isEdit = true}else{this.$set(fasong,'isEdit',true)}},// 失去焦点回调(真正执行修改)handleBlur(fasong,e){fasong.isEdit = falsethis.$bus.$emit('updateTodo',fasong.id,e.target.value)}}} </script>App.vue<template><div id="root"><div class="todo-container"><div class="todo-wrap"><UserHeader @addTodo="addTodo"></UserHeader><UserList :todos="todos"></UserList><UserFooter :todos="todos" @checkAllTodo="checkAllTodo" @clearAllTodo="clearAllTodo"></UserFooter></div></div></div></template><!-- App.vue --> <script>import pubsub from 'pubsub-js'import UserHeader from './components/UserHeader.vue'import UserList from './components/UserList'import UserFooter from './components/UserFooter'export default {name:'App',components:{UserHeader,UserList,UserFooter},data(){return{todos:JSON.parse(localStorage.getItem('todos')) || []}},methods:{// 数据在哪,对数据的操作就在哪// 添加一个todoaddTodo(todoObj){this.todos.unshift(todoObj)},// 勾选or取消勾选一个todocheckTodo(id){this.todos.forEach((todo)=>{if(todo.id === id) todo.done = !todo.done})},// 修改一个todoupdateTodo(id,title){this.todos.forEach((todo)=>{if(todo.id === id) todo.title = title})},// 删除一个tododeleteTodo(_,id){// this.todos = this.todos.filter((todo)=>{// return todo.id !== id// })// 精简写法this.todos = this.todos.filter(todo => todo.id != id)},// 全选or取消全选checkAllTodo(done){this.todos.forEach((todo)=>{todo.done = done})},// 清除所有已经完成的todoclearAllTodo(){this.todos = this.todos.filter((todo)=>{return !todo.done})}},watch:{todos:{// 开启深度监视deep:true,handler(value){localStorage.setItem('todos',JSON.stringify(value))}}},mounted(){this.$bus.$on('checkTodo',this.checkTodo)this.$bus.$on('updateTodo',this.updateTodo)this.pubId = pubsub.subscribe('deleteTodo',this.deleteTodo)},beforeDestroy(){this.$bus.$off('checkTodo')this.$bus.$off('updateTodo')pubsub.unsubscribe(this.pubId)}} </script>- 准备编辑
- 正在编辑(按钮不显示)
- 焦点移除,修改
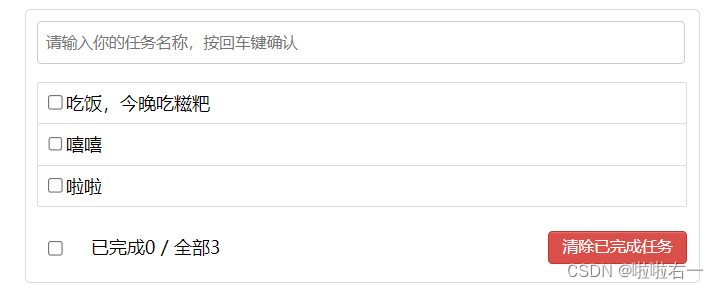
- 准备编辑
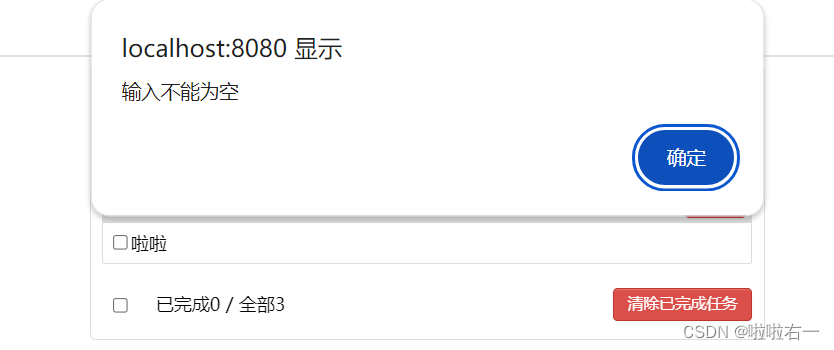
⭐️内容不为空限制
// 失去焦点回调(真正执行修改)
handleBlur(fasong,e){fasong.isEdit = falseif(!e.target.value.trim()) return alert('输入不能为空')this.$bus.$emit('updateTodo',fasong.id,e.target.value)
}
⭐️点击编辑按钮自动获取焦点
this.$nextTick(function(){this.$refs.inputTitle.focus()
})
- 🔥
nextTick- 语法:
this.$nextTick(回调函数) - 作用:在下一次 DOM 更新结束后执行其指定的回调。
- 什么时候用:当改变数据后,要基于更新后的新DOM进行某些操作时,要在nextTick所指定的回调函数中执行。
- 语法:
📚Vue封装的过度与动画
🐇使用方法
- 作用:在插入、更新或移除 DOM元素时,在合适的时候给元素添加样式类名。
- 写法:
-
准备好样式:
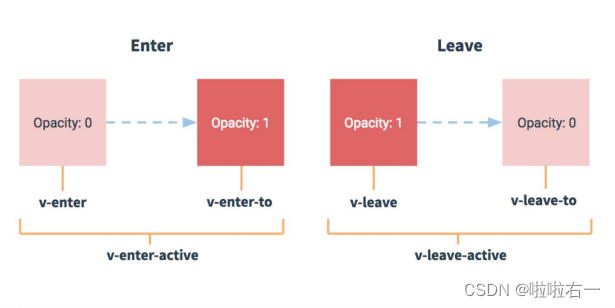
- 元素进入的样式:
v-enter:进入的起点v-enter-active:进入过程中v-enter-to:进入的终点
- 元素离开的样式:
v-leave:离开的起点v-leave-active:离开过程中v-leave-to:离开的终点
- 元素进入的样式:
-
使用
<transition>包裹要过度的元素,并配置name属性:<transition name="hello"><h1 v-show="isShow">你好啊!</h1> </transition> -
备注:若有多个元素需要过度,则需要使用:
<transition-group>,且每个元素都要指定key值。
-
🐇案例练习
-
过度效果
<template><div><button @click="isShow = !isShow">显示/隐藏</button><transition name="hello" appear><h1 v-show="isShow">你好啊!</h1></transition></div> </template><script>export default {name:'Final-Test',data() {return {isShow:true}},} </script><style scoped>h1{background-color: pink;}.hello-enter-active{animation: atguigu 0.5s linear;}.hello-leave-active{animation: atguigu 0.5s linear reverse;}@keyframes atguigu {from{transform: translateX(-100%);}to{transform: translateX(0px);}} </style> -
多个元素过度
<template><div><button @click="isShow = !isShow">显示/隐藏</button><transition-group name="hello" appear><h1 v-show="!isShow" key="1">你好啊!</h1><h1 v-show="isShow" key="2">尚硅谷!</h1></transition-group></div> </template><script>export default {name:'Final-Test2',data() {return {isShow:true}},} </script><style scoped>h1{background-color: skyblue;}/* 进入的起点、离开的终点 */.hello-enter,.hello-leave-to{transform: translateX(-100%);}.hello-enter-active,.hello-leave-active{transition: 0.5s linear;}/* 进入的终点、离开的起点 */.hello-enter-to,.hello-leave{transform: translateX(0);} </style> -
集成第三方动画,animate.css官网
<template><div><button @click="isShow = !isShow">显示/隐藏</button><transition-group appearname="animate__animated animate__bounce" enter-active-class="animate__swing"leave-active-class="animate__backOutUp"><h1 v-show="!isShow" key="1">你好啊!</h1><h1 v-show="isShow" key="2">尚硅谷!</h1></transition-group></div>
</template><script>// npm install animate.cssimport 'animate.css'export default {name:'Final-Test3',data() {return {isShow:true}},}
</script><style scoped>h1{background-color: rgb(0, 255, 183);}
</style>

🐇TodoList案例优化
- 让每一个todo的添加和删除都很柔和
- 法①:
UserItem.vue的整个li加过度和动画 - 法②:在
UserList.vue添加(关注多组是transition-group)(以下代码实现方式)
- 法①:
- 结构部分
<template><ul class="todo-main"><transition-group name="todo" appear><UserItem v-for="todoObj in todos" :key="todoObj.id" :fasong="todoObj" ></UserItem></transition-group></ul> </template> - 样式部分
.todo-enter-active{animation: atguigu 0.5s linear;}.todo-leave-active{animation: atguigu 0.5s linear reverse;}@keyframes atguigu {from{transform: translateX(100%);}to{transform: translateX(0px);}}
这篇关于Vue | (三)使用Vue脚手架(下)| 尚硅谷Vue2.0+Vue3.0全套教程的文章就介绍到这儿,希望我们推荐的文章对编程师们有所帮助!


