本文主要是介绍安卓ListView中使用RadioGroup进行RadioButton的单项选择,希望对大家解决编程问题提供一定的参考价值,需要的开发者们随着小编来一起学习吧!
在做项目时,有这样的需求:ListView列表的adapter布局中有两个RadioButton,但是要求这两个RadioButton必须是单选的,所有就加入了RadioGroup,也是是这样的,要保证单选,获取选中的RadioButton的值,而且ListView的Item还有其它用。不得不说需求有点坑爹,一般都是checkBox全选,但程序员没办法,只能照着客户的需求来做。在网上也找了很多资料,但都没有相关的介绍,在此记录一下,
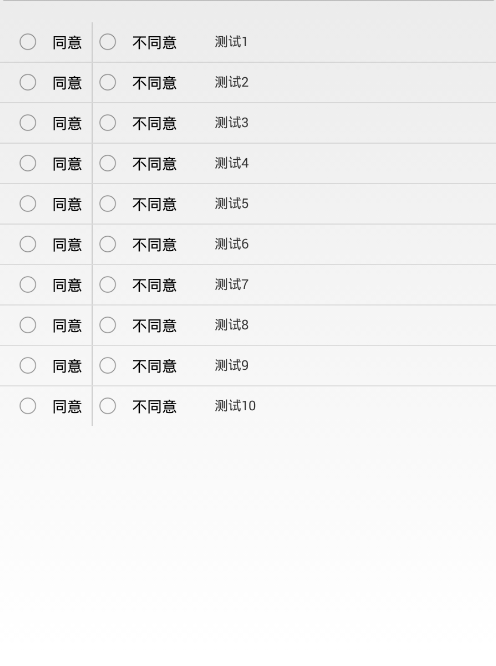
最终要实现的效果为:
上代码:
主xml就一个ListView和一个按钮,adapter的布局文件:
<?xml version="1.0" encoding="utf-8"?>
<LinearLayout xmlns:android="http://schemas.android.com/apk/res/android"android:layout_width="match_parent"android:layout_height="match_parent"android:orientation="vertical" ><RelativeLayout
        android:layout_width="match_parent"android:layout_height="wrap_content" ><RadioGroup
            android:id="@+id/radioGroup1"android:layout_width="wrap_content"android:layout_height="wrap_content"android:orientation="horizontal" ><RadioButton
                android:id="@+id/fragment2_yesRb"android:layout_width="wrap_content"android:layout_height="wrap_content"android:layout_marginLeft="15dp"android:focusable="false"android:padding="10dp"android:text="同意" /><View android:layout_width="1dp"android:layout_height="match_parent"android:background="#ccc"/><RadioButton
                android:id="@+id/fragment2_noRb"android:layout_width="wrap_content"android:layout_height="wrap_content"android:focusable="false"android:padding="10dp"android:text="不同意" /></RadioGroup><TextView
            android:id="@+id/fragment2TextView"android:layout_width="wrap_content"android:layout_height="wrap_content"android:layout_alignParentTop="true"android:layout_marginLeft="20dp"android:layout_toRightOf="@+id/radioGroup1"android:padding="10dp"android:text="表单" /></RelativeLayout></LinearLayout>
自定义adapter:
package com.android.radiobutton;import java.util.HashMap;
import java.util.List;
import java.util.Map;
import android.content.Context;
import android.view.LayoutInflater;
import android.view.View;
import android.view.ViewGroup;
import android.widget.BaseAdapter;
import android.widget.RadioButton;
import android.widget.RadioGroup;
import android.widget.RadioGroup.OnCheckedChangeListener;
import android.widget.TextView;
import android.widget.Toast;public class TestAdapter extends BaseAdapter {private List<String> list;private Context mContext;LayoutInflater inflater;    public static final Map<Integer, String> map = new HashMap<Integer, String>();public TestAdapter(List<String> list, Context mContext) {super();this.list = list;this.mContext = mContext;inflater = LayoutInflater.from(mContext);       }@Overridepublic int getCount() {// TODO Auto-generated method stubreturn list.size();}@Overridepublic Object getItem(int position) {// TODO Auto-generated method stubreturn list.get(position);}@Overridepublic long getItemId(int position) {// TODO Auto-generated method stubreturn position;}@Overridepublic View getView(final int position, View convertView, ViewGroup parent) {// TODO Auto-generated method stubViewHolder holder = null;if(convertView == null){convertView = inflater.inflate(R.layout.flow_adapter, null);holder = new ViewHolder();holder.rg = (RadioGroup) convertView.findViewById(R.id.radioGroup1);
//          holder.rb1 = (RadioButton) convertView.findViewById(R.id.fragment2_yesRb);
//          holder.rb2 = (RadioButton) convertView.findViewById(R.id.fragment2_noRb);holder.tv = (TextView) convertView.findViewById(R.id.fragment2TextView);convertView.setTag(holder);}else{holder = (ViewHolder) convertView.getTag();}holder.tv.setText(list.get(position));final RadioGroup rgBtn = holder.rg;     rgBtn.setOnCheckedChangeListener(new OnCheckedChangeListener() {@Overridepublic void onCheckedChanged(RadioGroup group, int checkedId) {// TODO Auto-generated method stubRadioButton rbtn = (RadioButton) group.findViewById(checkedId);map.put(position, rbtn.getText().toString());Toast.makeText(mContext, rbtn.getText().toString(), 1).show();}});return convertView;}public class ViewHolder{RadioGroup rg;RadioButton rb1;RadioButton rb2;TextView tv;}}
这里监听RadioGroup的点击事件,开始本想把RadioButton作为监听,但是有两个RadioButton,所有就选择RadioGroup作为监听,setOnCheckChanagerListener();监听事件,通过RadioButton rbtn = (RadioButton) group.findViewById(checkedId);中checkedId可以知道用户点击的是哪个RadioButton,再通过rbtn.getText().getString();可以获取RadioButton的值。最后,使用Map来记录所点击的RadioButton,这里是把position作为map中的key值,当然,也可以根据自己的需求做修改。
MainActivity中:
package com.android.radiobutton;import java.util.ArrayList;
import java.util.Iterator;
import java.util.List;
import java.util.Map;
import android.app.Activity;
import android.content.Context;
import android.os.Bundle;
import android.view.View;
import android.view.View.OnClickListener;
import android.widget.Button;
import android.widget.ListView;
import android.widget.TextView;
import android.widget.Toast;public class MainActivity extends Activity {private ListView listView;private TestAdapter adapter;private List<String> list;  private TextView tv;private Button btn;private static Context context;private Map<Integer,String> map;@Overrideprotected void onCreate(Bundle savedInstanceState) {// TODO Auto-generated method stubsuper.onCreate(savedInstanceState);setContentView(R.layout.main);context = this;listView = (ListView) findViewById(R.id.rbListView);btn = (Button) findViewById(R.id.rbtn);tv = (TextView) findViewById(R.id.show_tv);map = TestAdapter.map;//添加测试数据list = new ArrayList<String>();for(int i=1;i<11;i++){list.add("测试"+i);}       //实例化adapter,listView绑定数据adapter = new TestAdapter(list, MainActivity.this);listView.setAdapter(adapter);btn.setOnClickListener(new OnClickListener() {@Overridepublic void onClick(View v) {showToast("map.size() = " + map.size());                StringBuffer sb = new StringBuffer(100);//遍历map中的key 和 valueIterator<Map.Entry<Integer, String>> it = map.entrySet().iterator();  while (it.hasNext()) {  Map.Entry<Integer, String> entry = it.next();  System.out.println("key= " + entry.getKey() + " and value= " + entry.getValue());                  sb.append(entry.getKey()+","+entry.getValue().trim()+";");}
//              sb.deleteCharAt(sb.length()-1);   //截取最后一个字符
//              sb.insert(sb.length(), ",");      //在最后一位置天假字符String data = sb.toString();            tv.setText(data);}});}private static void showToast(String txt){Toast.makeText(context, txt, 2).show();}
}
初始化ListView、给list赋值、实例化adapter等。获取adapter中的map集合,adapter中map需要加上public,如果是private就作为私有的了。
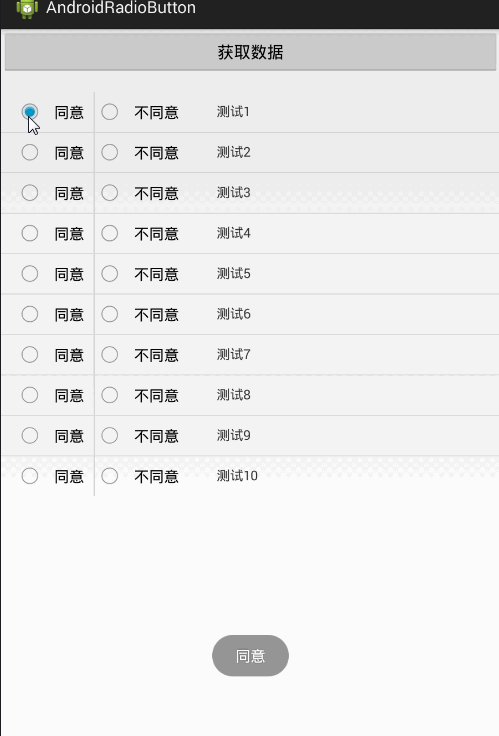
接下来就是遍历map中的值了,可以根据需求,这里是把key和value都遍历出来,关于如何遍历map的方法有很多大神写的博客可以参考学习;因为项目的需求,是需要把选择的RadioButton的值和获取到的Item中的值拼接一起,在这里来说就是:同意,测试1;不同意,测试2;……等等,当然,你可以再最后加或者截取字符。最终的效果就是上图。
代码下载
这篇关于安卓ListView中使用RadioGroup进行RadioButton的单项选择的文章就介绍到这儿,希望我们推荐的文章对编程师们有所帮助!


