本文主要是介绍Oracle APEX 安装Oracle REST Data Services (ORDS) 教程,希望对大家解决编程问题提供一定的参考价值,需要的开发者们随着小编来一起学习吧!
1- Introduction
Tài liệu được viết dựa trên:
Oracle 11g, 12c
ORDS 3.x
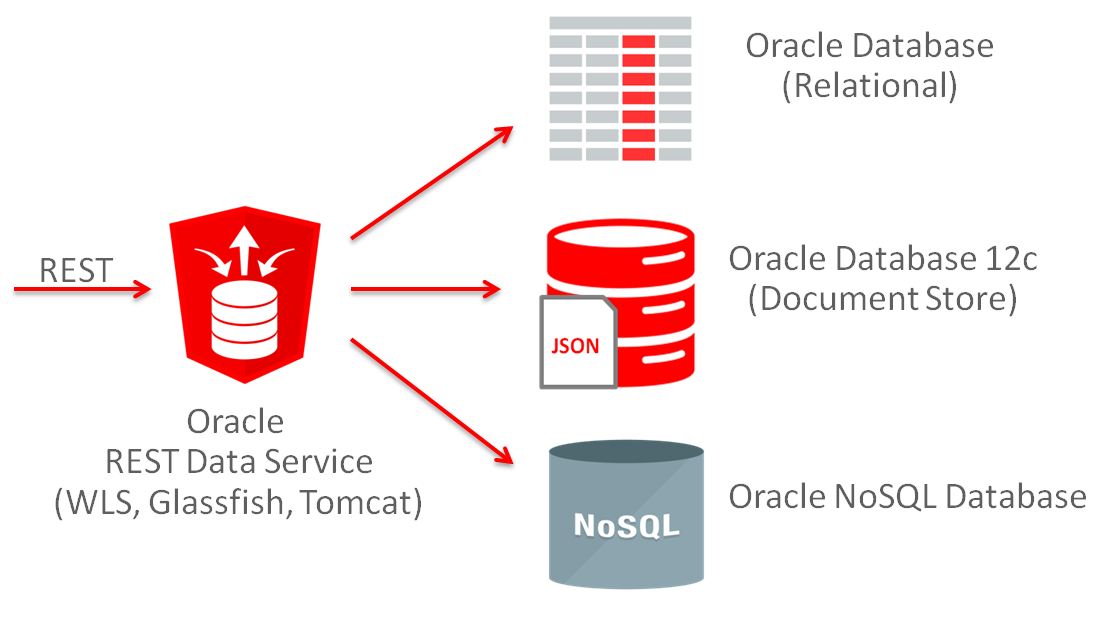
2- What is Oracle REST Data Services?
Oracle REST Data Services (ORDS) is a data service which is used to replace Oracle HTTP server and mod_plsql. It bases on Java EE that provides RESTful service and increases security capability. it can deploy on WebLogic, Tomcat, Glassfish or independently.
3- Interaction between Oracle and Oracle APEX ORDS
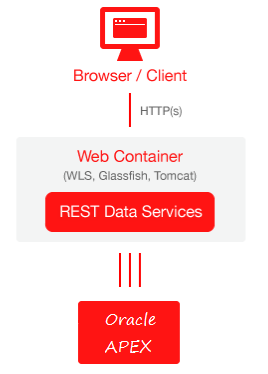
Normally, there are two ways to install Oracle APEX.
Method 1: Configure the Embedded PL/SQL Gateway: This is the way to configure Oracle APEX which can run on Oracle XML DB HTTP Server, it is a HTTP that is available when you install Oracle 11g or higher.
Method 2: Install Oracle APEX on a specific web server such as WebLogic, Tomcat or Glassfish, ...
Link worked with Oracle APEX as followed:
- http://your-server:8080/apex
To use RESTful services, you need to install Oracle ORDS which can deploy on WebLogic Server, Tomcat, Glassfish,.. or independently. Oracle ORDS can read directly to Oracle APEX and replace completely Oracle HTTP Server, therefore you can use RESTful on APEX and new URL to work with Oracle APEX.
- http://your-server:8080/ords
4- Download Oracle ORDS
You can download Oracle ORDS at:
- http://www.oracle.com/technetwork/developer-tools/rest-data-services/downloads/index.html
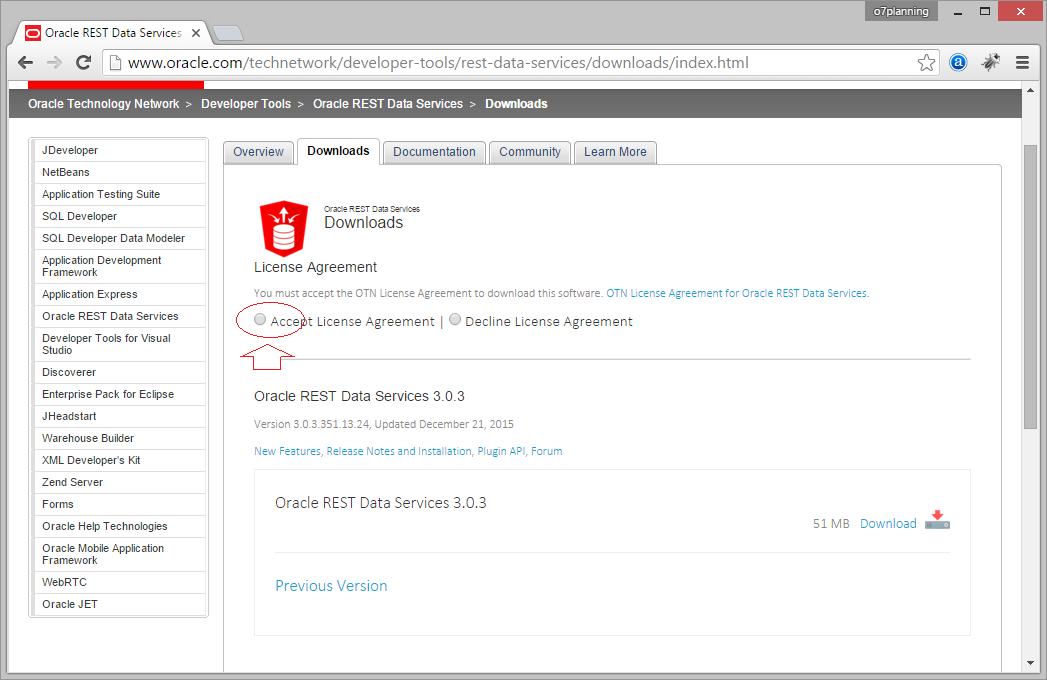
Download results:
5- Config ORDS for APEX
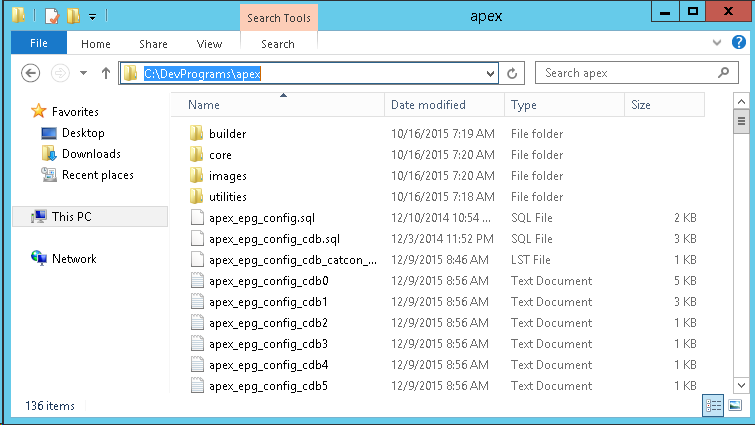
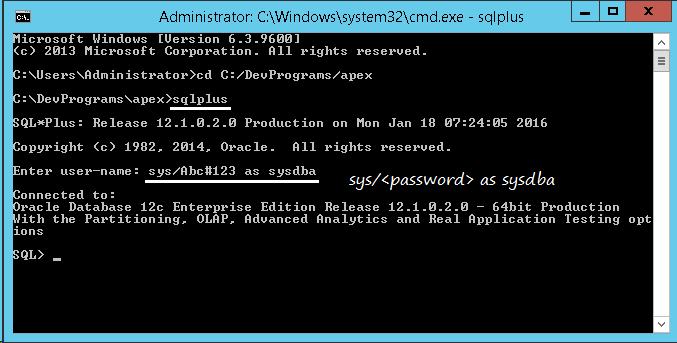
CD to apex home directory.

Login to sqlplus as sysdba.
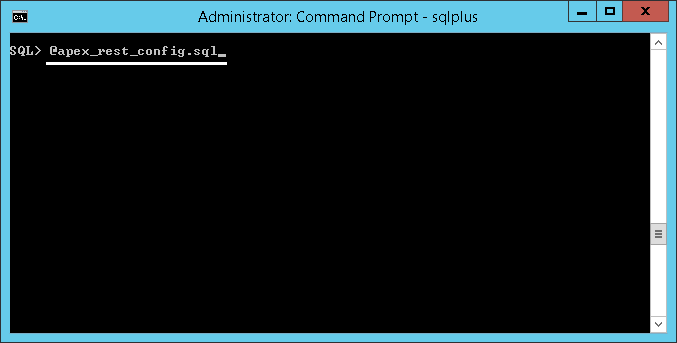
Run the command to configure REST Service.
| 1 2 3 4 | -- Configuring REST Service. @apex_rest_config.sql |

Sau khi lệnh trên thực thi thành công, 2 user APEX_LISTENER và APEX_REST_PUBLIC_USER đã được tạo ra.
- APEX_LISTENER - The account used to query RESTful Services definitions stored in Oracle Application Express.
- APEX_REST_PUBLIC_USER - The account used when calling RESTful Services definitions stored in Oracle Application Express.
Enable Network Services
By default, Network Services are disable in Oracle 11g or the newer version. Therefore, you must use the package of DBMS_NETWORK_ACL_ADMIN in order to to grant connect privileges to any host for the APEX_050000 database user
You need to query to view the APEX users in the database:
SelectUsernamefromAll_Userswhereusernamelike'APEX%';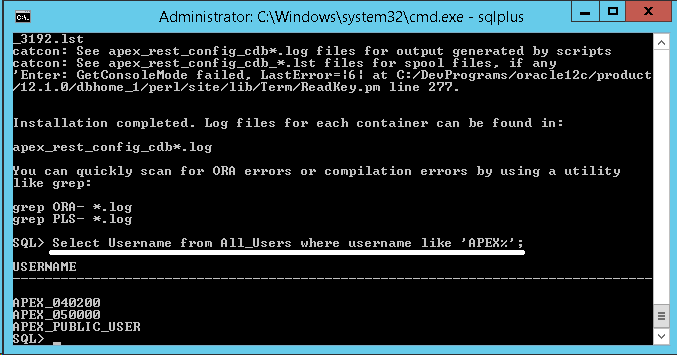
Run command to grant connect privileges to any host for the APEX_050000 database user.
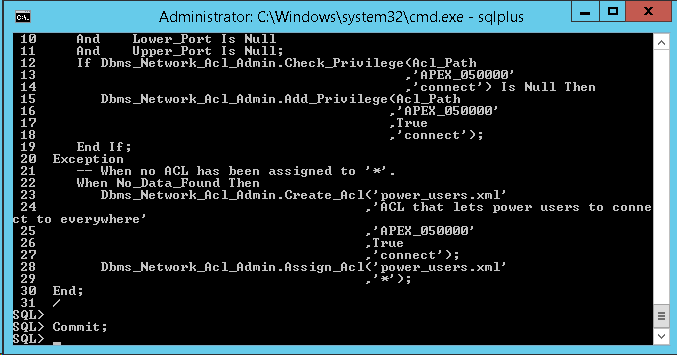
| 1 2 3 4 5 6 7 8 9 10 11 12 13 14 15 16 17 18 19 20 21 22 23 24 25 26 27 28 29 30 31 32 33 34 | Declare Acl_Path Varchar2(4000); Begin -- Look for the ACL currently assigned to '*' and give APEX_050000 -- the "connect" privilege if APEX_050000 does not have the privilege yet. Select Acl Into Acl_Path From Dba_Network_Acls Where Host = '*' And Lower_Port Is Null And Upper_Port Is Null ; If Dbms_Network_Acl_Admin.Check_Privilege(Acl_Path , 'APEX_050000' , 'connect' ) Is Null Then Dbms_Network_Acl_Admin.Add_Privilege(Acl_Path , 'APEX_050000' , True , 'connect' ); End If; Exception -- When no ACL has been assigned to '*'. When No_Data_Found Then Dbms_Network_Acl_Admin.Create_Acl( 'power_users.xml' , 'ACL that lets power users to connect to everywhere' , 'APEX_050000' , True , 'connect' ); Dbms_Network_Acl_Admin.Assign_Acl( 'power_users.xml' , '*' ); End ; / Commit ; |
Grant connect for APEX_050000 user (If database is Oracle 11g):
| 1 2 3 4 5 6 7 8 9 10 11 12 13 14 15 16 17 18 19 20 21 22 23 24 25 26 27 28 29 30 31 32 33 34 | Declare Acl_Path Varchar2(4000); Begin -- Look for the ACL currently assigned to '*' and give APEX_050000 -- the "connect" privilege if APEX_050000 --does not have the privilege yet. Select Acl Into Acl_Path From Dba_Network_Acls Where Host = '*' And Lower_Port Is Null And Upper_Port Is Null ; If Dbms_Network_Acl_Admin.Check_Privilege(Acl_Path , 'APEX_050000' , 'connect' ) Is Null Then Dbms_Network_Acl_Admin.Add_Privilege(Acl_Path , 'APEX_050000' , True , 'connect' ); End If; Exception -- When no ACL has been assigned to '*'. When No_Data_Found Then Dbms_Network_Acl_Admin.Create_Acl( 'power_users.xml' , 'ACL that lets power users to connect to everywhere' , 'APEX_050000' , True , 'connect' ); Dbms_Network_Acl_Admin.Assign_Acl( 'power_users.xml' , '*' ); End ; / Commit ; |
Grant connect for APEX_050000 user (If database is Oracle 12c):
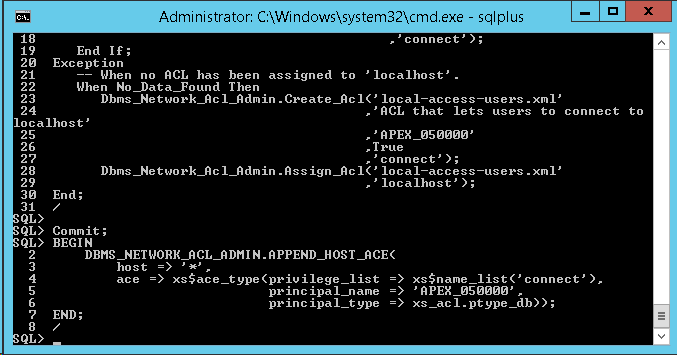
Procedures CREATE_ACL, ASSIGN_ACL, ADD_PRIVILEGE and CHECK_PRIVILEGE in DBMS_NETWORK_ACL_ADMIN are deprecated in Oracle Database 12c. Oracle recommends using APPEND_HOST_ACE instead.
| 1 2 3 4 5 6 7 8 9 10 | -- Sử dụng cho Oracle 12c. BEGIN DBMS_NETWORK_ACL_ADMIN.APPEND_HOST_ACE( host => '*' , ace => xs$ace_type(privilege_list => xs$name_list( 'connect' ), principal_name => 'APEX_050000' , principal_type => xs_acl.ptype_db)); END ; / |
6- Deploying ORDS
Note: you must sure that you have installed Jave version 7 or higher and declare PATH variable. You can see how to install Java at:
- Installing and Configuring Java
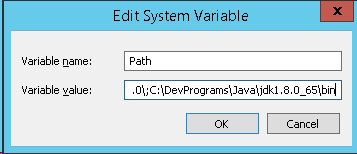
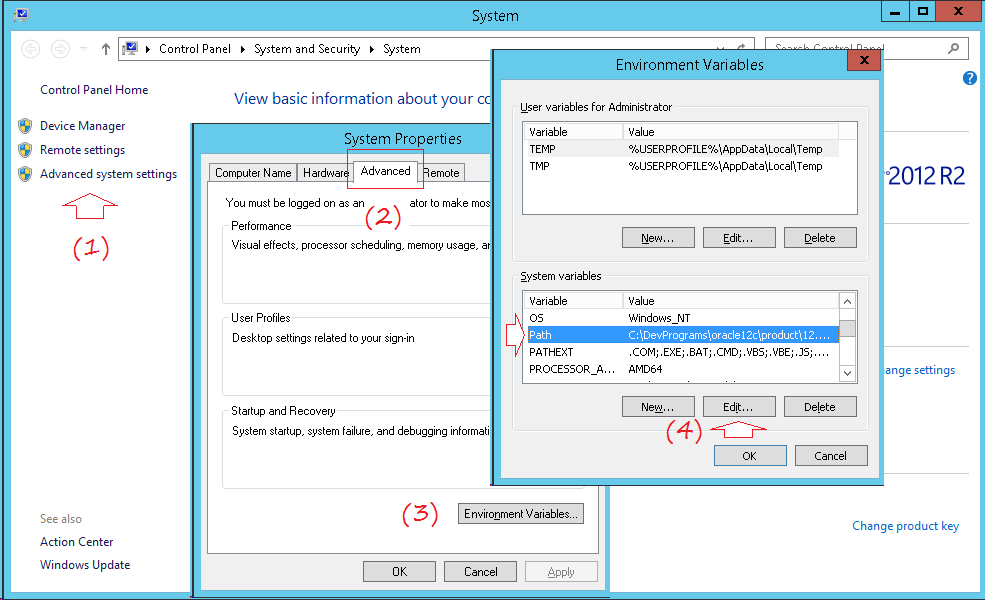 Add the path to bin folder of Java at the end of PATH
- ;C:\DevPrograms\Java\jdk1.8.0_65\bin
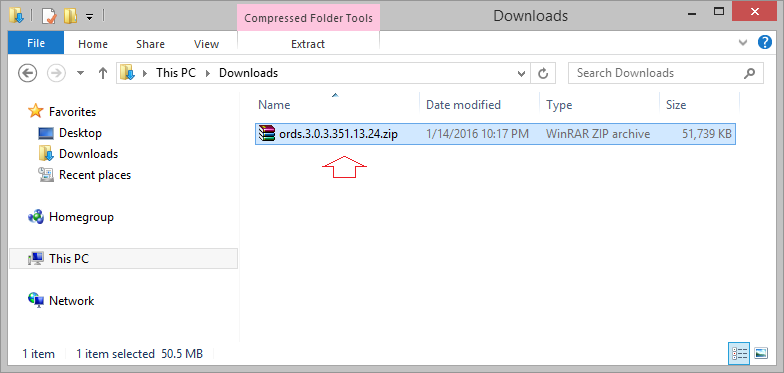
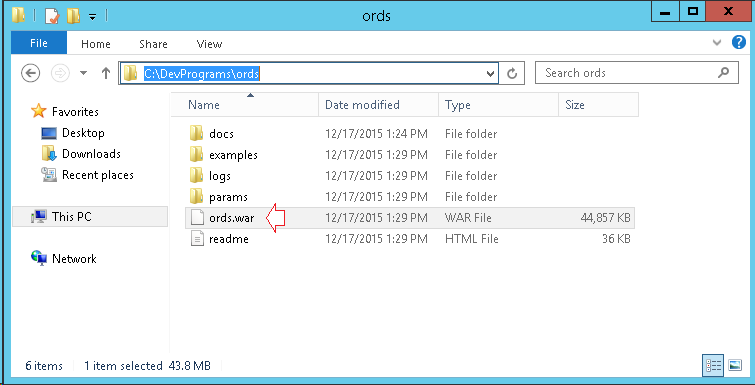
Unzip the file ord - **. zip that you have downloaded to a folder

You can see that in the folder unzipped have ords.war file
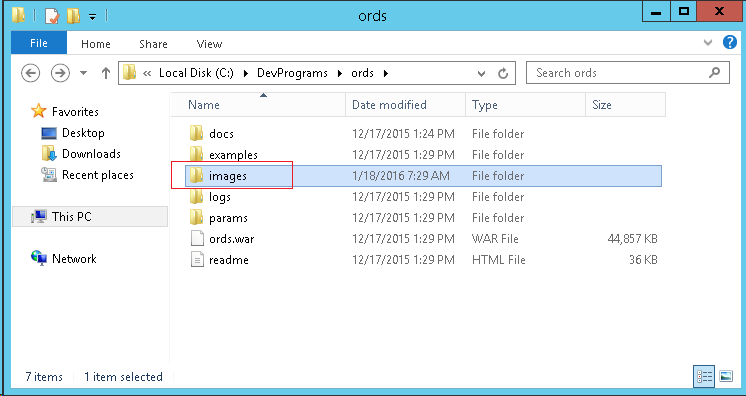
Copy images folder in apex to ords folder:
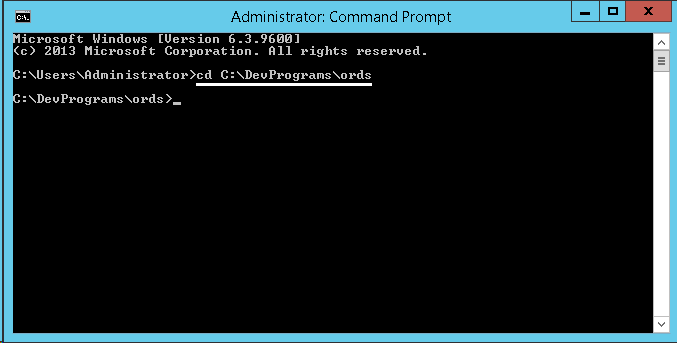
Now, we will install Oracle ORDS independently (It is not necessary to deploy on Weblogic, Tomcat or other web server)
CD to ords folder:
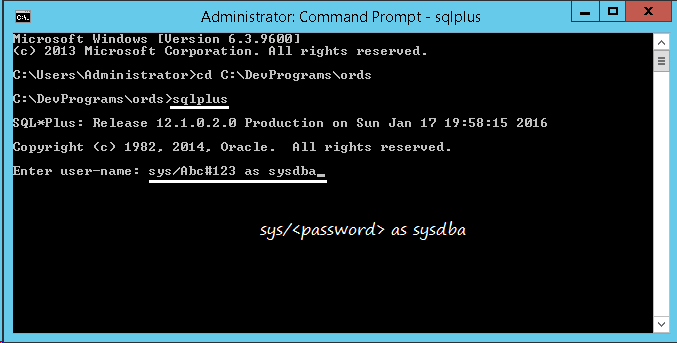
Next, login sqlplus as sysdba.
Your Oracle APEX is running on Oracle XML DB HTTP Server, you should disable it with the command:
| 1 2 3 4 5 6 7 8 | -- Disable Oracle APEX on Oracle XML DB HTTP Server. EXEC DBMS_XDB.SETHTTPPORT(0); -- Note: You can enable it with command: EXEC DBMS_XDB.SETHTTPPORT(8080) |

Exit sqlplus. And CD to ords:
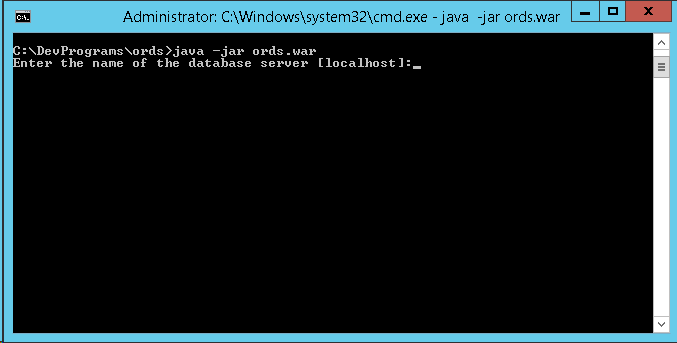
Run command:
| 1 2 3 4 5 6 7 | # Run command: java -jar ords.war # Or: java -jar ords.war install |
Enter the address of the machine that contains the database (default is localhost):
Port of database (Default is 1521):
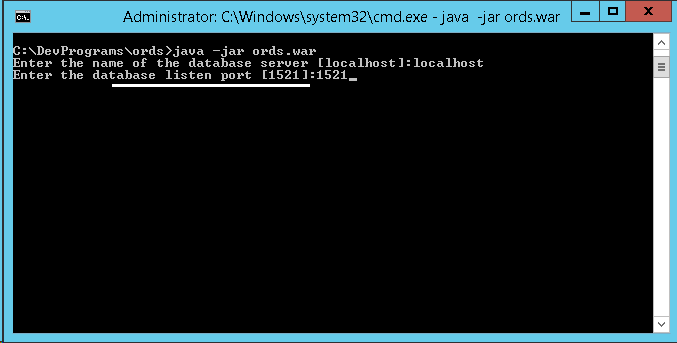
Enter Service Name or SID of database:

Enter password for ORDS_PUBLIC_USER
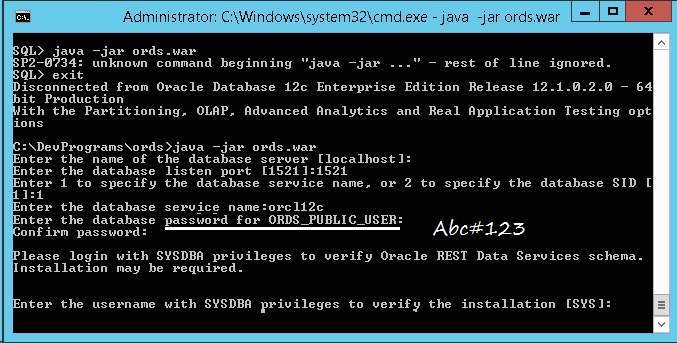
Sqlplus requests to re-enter the user database information with sysdba rights. (Enter sys and then password).
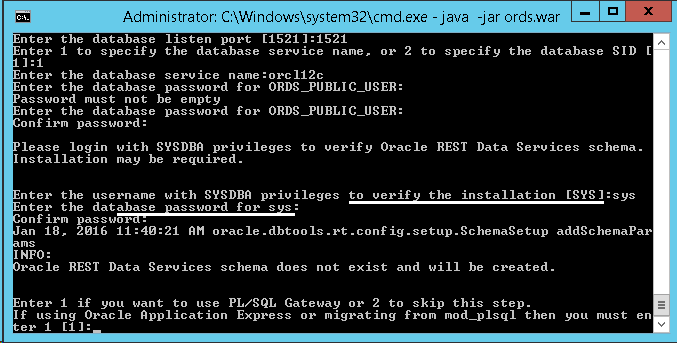
SQLPlus will ask whether you use Oracle APEX or not, if yes let's enter 1, then press "enter" to continue.

Entering a password for user will be created (APEX_PUBLIC_USER):

Next, enter 1 to specify password for 2 newly created user database (APEX_LISTENER, APEX_REST_PUBLIC_USER).

Select 1 to start ORDS in standalone mode:
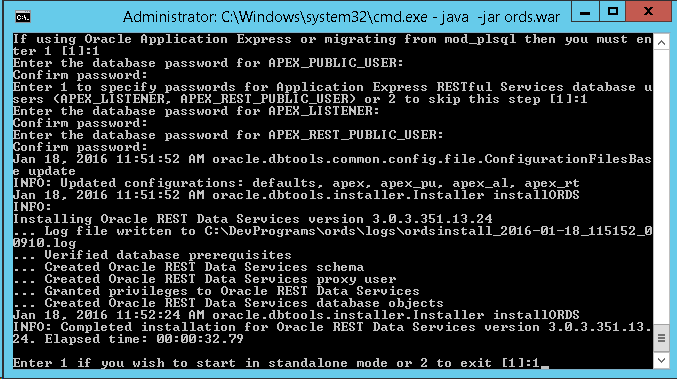
You have configured ORDS successfully. Close CMD window
Running ORDS
Note: You can run the command below to see the help:
java -jar ords.war help standalone
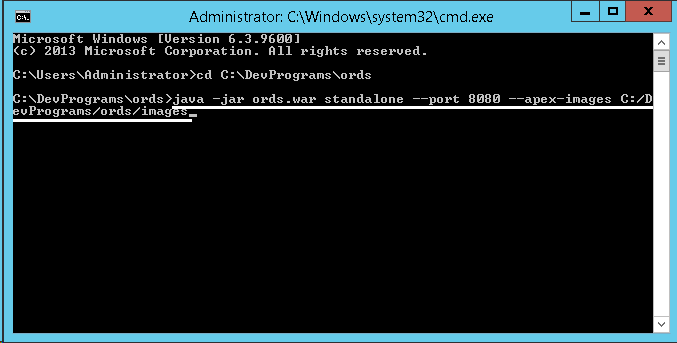
CD to ORDS folder and run command:
| 1 | java -jar ords.war standalone --port 8080 --apex-images C:/DevPrograms/ords/images |
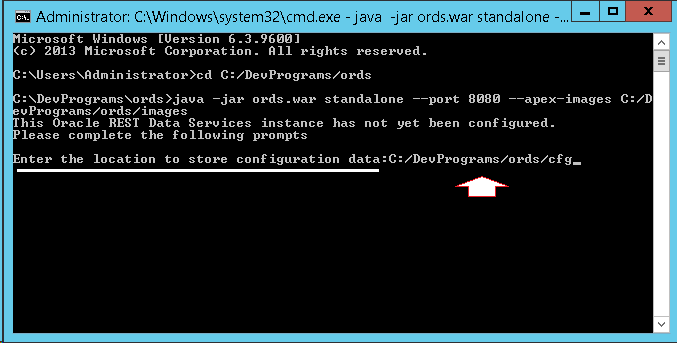
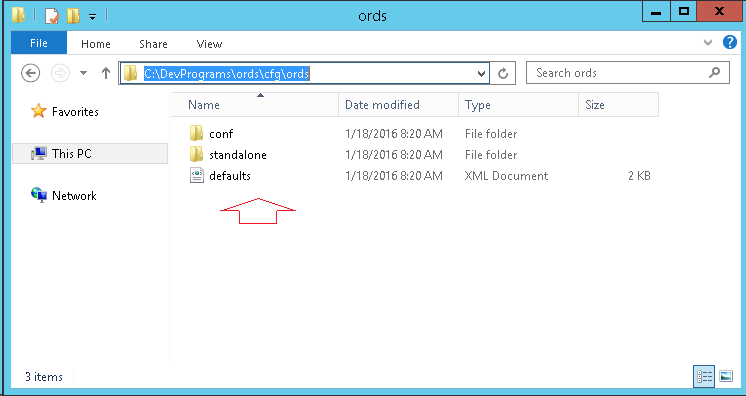
For the 1st time, it will ask where to place configure file:
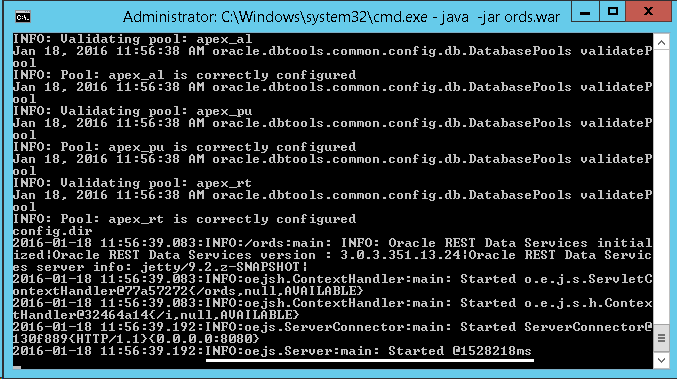
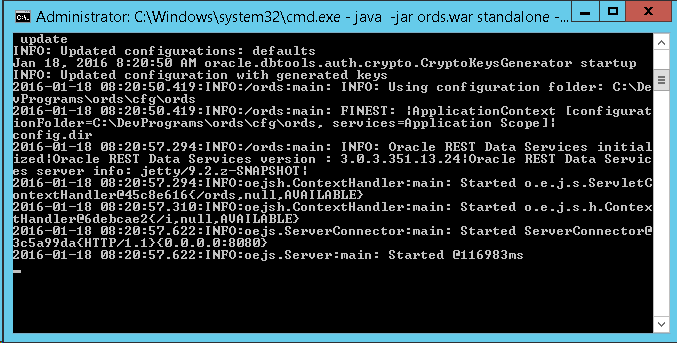
ORDS has been successfully deployed.
Note: If you receive an error: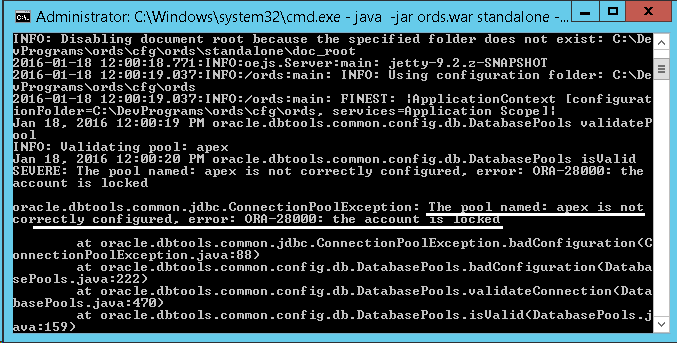 Unlock for APEX_PUBLIC_USER user
Columnusername format a25;Columnaccount_status format a25;-- Query unlocked APEX user.selectusername,account_statusfromdba_userswherelock_dateisnotnullandusernamelike'APEX%';
AlteruserAPEX_PUBLIC_USER account unlock;
The configure file is also created after you deployed ORDS:
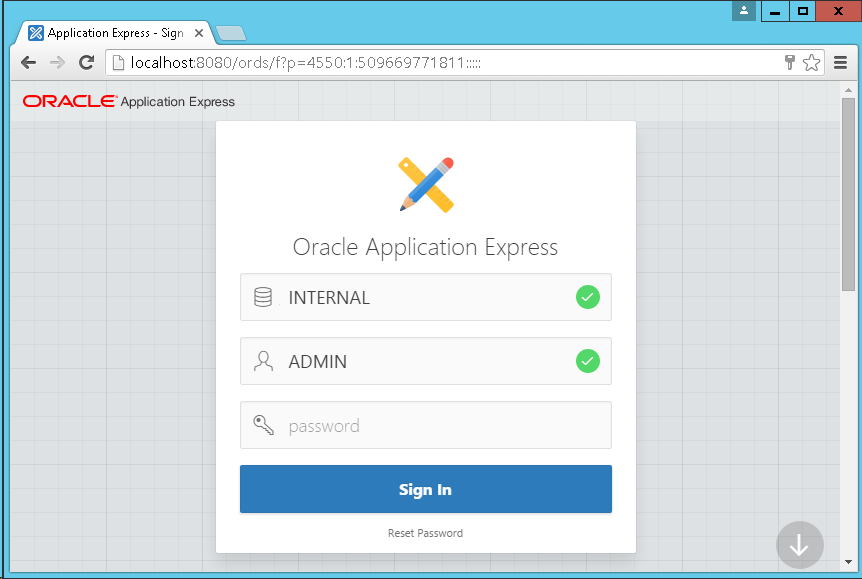
Don't close the window above, you can use APEX with new url:
- http://localhost:8080/ords
这篇关于Oracle APEX 安装Oracle REST Data Services (ORDS) 教程的文章就介绍到这儿,希望我们推荐的文章对编程师们有所帮助!


