本文主要是介绍openssl3.2 - osslsigncode工程的学习,希望对大家解决编程问题提供一定的参考价值,需要的开发者们随着小编来一起学习吧!
文章目录
- openssl3.2 - osslsigncode工程的学习
- 概述
- 笔记
- 工程库地址
- 工程的编译
- osslsigncodeM工程文件列表
- osslsigncodeM工程搭建细节
- 原始工程实现的改动
- 自己封装的包含openssl和curl的实现
- osslsigncodeM工程命令行的用法
- 备注 - VS2019调试环境
- 备注 - 如果要单步openssl的API
- 学学作者怎么对签好的PE进行验签(code sgin)
- 取PE中的签名位置和签名数据长度
- 算PE的实际文件累加和
- END
openssl3.2 - osslsigncode工程的学习
概述
github上有个osslsigncode工程, 可以对PE文件进行code sign签名和验签.
想在自己工程中, 对正在运行的的PE本身文件进行完整性校验, 应该能从osslsigncode工程中学到东西.
在看资料时, 看到一个逆向工程师, patch掉一个用土法进行EXE本身的完整性校验的案例.
这个案例, 程序里面自己算了本身的校验和, 然后和程序中预留的校验和进行比对, 这样很容易被别人搞掉.
好一些的方法是, 用osslsigncode工程里面这种用公版openssl的验签的方法, 不存在直接的比对.
发现不对了, 悄悄的不干活就是了.
如果逆向工程师硬要暴力patch, 后续再结合其他措施, 让被加密的配置文件不能正常解密, 达到程序不能让非正版用户使用的目的就行了.
笔记
工程库地址
https://github.com/mtrojnar/osslsigncode.git
工程的编译
作者的使用环境是在like-unix环境下, 他没有认真考虑使用者在windows环境下的编译.
用作者的脚本, 无法正常在(vs2019 + cmake)环境下编译通过. 编译脚本给的真的有问题.
主要是cmake + vcpkg的依赖太复杂, 要是像我重建的工程这样整简单一些(工程依赖项都是编译好的, 只考虑工程本身). 那工程的学习和使用者就方便太多了.
这个工程用了openssl3.1.x + curl作为组件, 其他是作者自己的实现.
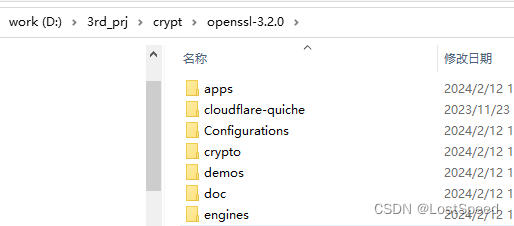
openssl3.x接口都是兼容的, 我这里就使用openssl3.2.
openssl3.2我自己编译好了(openssl3.2 - 编译).
curl编译挺复杂的, 我直接用了官方的x64版(curl8.6.0 - CURLE_PEER_FAILED_VERIFICATION).
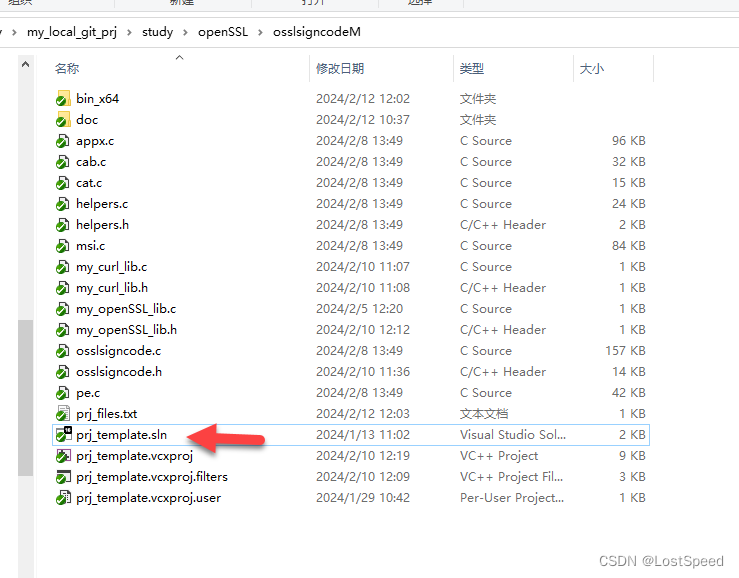
基于上面2个现成的组件(openssl3.2 + curl8.6.0), 自己复原了一个osslsigncode的VS2019X64工程, 命名为osslsigncodeM (M means modify)
osslsigncodeM工程文件列表
| .
| appx.c
| cab.c
| cat.c
| helpers.c
| helpers.h
| msi.c
| my_curl_lib.c
| my_curl_lib.h
| my_openSSL_lib.c
| my_openSSL_lib.h
| osslsigncode.c
| osslsigncode.h
| pe.c
| prj_files.txt
| prj_template.sln
| prj_template.vcxproj
| prj_template.vcxproj.filters
| prj_template.vcxproj.user
|
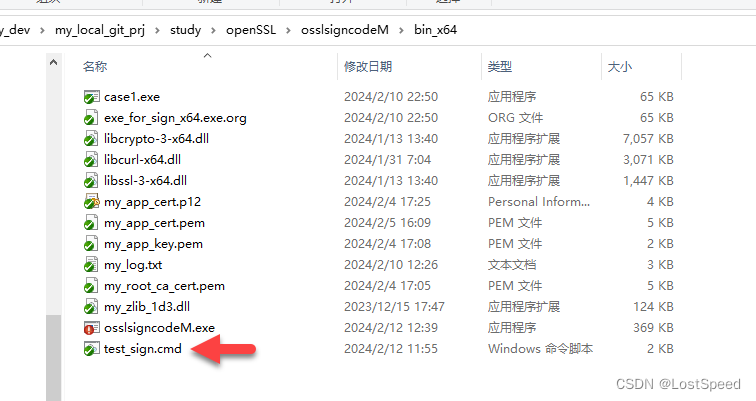
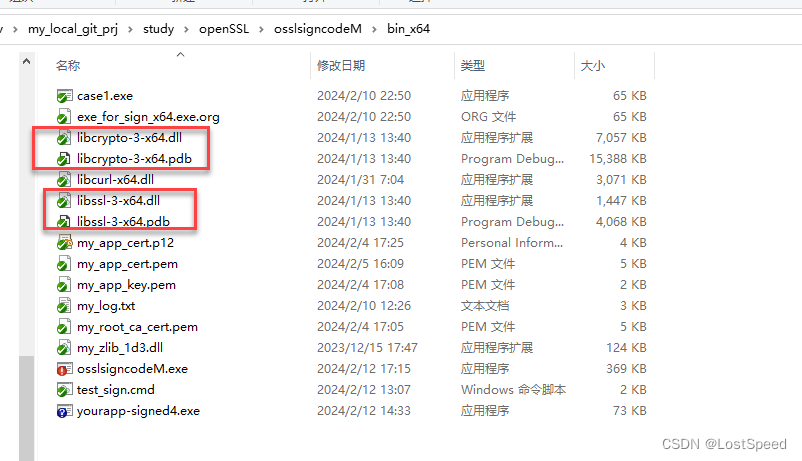
+---bin_x64
| case1.exe
| exe_for_sign_x64.exe.org
| libcrypto-3-x64.dll
| libcurl-x64.dll
| libssl-3-x64.dll
| my_app_cert.p12
| my_app_cert.pem
| my_app_key.pem
| my_log.txt
| my_root_ca_cert.pem
| my_zlib_1d3.dll
| osslsigncodeM.exe
| test_sign.cmd
|
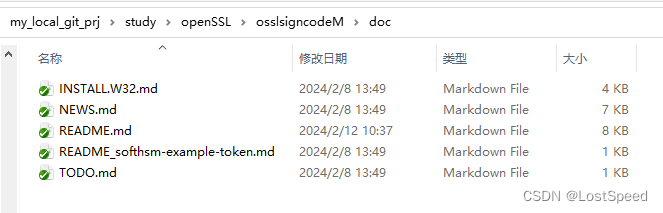
\---docINSTALL.W32.mdNEWS.mdREADME.mdREADME_softhsm-example-token.mdTODO.mdosslsigncodeM工程搭建细节
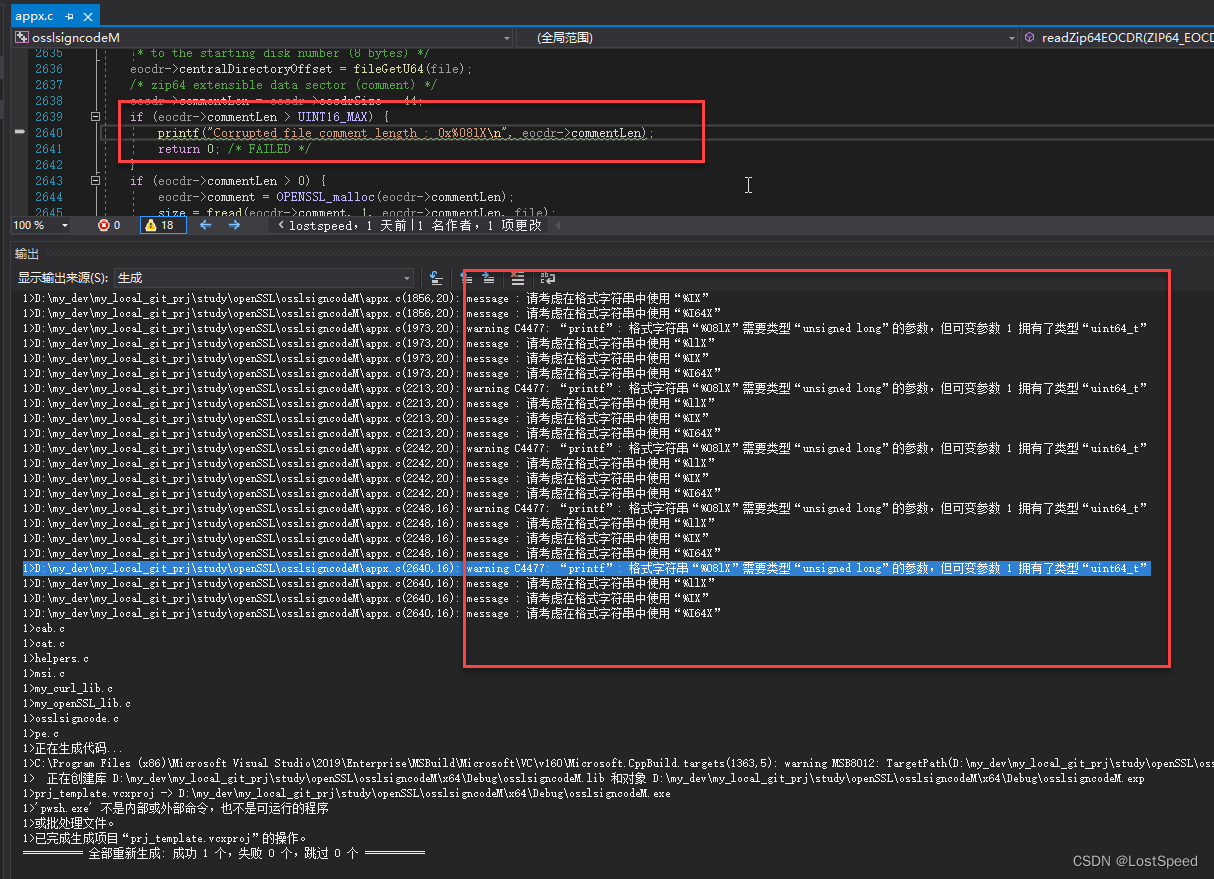
工程搭建完成后, 编译有一些警告, 都是作者打印信息时的字符串格式化的选项不合适, 不影响用, 不管了.
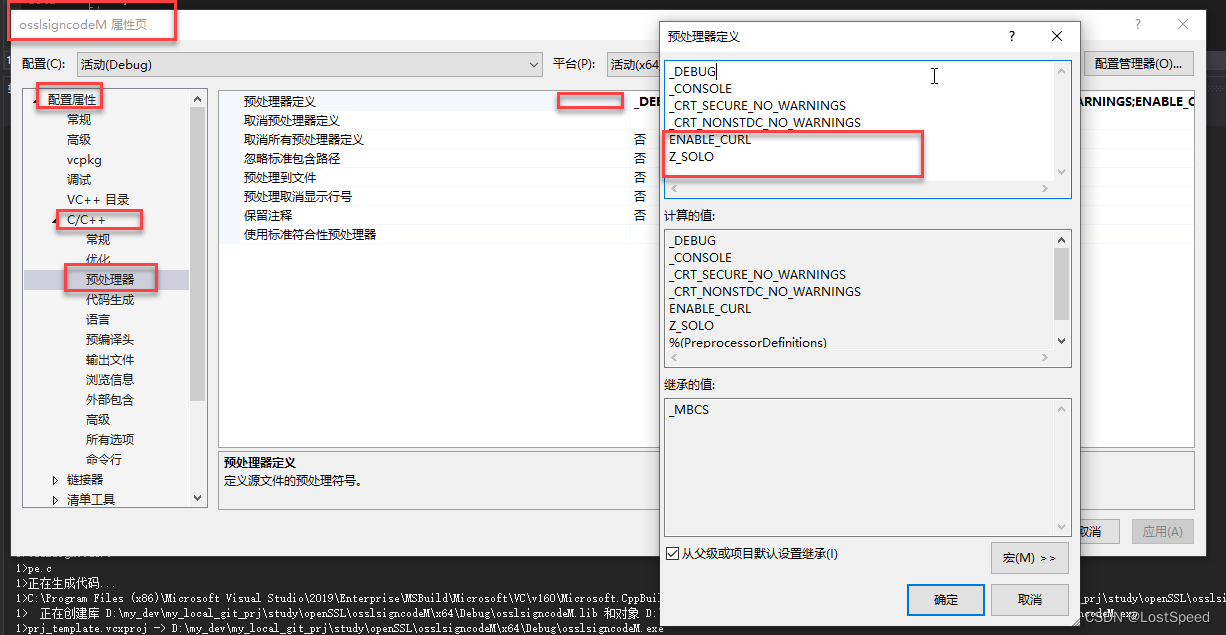
预处理选项中, 要加2个宏, 否则编译不过.
ENABLE_CURL
Z_SOLO
头文件包含路径 - 指定openssl和curl的头文件路径
.\;D:\my_dev\lib\openssl_3d2\include;D:\my_dev\lib\curl-8.6.0_1-win64-mingw\include
库文件包含路径 - 指定openssl, curl, zlib的库文件包换路径
zlib是openssl要用的, curl中用的zlib是静态包含的.
D:\my_dev\lib\openssl_3d2\lib;D:\my_dev\lib\curl-8.6.0_1-win64-mingw\lib;D:\my_dev\lib\zlib_1d3
输出文件路径改一下, 生成到工程目录下的单独文件夹中, 可以和中间输出文件分开, 方便调试和归档.
$(ProjectDir)\bin_x64\$(TargetName)$(TargetExt)
原始工程实现的改动
osslsigncode.h 要包含openssl和curl库, 需要加2句.
/*! \file osslsigncode.h * Copyright (C) 2021-2023 Michał Trojnara <Michal.Trojnara@stunnel.org>* Author: Małgorzata Olszówka <Malgorzata.Olszowka@stunnel.org>*/// add by ls
#include "my_openSSL_lib.h"
#include "my_curl_lib.h"#define OPENSSL_API_COMPAT 0x10100000L
#define OPENSSL_NO_DEPRECATED
自己封装的包含openssl和curl的实现
/*!
\file my_openSSL_lib.h
*/#ifndef __MY_OPENSSL_LIB_H__
#define __MY_OPENSSL_LIB_H__#ifdef  _WIN32
#include <WinSock2.h>
#pragma comment(lib, "ws2_32.lib") // for select()#include <windows.h>#pragma comment(lib, "libcrypto.lib")
#pragma comment(lib, "libssl.lib")#pragma comment(lib, "my_zlib_1d3.lib")#endif /* #ifdef  _WIN32 */// --------------------------------------------------------------------------------
// 开关宏 - begin
// --------------------------------------------------------------------------------#define MY_USE_APPLINK// --------------------------------------------------------------------------------
// 开关宏 - END
// --------------------------------------------------------------------------------#endif /* #ifndef __MY_OPENSSL_LIB_H__ */
/*!
* \file D:\my_dev\my_local_git_prj\study\openSSL\nmake_test\test_c\prj_005_afalgtest.c\my_openSSL_lib.c
*/#include "my_openSSL_lib.h"#ifdef MY_USE_APPLINK
#include <openssl/applink.c> /*! for OPENSSL_Uplink(00007FF8B7EF0FE8,08): no OPENSSL_Applink */
#endif // #ifdef MY_USE_APPLINK
/*!
\file my_curl_lib.h
*/#ifndef __MY_CURL_LIB_H__
#define __MY_CURL_LIB_H__#include <curl/curl.h>
#pragma comment(lib, "libcurl.dll.a")#endif /* #ifndef __MY_CURL_LIB_H__ */
/*!
* \file my_curl_lib.c
*/#include "my_curl_lib.h"
osslsigncodeM工程命令行的用法
osslsigncode实现还没看, 主要试一下是否工程复原成功了. 如果工程搭建出来没有原始工程的效果, 还得找原因或放弃.
看osslsigncode的文档, 一共5个, 都有点用.
整理了一个脚本, 试了好使.
实验用到的证书, 都是自己前面做openssl实验(openssl3.2 - use openssl cmd create ca and p12)时准备好的.
脚本如下
@echo offrem \file test_sign.cmdrem 官方用法
rem osslsigncode sign -certs <cert-file> -key <der-key-file>                  -n "Your Application" -i http://www.yourwebsite.com/ -in yourapp.exe -out yourapp-signed.exe
rem osslsigncode sign -certs <cert-file> -key <key-file> -pass <key-password> -n "Your Application" -i http://www.yourwebsite.com/ -in yourapp.exe -out yourapp-signed.exe
rem osslsigncode sign -certs <cert-file> -key <key-file> -pass <key-password>    -n "Your Application" -i http://www.yourwebsite.com/ -t http://timestamp.digicert.com -in yourapp.exe -out yourapp-signed.exe
rem osslsigncode sign -pkcs12 <pkcs12-file>              -pass <pkcs12-password> -n "Your Application" -i http://www.yourwebsite.com/ -t http://timestamp.digicert.com -in yourapp.exe -out yourapp-signed.exe
rem osslsigncode.exe add -addUnauthenticatedBlob -in your_signed_file.exe -out out.exerem my_app_key.pem 口令 = pwd_app_222222, 配套证书 my_app_cert.pem
rem my_app_cert.p12 口令 = pwd_exp_333333rem 自己的实际 case
rem osslsigncodeM.exe sign -certs my_app_cert.pem -key my_app_key.pem -n "Your Application" -i http://www.yourwebsite.com/ -in case1.exe -out yourapp-signed1.exe
rem osslsigncodeM.exe sign -certs my_app_cert.pem -key my_app_key.pem -pass pwd_app_222222 -n "Your Application" -i http://www.yourwebsite.com/ -in case1.exe -out yourapp-signed2.exe
rem osslsigncodeM.exe sign -certs my_app_cert.pem -key my_app_key.pem -pass pwd_app_222222 -n "Your Application" -i http://www.yourwebsite.com/ -t http://timestamp.digicert.com -in case1.exe -out yourapp-signed3.exe
rem osslsigncodeM.exe sign -pkcs12 my_app_cert.p12 -pass pwd_exp_333333 -n "Your Application" -i http://www.yourwebsite.com/ -t http://timestamp.digicert.com -in case1.exe -out yourapp-signed4.exe
rem osslsigncodeM.exe.exe add -addUnauthenticatedBlob -in your_signed_file4.exe -out out.exerem PE code sign 验签
osslsigncodeM.exe verify -CAfile my_root_ca_cert.pem -ignore-timestamp yourapp-signed4.exe
根据工程文档, osslsigncode的功能主要有3个.
- 对PE文件进行签名(code sign), 作者给了例子.
- 对PE文件进行验签(code sign), 作者没给例子, 自己猜读/实验, 搞定了.
- 对已经签名的PE文件附加一段1024bytes的数据, 作者给了例子.
对于第3个用法, 有可能杀毒软件有不好的提示, 如果没有特殊用场, 这个用法还是别用, 正常的用程序来实现, 而不是在签名后再附加数据. 正常程序都不会这么玩.
对于第1个用法, 除非自己写签名(code sign)程序, 正常的都是用第三方程序来签名. 这个我不用.
我比较关注的是第2个用法, 学学人家怎么用openssl来验签(code sign).
我自己实验整理出来的验签命令行, 加了-ignore-timestamp, 不验证时间戳, 对于我自己的工程应用就够了.
osslsigncode的细节用法, 远不止作者列出的这2种(签名, 附加数据), e.g. 验签
因为不是作者, 如果感兴趣, 只能自己去看命令行参数和程序实现, 自己去实验了.
对于开源工程, 小白大致只能看作者发布的文档, 作者没说的, 又看着大概好像有的功能, 只能自己去工程中去深挖了.
D:\my_dev\my_local_git_prj\study\openSSL\osslsigncodeM\bin_x64>osslsigncodeM.exe --help
osslsigncode custom build, using:OpenSSL 3.2.0 23 Nov 2023 (Library: OpenSSL 3.2.0 23 Nov 2023)libcurl/8.6.0 LibreSSL/3.8.2 zlib/1.3.1 brotli/1.1.0 zstd/1.5.5 WinIDN libpsl/0.21.5 libssh2/1.11.0 nghttp2/1.59.0 ngtcp2/1.2.0 nghttp3/1.1.0osslsigncode is a small tool that implements part of the functionality of the Microsoft
tool signtool.exe - more exactly the Authenticode signing and timestamping.
It can sign and timestamp PE (EXE/SYS/DLL/etc), CAB and MSI files,
supports getting the timestamp through a proxy as well.
osslsigncode also supports signature verification, removal and extraction.--version | -v         = print osslsigncode version and usage
--help                 = print osslsigncode help menuCommands:
add                    = add an unauthenticated blob or a timestamp to a previously-signed file
attach-signature       = sign file using a given signature
extract-signature      = extract signature from a previously-signed file
remove-signature       = remove sections of the embedded signature on a file
sign                   = digitally sign a file
verify                 = verifies the digital signature of a fileFor help on a specific command, enter osslsigncodeM.exe <command> --helpUsage: osslsigncodeM.exe[ --version | -v ][ --help ][ sign ] ( -certs | -spc <certfile> -key <keyfile> | -pkcs12 <pkcs12file> |[ -pkcs11engine <engine> ] -pkcs11module <module> -pkcs11cert <pkcs11 cert id> |-certs <certfile> -key <pkcs11 key id>)[ -nolegacy ][ -pass <password> [ -readpass <file> ][ -ac <crosscertfile> ][ -h {md5,sha1,sha2(56),sha384,sha512} ][ -n <desc> ] [ -i <url> ] [ -jp <level> ] [ -comm ][ -ph ][ -t <timestampurl> [ -t ... ] [ -p <proxy> ] [ -noverifypeer  ][ -ts <timestampurl> [ -ts ... ] [ -p <proxy> ] [ -noverifypeer ] ][ -TSA-certs <TSA-certfile> ] [ -TSA-key <TSA-keyfile> ][ -TSA-time <unix-time> ][ -time <unix-time> ][ -addUnauthenticatedBlob ][ -nest ][ -verbose ][ -add-msi-dse ][ -pem ][ -in ] <infile> [-out ] <outfile>extract-data [ -pem ][ -h {md5,sha1,sha2(56),sha384,sha512} ][ -ph ][ -add-msi-dse ][ -in ] <infile> [ -out ] <datafile>add [-addUnauthenticatedBlob][ -t <timestampurl> [ -t ... ] [ -p <proxy> ] [ -noverifypeer  ][ -ts <timestampurl> [ -ts ... ] [ -p <proxy> ] [ -noverifypeer ] ][ -TSA-certs <TSA-certfile> ] [ -TSA-key <TSA-keyfile> ][ -TSA-time <unix-time> ][ -h {md5,sha1,sha2(56),sha384,sha512} ][ -index <index> ][ -verbose ][ -add-msi-dse ][ -in ] <infile> [ -out ] <outfile>attach-signature [ -sigin ] <sigfile>[ -CAfile <infile> ][ -CRLfile <infile> ][ -TSA-CAfile <infile> ][ -TSA-CRLfile <infile> ][ -time <unix-time> ][ -h {md5,sha1,sha2(56),sha384,sha512} ][ -require-leaf-hash {md5,sha1,sha2(56),sha384,sha512}:XXXXXXXXXXXX... ][ -nest ][ -add-msi-dse ][ -in ] <infile> [ -out ] <outfile>extract-signature [ -pem ][ -in ] <infile> [ -out ] <sigfile>remove-signature [ -in ] <infile> [ -out ] <outfile>verify [ -in ] <infile>[ -c | -catalog <infile> ][ -CAfile <infile> ][ -CRLfile <infile> ][ -TSA-CAfile <infile> ][ -TSA-CRLfile <infile> ][ -index <index> ][ -ignore-timestamp ][ -time <unix-time> ][ -require-leaf-hash {md5,sha1,sha2(56),sha384,sha512}:XXXXXXXXXXXX... ][ -verbose ]D:\my_dev\my_local_git_prj\study\openSSL\osslsigncodeM\bin_x64>
备注 - VS2019调试环境
如果输出的路径自己改了, 调试时的命令, 也要改成自己实际输出的那个EXE全路径, 否则VS2019找不到要调试的程序.

备注 - 如果要单步openssl的API
- 供APP用的openssl本身就是就要是debug版的才行. 我将安装后的openssl做了备份 openssl-3.2.0_debug_build_ok.7z
- 给APP用的openssl的DLL同级目录要有对应的Debug版的.PDB, 没有PDB, 即使是用的debug版的openssl DLL, 也无法步入.
- .PDB中记录的.c实现文件, 都是绝对路径, 所以编译出的源码工程位置不能变. 如果openssl源码目录改个名字, 就会跳出某个文件找不到, 让调试者自己找的浏览框.
学学作者怎么对签好的PE进行验签(code sgin)
取PE中的签名位置和签名数据长度
/** Verify mapped PE file and create PE format specific structure.* [in] indata: mapped PE file* [in] filesize: size of PE file* [returns] pointer to PE format specific structure*/
static PE_CTX *pe_ctx_get(char *indata, uint32_t filesize)
{PE_CTX *pe_ctx;uint32_t header_size, pe32plus, pe_checksum, nrvas, sigpos, siglen;uint16_t magic;if (filesize < 64) {printf("Corrupt DOS file - too short\n");return NULL; /* FAILED */}/* SizeOfHeaders field specifies the combined size of an MS-DOS stub, PE header,* and section headers rounded up to a multiple of FileAlignment.* SizeOfHeaders must be < filesize and cannot be < 0x0000002C (44) in Windows 7* because of a bug when checking section names for compatibility purposes */header_size = GET_UINT32_LE(indata + 60);if (header_size < 44 || header_size > filesize) {printf("Unexpected SizeOfHeaders field: 0x%08X\n", header_size);return NULL; /* FAILED */}if (filesize < header_size + 176) {printf("Corrupt PE file - too short\n");return NULL; /* FAILED */}if (memcmp(indata + header_size, "PE\0\0", 4)) {printf("Unrecognized DOS file type\n");return NULL; /* FAILED */}/* Magic field identifies the state of the image file. The most common number is* 0x10B, which identifies it as a normal executable file,* 0x20B identifies it as a PE32+ executable,* 0x107 identifies it as a ROM image (not supported) */magic = GET_UINT16_LE(indata + header_size + 24);if (magic == 0x20b) {pe32plus = 1;} else if (magic == 0x10b) {pe32plus = 0;} else {printf("Corrupt PE file - found unknown magic %04X\n", magic);return NULL; /* FAILED */}/* The image file checksum */pe_checksum = GET_UINT32_LE(indata + header_size + 88);/* NumberOfRvaAndSizes field specifies the number of data-directory entries* in the remainder of the optional header. Each describes a location and size. */nrvas = GET_UINT32_LE(indata + header_size + 116 + pe32plus * 16);if (nrvas < 5) {printf("Can not handle PE files without certificate table resource\n");return NULL; /* FAILED */}/* Certificate Table field specifies the attribute certificate table address (4 bytes) and size (4 bytes) */sigpos = GET_UINT32_LE(indata + header_size + 152 + pe32plus * 16);siglen = GET_UINT32_LE(indata + header_size + 152 + pe32plus * 16 + 4);// 对于未签名的PE, 得到的sigpos = 0, siglen = 0/* Since fix for MS Bulletin MS12-024 we can really assumethat signature should be last part of file */if ((sigpos != 0 || siglen != 0) &&(sigpos == 0 || siglen == 0 || sigpos >= filesize || sigpos + siglen != filesize)) {printf("Ignoring PE signature not at the end of the file\n");sigpos = 0;siglen = 0;}pe_ctx = OPENSSL_zalloc(sizeof(PE_CTX));pe_ctx->header_size = header_size;pe_ctx->pe32plus = pe32plus;pe_ctx->magic = magic;pe_ctx->pe_checksum = pe_checksum;pe_ctx->nrvas = nrvas;pe_ctx->sigpos = sigpos;pe_ctx->siglen = siglen;pe_ctx->fileend = filesize;return pe_ctx; /* OK */
}
算PE的实际文件累加和
/** Compute a checkSum value of the signed or unsigned PE file.* [in] ctx: structure holds input and output data* [returns] checksum*/
static uint32_t pe_calc_realchecksum(FILE_FORMAT_CTX *ctx)
{uint32_t n = 0, checkSum = 0, offset = 0;BIO *bio = BIO_new(BIO_s_mem());unsigned short *buf = OPENSSL_malloc(SIZE_64K);/* calculate the checkSum */while (n < ctx->pe_ctx->fileend) {size_t i, written, nread;size_t left = ctx->pe_ctx->fileend - n;unsigned short val;if (left > SIZE_64K)left = SIZE_64K;if (!BIO_write_ex(bio, ctx->options->indata + n, left, &written))goto err; /* FAILED */(void)BIO_seek(bio, 0);n += (uint32_t)written;if (!BIO_read_ex(bio, buf, written, &nread))goto err; /* FAILED */for (i = 0; i < nread / 2; i++) {val = LE_UINT16(buf[i]);if (offset == ctx->pe_ctx->header_size + 88|| offset == ctx->pe_ctx->header_size + 90) {val = 0; // 如果读到PE文件中累加和的位置的4个字节, 跳过去.}checkSum += val;checkSum = LOWORD(LOWORD(checkSum) + HIWORD(checkSum));offset += 2;}}checkSum = LOWORD(LOWORD(checkSum) + HIWORD(checkSum));checkSum += offset; // 文件内容的实际累加和还要加上文件size
err:OPENSSL_free(buf);BIO_free(bio);return checkSum;
}
END
这篇关于openssl3.2 - osslsigncode工程的学习的文章就介绍到这儿,希望我们推荐的文章对编程师们有所帮助!