本文主要是介绍M1 Mac使用SquareLine-Studio进行LVGL开发,希望对大家解决编程问题提供一定的参考价值,需要的开发者们随着小编来一起学习吧!
背景
使用Gui-Guider开发遇到一些问题,比如组件不全。使用LVGL官方的设计软件开发
延续上一篇使用的基本环境。
LVGL项目
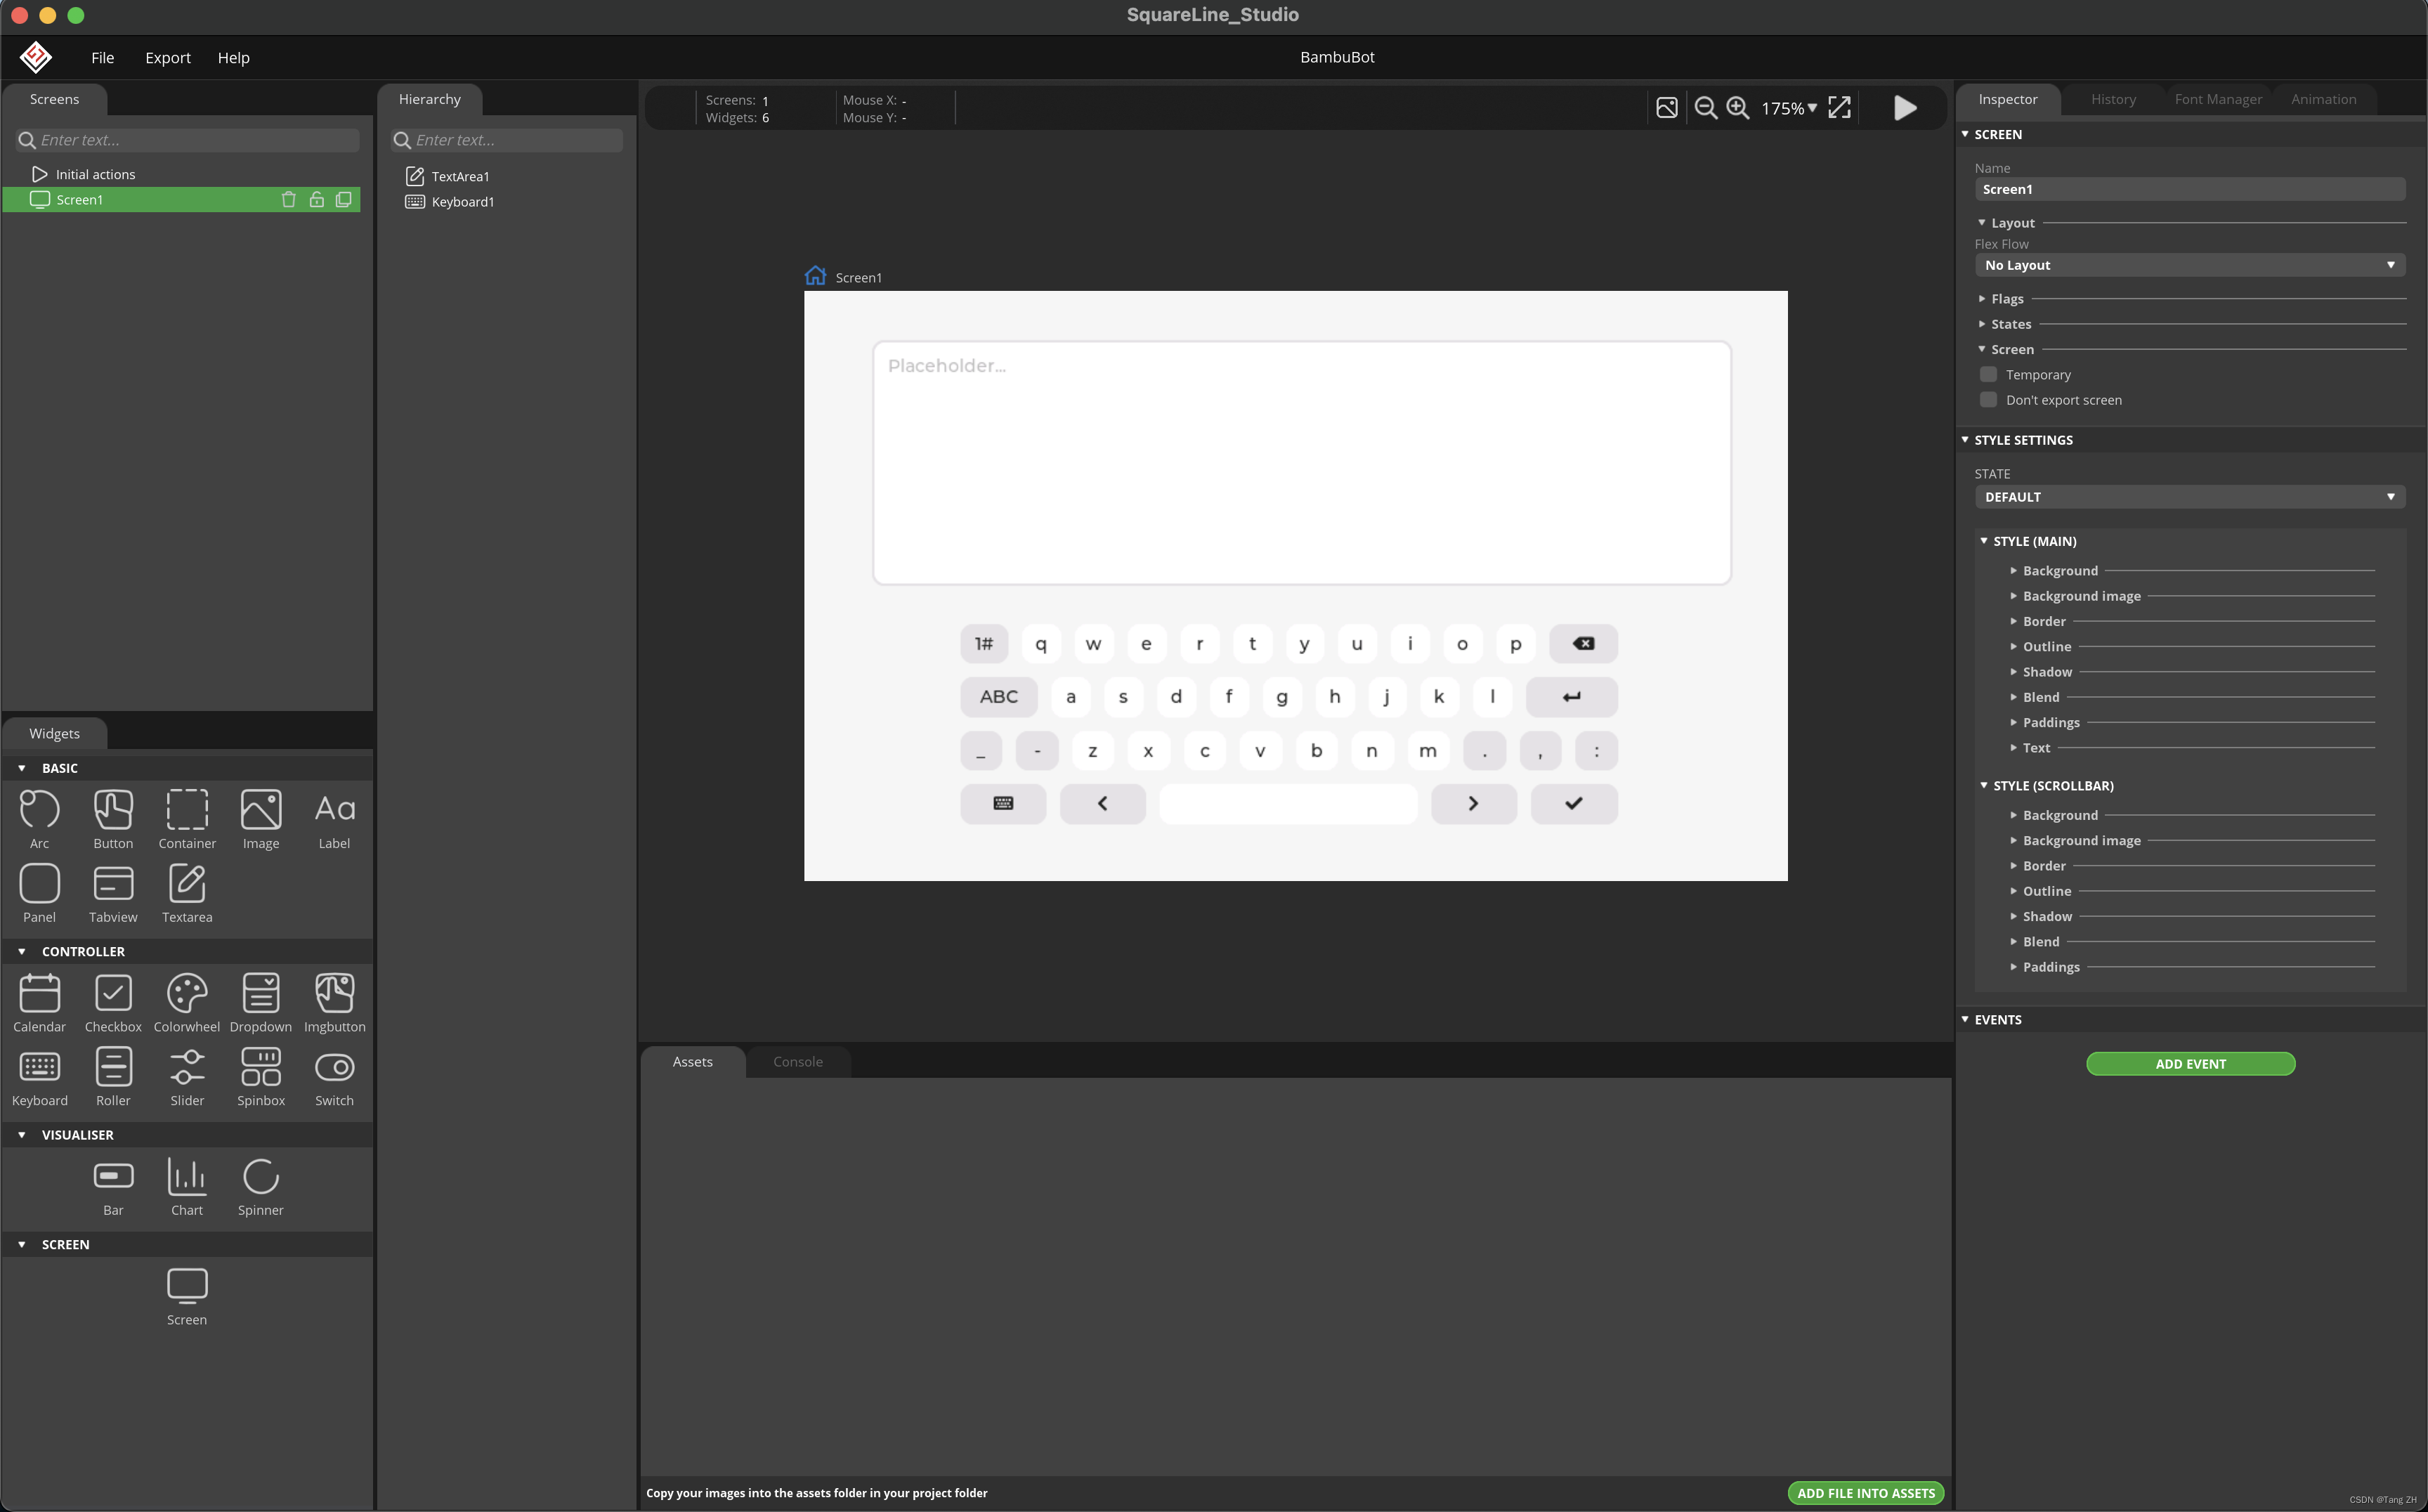
新建项目
选择Arduino的项目,设定好分辨率及颜色。

设计UI
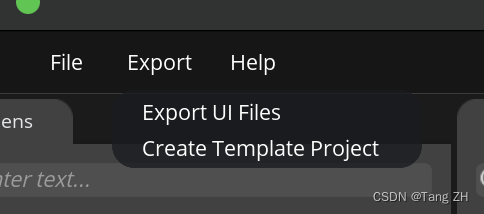
导出代码
Export -> Create Template Project
导出文件如图
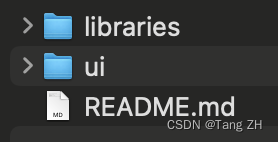
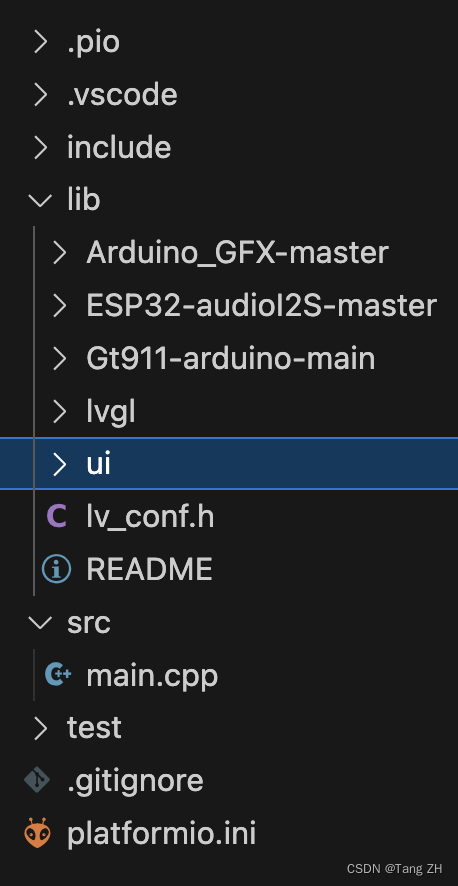
将libraries下的ui文件夹添加到项目的lib中
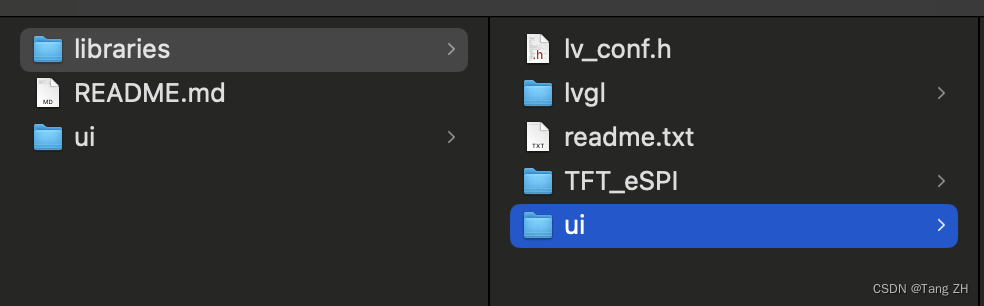
项目结构如图
修改main.cpp
#include "ui.h"
...
ui_init();
全文:
#include <Arduino.h>/******************************************************************************** LVGL Widgets* This is a widgets demo for LVGL - Light and Versatile Graphics Library* import from: https://github.com/lvgl/lv_demos.git** Dependent libraries:* LVGL: https://github.com/lvgl/lvgl.git* Touch libraries:* FT6X36: https://github.com/strange-v/FT6X36.git* GT911: https://github.com/TAMCTec/gt911-arduino.git* XPT2046: https://github.com/PaulStoffregen/XPT2046_Touchscreen.git** LVGL Configuration file:* Copy your_arduino_path/libraries/lvgl/lv_conf_template.h* to your_arduino_path/libraries/lv_conf.h* Then find and set:* #define LV_COLOR_DEPTH     16* #define LV_TICK_CUSTOM     1** For SPI display set color swap can be faster, parallel screen don't set!* #define LV_COLOR_16_SWAP   1** Optional: Show CPU usage and FPS count* #define LV_USE_PERF_MONITOR 1******************************************************************************/
//#include "lv_demo_widgets.h"#include <lvgl.h>
// #include <demos/lv_demos.h>
// #include "gui_guider.h"
// #include "custom.h"
// lv_ui guider_ui;
#include "ui.h"/*************************************************************************************************************************************************************/
#include <Arduino_GFX_Library.h>
#define TFT_BL 2
#define GFX_BL DF_GFX_BL // default backlight pin, you may replace DF_GFX_BL to actual backlight pin/* More dev device declaration: https://github.com/moononournation/Arduino_GFX/wiki/Dev-Device-Declaration */
#if defined(DISPLAY_DEV_KIT)
Arduino_GFX *gfx = create_default_Arduino_GFX();
#else /* !defined(DISPLAY_DEV_KIT) *//* More data bus class: https://github.com/moononournation/Arduino_GFX/wiki/Data-Bus-Class */
//Arduino_DataBus *bus = create_default_Arduino_DataBus();/* More display class: https://github.com/moononournation/Arduino_GFX/wiki/Display-Class */
//Arduino_GFX *gfx = new Arduino_ILI9341(bus, DF_GFX_RST, 0 /* rotation */, false /* IPS */);Arduino_ESP32RGBPanel *bus = new Arduino_ESP32RGBPanel(GFX_NOT_DEFINED /* CS */, GFX_NOT_DEFINED /* SCK */, GFX_NOT_DEFINED /* SDA */,40 /* DE */, 41 /* VSYNC */, 39 /* HSYNC */, 42 /* PCLK */,45 /* R0 */, 48 /* R1 */, 47 /* R2 */, 21 /* R3 */, 14 /* R4 */,5 /* G0 */, 6 /* G1 */, 7 /* G2 */, 15 /* G3 */, 16 /* G4 */, 4 /* G5 */,8 /* B0 */, 3 /* B1 */, 46 /* B2 */, 9 /* B3 */, 1 /* B4 */
);
// option 1:
// ST7262 IPS LCD 800x480Arduino_RPi_DPI_RGBPanel *gfx = new Arduino_RPi_DPI_RGBPanel(bus,800 /* width */, 0 /* hsync_polarity */, 8 /* hsync_front_porch */, 4 /* hsync_pulse_width */, 8 /* hsync_back_porch */,480 /* height */, 0 /* vsync_polarity */, 8 /* vsync_front_porch */, 4 /* vsync_pulse_width */, 8 /* vsync_back_porch */,1 /* pclk_active_neg */, 14000000 /* prefer_speed */, true /* auto_flush */);
#endif /* !defined(DISPLAY_DEV_KIT) */
/******************************************************************************** End of Arduino_GFX setting******************************************************************************//******************************************************************************** Please config the touch panel in touch.h******************************************************************************/
#include "touch.h"/* Change to your screen resolution */
static uint32_t screenWidth;
static uint32_t screenHeight;
static lv_disp_draw_buf_t draw_buf;
static lv_color_t *disp_draw_buf;
static lv_disp_drv_t disp_drv;/* Display flushing */
void my_disp_flush(lv_disp_drv_t *disp, const lv_area_t *area, lv_color_t *color_p)
{uint32_t w = (area->x2 - area->x1 + 1);uint32_t h = (area->y2 - area->y1 + 1);#if (LV_COLOR_16_SWAP != 0)gfx->draw16bitBeRGBBitmap(area->x1, area->y1, (uint16_t *)&color_p->full, w, h);
#elsegfx->draw16bitRGBBitmap(area->x1, area->y1, (uint16_t *)&color_p->full, w, h);
#endiflv_disp_flush_ready(disp);
}void my_touchpad_read(lv_indev_drv_t *indev_driver, lv_indev_data_t *data)
{if (touch_has_signal()){if (touch_touched()){data->state = LV_INDEV_STATE_PR;/*Set the coordinates*/data->point.x = touch_last_x;data->point.y = touch_last_y;}else if (touch_released()){data->state = LV_INDEV_STATE_REL;}}else{data->state = LV_INDEV_STATE_REL;}
}void setup()
{Serial.begin(115200);// while (!Serial);Serial.println("LVGL Widgets Demo");// Init touch device// Init Displaygfx->begin();
#ifdef TFT_BLpinMode(TFT_BL, OUTPUT);digitalWrite(TFT_BL, HIGH);
#endifgfx->fillScreen(RED);delay(500);gfx->fillScreen(GREEN);delay(500);gfx->fillScreen(BLUE);delay(500);gfx->fillScreen(BLACK);delay(500);lv_init();delay(10);touch_init();screenWidth = gfx->width();screenHeight = gfx->height();
#ifdef ESP32disp_draw_buf = (lv_color_t *)heap_caps_malloc(sizeof(lv_color_t) * screenWidth * screenHeight/4 , MALLOC_CAP_INTERNAL | MALLOC_CAP_8BIT);
#elsedisp_draw_buf = (lv_color_t *)malloc(sizeof(lv_color_t) * screenWidth * screenHeight/4);
#endifif (!disp_draw_buf){Serial.println("LVGL disp_draw_buf allocate failed!");}else{lv_disp_draw_buf_init(&draw_buf, disp_draw_buf, NULL, screenWidth * screenHeight/4);/* Initialize the display */lv_disp_drv_init(&disp_drv);/* Change the following line to your display resolution */disp_drv.hor_res = screenWidth;disp_drv.ver_res = screenHeight;disp_drv.flush_cb = my_disp_flush;disp_drv.draw_buf = &draw_buf;lv_disp_drv_register(&disp_drv);/* Initialize the (dummy) input device driver */static lv_indev_drv_t indev_drv;lv_indev_drv_init(&indev_drv);indev_drv.type = LV_INDEV_TYPE_POINTER;indev_drv.read_cb = my_touchpad_read;lv_indev_drv_register(&indev_drv);ui_init();Serial.println("Setup done");}
}void loop()
{lv_timer_handler(); /* let the GUI do its work */delay(5);
}
这篇关于M1 Mac使用SquareLine-Studio进行LVGL开发的文章就介绍到这儿,希望我们推荐的文章对编程师们有所帮助!


