本文主要是介绍Unity2d平台动作游戏教程,希望对大家解决编程问题提供一定的参考价值,需要的开发者们随着小编来一起学习吧!
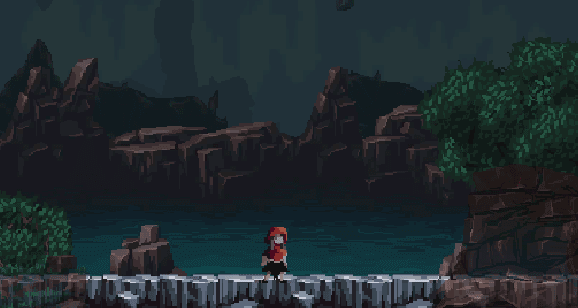
最终效果如下:

目录
玩家的基础移动
加入移动和跳跃动画
加入攻击动作
实现打击感
添加敌人受击动画与击退
添加敌人受击特效
攻击时的屏幕振动
首先实现最基础的功能,将环境拖拽进来,注意到环境的各个前后景的层次感是通过设定layer实现的:


玩家的基础移动
我们将玩家设定在第七个layer,以便于突出玩家处于环境中间。

并为了跳跃手感改变重力scale,这可以实现重力对不同的物体有不同的效果。
下面这段代码实现了移动和跳跃
public class MyPlayerController : MonoBehaviour
{new private Rigidbody2D rigidbody;private float input;private bool isGround;[SerializeField]public Vector3 checkPointOffset;[SerializeField]public LayerMask groundLayer;public int moveSpeed = 10;public int jumpStartSpeed = 10;// Start is called before the first frame updatevoid Start(){rigidbody = GetComponent<Rigidbody2D>();}// Update is called once per framevoid Update(){input = Input.GetAxisRaw("Horizontal");isGround = Physics2D.OverlapCircle(transform.position + new Vector3(checkPointOffset.x, checkPointOffset.y, 0), checkPointOffset.z, groundLayer);Move();}void Move(){rigidbody.velocity = new Vector2(input * moveSpeed, rigidbody.velocity.y);if (Input.GetKeyDown(KeyCode.W) && isGround){rigidbody.velocity = new Vector2(0, jumpStartSpeed);}if (rigidbody.velocity.x < 0)transform.localScale = new Vector3(-1, 1, 1);else if (rigidbody.velocity.x > 0)transform.localScale = new Vector3(1, 1, 1);}
}
这两个标头具有序列化的作用:


加入移动和跳跃动画
exit time打断时间(从哪一帧开始逐渐降低当前动画的权重)、
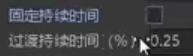
fixed duration固定持续时间(这其实是一个切换开关,切换是按照秒显示还是按照百分比显示)、transition duration过度持续时间 (过度有多长)、
勾选这个选项其实影响的是以百分比还是秒来显示:

transition offset过度抵消(从下一个动画的什么位置开始播放)、
interruption source中断来源
先创建控制器并且拖入站立和跑步和跳跃的动画,并进行衔接:

同时删去过渡时间:

在动画控制器中 如果动画切换的条件是用一个与来表示的话 可以这样:

(注意对于速度的设置判断有时候不要判断是否为0,因为有时候即使没动,物体的速度可能也是一个非常小的值:
![]() )
)
如果是用或条件表示的话,就多添加一次transtition,就会变成下图所示:

此处举例,从站立到跑有两个切换条件


jump的切换使用触发器:

随后即可实现跑跳
接下来加入降落的动画,即人物到达最高点后,会播放降落的动画:
三种状态都有可能进入fall状态,因此进行设置
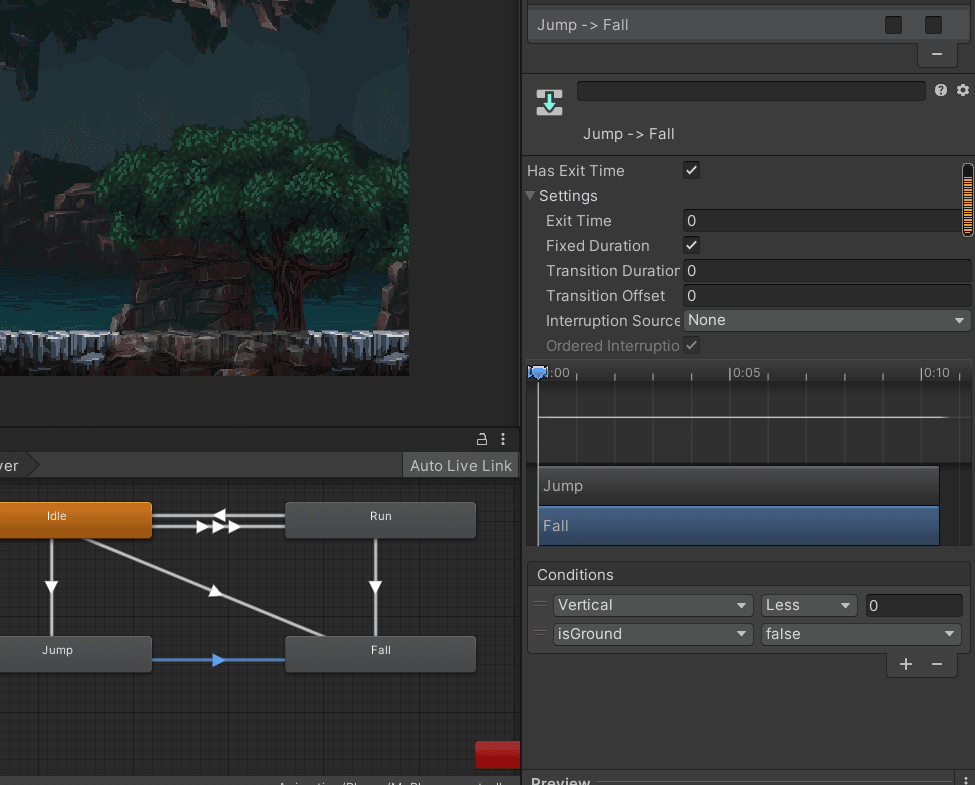
为了降落更加流畅,给Fall添加一个无条件的falling动画,之后动画变成这样:

之后即可实现降落。
接下来实现着陆地面,由于着陆到地面有三种前置可能:jump、fall、falling,因此都需要添加转换。并且落地后无条件变为idle,如下所示:

让玩家着陆1秒后变为idle状态:

实现如下:

此时代码如下:
using System.Collections;
using System.Collections.Generic;
using UnityEngine;public class MyPlayerController : MonoBehaviour
{new private Rigidbody2D rigidbody;private float input;private bool isGround;[SerializeField]public Vector3 checkPointOffset;[SerializeField]public LayerMask groundLayer;public int moveSpeed = 5;public int jumpStartSpeed = 10;//----------下面这部分实现动画private Animator animator;// Start is called before the first frame updatevoid Start(){rigidbody = GetComponent<Rigidbody2D>();animator = GetComponent<Animator>();}// Update is called once per framevoid Update(){input = Input.GetAxisRaw("Horizontal");isGround = Physics2D.OverlapCircle(transform.position + new Vector3(checkPointOffset.x, checkPointOffset.y, 0), checkPointOffset.z, groundLayer);Move();}void Move(){rigidbody.velocity = new Vector2(input * moveSpeed, rigidbody.velocity.y);animator.SetFloat("Horizontal", rigidbody.velocity.x);animator.SetFloat("Vertical", rigidbody.velocity.y);animator.SetBool("isGround", isGround);if (Input.GetKeyDown(KeyCode.W) && isGround){rigidbody.velocity = new Vector2(0, jumpStartSpeed);animator.SetTrigger("Jump");}if (rigidbody.velocity.x < 0)transform.localScale = new Vector3(-1, 1, 1);else if (rigidbody.velocity.x > 0)transform.localScale = new Vector3(1, 1, 1);}
}
加入攻击动作
首先导入资源,加入三个轻攻击动画到动画机里,由于希望任何状态都可以攻击,所以用any state衔接:

设置好过度条件

并且播放完攻击动画希望玩家再次进入idle,因此可以将过度衔接到exit:


重攻击同理,随后效果如下:

接下来书写Attack函数:
private int lightCombo = 1;private int heavyCombo = 1;private int comboInterval = 2;//连击的间隔,一旦超过这个间隔则玩家连击会中断private float comboTimer = 0;//连击计时器,用来记录连击到上次过了多久bool isAttack = false; void Attack(){if (!isAttack && Input.GetKeyDown(KeyCode.J)){isAttack = true;animator.SetTrigger("LightAttack");animator.SetInteger("LightCombo", lightCombo);lightCombo++;if (lightCombo > 3) lightCombo = 1;comboTimer = 0;}if (!isAttack && Input.GetKeyDown(KeyCode.K)){isAttack = true;animator.SetTrigger("HeavyAttack");animator.SetInteger("HeavyCombo", heavyCombo);heavyCombo++;if (heavyCombo > 3) heavyCombo = 1;comboTimer = 0;}comboTimer += Time.deltaTime;if (comboTimer >= comboInterval){comboTimer = 0;lightCombo = 0;heavyCombo = 0;}}以及一个attackOver函数,用于函数结束时调用:
public void AttackOver()//用来给unity在动画结束时调用,采用帧事件的形式{isAttack = false;}接下来添加帧事件,在动画播放完关键连击时插入关键帧,用于调用attackover函数。
通常这种关键帧不会放在动画的最后一帧,这样有助于连击的连贯性。


但是我们发现攻击时仍可以移动,我们需要取消这点,取而代之,使用攻击时自动位移的方式实现位移补偿。
private string attackType;[Header("补偿速度")]public float lightAttackSpeed=1.3f;public float heavyAttackSpeed=0.7f; void Move(){if (!isAttack) {rigidbody.velocity = new Vector2(input * moveSpeed, rigidbody.velocity.y);}else{if(attackType=="Light") rigidbody.velocity = new Vector2(transform.localScale.x * lightAttackSpeed, rigidbody.velocity.y);if (attackType == "Heavy") rigidbody.velocity = new Vector2(transform.localScale.x * heavyAttackSpeed, rigidbody.velocity.y);}}此处代码犯了一个错,清空连击应该设置为1而不是设置为0:

此处还犯了一个bug,bug动图如下:如果在移动中按下攻击键,则玩家不会立即进入攻击状态而是跑一小段距离再进入攻击,如果把衔接的has exit time移除即可。

在实际上自己做这一步的时候一下子犯了两个bug,以后也可能会出现一下子遇见多个bug的情况。
解决bug的思路其实很简单,重点观察那些参数,检查代码是否有误,无误则检查是否是动画器某个衔接设置错了。
实现打击感
添加敌人受击动画与击退
我们接下来添加敌人,并为玩家的layer设置为player,敌人的layer设置为enemy,并且我们不希望player和enemy发生碰撞,因此在设置中选择:

为敌人添加动画控制器:

接下来需要在攻击动画的对应时刻进行攻击范围的判定,因此需要加特定的因素然后在特定帧修改,通过录制动画的形式。

加好之后,接下来书写代码:
给玩家添加attackArea后,注意层级不能设置为player否则无法发生触碰。
触碰敌人的代码:
private void OnTriggerEnter2D(Collider2D other){if (other.CompareTag("Enemy")){if (transform.localScale.x > 0) other.GetComponent<MyEnemy>().GetHit(Vector2.right);if (transform.localScale.x < 0) other.GetComponent<MyEnemy>().GetHit(Vector2.left);Debug.Log("attack success");}}Enemy的函数:
using System.Collections;
using System.Collections.Generic;
using UnityEngine;public class MyEnemy : MonoBehaviour
{private new Rigidbody2D rigidbody;private bool isHit;private Animator animator;private AnimatorStateInfo animStateInfo;public float speed;private Vector2 direction;// Start is called before the first frame updatevoid Start(){animator = GetComponent<Animator>();rigidbody = GetComponent<Rigidbody2D>();}// Update is called once per framevoid Update(){animStateInfo = animator.GetCurrentAnimatorStateInfo(0);if (isHit){rigidbody.velocity = direction * speed;if (animStateInfo.normalizedTime > 0.6f)//敌人后退的时间{isHit = false;}}}public void GetHit(Vector2 direction)//公开的给玩家调用的函数{transform.localScale = new Vector3(-direction.x, 1, 1);//与玩家的方向相反isHit = true;this.direction = direction;//让敌人按照玩家朝向的方向后退animator.SetTrigger("Hit");}
}

效果如下

添加敌人受击特效
为敌人添加子物体,并为其创建帧动画,帧动画由特效组成:

然后设置动画器:

在enemy脚本中添加:

效果如下:

攻击时的屏幕振动
此处希望这个类作为工具类,让其他脚本方便的调用里面的函数,所以这里采用单例模式编写,可以直接调用其方法而无需实例化。
using System.Collections;
using System.Collections.Generic;
using UnityEngine;public class AttackShake : MonoBehaviour
{private static AttackShake instance;public static AttackShake Instance{get{if (instance == null)instance = Transform.FindObjectOfType<AttackShake>();return instance;}}public void HitPause(int duration){StartCoroutine(Pause(duration));}IEnumerator Pause(int duration){float pauseTime = duration / 60f;Time.timeScale = 0;//暂时暂停时间yield return new WaitForSecondsRealtime(pauseTime);Time.timeScale = 1;}private bool isShake;public void CameraShake(float duration,float strength){if (!isShake) StartCoroutine(Shake(duration, strength));}IEnumerator Shake(float duration,float strength){isShake = true;Transform camera = Camera.main.transform;Vector3 startPos = camera.position;while (duration > 0){camera.position = Random.insideUnitSphere * strength+startPos;duration -= Time.deltaTime;yield return null;}isShake = false;}
}
上面实现了卡顿和抖动的函数,接下来只需要让玩家命中敌人时调用该函数并传入参数即可。
在playerController中:
[Header("打击感")]public float shakeTime=0.1f;public int lightPause = 6;public float lightStrength=0.015f;public int heavyPause=12;public float heavyStrength=0.065f;private void OnTriggerEnter2D(Collider2D other){if (other.CompareTag("Enemy")){if (transform.localScale.x > 0) other.GetComponent<MyEnemy>().GetHit(Vector2.right);if (transform.localScale.x < 0) other.GetComponent<MyEnemy>().GetHit(Vector2.left);Debug.Log("attack success");if (attackType == "Light"){AttackShake.Instance.HitPause(lightPause);AttackShake.Instance.CameraShake(shakeTime, lightStrength);}if (attackType == "Heavy"){AttackShake.Instance.HitPause(heavyPause);AttackShake.Instance.CameraShake(shakeTime, heavyStrength);}}}然后根据攻击类型是轻重攻击调用不同的参数即可,最终效果如下:

这篇关于Unity2d平台动作游戏教程的文章就介绍到这儿,希望我们推荐的文章对编程师们有所帮助!


