本文主要是介绍rust学习基于tokio_actor聊天服务器实战(一 ),希望对大家解决编程问题提供一定的参考价值,需要的开发者们随着小编来一起学习吧!
前言
tokio是Rust中使用最广泛的异步Runtime,它性能高、功能丰富、便于使用,是使用Rust实现高并发不可不学的一个框架
Actor 背后的基本思想是产生一个独立的任务,该任务独立于程序的其他部分执行某些工作。 通常,这些参与者通过使用消息传递信道与程序的其余部分进行通信。 由于每个 Actor 独立运行,因此使用它们设计的程序自然是并行的。 Actor 的一个常见用法是为 Actor 分配你要共享的某些资源的专有所有权,然后让其他任务通过与 Actor 通信来间接访问彼此的资源。 例如,如果要实现聊天服务器,则可以为每个连接生成一个任务,并在其他任务之间路由一个聊天消息的主任务。 十分有用,因为主任务可以避免必须处理网络IO,而连接任务可以专门处理网络IO;
为什么一定要用actor,这里只是仿照go项目里一部分,go 用的就是actor;
1:环境
rust1.75
ide rustrover64
2:设计及实现
这里使用类似单点登录模式,
useractor
先看go的
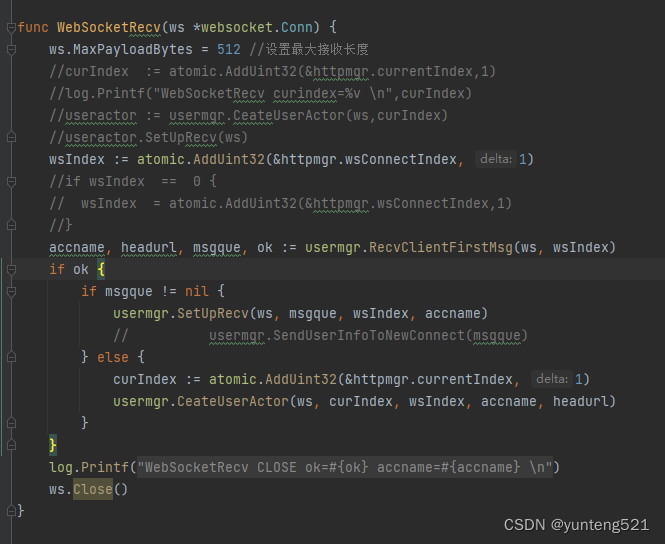

一共3个协程/future
接受网络消息 一个协程/future
发送网络消息 一个协程/future
逻辑处理 一个协程/future
协程/future间通信 直接用mpsc
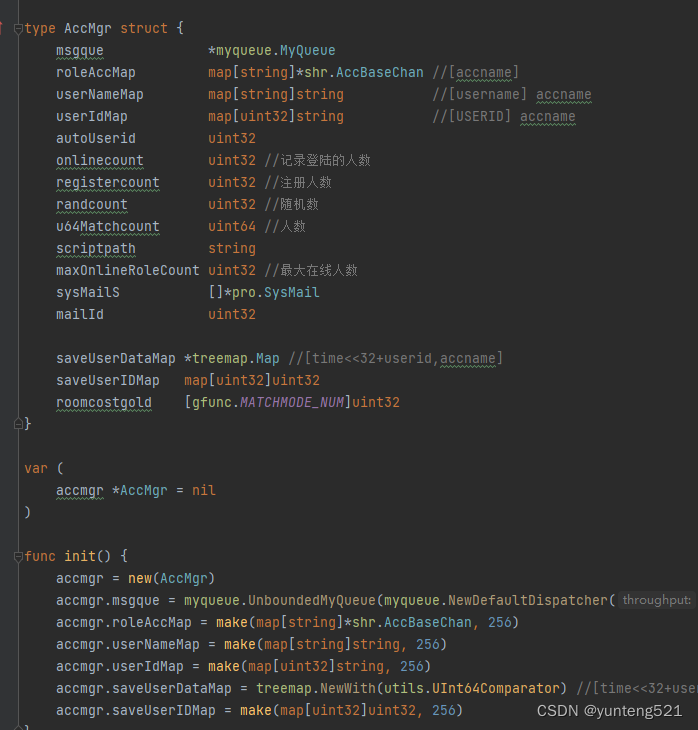
world actor/accmgr 管理useractor 登录,踢人,广播等
一共1个协程/future 处理逻辑消息
rust 版
useractor
说明 receiver: mpsc::UnboundedReceiver, logic future 接受消息并处理
sendclient: mpsc::UnboundedSender 发送消息给 网络future 从而发送给前端
worldsender: mpsc::UnboundedSender, 跟world actor 通信接口
pub enum ActorMessage {synmsgwaitrep {//同步等待回复//需要发送到别处等到别处返回结果,类似于同步操作,只是异步执行的  //oneshot  spscrespond_to: crate::synMsgWaitRep, //同步消息},wtc_userchann {respond_to: crate::userChan_WTC, //},wtc_msg(sendMsgAndType),wtc_forwardmsg(sendMsgAndType), //直接转发 datactw_msg(sendMsgAndType),ctc_nettologic_msg(sendMsgAndType), //网络消息 to logicctc_logictonet_msg(sendMsgAndType), //logic to net  sendctc_signal_event(signalType),ctw_signal_event(signalType),wtc_signal_event(signalType),wtc_getChan_msg(userChannChann),
}
pub struct MyUserActor {connid: ConnectID,userid: UserID,username: String,guildid: GuildID,userstate: Arc<AtomicU8>,receiver: mpsc::UnboundedReceiver<ActorMessage>,sendclient: mpsc::UnboundedSender<VU8>,worldsender: mpsc::UnboundedSender<ActorMessage>,msgmask: u32,lasttime: [u32; ChatChannel_Num],
}
world actor
mpscrecv: mpsc::UnboundedReceiver, 接收ActorMessage logic future
chanchan: mpsc::UnboundedReceiver, 接受 ActorMessage2 logic future
pub enum ActorMessage2 {synmsgwaitrep {//同步等待回复//需要发送到别处等到别处返回结果,类似于同步操作,只是异步执行的  //oneshot  spscrespond_to: crate::synMsgWaitRep2, //同步消息},ctw_userhann {respond_to: crate::userChan_CTW, //同步消息},
}
pub struct userSendChanActorMessage {pub(crate) chanchan: Option<mpsc::UnboundedSender<ActorMessage>>,pub(crate) username: String,pub(crate) userguildid: GuildID,pub(crate) connectid: ConnectID,pub(crate) chanState: Arc<AtomicU8>, //user 状态
}pub struct worldActor {sharestate: Arc<AtomicU8>,mpscrecv: mpsc::UnboundedReceiver<ActorMessage>,chanchan: mpsc::UnboundedReceiver<ActorMessage2>,usermap: HashMap<UserID, userChan_world>,namemap: HashMap<String, UserID>,guildmap: HashMap<GuildID, HashSet<UserID>>,maxonlinerole: u32,
}async fn run(mut self) {// let logic_handle = self.handle_logic(recv);loop {tokio::select! {recvmsg= self.mpscrecv.recv()=> {if let Some(actmsg) = recvmsg {self.handle_logic(actmsg).await ;}}recvmsgchan= self.chanchan.recv()=>{if let Some(actmsg) = recvmsgchan {self.handle_logic2(actmsg).await ;}}_=tokio::time::sleep(Duration::from_millis(1000*8)) =>{}}} //end loop}
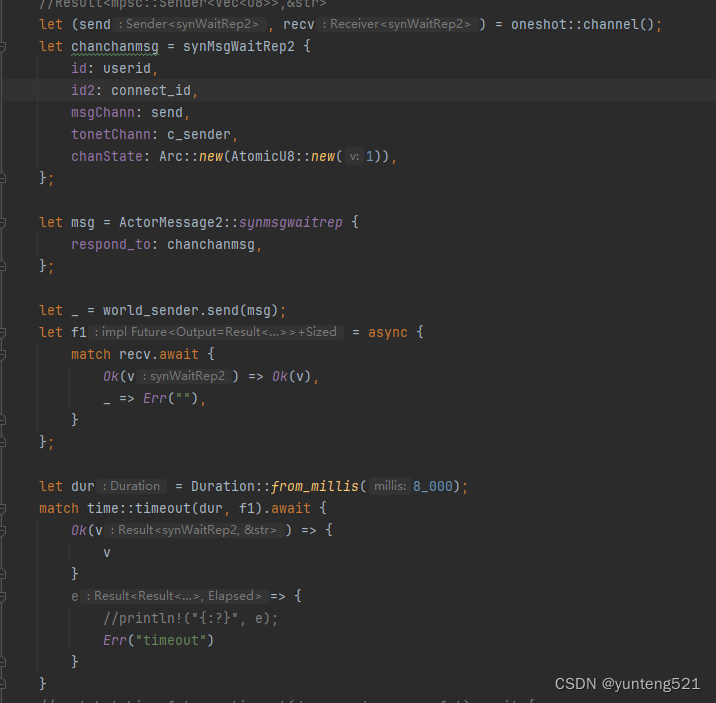
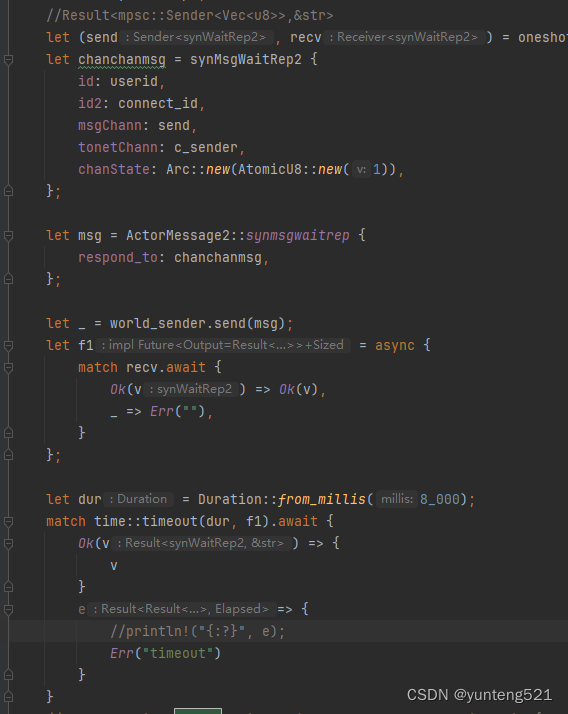
同步的方式的异步 go 很简单, rust go 上多一点点
go

rust
网络跟逻辑分开,这样 挤号,只需要把 logic future 里 sendclient mpsc 更新, 把网络 to logic mpsc 更新 及一些 状态重置下 即可,无需重新加载现有useractor 里的信息
类试单点登录 对于聊天服务器来说 ,只需要 角色进入后,由logic服 ase 对称加密(密钥及盐,logic 服 chat 服 共享/配置,共享方式自行决定)或 非对称(ECC) 等都可以,加密的token 由前端发送 给chat 服,chat 解密 得到 相应信息 并验证有效性 参考加解密验证用户的合法性
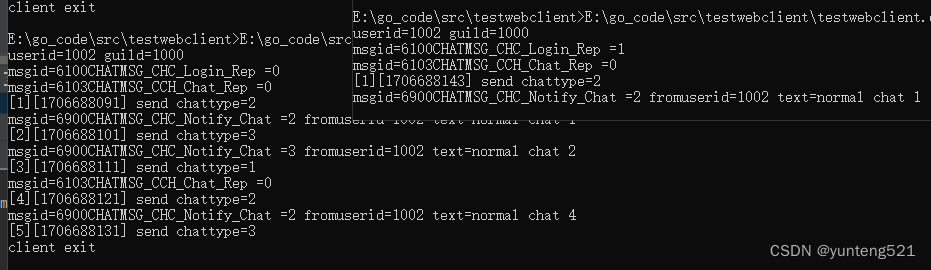
3:测试
前端简单用go 写了个
var origin = "http://192.168.1.32:8080"
var url = "wss://192.168.1.32:8080/websocket"
func GetProtoMsgID(data []byte) uint32 {var sMsgID uint16 = uint16(uint8(data[3] & 0x7f))if (uint8(data[3]) & 0x80) > 0 {sMsgID += (uint16(data[4]) & 0x7f) << 7}return uint32(sMsgID)
}func  sendMsg(ws *websocket.Conn,pb proto.Message) {if ws != nil {if data, err2 := proto.Marshal(pb); err2 != nil {log.Printf("SendMessage pb=%v err2=%v \n", pb, err2)} else {if err4 := websocket.Message.Send(ws, data); err4 != nil {log.Printf("send error =%v \n", err4)}}}
}func doLogicMsg(data []byte)  {msgId := GetProtoMsgID(data)fmt.Printf("msgid=%v",msgId)switch msgId {case uint32(chatproto.CHATMSG_CHC_Login_Rep):{loginReq := &chatproto.ChatMessageLoginRep{}if err := proto.Unmarshal(data, loginReq); err != nil {} else {fmt.Printf("CHATMSG_CHC_Login_Rep =%v \n",loginReq.Res)}}case uint32(chatproto.CHATMSG_CCH_Chat_Rep):{chatrep := &chatproto.ChatMessageChatRep{}if err := proto.Unmarshal(data, chatrep); err != nil {} else {fmt.Printf("CHATMSG_CCH_Chat_Rep =%v \n",chatrep.Res)}}case uint32(chatproto.CHATMSG_CHC_Notify_Chat):{chatmsg := &chatproto.ChatMessageNotifyChat{}if err := proto.Unmarshal(data, chatmsg); err != nil {} else {fmt.Printf("CHATMSG_CHC_Notify_Chat =%v fromuserid=%v text=%v \n",chatmsg.Chattype,chatmsg.Senderid,chatmsg.Strcontext)}}}}
func getTimestamp() uint32 {return  uint32(time.Now().UTC().Unix());
}func main(){//if os.Args[0]userid :=  getTimestamp()guildid := uint32(0)if len(os.Args) > 1 {if s,e := strconv.Atoi(os.Args[1]);e ==nil {userid = uint32(s)}}if len(os.Args) > 2 {if s,e := strconv.Atoi(os.Args[2]);e ==nil {guildid = uint32(s)}}ws, err := websocket.Dial(url, "", origin)if err != nil {log.Fatal(err)}fmt.Printf("userid=%v guild=%v \n",userid,guildid){msg := new(chatproto.ChatMessageLoginReq)msg.Msghead = &chatproto.ChatMessageHead{uint32(chatproto.CHATMSG_CCH_Login_Req), 1}msg.Userid = useridmsg.Username = "name_"+strconv.Itoa(int(userid))msg.Guildid = guildidmsg.Tokenmd5 = "md5"msg.Tokenstr = "Tokenstr"sendMsg(ws, msg)}disflag :=  false{go func() {for{buf := make([]byte, 1024*4)err := websocket.Message.Receive(ws, &buf)if err != nil {//log.Printf("websocket.Message.Receive err=%v  ---%s\n", err,self.getAccName())disflag = truereturn}if len(buf) >= 4 {doLogicMsg(buf)//self.msgQue.PostUserMessage(&ReceiveNetMsg{buf})} else {log.Printf("[error]recv data=%v \n", buf)return}}}()}time.Sleep(time.Second*3)//pub enum  ChatChannel{//	ChatChannel_NONE=0,//	ChatChannel_NORMAL,//	ChatChannel_GUILD,//	ChatChannel_WORLD,//	ChatChannel_ALL,//}{sendcount := uint32(1)num := uint32(0)msg := new(chatproto.ChatMessageChatReq)msg.Msghead = &chatproto.ChatMessageHead{uint32(chatproto.CHATMSG_CCH_Chat_Req), 1}msg.Chattype = 1msg.Context ="normal chat "+ strconv.Itoa(int(num))for {if disflag { //脏数据break}sendMsg(ws, msg)time.Sleep(time.Second*10)num++m := num % 3 +1msg.Chattype = uint32(m)msg.Context ="normal chat "+ strconv.Itoa(int(sendcount))fmt.Printf("[%v][%v] send chattype=%v \n",sendcount,getTimestamp(),msg.Chattype)sendcount++//if m == 3  {//	time.Sleep(time.Second*10)//}}}ws.Close()//关闭连接fmt.Printf("client exit\n")
}
相互挤号测试
4:DEMO工程 后续完善了如有需要再上传(当前只能说基本上跑起来)
如果觉得有用,麻烦点个赞,加个收藏
这篇关于rust学习基于tokio_actor聊天服务器实战(一 )的文章就介绍到这儿,希望我们推荐的文章对编程师们有所帮助!


