本文主要是介绍JupyterHub学习笔记 普通用户,如何在JupyterHub中创建自己的环境并使用自己的kernel 像screen一样使用jupyterlab 交互运行 jupyternotebook,希望对大家解决编程问题提供一定的参考价值,需要的开发者们随着小编来一起学习吧!
安装 python2r环境 并激活
conda create -n python2r -y
conda activate python2rconda install pip -y
conda install mamba -c conda-forge -c bioconda -y
conda install python -y
conda install ipykernel -y
python -m ipykernel install --user --name python2r --display-name "python2r"
conda activate squidpyconda install ipykernel -ypython -m ipykernel install --user --name squidpy --display-name "squidpy"
conda activate cell2loc_envconda install ipykernel -ypython -m ipykernel install --user --namecell2loc_env--display-name "cell2loc_env" 相关包的安装 How to program with Python and R in Jupyter Notebook - Ander Fernández (anderfernandez.com)Getting started with Python and the IPython notebook — Computational Statistics in Python 0.1 documentation (duke.edu)
conda install -c r r-essentials -y
pip install rpy2[all]
pip install rpy2 -i https://pypi.douban.com/simple/ #rpy2/rpy2: Interface to use R from Python (github.com)
或者使用conda 安装rpy2
conda install -c "conda-forge/label/cf202003" rpy2 -y
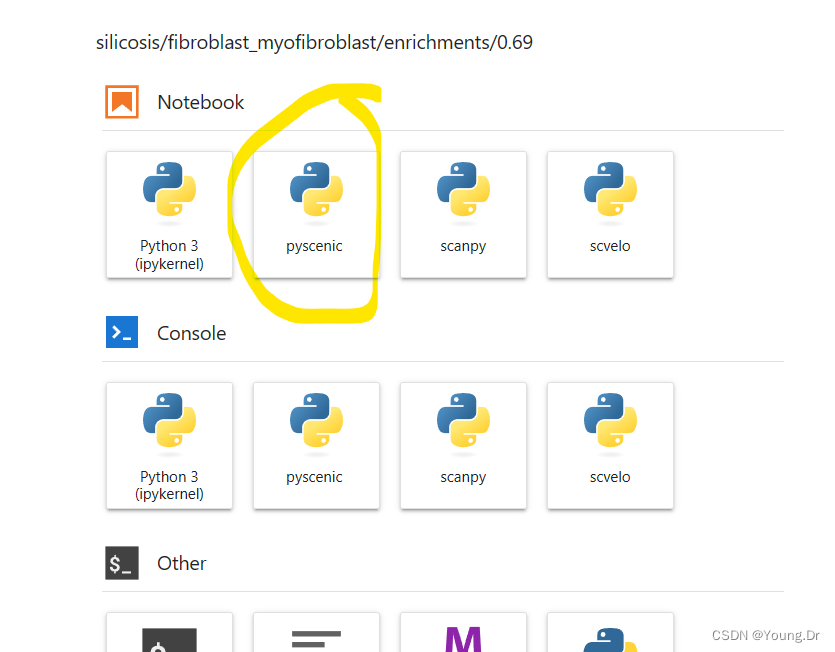
安装并进入pyscenic环境
conda create -n pyscenic
conda activate pyscenicconda install pipconda install python=3.10
pip install pyscenicconda install ipykernelpython -m ipykernel install --user --name pyscenic --display-name "pyscenic"
大概看一下 初步了解
JupyterLab最全详解,如果你还在使用Notebook,那你就out了! - 知乎
快速掌握数据分析必备工具 - ipython和jupyter notebook - 知乎本文帮你快速掌握数据分析师必须会用的两个工具 - ipython和jupyter notebook。 既然有了Python,为什么还要ipython?麦叔不用说话,给你一张图你就明白啦。jupyter notebook又是什么鬼? 建议把本文放到收藏夹。…![]() https://zhuanlan.zhihu.com/p/356572461
https://zhuanlan.zhihu.com/p/356572461
jupyter配置多环境Anconda,轻松切换不同内核 - 知乎 认真看这个,符合自己的需求
在JupyterHub中创建自己的环境可以通过以下步骤完成:
-
登录到JupyterHub并进入主页面。
-
点击右上角的“New”按钮,然后选择“Terminal”以打开终端。
-
在终端中创建一个新的conda环境,例如:
conda create --name myenv这将创建一个名为“myenv”的新环境。
-
安装所需的软件包和依赖项,例如:
conda install numpy pandas matplotlib这将在新的conda环境中安装NumPy、Pandas和Matplotlib等包。
-
在终端中退出conda环境,例如:
conda deactivate
6. 返回JupyterHub主页,并点击右上角的“New”按钮,然后选择“Notebook”以打开一个新的Jupyter Notebook。
7. 在Notebook中选择“Kernel” > “Change kernel” > “myenv”来选择刚才创建的新环境作为Kernel。
现在您可以在新的Jupyter Notebook中使用所需的软件包和依赖项,而不会与其他用户或系统环境冲突。
I haved created myenv in conda in my terminal,but i CANNOT find "myenv " as you told me “Kernel” > “Change kernel” > “myenv”. but i can only find python3(ipykernel)
If you have already created your myenv environment using conda in your terminal, but you cannot find it when you try to change the kernel in Jupyter Notebook, you may need to install ipykernel into your myenv environment and register it with Jupyter Notebook. Here are the steps:
-
Activate your
myenvenvironment in your terminal using the command:conda activate myenv -
Install
ipykernelin yourmyenvenvironment using the command:conda install ipykernel -
Register
myenvenvironment with Jupyter Notebook using the command:python -m ipykernel install --user --name myenv --display-name "myenv"
只需要更改 myenv 为自己的环境名称即可
python -m ipykernel install --user --name scvelo --display-name "scvelo"python -m ipykernel install --user --name pyscenic --display-name "pyscenic"
-
This will create a new kernel called
myenvin Jupyter Notebook. -
Start Jupyter Notebook in your browser and create a new notebook. Then, click on the "Kernel" menu, and you should now see
myenvas an option in the "Change kernel" submenu.Note: If you don't see
myenvin the list of available kernels, try refreshing the page or restarting Jupyter Notebook.
I hope this helps you to use your myenv environment in Jupyter Notebook.
do I need do change the user to my name?
No, you do not need to change the user to your name in order to create and use a new environment in JupyterHub. When you create a new environment using conda in the terminal, it will be associated with your user account by default.
When you start a new Jupyter Notebook, you should be able to see all the available kernels that are installed on your account. The myenv kernel should be listed as an option in the "Kernel" menu. You can select this kernel to use your myenv environment for that particular notebook.
If you still cannot see the myenv kernel, you can try restarting your JupyterHub server and refreshing your browser. If the issue persists, you may need to check that the ipykernel package is installed in your myenv environment and that the kernel has been registered correctly using the python -m ipykernel install command.
使用这环境,如何才能像screen一样,下次可以直接进入,不怕断网
这篇关于JupyterHub学习笔记 普通用户,如何在JupyterHub中创建自己的环境并使用自己的kernel 像screen一样使用jupyterlab 交互运行 jupyternotebook的文章就介绍到这儿,希望我们推荐的文章对编程师们有所帮助!


