本文主要是介绍定时关机应用V2.1,希望对大家解决编程问题提供一定的参考价值,需要的开发者们随着小编来一起学习吧!
# 在ShutDown_2.0的基础上,作了如下改进:
# 1) 修正了默认模式无法选择其他时间的bug,还增加了2.5小时和3小时两个选项;
# 2)自定义模式将计时单位从“秒”改为“分钟”,倒计时显示也优化为“小时:分钟:秒”;
# 3)增加了第三种“定时模式”'''
# 在ShutDown_2.0的基础上,作了如下改进:
# 1)默认模式增加了2.5小时和3小时“两个选项;
# 2)自定义模式将计时单位从“秒”改为“分钟”,倒计时显示也优化为“小时:分钟:秒”;
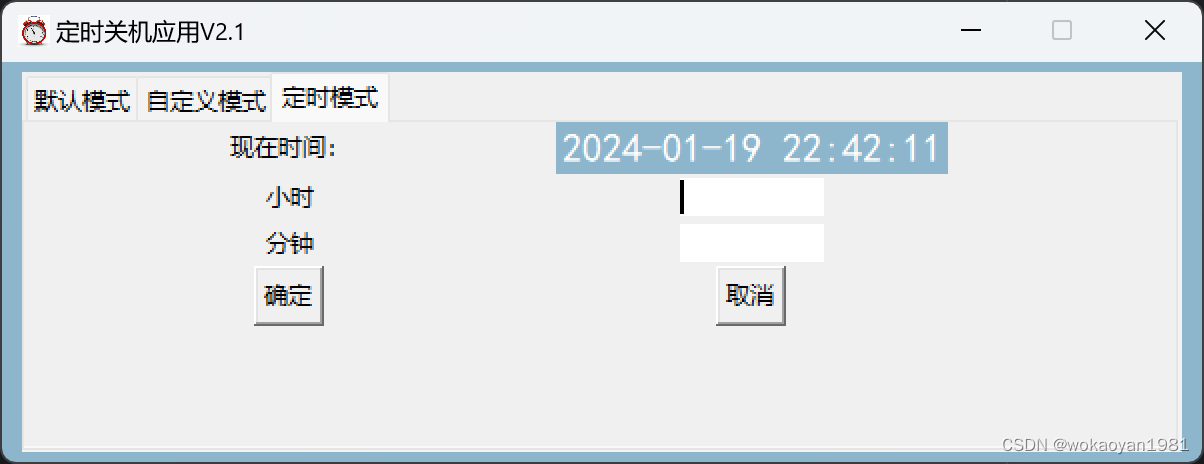
# 3)增加了第三种“定时模式”'''import datetime
import tkinter as tk
from tkinter import ttk
from threading import Thread
import time
import osdef selected_time(selected_value):match selected_value:case '0.5小时':return 1800case '1小时':return 3600case '1.5小时':return 5400case '2小时':return 7200case '2.5小时':return 9000case '3小时':return 10800class ShutdownApp:def __init__(self, root):self.time_left = 0self.time_left2 = 0self.root = rootself.root.title("定时关机应用V2.1")self.root.resizable(0, 0)screenwidth = self.root.winfo_screenwidth()screenheight = self.root.winfo_screenheight()width = 600height = 200size_geo = '%dx%d+%d+%d' % (width, height, (screenwidth - width) / 2, (screenheight - height) / 2)self.root.geometry(size_geo)self.root.iconphoto(False, tk.PhotoImage(file="C:\\Users\\wokao\\Documents\\MyPythonCode\\ShutDown_v2.0\\""icon.png"))self.root["background"] = "#8DB6CD"self.notebook = tk.ttk.Notebook(self.root)self.framework1 = tk.Frame()self.framework2 = tk.Frame()self.framework3 = tk.Frame()self.notebook.add(self.framework1, text='默认模式')self.notebook.add(self.framework2, text='自定义模式')self.notebook.add(self.framework3, text='定时模式')self.notebook.pack(padx=10, pady=5, fill=tk.BOTH, expand=True)# 选项卡1的界面tk.Label(self.framework1, text="选择倒计时关机时长:").pack()self.cbox = ttk.Combobox(self.framework1)self.cbox['value'] = ('0.5小时', '1小时', '1.5小时', '2小时', '2.5小时', '3小时')self.cbox.current(1)self.selected_value = self.cbox.get()self.cbox.pack()self.start_button = tk.Button(self.framework1, text="开始", command=self.start_timer)self.start_button.pack()self.cancel_button = tk.Button(self.framework1, text="取消关机", state='disabled', command=self.cancel_timer)self.cancel_button.pack()self.timer_label = tk.Label(self.framework1, text="", bg="#8DB6CD")self.timer_label.pack()# 选项卡2的界面tk.Label(self.framework2, text="输入倒计时关机时长(分钟):").pack()self.time_entry2 = tk.Entry(self.framework2)self.time_entry2.pack()self.start_button2 = tk.Button(self.framework2, text="开始", command=self.start_timer2)self.start_button2.pack()self.cancel_button2 = tk.Button(self.framework2, text="取消关机", state='disabled', command=self.cancel_timer2)self.cancel_button2.pack()self.timer_label2 = tk.Label(self.framework2, text="", bg="#8DB6CD")self.timer_label2.pack()self.timer_thread = Noneself.running = False# 选项卡3的界面self.Label3_text = tk.Label(self.framework3, text='现在时间:')self.Label3_text.grid(padx=100, row=0, column=0)self.Label3 = tk.Label(self.framework3,text=time.strftime('%Y-%m-%d %H:%M:%S', time.localtime(time.time())),font=("黑体", 15), fg="white", bg="#8DB6CD")self.Label3.grid(row=0, column=3)self.Label3.after(1000, self.display_timer3)self.l1 = tk.Label(self.framework3, text="小时")self.l1.grid(row=1, column=0)self.input_hour = tk.Entry(self.framework3, bd=0, width=10)self.input_hour.grid(row=1, column=3)self.l2 = tk.Label(self.framework3, text="分钟")self.l2.grid(row=2, column=0)self.input_minute = tk.Entry(self.framework3, bd=0, width=10)self.input_minute.grid(row=2, column=3)self.start_button3 = tk.Button(self.framework3, text="确定", command=self.start_timer3)self.start_button3.grid(row=3, column=0)self.cancel_button3 = tk.Button(self.framework3, text="取消", command=self.cancel_timer3)self.cancel_button3.grid(row=3, column=3)# 选项卡1的功能实现def start_timer(self):try:self.time_left = selected_time(self.cbox.get())except ValueError:self.timer_label.config(text="请选择关机倒计时时长!")returnself.notebook.tab(1, state='disabled')self.notebook.tab(2, state='disabled')self.running = Trueself.start_button.config(state='disabled')self.cancel_button.config(state='normal')self.timer_thread = Thread(target=self.run_timer)self.timer_thread.start()def run_timer(self):timer = datetime.timedelta(seconds=self.time_left)while timer > datetime.timedelta(seconds=0) and self.running:self.timer_label.config(text=f"关机倒计时: {str(timer)} ", font=("黑体", 45), fg="white", bg="#8DB6CD")time.sleep(1)timer -= datetime.timedelta(seconds=1)self.timer_label.config(text="")if self.running:os.system("shutdown /s /t 1") # 在Windows上执行关机命令def cancel_timer(self):self.running = Falseself.start_button.config(state='normal')self.cancel_button.config(state='disabled')self.timer_label.config(text="已取消关机")self.notebook.tab(1, state='normal')self.notebook.tab(2, state='normal')# 选项卡2的功能实现def start_timer2(self):try:self.time_left2 = int(self.time_entry2.get())except ValueError:self.timer_label2.config(text="请输入有效的数字!")returnself.notebook.tab(0, state='disabled')self.notebook.tab(2, state='disabled')self.running = Trueself.start_button2.config(state='disabled')self.cancel_button2.config(state='normal')self.timer_thread = Thread(target=self.run_timer2)self.timer_thread.start()def run_timer2(self):timer = datetime.timedelta(seconds=60 * self.time_left2)while timer > datetime.timedelta(seconds=0) and self.running:self.timer_label2.config(text=f"关机倒计时: {str(timer)} ", font=("黑体", 45), fg="white", bg="#8DB6CD")time.sleep(1)timer -= datetime.timedelta(seconds=1)self.timer_label2.config(text="")if self.running:os.system("shutdown /s /t 1") # 在Windows上执行关机命令def cancel_timer2(self):self.running = Falseself.start_button2.config(state='normal')self.cancel_button2.config(state='disabled')self.timer_label2.config(text="已取消关机")self.notebook.tab(0, state='normal')self.notebook.tab(2, state='normal')# 选项卡3的功能实现def display_timer3(self):currentTime = time.strftime('%Y-%m-%d %H:%M:%S', time.localtime(time.time()))self.Label3.config(text=currentTime)self.root.update()self.Label3.after(1000, self.display_timer3)def start_timer3(self):try:hour = int(self.input_hour.get())minute = int(self.input_minute.get())except ValueError:returncur_time = datetime.datetime.now()cur_time_hour = cur_time.hourcur_time_minute = cur_time.minutehours = ((hour + (minute / 60)) - (cur_time_hour + cur_time_minute / 60))seconds = hours * 60 * 60os.system('shutdown -s -t %d' % seconds)self.notebook.tab(0, state='disabled')self.notebook.tab(1, state='disabled')self.start_button3.config(state='disabled')self.cancel_button3.config(state='normal')def cancel_timer3(self):self.start_button3.config(state='normal')self.cancel_button3.config(state='disabled')self.notebook.tab(0, state='normal')self.notebook.tab(1, state='normal')try:os.system("shutdown -a")except Exception:returnif __name__ == "__main__":ui = tk.Tk()app = ShutdownApp(ui)ui.mainloop()
这篇关于定时关机应用V2.1的文章就介绍到这儿,希望我们推荐的文章对编程师们有所帮助!


