本文主要是介绍Android Matrix绘制PaintDrawable设置BitmapShader,手指触点为圆心scale放大原图,Kotlin,希望对大家解决编程问题提供一定的参考价值,需要的开发者们随着小编来一起学习吧!
Android Matrix绘制PaintDrawable设置BitmapShader,手指触点为圆心scale放大原图,Kotlin
在 Android基于Matrix绘制PaintDrawable设置BitmapShader,以手指触点为中心显示原图的圆切图,Kotlin(4)-CSDN博客 的基础上,实现一个功能,手指在上面原图的区域滑动,然后在下面的图中以若干放大因子放大显示切块出来的小图,下面切块出来的原图的圆心是手指在上面的触点。同时在下图中复刻上图手指滑动的轨迹。下图的中心圆点用一个圆圈,标识出手指在上图的触点。下图相当于一个放大镜,同时在放大镜图里面显示手指划过的轨迹。
import android.content.Context
import android.graphics.Bitmap
import android.graphics.BitmapShader
import android.graphics.Canvas
import android.graphics.Color
import android.graphics.Matrix
import android.graphics.Paint
import android.graphics.Path
import android.graphics.RectF
import android.graphics.Shader.TileMode
import android.graphics.drawable.BitmapDrawable
import android.graphics.drawable.PaintDrawable
import android.os.Bundle
import android.util.AttributeSet
import android.view.MotionEvent
import android.widget.ImageView
import androidx.appcompat.app.AppCompatActivity
import androidx.appcompat.widget.AppCompatImageViewclass MainActivity : AppCompatActivity() {private var iv: MyImageView? = nulloverride fun onCreate(savedInstanceState: Bundle?) {super.onCreate(savedInstanceState)setContentView(R.layout.activity_main)iv = findViewById(R.id.iv)val r = findViewById<ImageView>(R.id.result)iv?.setTestImageView(r)}
}class MyImageView : AppCompatImageView {private var mCurX = 0fprivate var mCurY = 0fprivate val mPath1 = Path()private val mPath2 = Path()private val mPathPaint1 = Paint()private val mPathPaint2 = Paint()private val mCirclePaint = Paint()private var mNewBmp: Bitmap? = nullprivate var mSrcBmp: Bitmap? = nullprivate var mIsDraw = falseprivate val mRadius = 380fprivate var mDrawable: PaintDrawable? = nullprivate var testIV: ImageView? = null//放大系数。private val mScaleFactor = 2.6fprivate var mBitmapShader: BitmapShader? = nullconstructor(ctx: Context, attrs: AttributeSet) : super(ctx, attrs) {mSrcBmp = (drawable as BitmapDrawable).bitmap //mSrcBmp是原始图大小,没有缩放和拉伸的。mPathPaint1.style = Paint.Style.STROKEmPathPaint1.strokeWidth = 10fmPathPaint1.isAntiAlias = truemPathPaint1.color = Color.REDmPathPaint2.style = Paint.Style.STROKEmPathPaint2.strokeWidth = 25fmPathPaint2.isAntiAlias = truemPathPaint2.color = Color.YELLOWmCirclePaint.style = Paint.Style.STROKEmCirclePaint.strokeWidth = 30fmCirclePaint.isAntiAlias = truemCirclePaint.color = Color.BLUE}fun setTestImageView(iv: ImageView?) {testIV = iv}override fun onTouchEvent(event: MotionEvent): Boolean {mCurX = event.xmCurY = event.ywhen (event.action) {MotionEvent.ACTION_DOWN -> {mPath1.moveTo(mCurX, mCurY)mPath2.moveTo(mCurX * mScaleFactor, mCurY * mScaleFactor)mIsDraw = true}MotionEvent.ACTION_MOVE -> {mPath1.lineTo(mCurX, mCurY)mPath2.lineTo(mCurX * mScaleFactor, mCurY * mScaleFactor)}MotionEvent.ACTION_UP, MotionEvent.ACTION_CANCEL -> {mIsDraw = false//抬手后,清除手指轨迹。myClear()}}invalidate()return true}private fun myClear() {//清除历史轨迹。mPath1.reset()mPath2.reset()}override fun onDraw(canvas: Canvas) {super.onDraw(canvas)if (mIsDraw) {myDraw()canvas.drawPath(mPath1, mPathPaint1)}}private fun myDraw() {if (mBitmapShader == null) {//创建一次,提高速度。mBitmapShader = BitmapShader(Bitmap.createScaledBitmap(mSrcBmp!!,(this.width * mScaleFactor).toInt(), //注意这里的如果精度损失,会造成坐标偏移(this.height * mScaleFactor).toInt(),//注意这里的如果精度损失,会造成坐标偏移true),TileMode.DECAL,TileMode.DECAL)}mDrawable = PaintDrawable(Color.BLACK)mDrawable!!.setCornerRadius(mRadius / 2) //圆角矩形,如果不除2即是圆形框图。mDrawable!!.paint.shader = mBitmapShadermDrawable!!.setBounds(0, 0, (mRadius * 2).toInt(), (mRadius * 2).toInt())if (mNewBmp == null) {//创建一次,提高速度。mNewBmp = Bitmap.createBitmap(this.width, this.height, Bitmap.Config.ARGB_8888)}val c = Canvas(mNewBmp!!)c.drawColor(Color.GRAY) //底色。val matrix = Matrix()matrix.setScale(mScaleFactor, mScaleFactor)matrix.setTranslate((-mCurX) * mScaleFactor + mRadius, (-mCurY) * mScaleFactor + mRadius)mDrawable!!.paint.shader.setLocalMatrix(matrix)mDrawable!!.draw(c)val rectF = RectF()matrix.mapRect(rectF)val cx = mCurX * mScaleFactor + rectF.leftval cy = mCurY * mScaleFactor + rectF.top//蓝色中心圆圈c.drawCircle(cx, cy, 50f, mCirclePaint)//下面小框图里面的Pathval path = Path()mPath2.transform(matrix, path)//绘制下面框图里面的Pathc.drawPath(path, mPathPaint2)testIV?.setImageBitmap(mNewBmp)}
}
<?xml version="1.0" encoding="utf-8"?>
<LinearLayout xmlns:android="http://schemas.android.com/apk/res/android"xmlns:tools="http://schemas.android.com/tools"android:layout_width="match_parent"android:layout_height="match_parent"android:background="@android:color/darker_gray"android:orientation="vertical"tools:context=".MainActivity"><com.pkg.MyImageViewandroid:id="@+id/iv"android:layout_width="match_parent"android:layout_height="wrap_content"android:adjustViewBounds="true"android:background="@drawable/ic_launcher_background"android:scaleType="fitCenter"android:src="@mipmap/mypic" /><ImageViewandroid:id="@+id/result"android:layout_width="wrap_content"android:layout_height="wrap_content"android:layout_marginTop="40dp"android:background="@drawable/ic_launcher_background"android:src="@drawable/ic_launcher_foreground" /></LinearLayout>
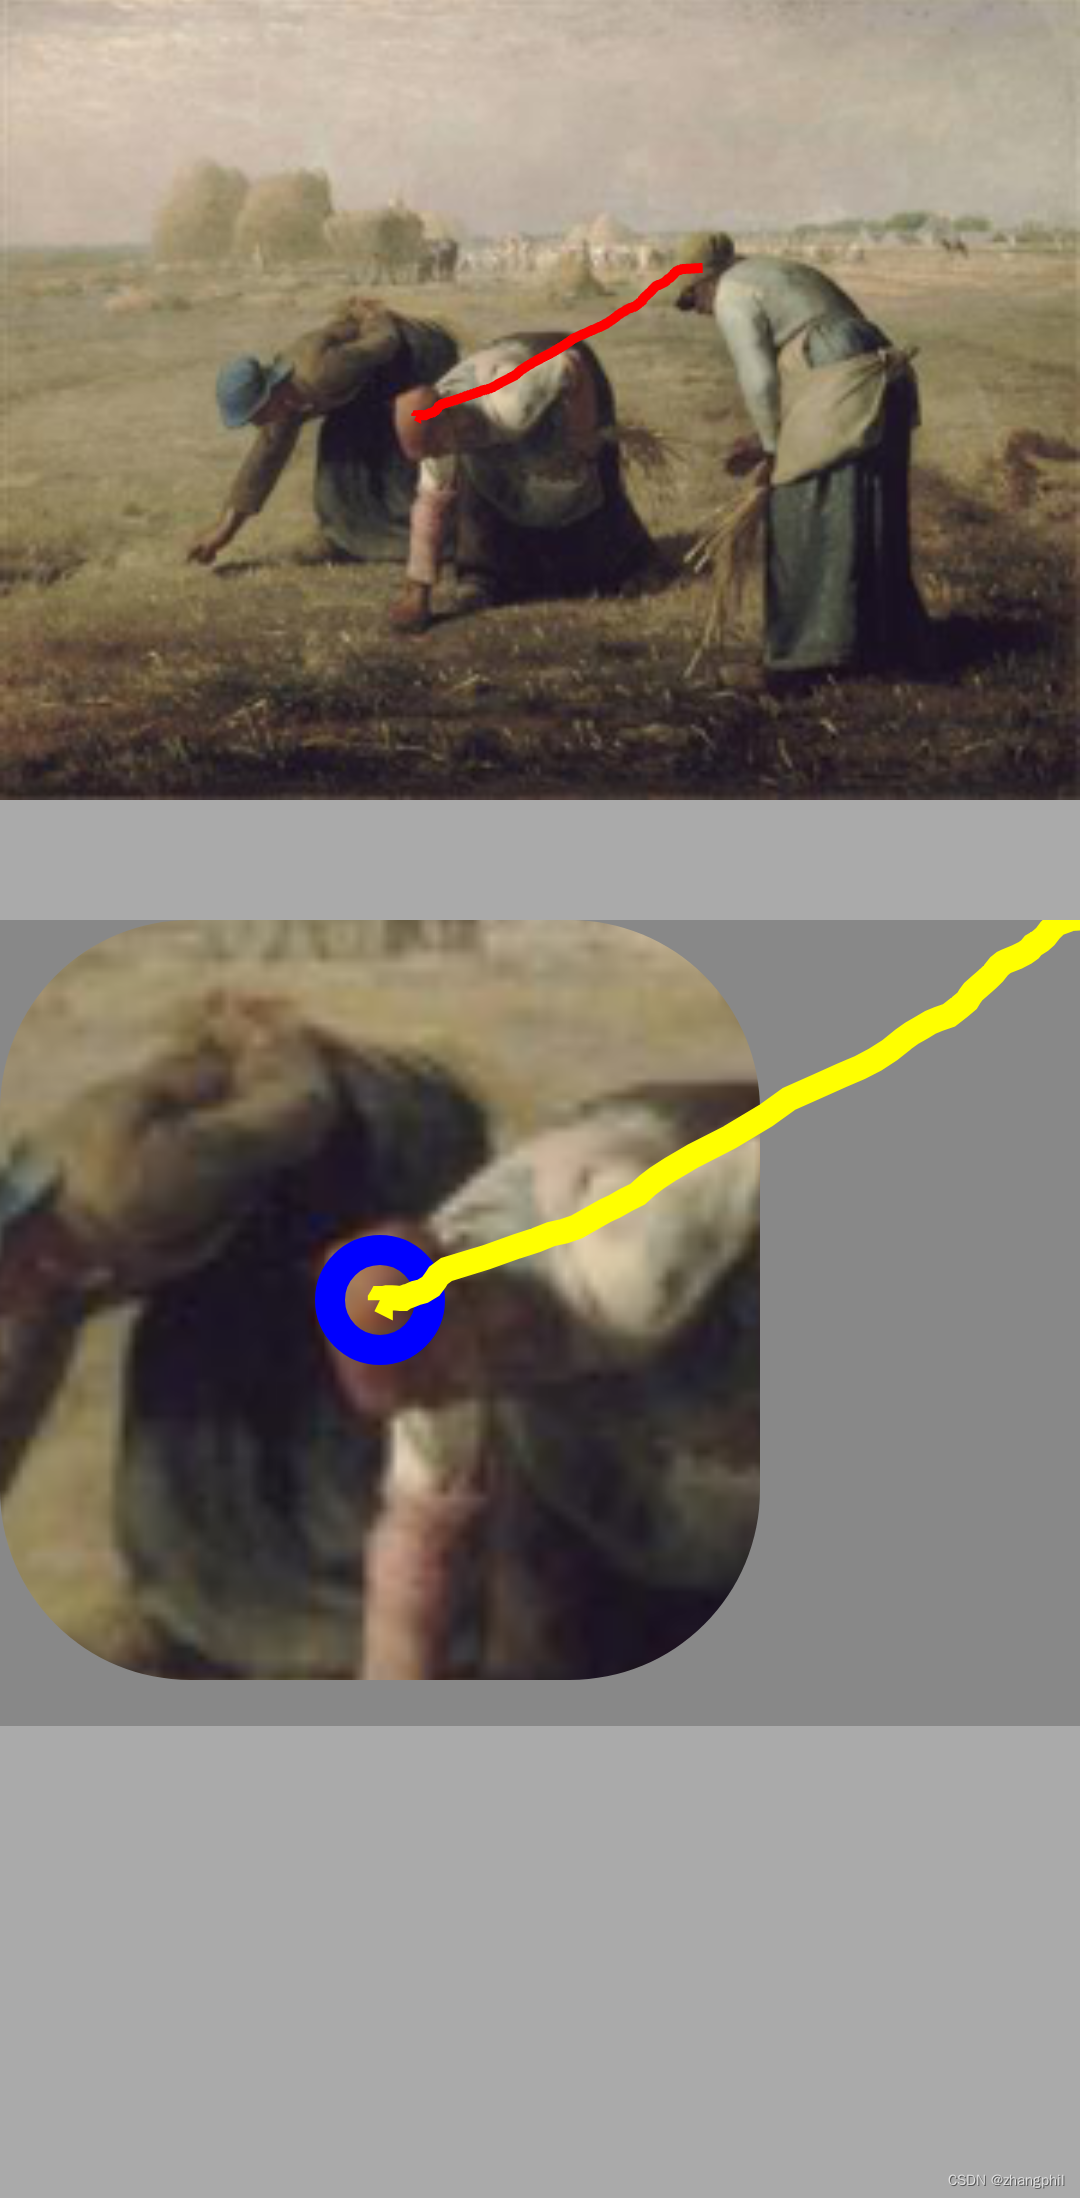
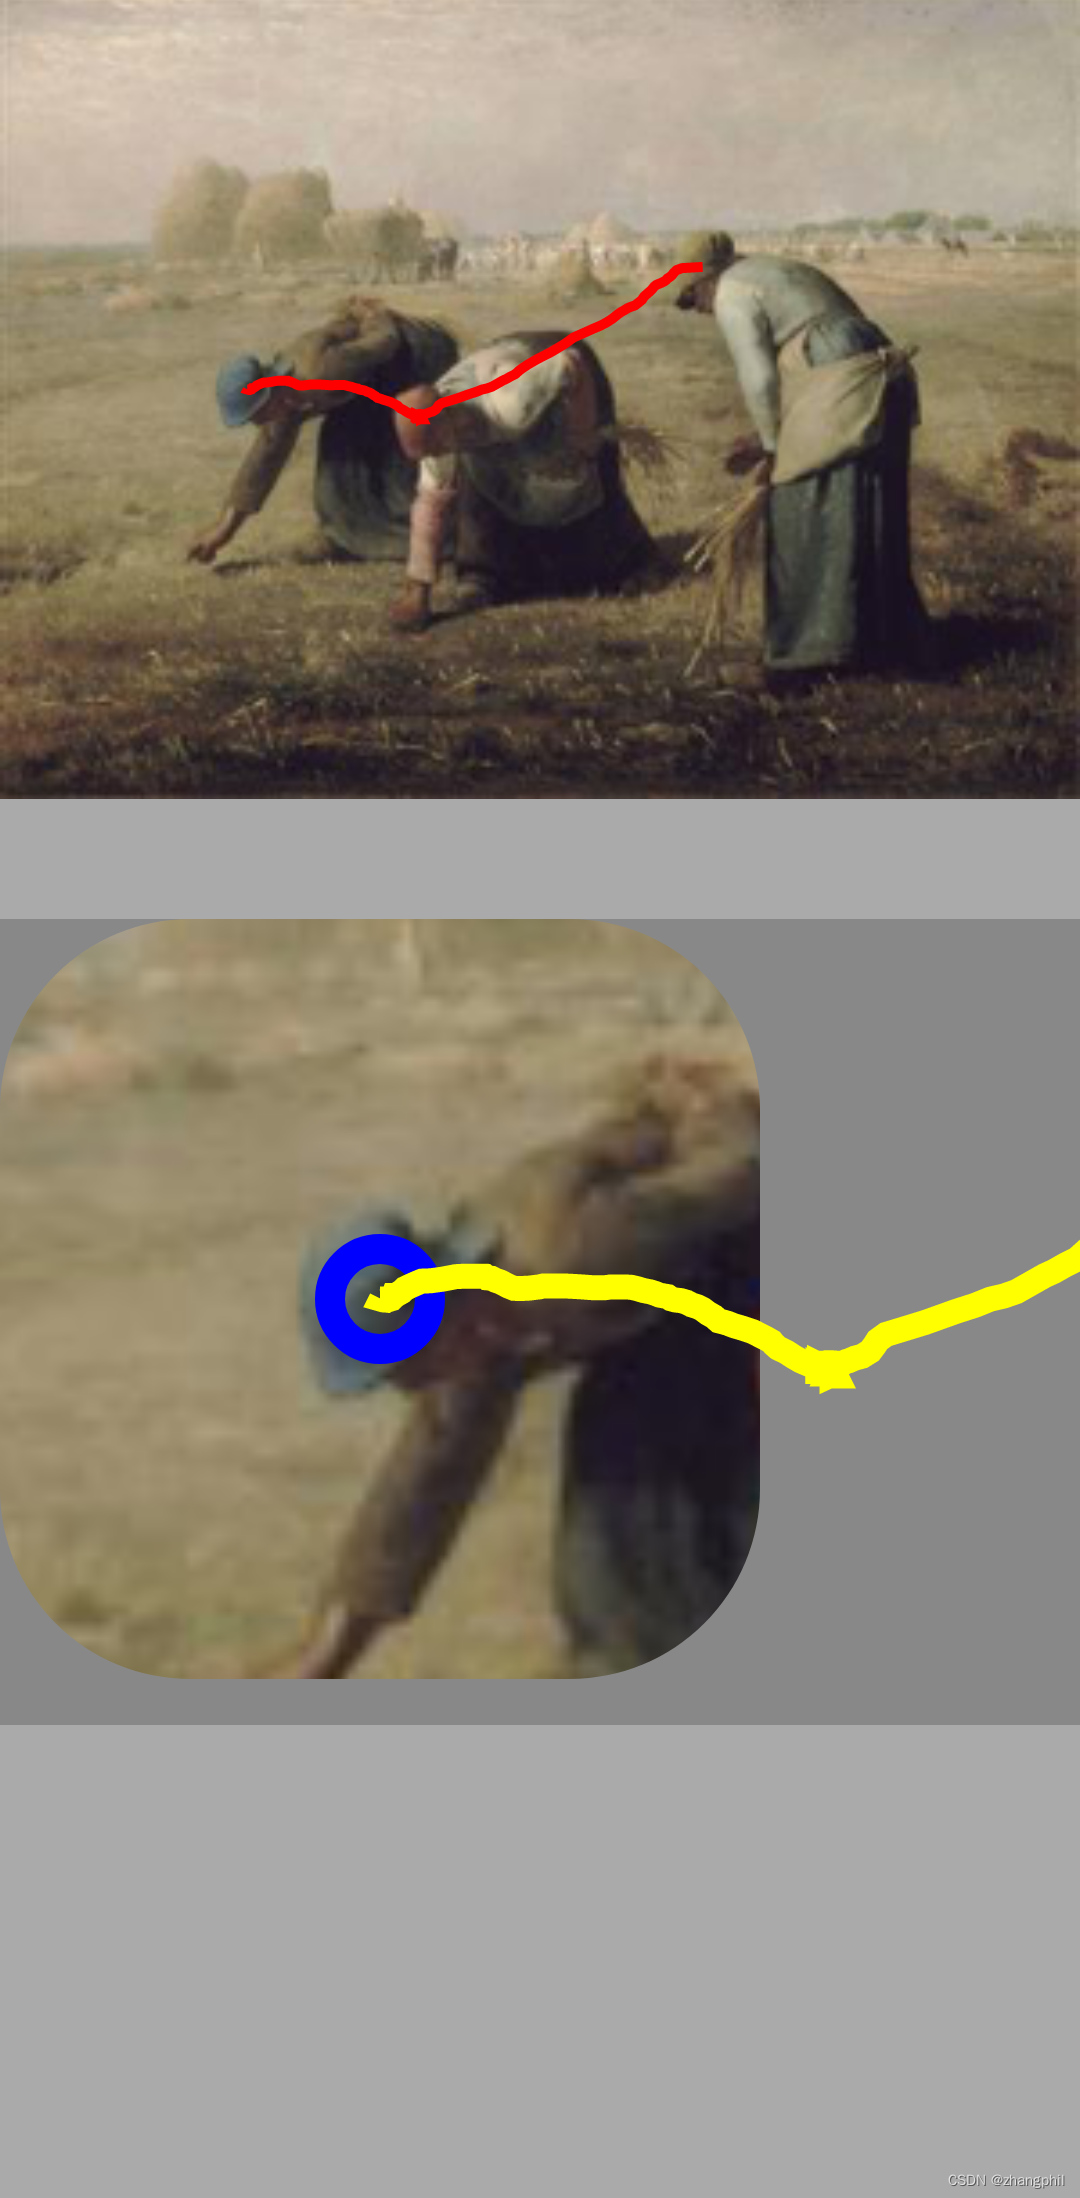

遗留一个问题,更好的做法是在下图中只显示圆角矩形切图区域里面的路径,超出圆角矩形切图外的区域,不应该再显示路径。
Android基于Matrix绘制PaintDrawable设置BitmapShader,以手指触点为中心显示原图的圆切图,Kotlin(4)-CSDN博客文章浏览阅读305次。基础上,增加一个功能,手指在上面的图中移动时,绘制红色移动轨迹(路线)同时,下面图中对应的小图中显示手指与屏幕的触点,这样可以“实时”指示当前手指在上面大图中移动的准确、精细位置。虽然实现了上图绘制手指在屏幕滑动的轨迹,且在下面的切图中用中心圆圈标记出当前手指在图中的位置,但没有在下面的切图中也绘制出与上图的手指滑动轨迹,下面实现这个功能:手指在原图中滑动,在切图中用圆圈标记手指的位置,同时在切图中复刻手指滑动的轨迹。1、手指滑动出有效取景区域后,切图还在显示,这不是很合理。https://blog.csdn.net/zhangphil/article/details/135572357
https://zhangphil.blog.csdn.net/article/details/135232618![]() https://zhangphil.blog.csdn.net/article/details/135232618
https://zhangphil.blog.csdn.net/article/details/135232618
这篇关于Android Matrix绘制PaintDrawable设置BitmapShader,手指触点为圆心scale放大原图,Kotlin的文章就介绍到这儿,希望我们推荐的文章对编程师们有所帮助!


