本文主要是介绍rabbitmq基础教程(ui,java,springamqp),希望对大家解决编程问题提供一定的参考价值,需要的开发者们随着小编来一起学习吧!
概述:安装看我上篇文章Docker安装rabbitmq-CSDN博客
任务一
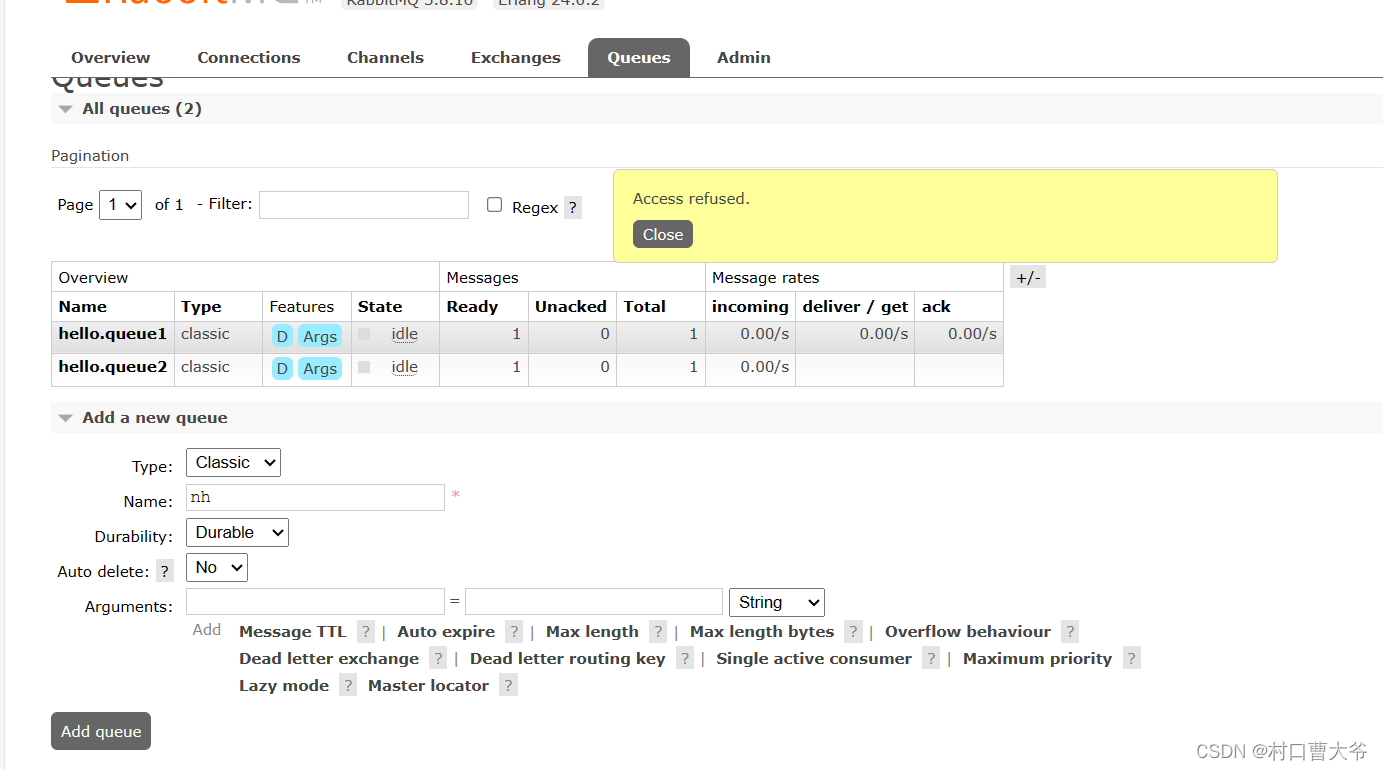
创建一个队列

这样创建两个队列

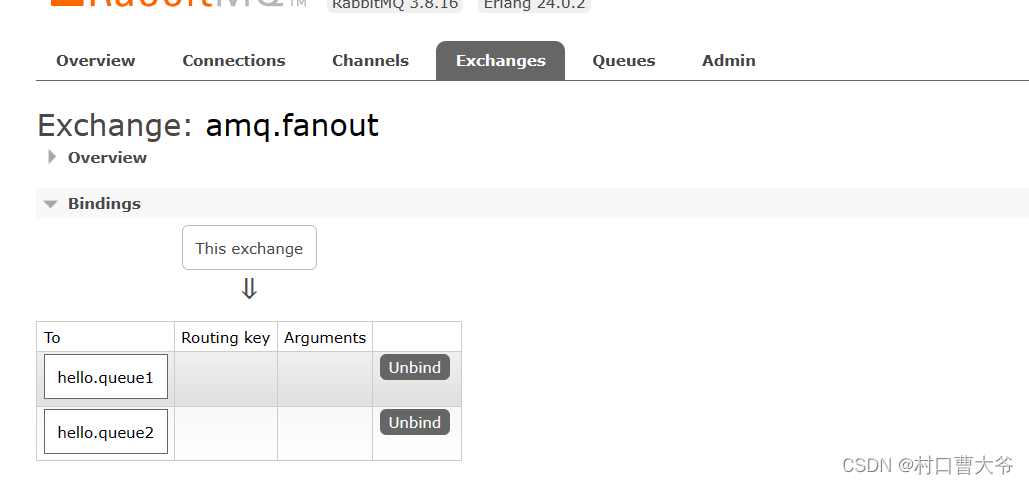
在amq.fanout交换机里面发送数据
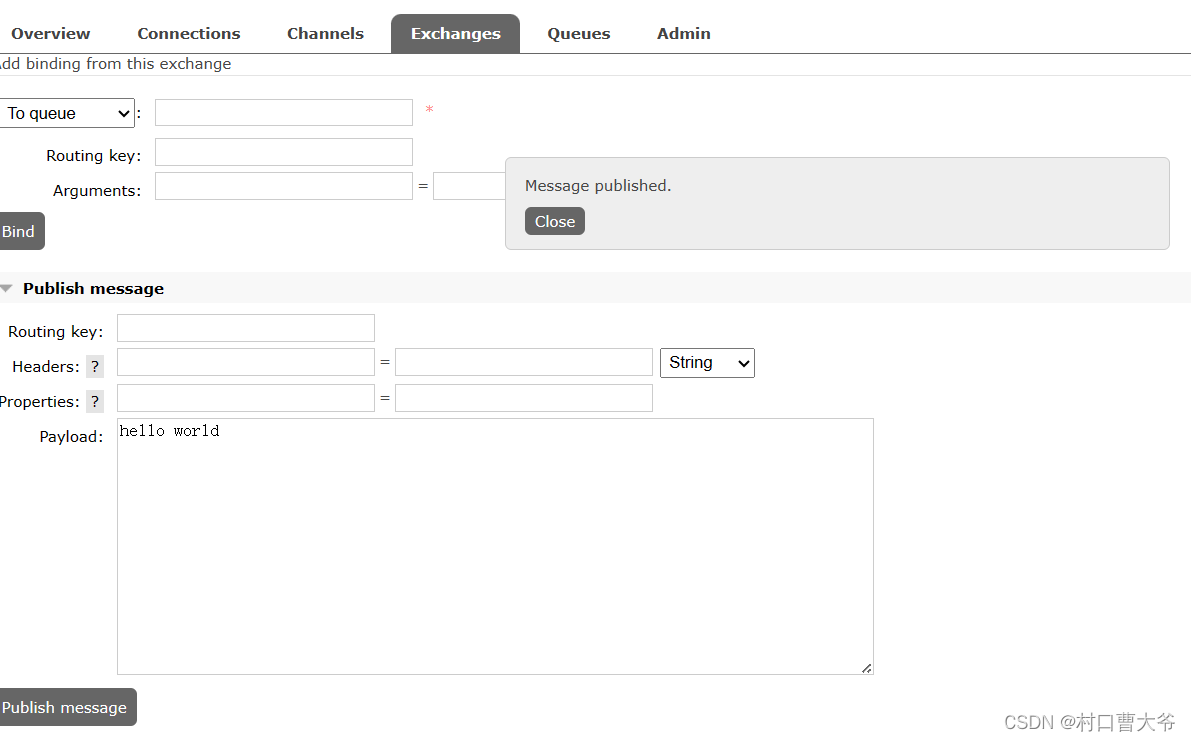
模拟发送数据
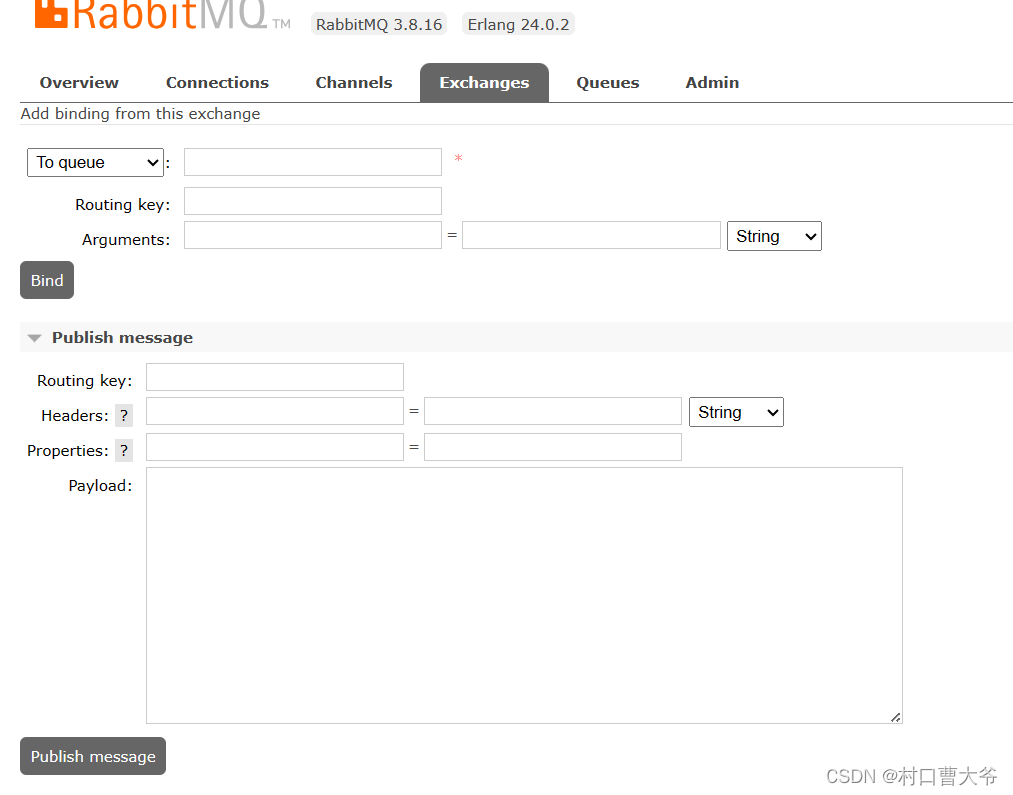
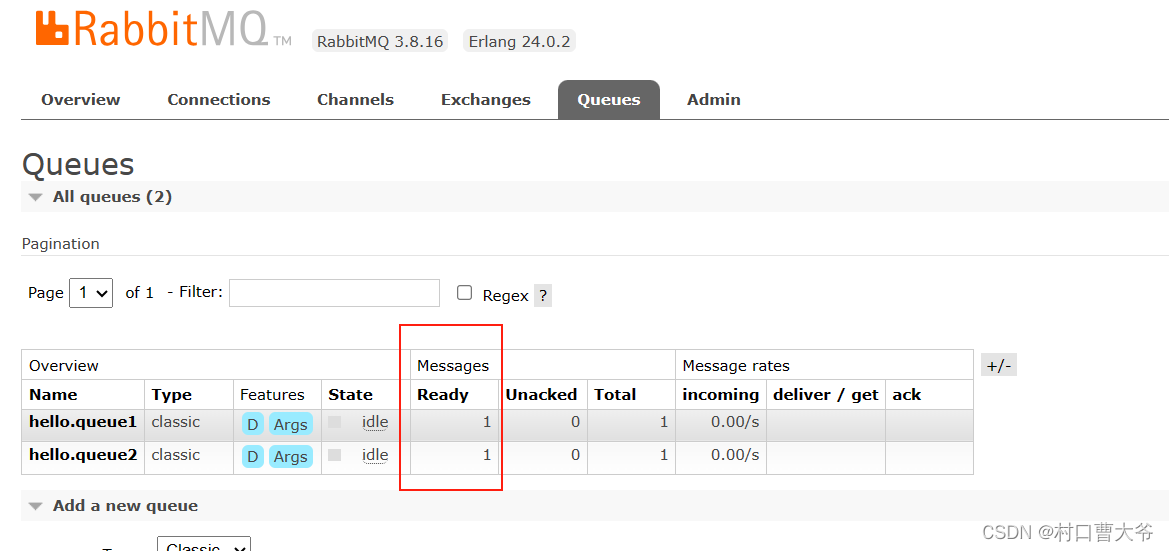
发送消息,发现一下信息:
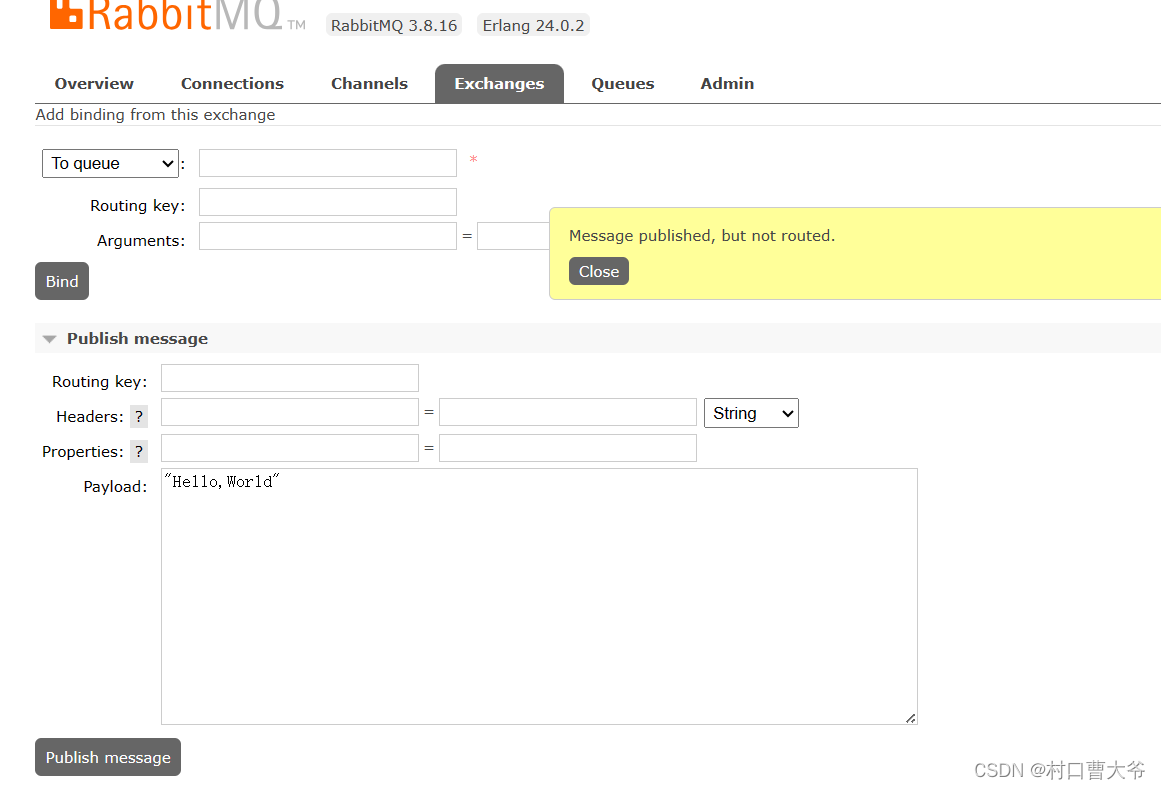
所以得出理论,消息发送是先到交换机,然后由交换机路由到消息队列
交换机是负责路由和转发消息的,并没有存储的功能。
绑定队列
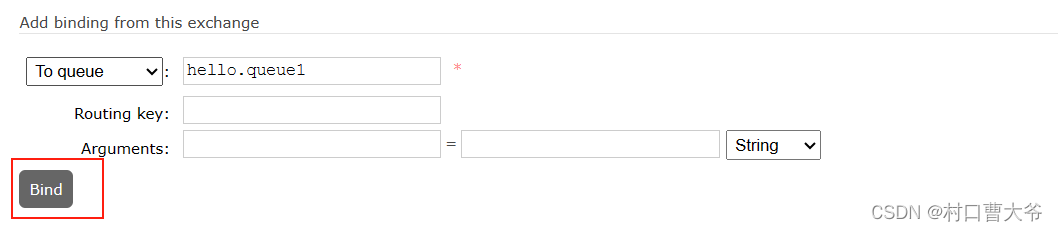 同理绑定queue2
这时,再在交换机中发消息
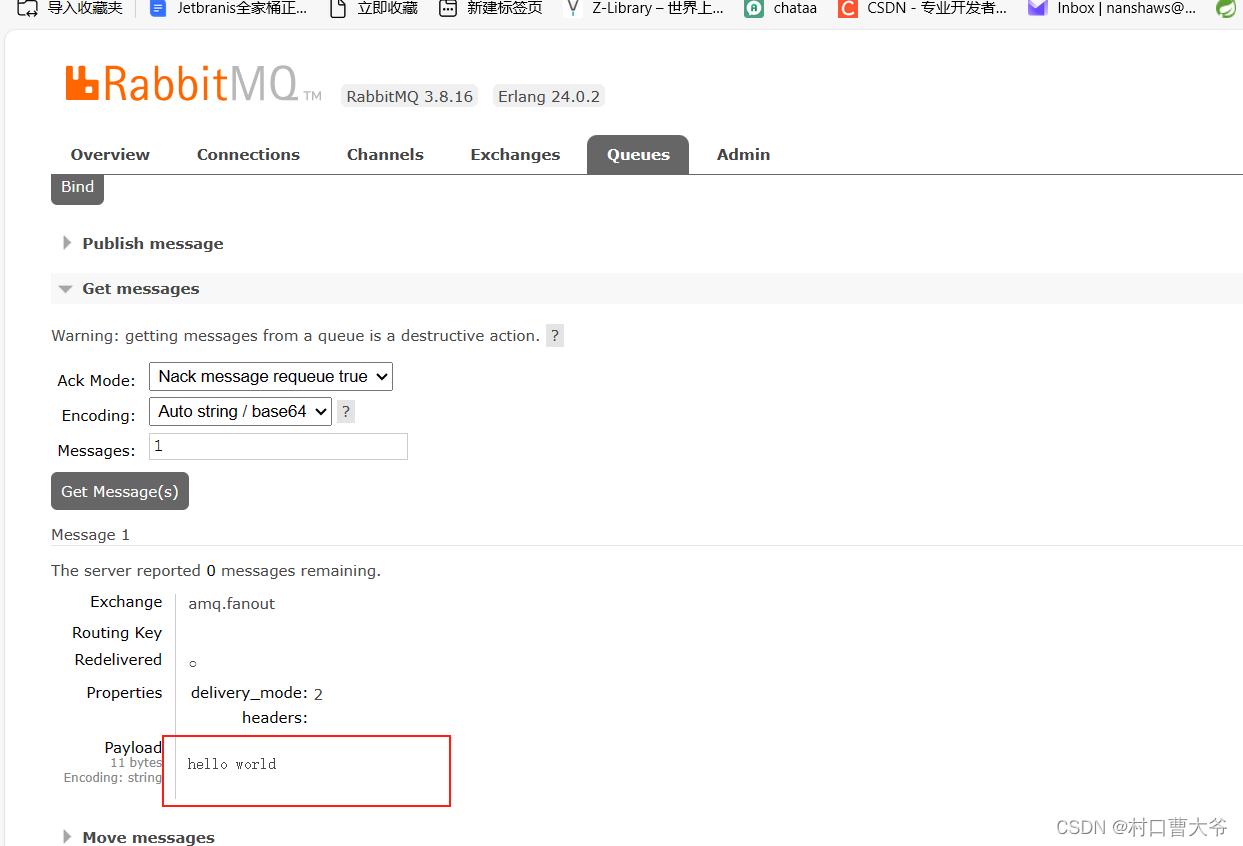
查看结果:
数据隔离
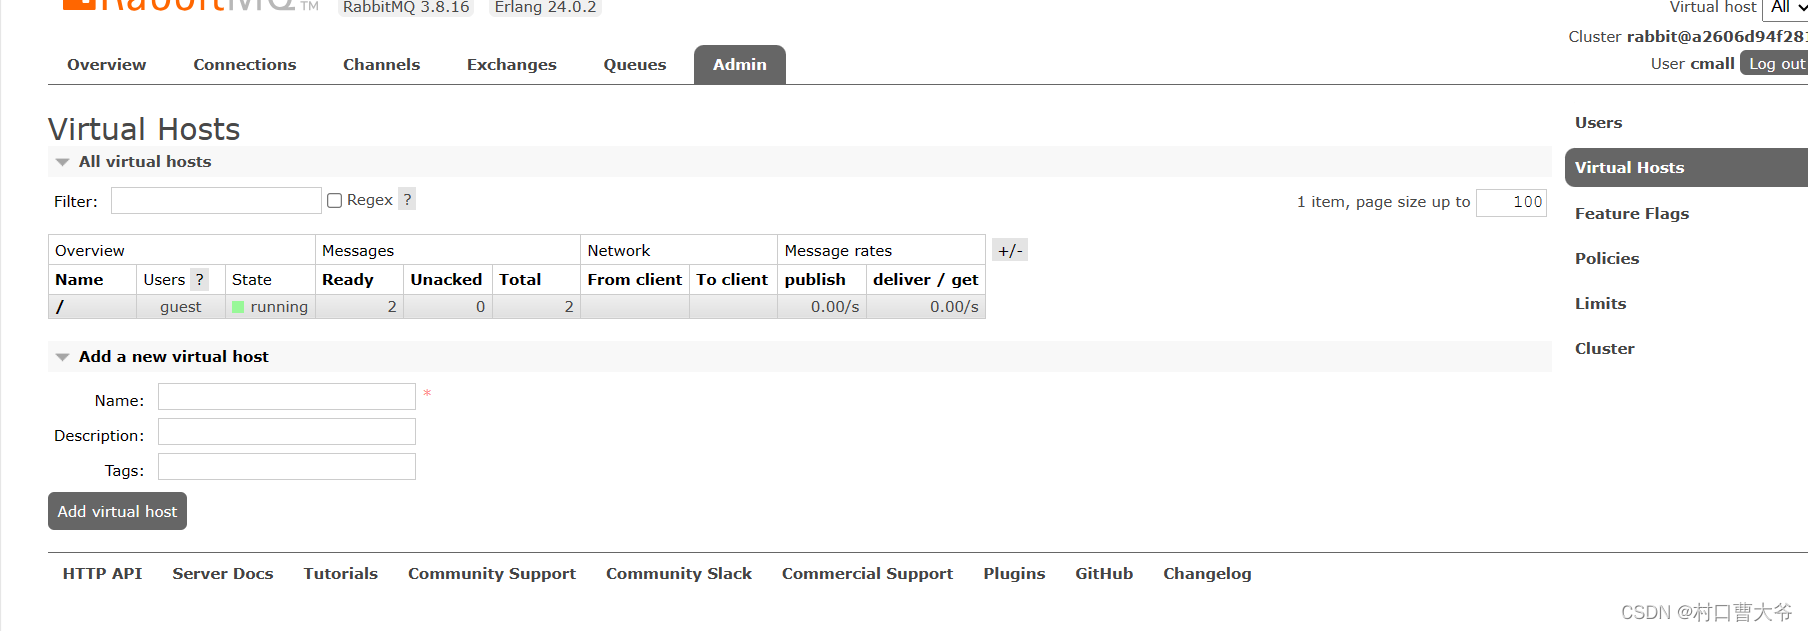
在rabbitmq中有虚拟主机的概念。

第一步:新添用户

添加成功后,发现没有虚拟主机,也就是说,我用这个用户登录后,是不可以操作上面的数据的。
又因为,我是超级管理员,所以我能看到这些
所以只能看,不能操作。
第二步:创立自己的虚拟主机
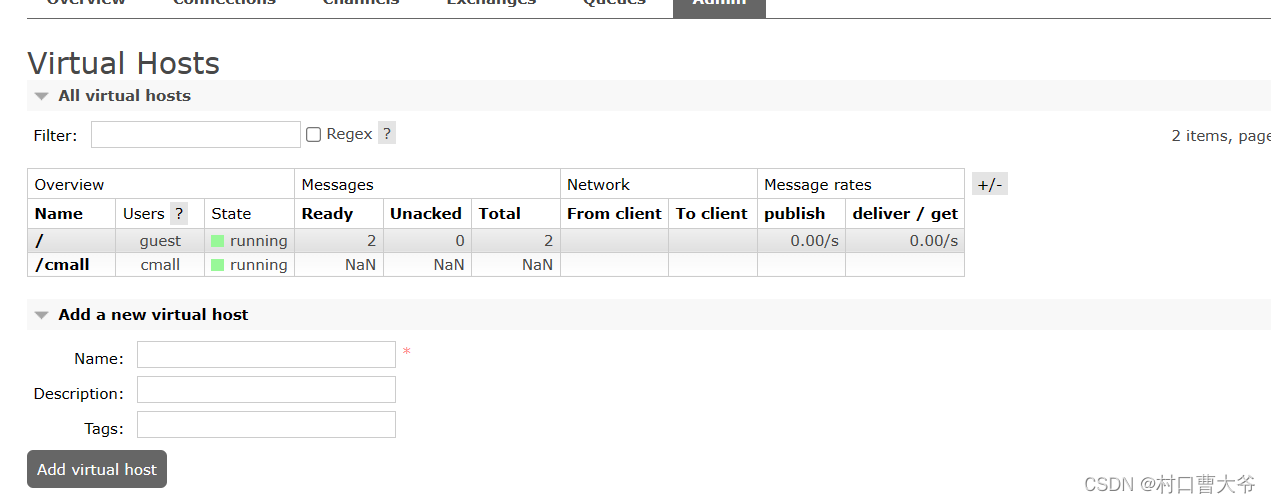
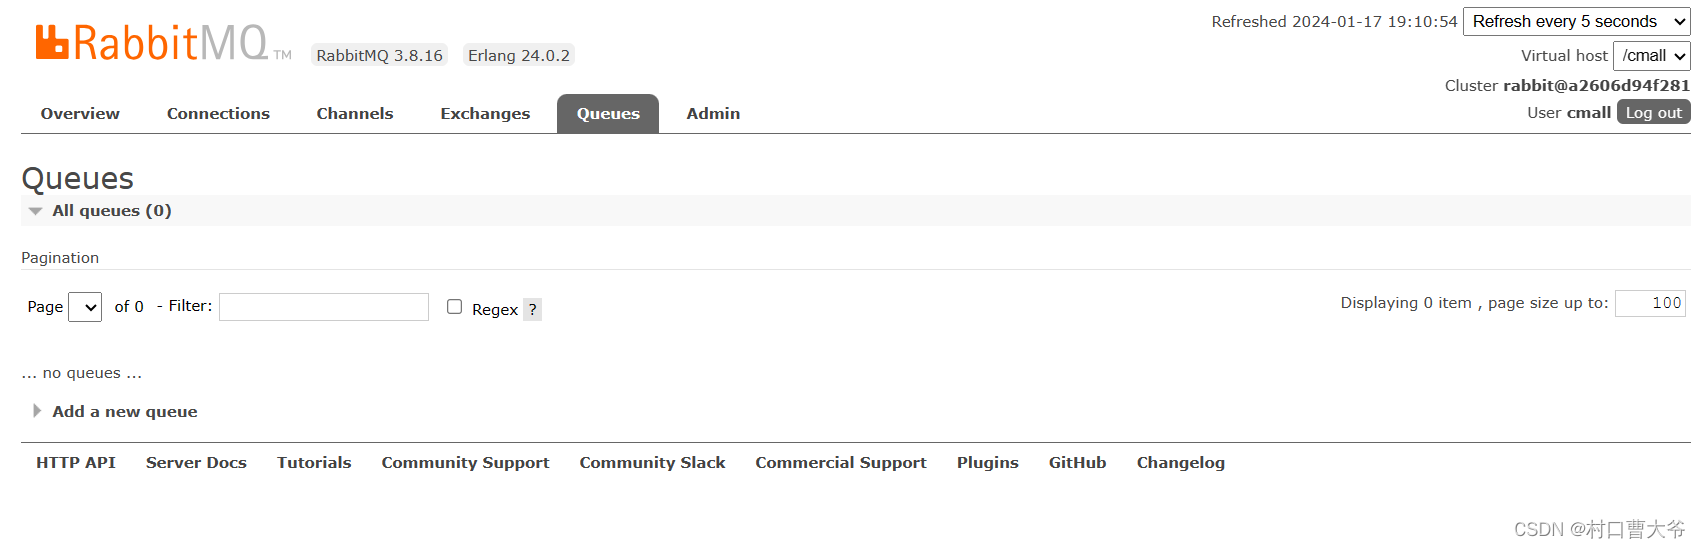
第三步:选自己的虚拟主机

选好后就只能看自己的了。
用Java代码操作
官网:RabbitMQ Tutorials — RabbitMQ
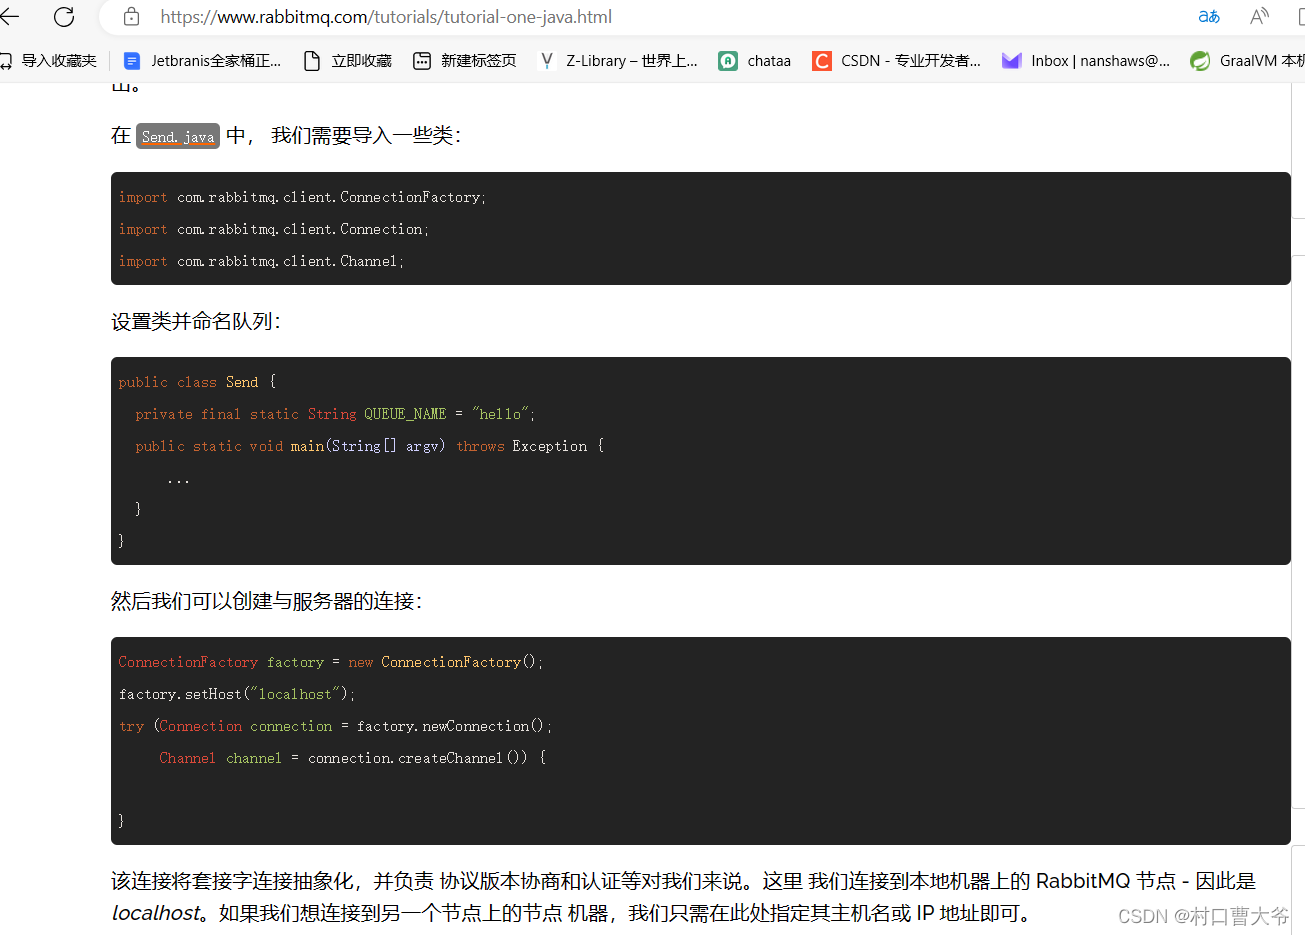
可以看到,官网上有案例,我们大多情况下用的是SpringAmqp,所以也就不讲那么多java简单调用的事情了。
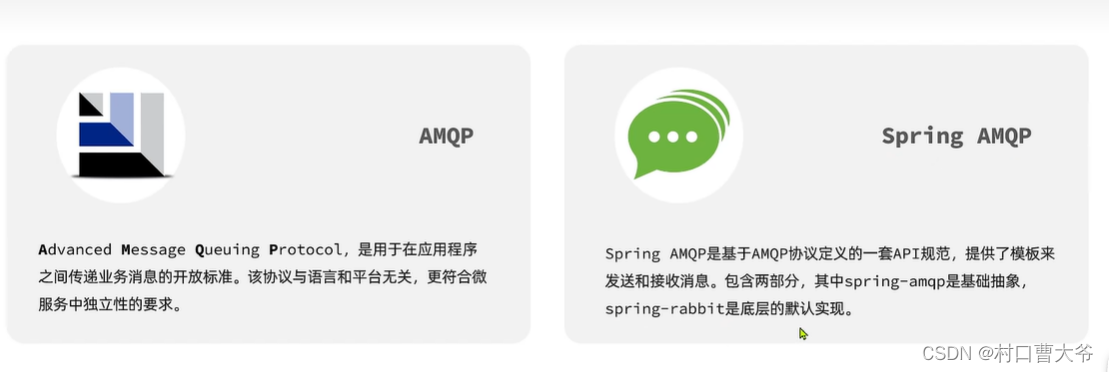
用Spring AMQP操作

第一步:在控制台里面创建一个simple.queue队列

第二步:编写代码
pom文件
<?xml version="1.0" encoding="UTF-8"?>
<project xmlns="http://maven.apache.org/POM/4.0.0" xmlns:xsi="http://www.w3.org/2001/XMLSchema-instance"xsi:schemaLocation="http://maven.apache.org/POM/4.0.0 https://maven.apache.org/xsd/maven-4.0.0.xsd"><modelVersion>4.0.0</modelVersion><groupId>org.cyl</groupId><artifactId>test09</artifactId><version>0.0.1-SNAPSHOT</version><name>test09</name><description>test09</description><properties><java.version>1.8</java.version><project.build.sourceEncoding>UTF-8</project.build.sourceEncoding><project.reporting.outputEncoding>UTF-8</project.reporting.outputEncoding><spring-boot.version>2.6.13</spring-boot.version></properties><dependencies><dependency><groupId>org.springframework.boot</groupId><artifactId>spring-boot-starter-web</artifactId></dependency><dependency><groupId>org.springframework.boot</groupId><artifactId>spring-boot-starter-test</artifactId><scope>test</scope></dependency><dependency><groupId>org.springframework.boot</groupId><artifactId>spring-boot-starter-amqp</artifactId></dependency><dependency><groupId>com.rabbitmq</groupId><artifactId>amqp-client</artifactId><version>5.13.0</version></dependency></dependencies><dependencyManagement><dependencies><dependency><groupId>org.springframework.boot</groupId><artifactId>spring-boot-dependencies</artifactId><version>${spring-boot.version}</version><type>pom</type><scope>import</scope></dependency></dependencies></dependencyManagement><build><plugins><plugin><groupId>org.apache.maven.plugins</groupId><artifactId>maven-compiler-plugin</artifactId><version>3.8.1</version><configuration><source>1.8</source><target>1.8</target><encoding>UTF-8</encoding></configuration></plugin><plugin><groupId>org.springframework.boot</groupId><artifactId>spring-boot-maven-plugin</artifactId><version>${spring-boot.version}</version><configuration><mainClass>org.cyl.test09.Test09Application</mainClass><skip>true</skip></configuration><executions><execution><id>repackage</id><goals><goal>repackage</goal></goals></execution></executions></plugin></plugins></build></project>
配置mq服务端消息
spring:rabbitmq:host: 192.168.56.10port: 5672virtual-host: /cmallusername: cmallpassword: 123456发送方:
package org.cyl.test09.demos;import org.springframework.amqp.rabbit.core.RabbitTemplate;
import org.springframework.beans.factory.annotation.Autowired;
import org.springframework.stereotype.Service;@Service
public class SendMessageService {@Autowiredprivate RabbitTemplate rabbitTemplate;public void testSimpleQueue(){String queueName="simple.queue";String message="hello,spring amqp!";rabbitTemplate.convertAndSend(queueName,message);}public void sendMessage(String exchange, String routingKey, Object message) {rabbitTemplate.convertAndSend(exchange, routingKey, message);}
}
接收方:
package org.cyl.test09.demos;import org.springframework.amqp.rabbit.annotation.RabbitListener;
import org.springframework.stereotype.Service;@Service
public class ReceiveMessageService {@RabbitListener(queues = "simple.queue")public void receiveMessage(String message) {System.out.println("接收到的消息: " + message);}
}
controller类:
package org.cyl.test09.demos.controller;import org.cyl.test09.demos.ReceiveMessageService;
import org.cyl.test09.demos.SendMessageService;
import org.springframework.beans.factory.annotation.Autowired;
import org.springframework.web.bind.annotation.GetMapping;
import org.springframework.web.bind.annotation.RestController;@RestController
public class HelloController {@AutowiredSendMessageService sendMsgservice;@AutowiredReceiveMessageService receiveMsgService;@GetMapping("/send")public String send(){sendMsgservice.testSimpleQueue();return "ok";}}
展示结果:


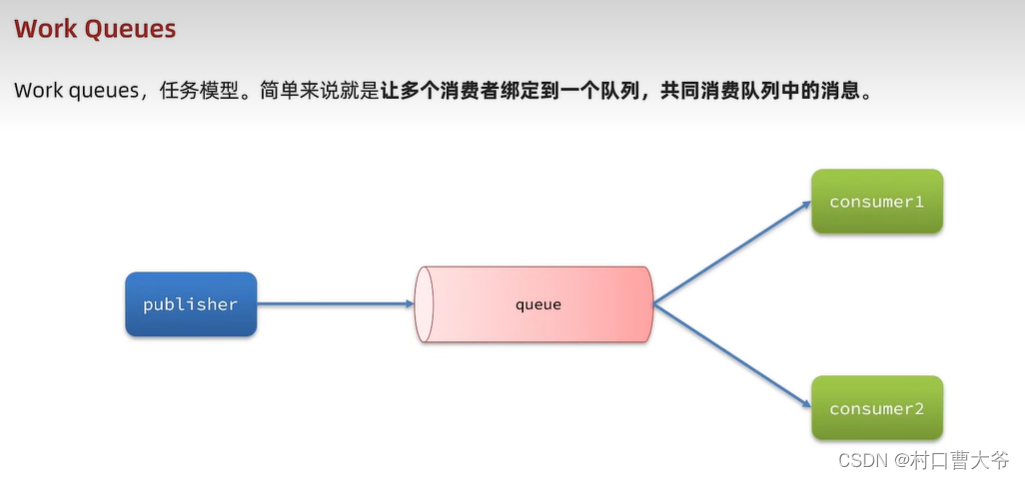
Work模型

第一步:创建一个队列

第二步:编写代码
发送:
package org.cyl.test09.demos;import org.springframework.amqp.rabbit.core.RabbitTemplate;
import org.springframework.beans.factory.annotation.Autowired;
import org.springframework.stereotype.Service;@Service
public class SendMessageService {@Autowiredprivate RabbitTemplate rabbitTemplate;public void testSimpleQueue() throws InterruptedException {String queueName="work.queue";for (int i=1;i<50;i++){String message="hello,spring amqp!_"+i;rabbitTemplate.convertAndSend(queueName,message);Thread.sleep(20);}}public void sendMessage(String exchange, String routingKey, Object message) {rabbitTemplate.convertAndSend(exchange, routingKey, message);}
}
接收:
package org.cyl.test09.demos;import org.springframework.amqp.rabbit.annotation.RabbitListener;
import org.springframework.stereotype.Service;@Service
public class ReceiveMessageService {@RabbitListener(queues = "work.queue")public void receiveMessage1(String message) {System.out.println("消费者1接收到的消息: " + message);}@RabbitListener(queues = "work.queue")public void receiveMessage2(String message) {System.out.println("消费者2接收到的消息: " + message);}
}
结果展示:

消费者一和消费者二是轮询效果。
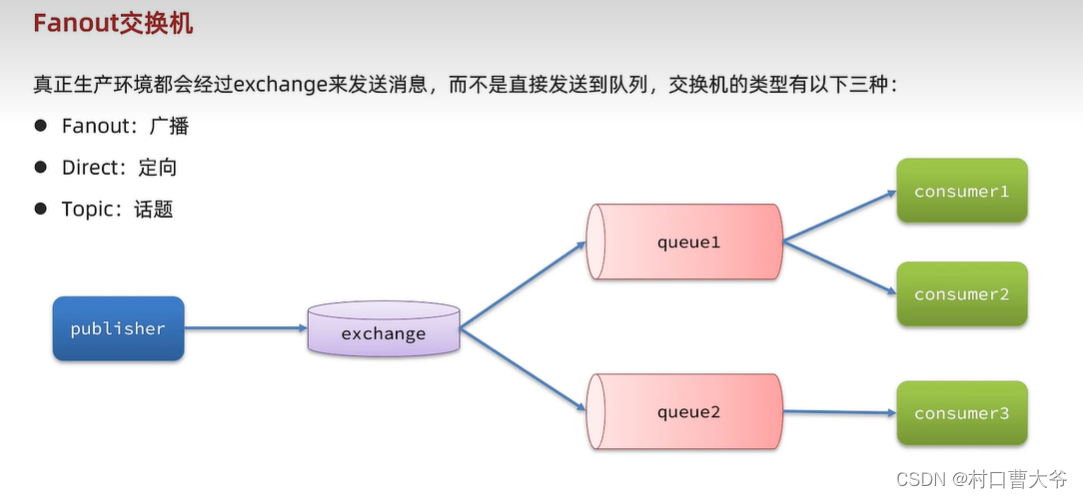
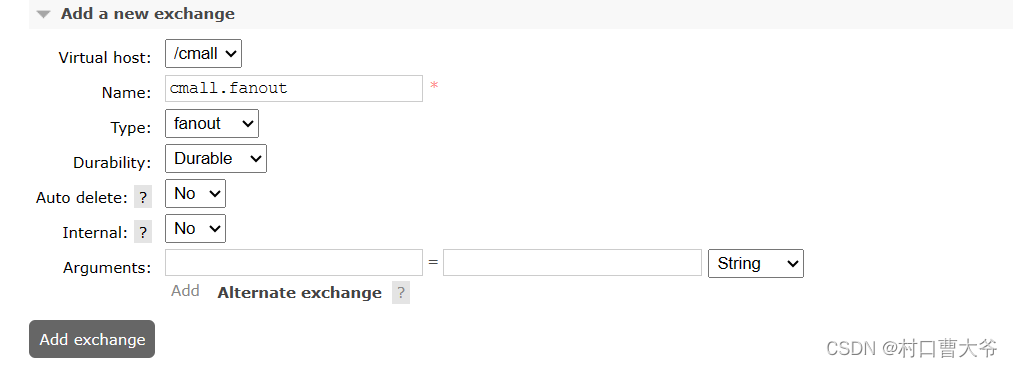
Fanout交换机


第一步:创建队列

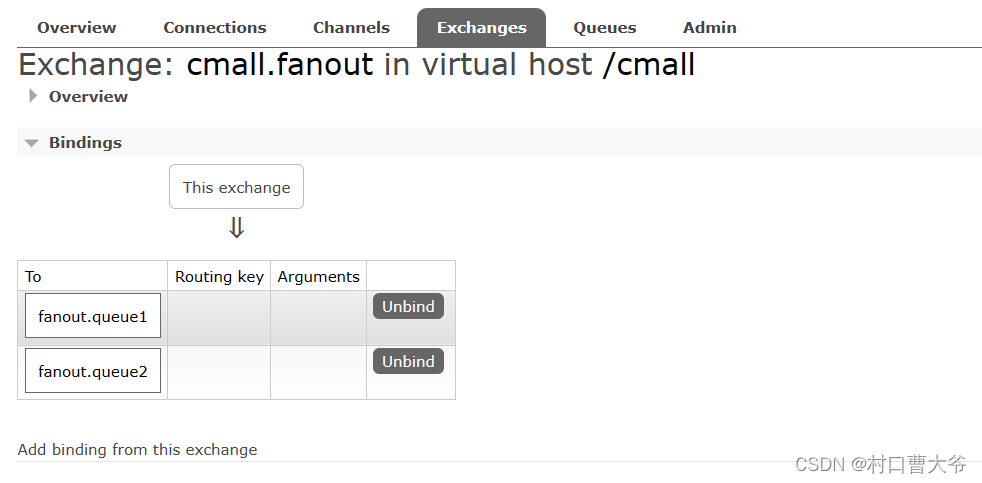
第二步:创建交换机并绑定
第三步:编写代码
发送端:
public void testFanout() {String exchangeName="cmall.fanout";String message="hello,spring everyone";rabbitTemplate.convertAndSend(exchangeName,null,message);}接收端:
@RabbitListener(queues = "fanout.queue1")public void receiveMessage3(String message) {System.out.println("消费者1接收到的消息: " + message);}@RabbitListener(queues = "fanout.queue2")public void receiveMessage4(String message) {System.out.println("消费者2接收到的消息: " + message);}展示结果:

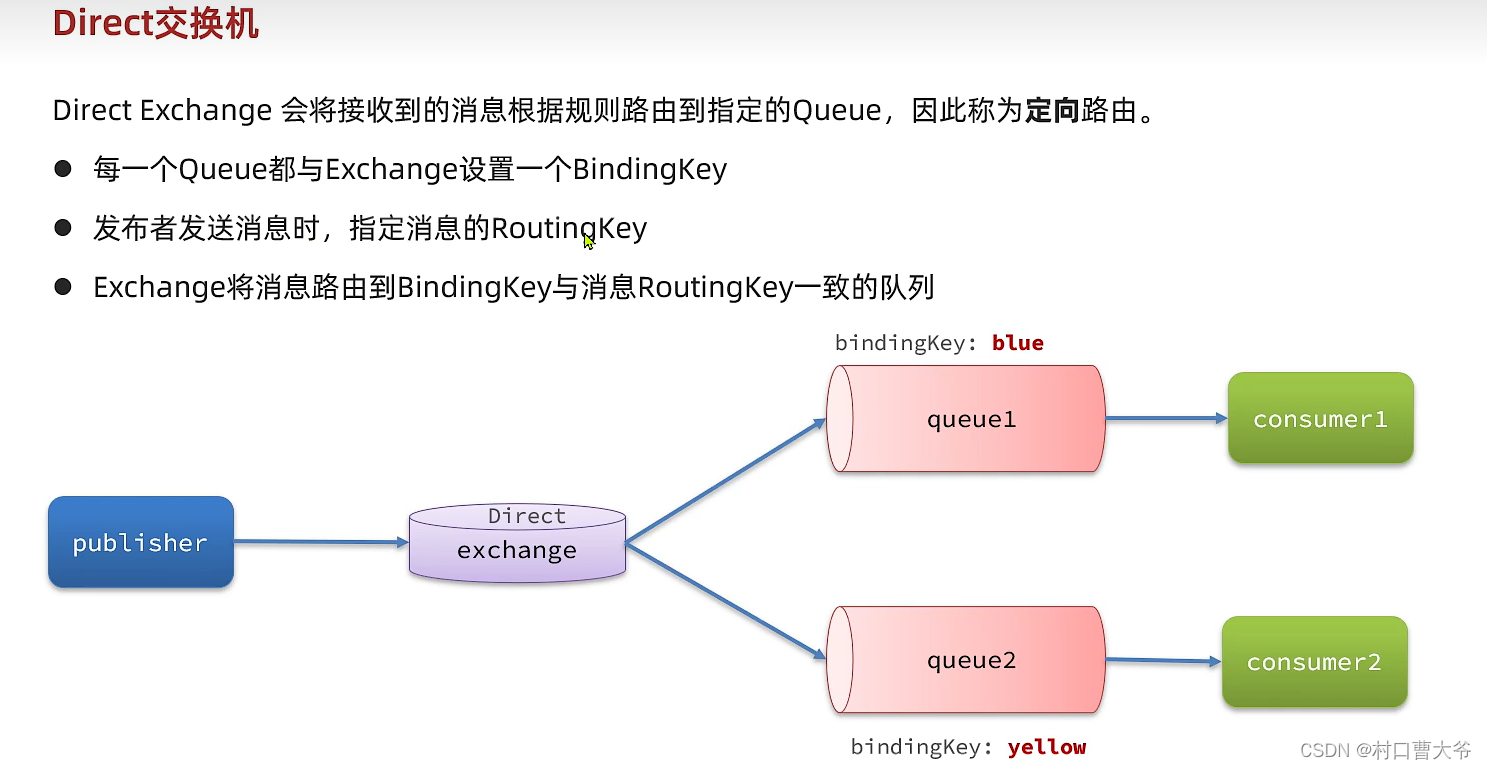
私发给不同的人:Direct交换机
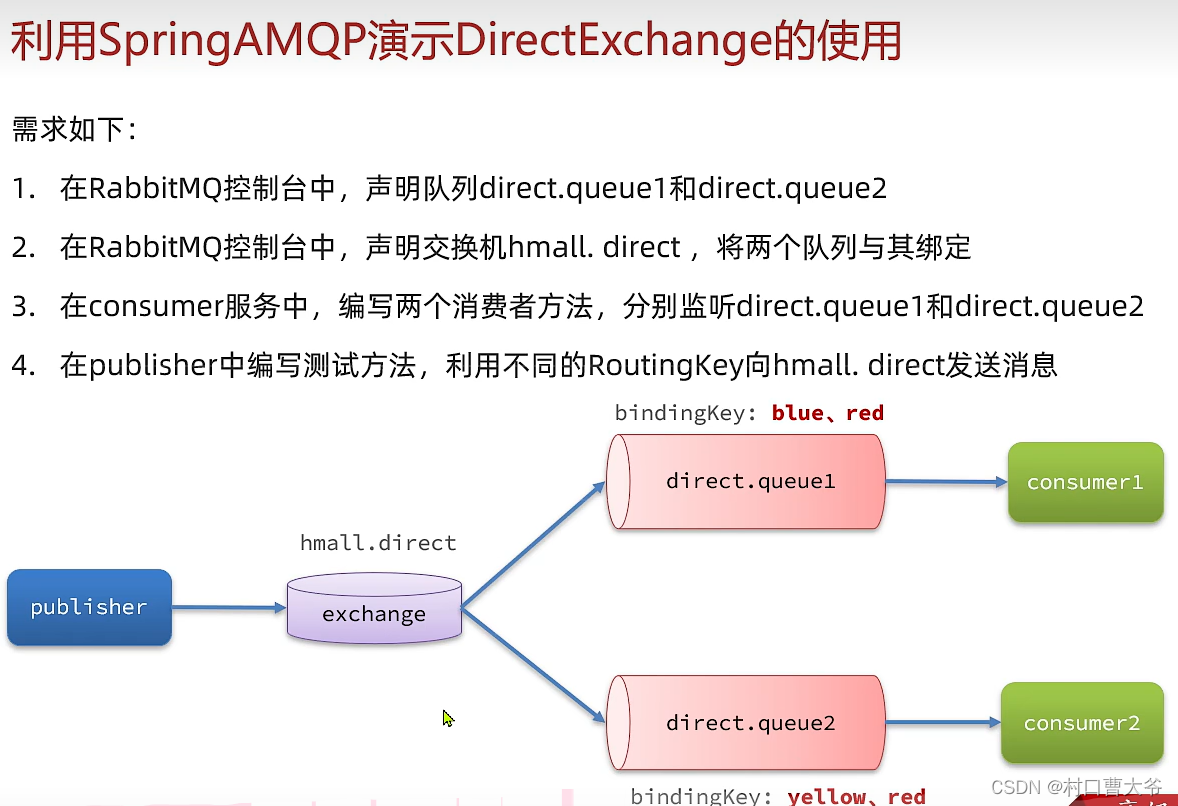
第一步:创建两个队列

第二步:声明交换机并绑定


第三步:编写代码
接收方:
@RabbitListener(queues = "direct.queue1")public void receiveMessage5(String message) {System.out.println("消费者1接收到的消息: " + message);}@RabbitListener(queues = "direct.queue2")public void receiveMessage6(String message) {System.out.println("消费者2接收到的消息: " + message);}发送方:
public void testDirect1() {String exchangeName="cmall.fanout";String message="hello,spring everyone";rabbitTemplate.convertAndSend(exchangeName,"red",message);}public void testDirect2() {String exchangeName="cmall.fanout";String message="hello,spring blue";rabbitTemplate.convertAndSend(exchangeName,"blue",message);}public void testDirect3() {String exchangeName="cmall.fanout";String message="hello,spring yellow";rabbitTemplate.convertAndSend(exchangeName,"yellow",message);}Topic交换机

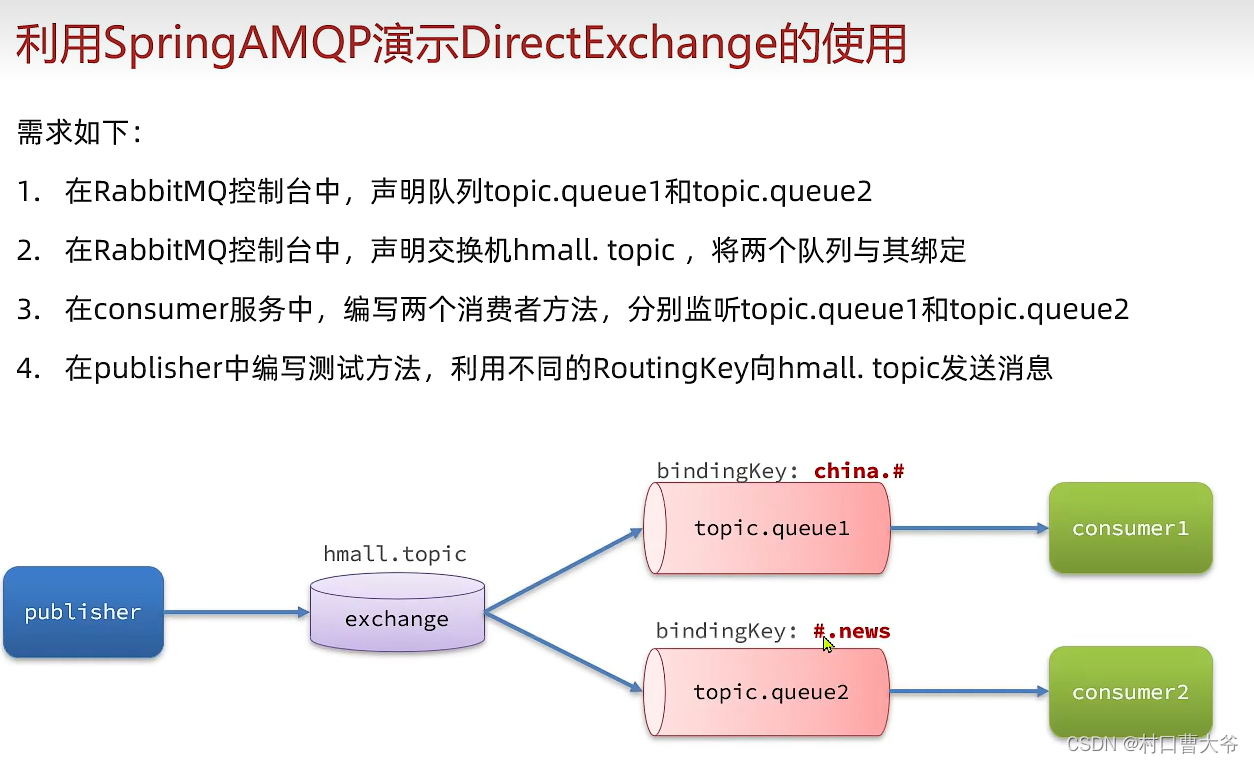
这个示例代码就懒得写了。
声明交换机和队列1


绑定队列到哪个交换机里面。
一般建立关系都是在消费者这边的。
声明交换机和队列2
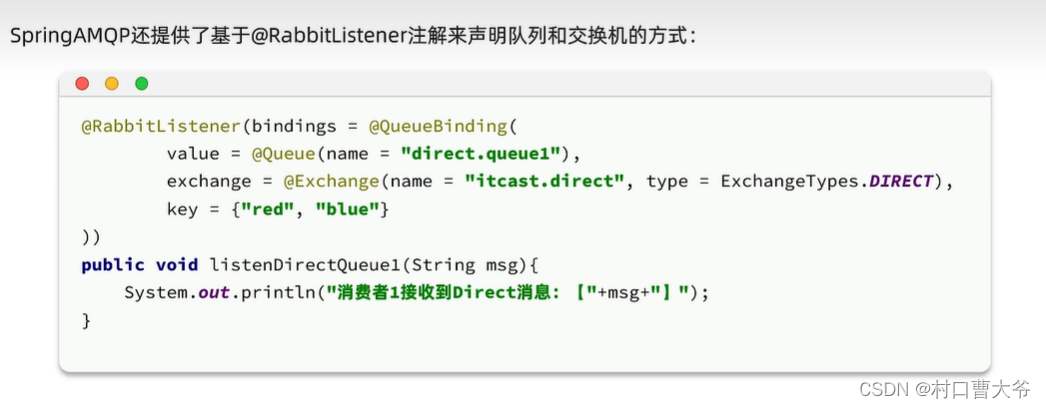
基于注解式声明队列和交换机。

消息转换器

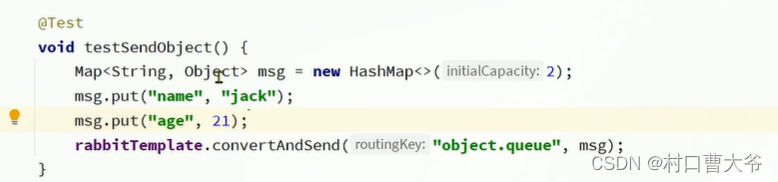
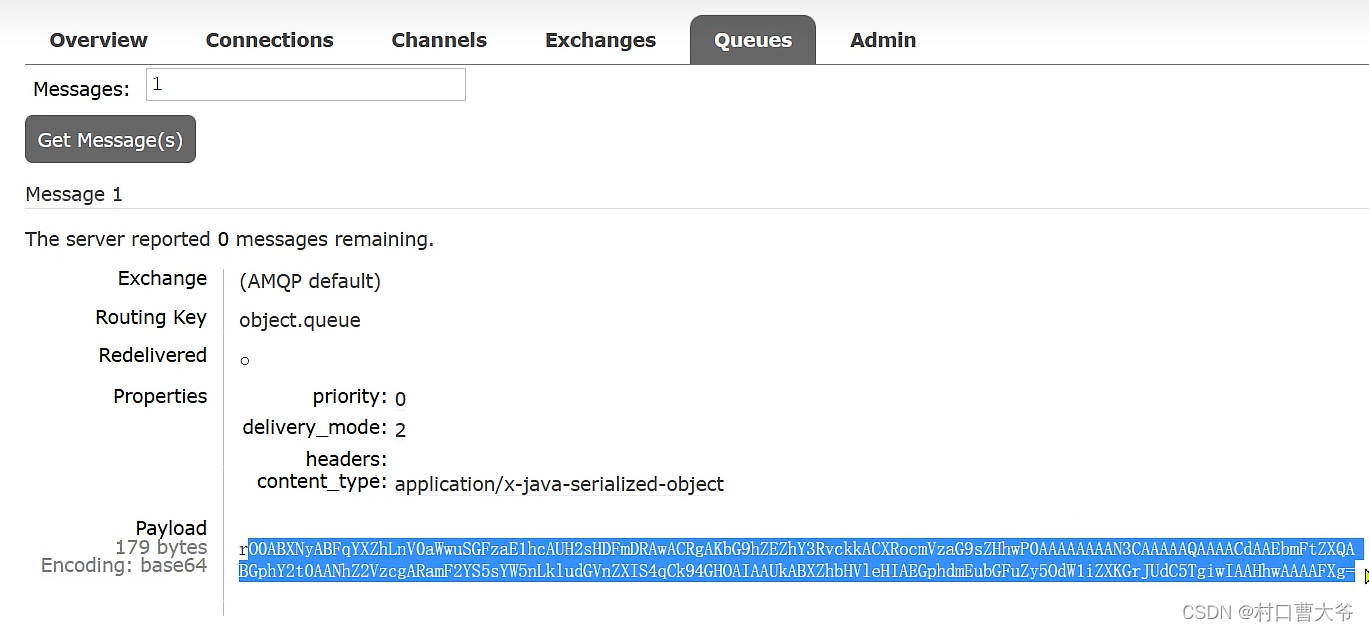
字节码可变,会有安全问题。

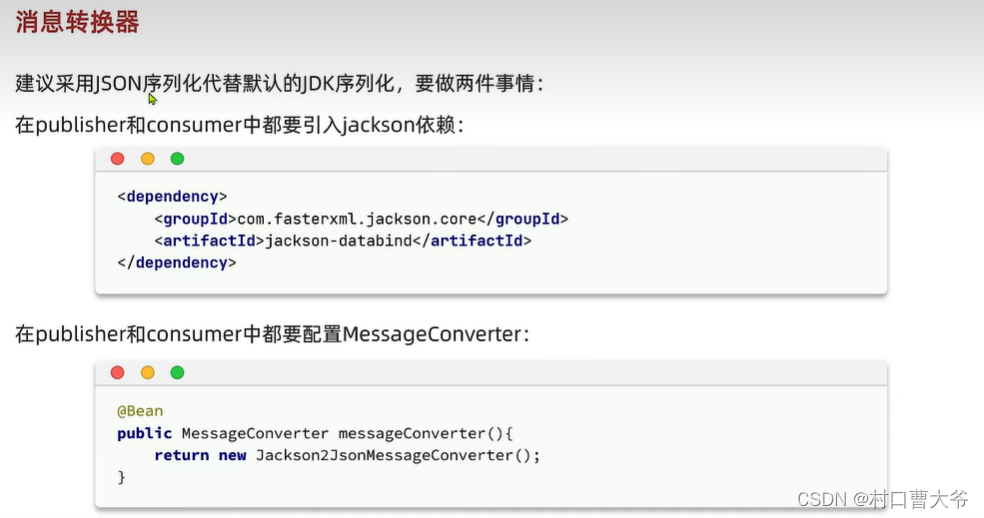
搞完以上东西,代码不用变,在发一次,即可为json。
好了,基础讲完。
这篇关于rabbitmq基础教程(ui,java,springamqp)的文章就介绍到这儿,希望我们推荐的文章对编程师们有所帮助!


