本文主要是介绍安卓屏幕自动息屏时亮度突然变亮,希望对大家解决编程问题提供一定的参考价值,需要的开发者们随着小编来一起学习吧!
自然息屏流程
USER_ACTIVITY_SCREEN_BRIGHT(亮屏) → USER_ACTIVITY_SCREEN_DIM(DIM) → USER_ACTIVITY_SCREEN_DREAM(灭屏)变化,最终进入ASLEEP后。在息屏时会执行一个变暗的动画
frameworks\base\services\core\java\com\android\server\display\DisplayPowerController.java
变暗的动画,执行动画代码中 会获取屏幕亮度,并且把亮度值进行转换:
private void animateScreenBrightness(float target, float sdrTarget, float rate) {
if (DEBUG) {
Slog.d(TAG, “Animating brightness: target=” + target + “, sdrTarget=” + sdrTarget
+ “, rate=” + rate);
}
if (mScreenBrightnessRampAnimator.animateTo(target, sdrTarget, rate)) {
Trace.traceCounter(Trace.TRACE_TAG_POWER, “TargetScreenBrightness”, (int) target);
// TODO(b/153319140) remove when we can get this from the above trace invocation
SystemProperties.set(“debug.tracing.screen_brightness”, String.valueOf(target));
noteScreenBrightness(target);
}
}
其中mScreenBrightnessRampAnimator.animateTo(target, sdrTarget, rate)在
frameworks\base\services\core\java\com\android\server\display\RampAnimator.java
public boolean animateTo(float targetLinear, float rate) {
// Convert the target from the linear into the HLG space.
final float target = BrightnessUtils.convertLinearToGamma(targetLinear);
    // Immediately jump to the target the first time.if (mFirstTime || rate <= 0) {if (mFirstTime || target != mCurrentValue) {mFirstTime = false;mRate = 0;mTargetValue = target;mCurrentValue = target;setPropertyValue(target);if (mAnimating) {mAnimating = false;cancelAnimationCallback();}if (mListener != null) {mListener.onAnimationEnd();}return true;}return false;}// Adjust the rate based on the closest target.// If a faster rate is specified, then use the new rate so that we converge// more rapidly based on the new request.// If a slower rate is specified, then use the new rate only if the current// value is somewhere in between the new and the old target meaning that// we will be ramping in a different direction to get there.// Otherwise, continue at the previous rate.if (!mAnimating|| rate > mRate|| (target <= mCurrentValue && mCurrentValue <= mTargetValue)|| (mTargetValue <= mCurrentValue && mCurrentValue <= target)) {mRate = rate;}final boolean changed = (mTargetValue != target);mTargetValue = target;// Start animating.if (!mAnimating && target != mCurrentValue) {mAnimating = true;mAnimatedValue = mCurrentValue;mLastFrameTimeNanos = System.nanoTime();postAnimationCallback();}return changed;
}
其中setPropertyValue是设置亮度值
private void setPropertyValue(float val) {
final float linearVal = BrightnessUtils.convertGammaToLinear(val);
mProperty.setValue(mObject, linearVal);
}
再看2.中的
postAnimationCallback();
private void postAnimationCallback() {
mChoreographer.postCallback(Choreographer.CALLBACK_ANIMATION, mAnimationCallback, null);
}
private final Runnable mAnimationCallback = new Runnable() {
@Override // Choreographer callback
public void run() {
final long frameTimeNanos = mChoreographer.getFrameTimeNanos();
final float timeDelta = (frameTimeNanos - mLastFrameTimeNanos)
* 0.000000001f;
mLastFrameTimeNanos = frameTimeNanos;
        // Advance the animated value towards the target at the specified rate// and clamp to the target. This gives us the new current value but// we keep the animated value around to allow for fractional increments// towards the target.final float scale = ValueAnimator.getDurationScale();if (scale == 0) {// Animation off.mAnimatedValue = mTargetValue;} else {final float amount = timeDelta * mRate / scale;if (mTargetValue > mCurrentValue) {mAnimatedValue = Math.min(mAnimatedValue + amount, mTargetValue);} else {mAnimatedValue = Math.max(mAnimatedValue - amount, mTargetValue);}}final float oldCurrentValue = mCurrentValue;mCurrentValue = mAnimatedValue;if (!BrightnessSynchronizer.floatEquals(oldCurrentValue, mCurrentValue)) {setPropertyValue(mCurrentValue);}if (!BrightnessSynchronizer.floatEquals(mTargetValue, mCurrentValue)) {postAnimationCallback();} else {mAnimating = false;if (mListener != null) {mListener.onAnimationEnd();}}}
};
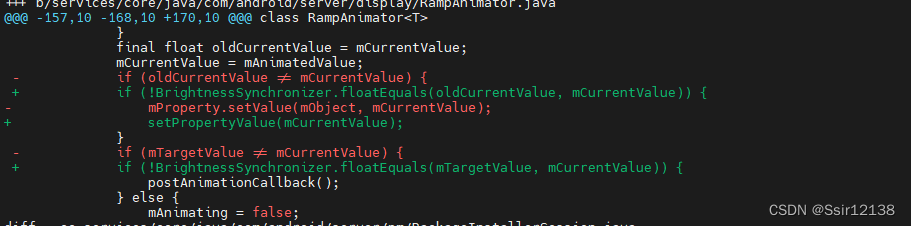
其中修改亮度调用的却是
if (!BrightnessSynchronizer.floatEquals(oldCurrentValue, mCurrentValue)) {
mProperty.setValue(mObject, mCurrentValue);
}
将此处改变亮度的api改成3.的设置亮度
if (!BrightnessSynchronizer.floatEquals(oldCurrentValue, mCurrentValue)) {
setPropertyValue(mCurrentValue);
}
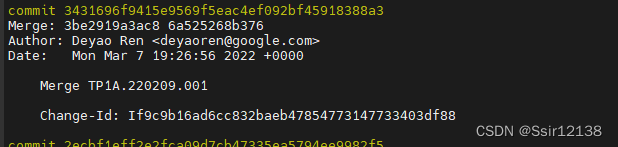
其他项目此处是有谷歌提交记录 这个项目没完全改掉
这篇关于安卓屏幕自动息屏时亮度突然变亮的文章就介绍到这儿,希望我们推荐的文章对编程师们有所帮助!


