本文主要是介绍LeapMotion开发(二)--Opencv绘制手掌位置,希望对大家解决编程问题提供一定的参考价值,需要的开发者们随着小编来一起学习吧!
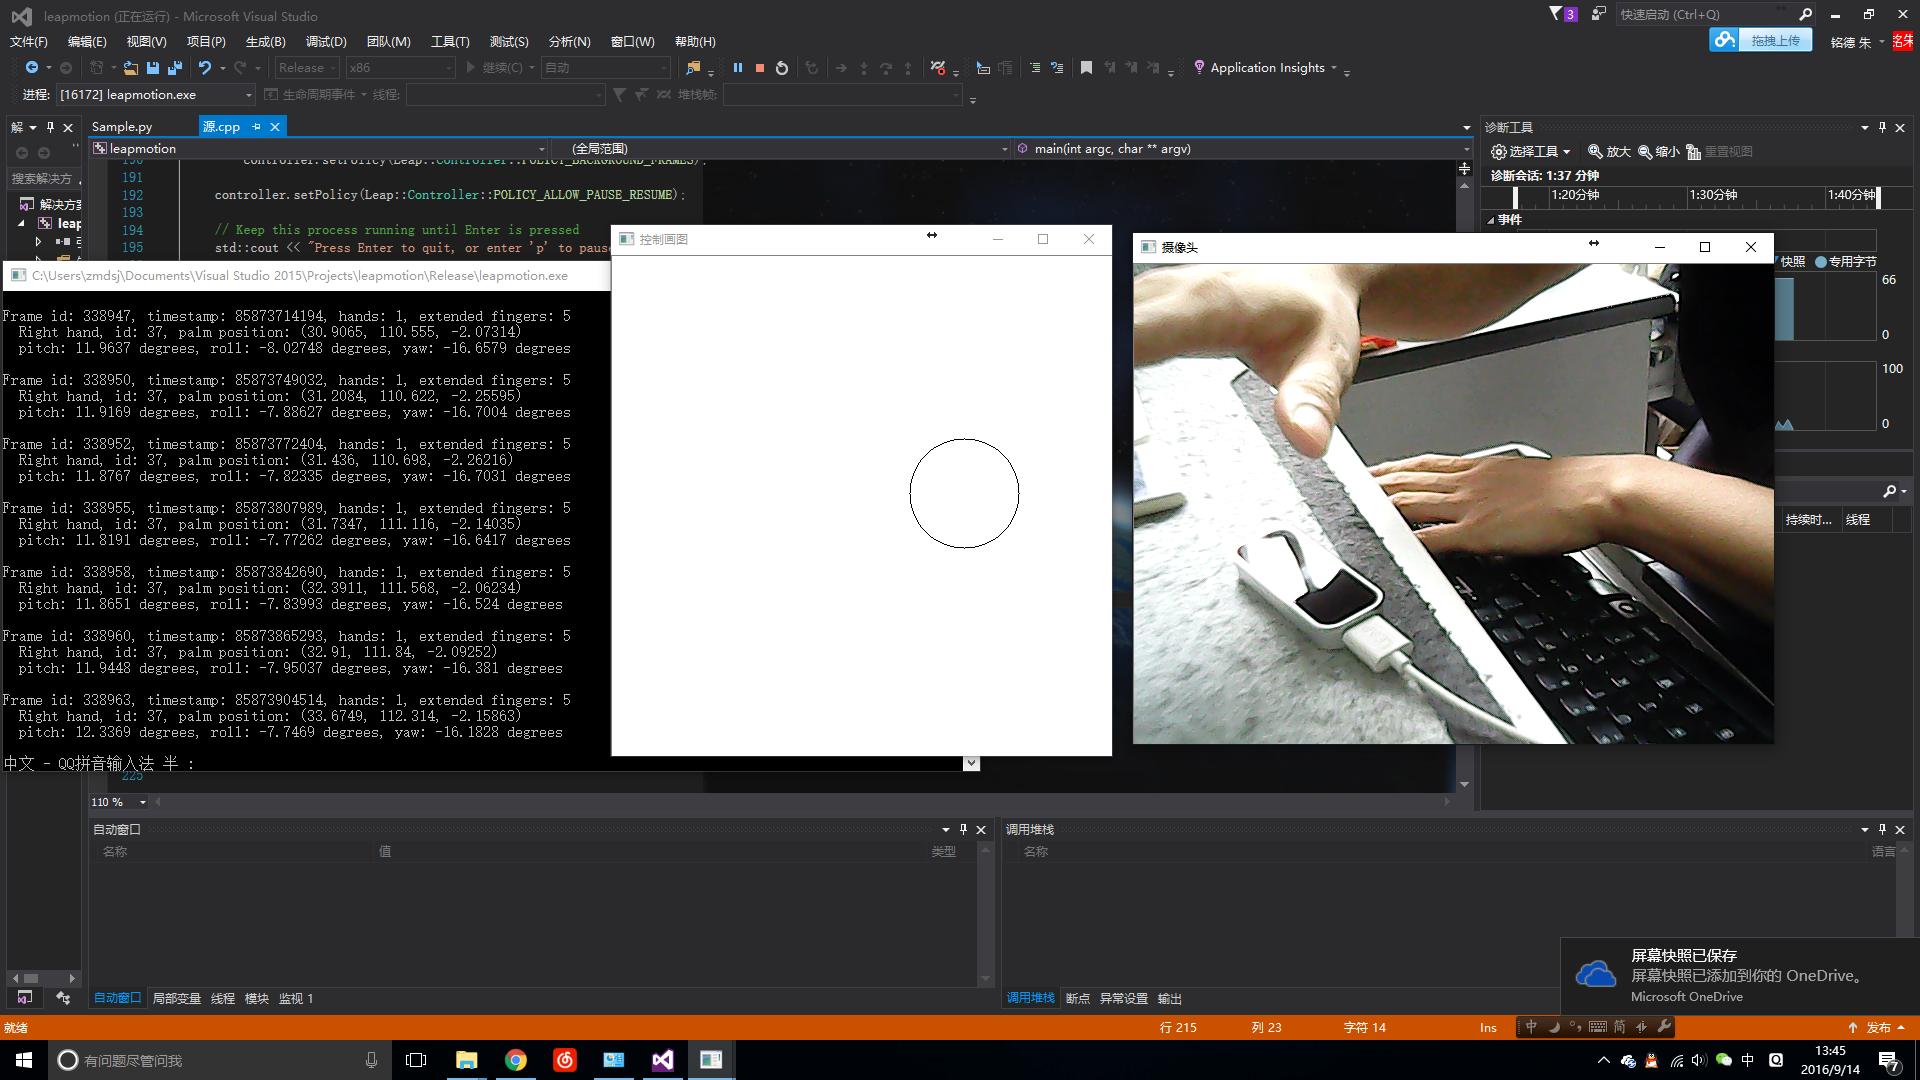
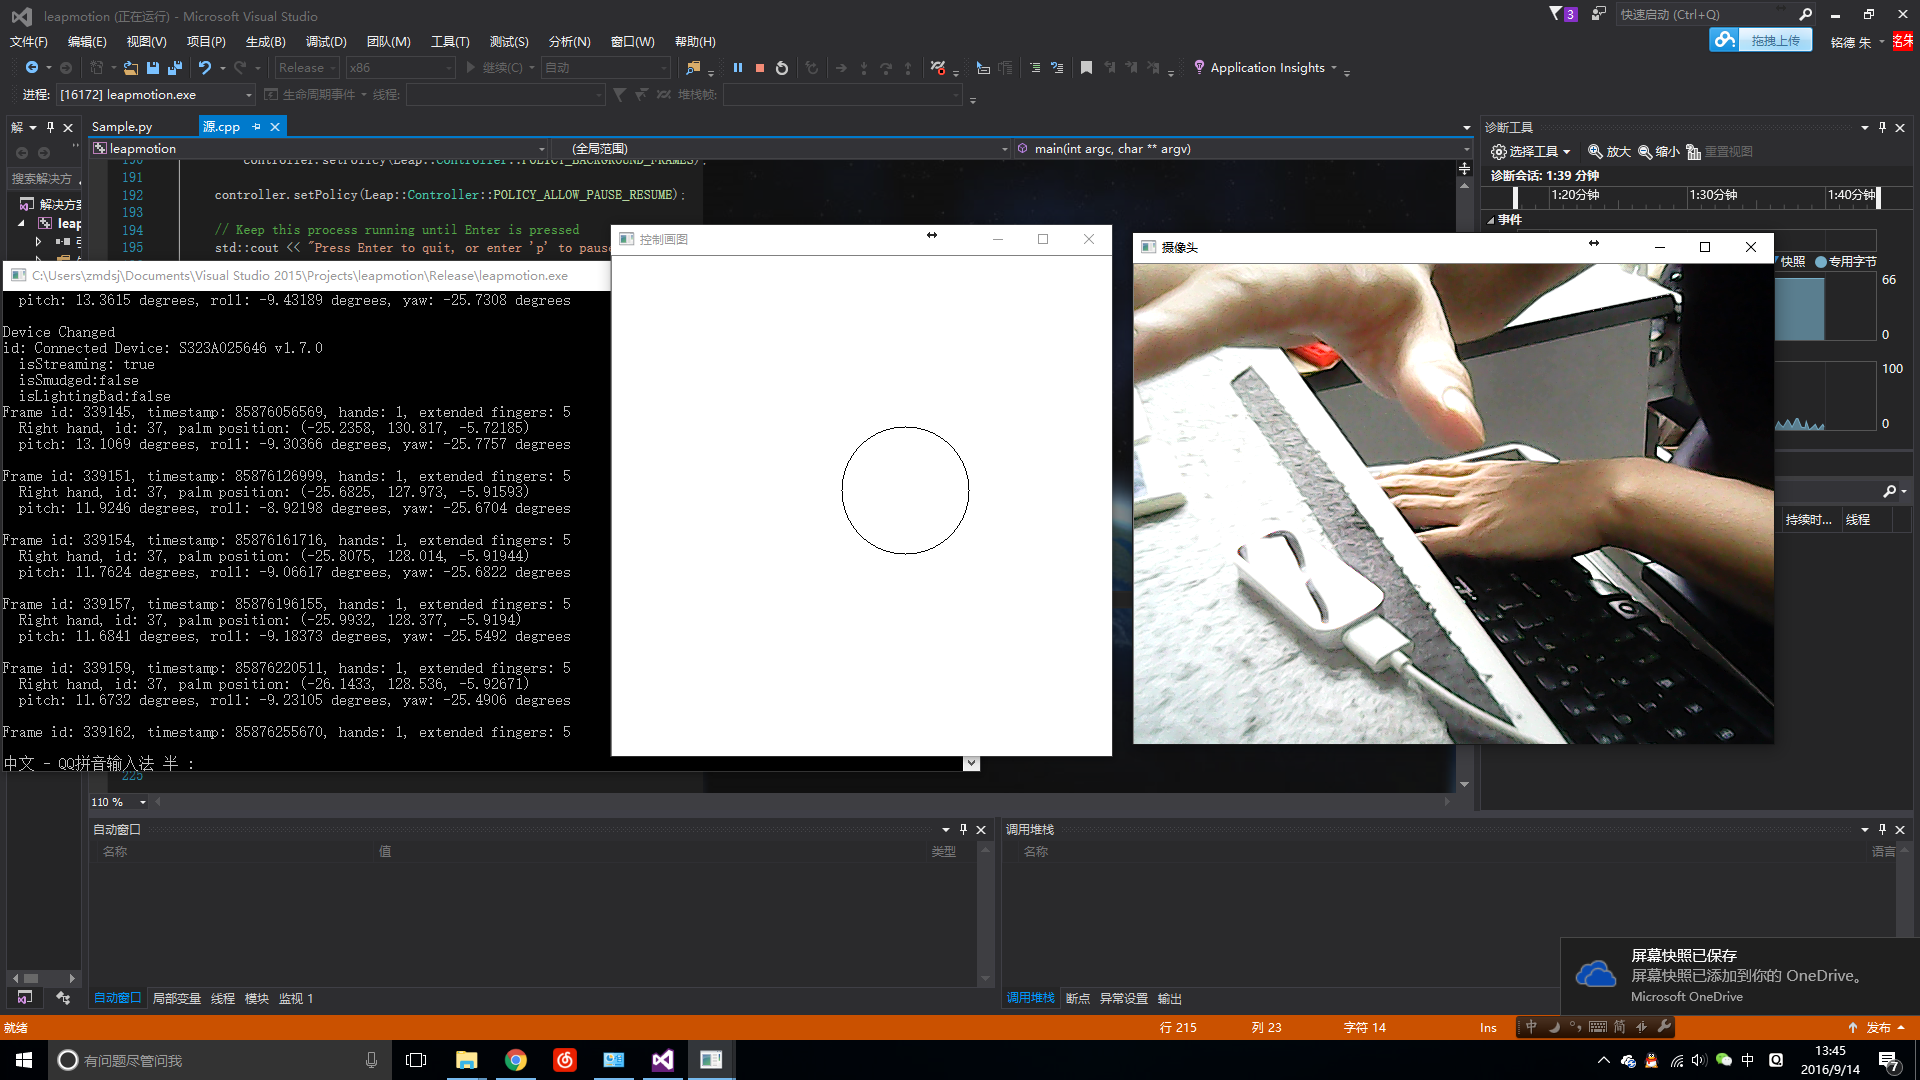
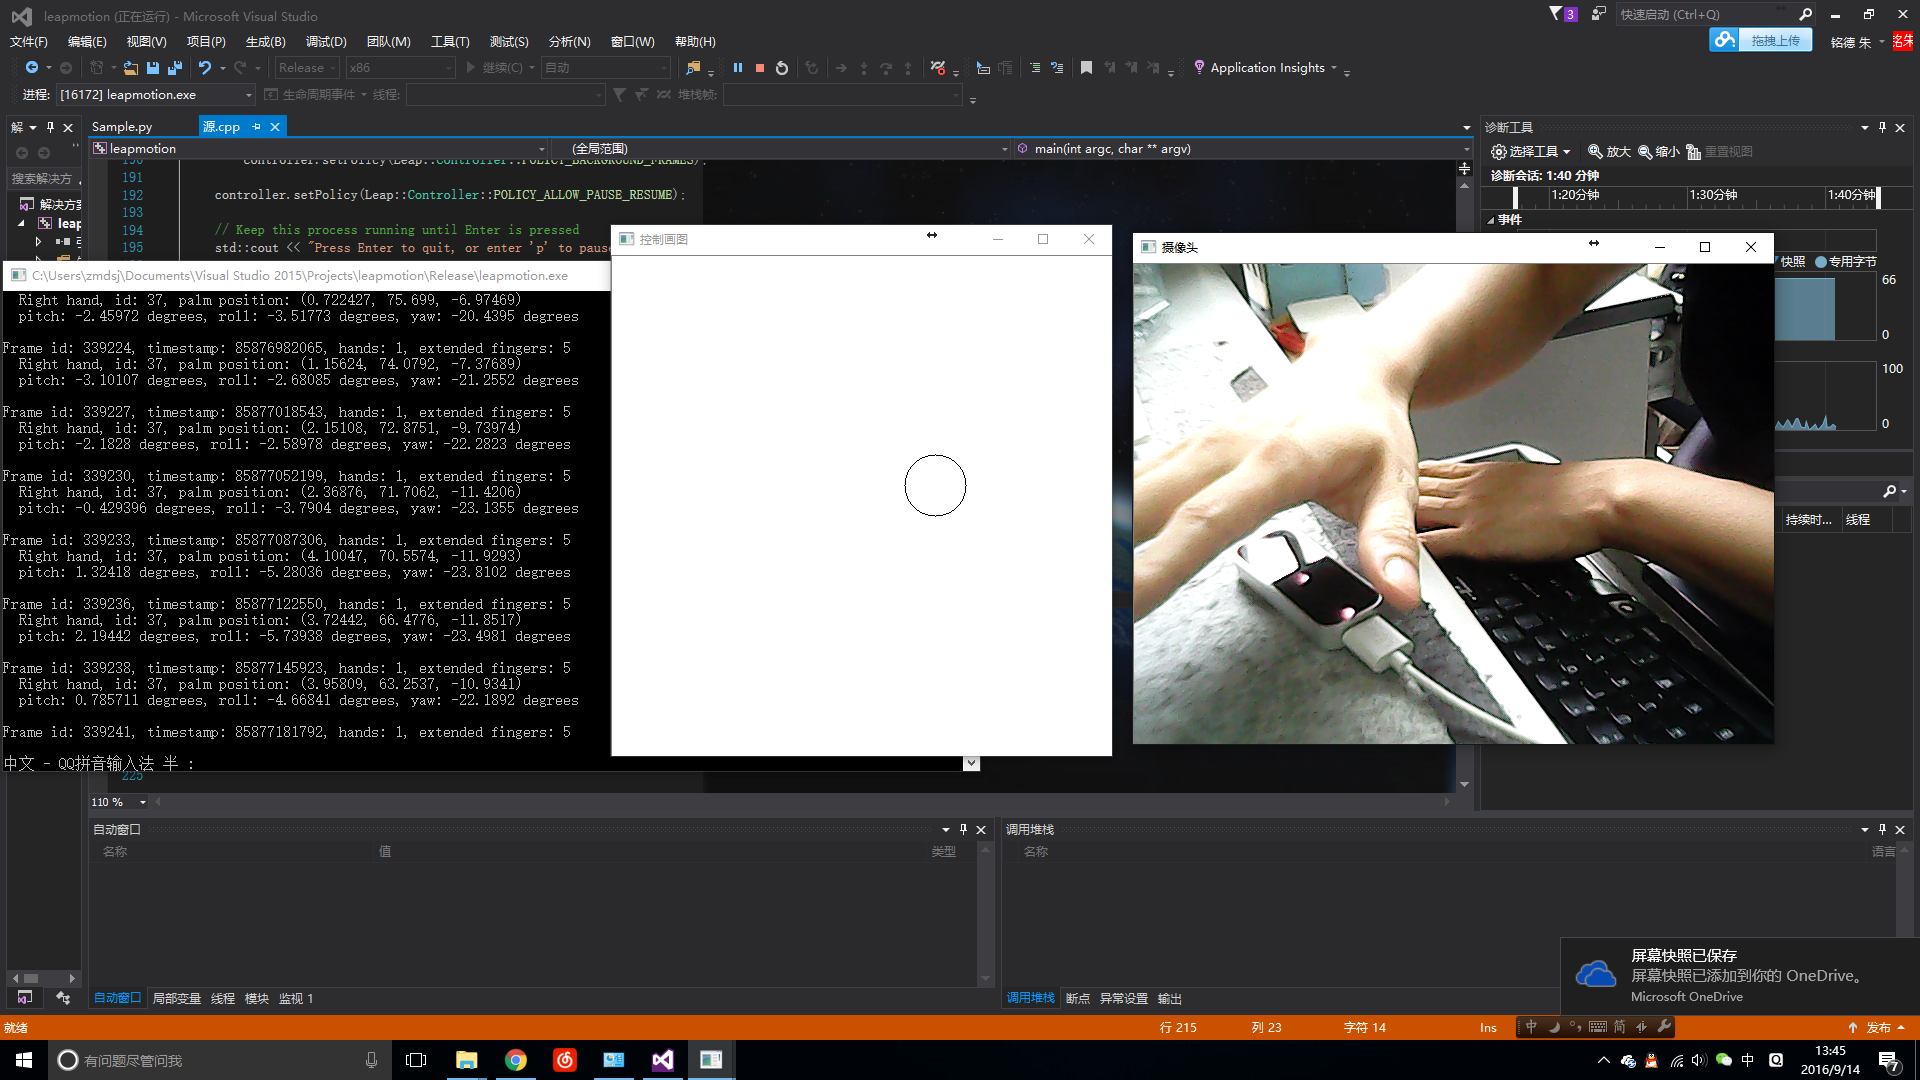
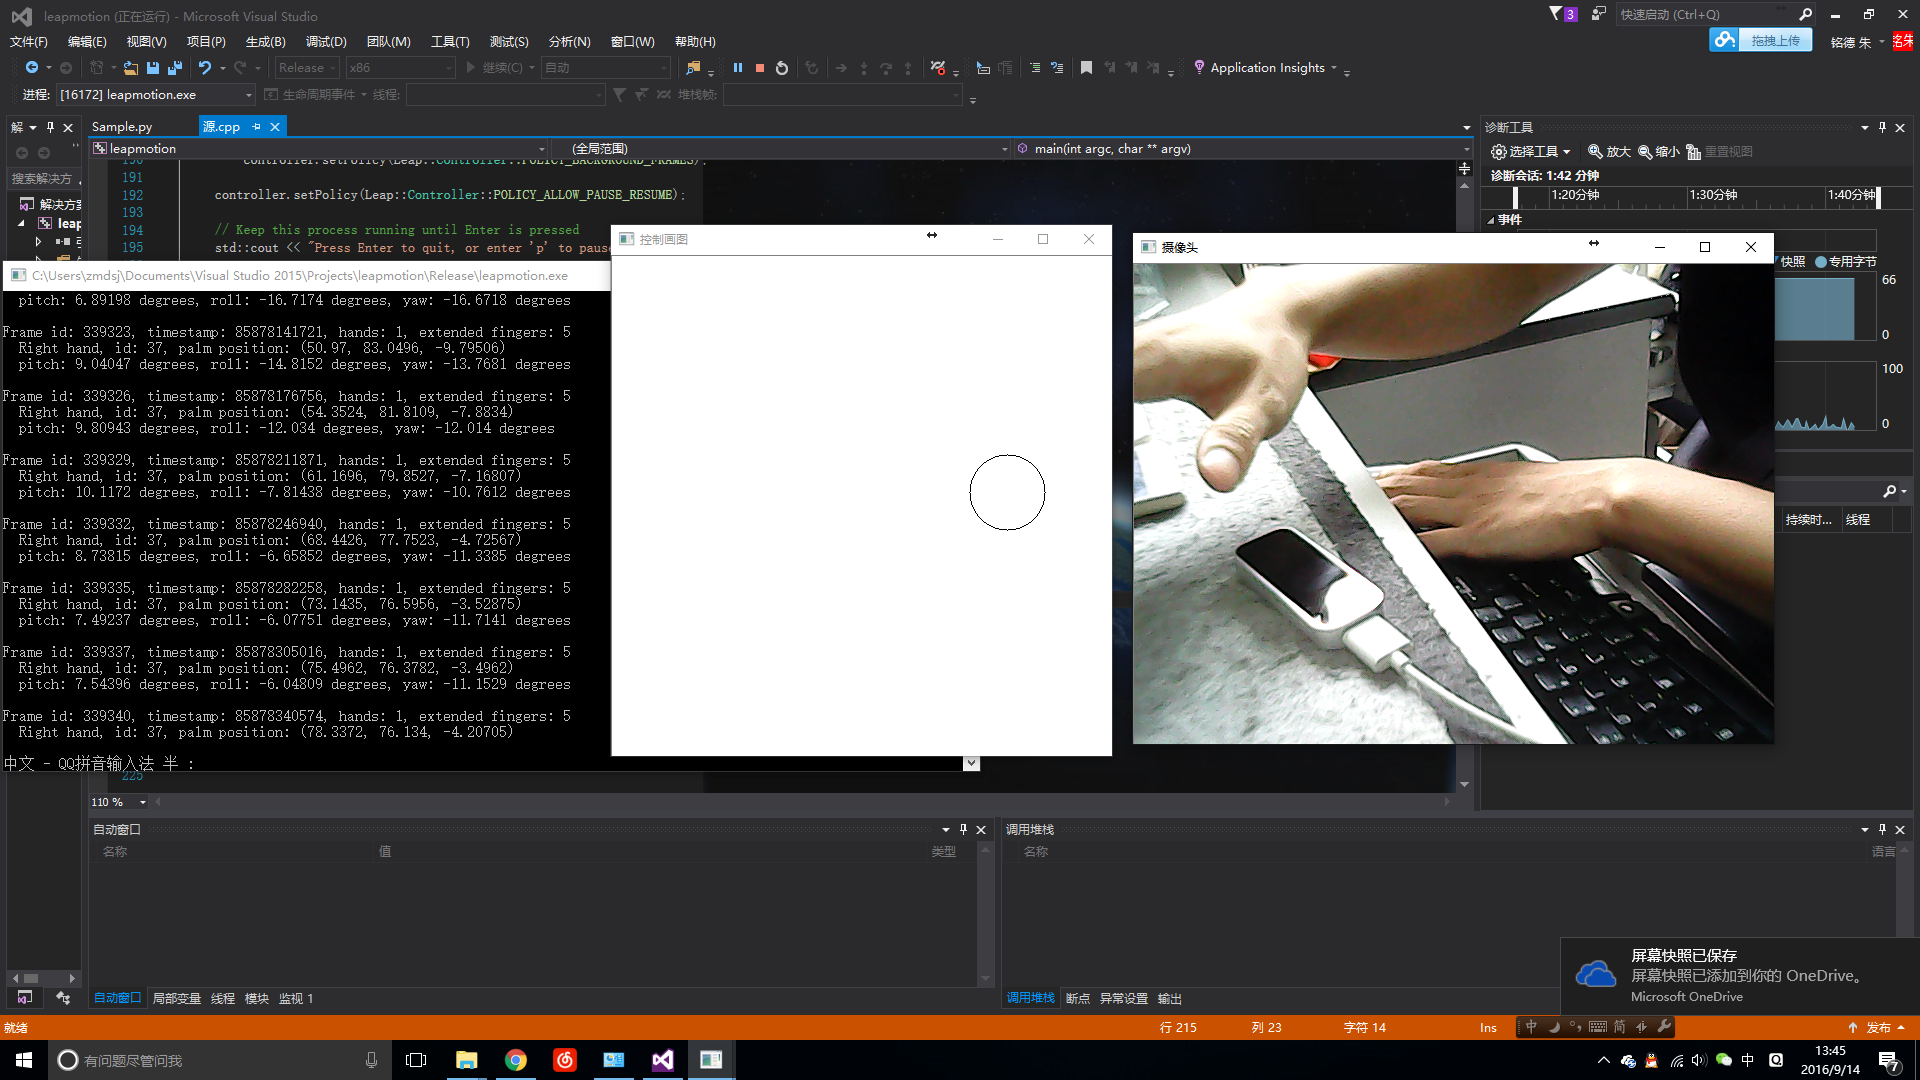
利用Leapmotion提取的掌心的三维坐标在空白画布上画出与手掌位置相对应的一个圆圈。
友情链接:
Opencv环境配置:http://blog.csdn.net/zmdsjtu/article/details/52235056
LeapMotion配置:http://blog.csdn.net/zmdsjtu/article/details/52514270
实现功能描述:在官方示例Sample.cpp的基础上提取手掌有效坐标,配置opencv环境利用画圆的函数将三维坐标对应于圆的横纵坐标以及半径。
首先介绍传参部分:
palm=hand.palmPosition();
palm为vector。
这是本文最为重要的一行代码,其他诸如opencv显示都是集成的,类似的其他各种数据可以从示例程序的cout里寻找,这里的hand.palmPosition()返回的是一个vector,可以进行一切你想要的操作。
Opencv部分函数部分:
//圆心 Point center = Point(255, 255);//半径 int r = 100;//承载图像 Mat picture(500, 500, CV_8UC3, Scalar(255, 255, 255));center= Point(palm[0]+320, palm[2]+240);r= palm[1] / 2;circle(picture,center, r, Scalar(0, 0,0));waitKey(30);waitKey()务必加上。。。血的教训
其中palm[0],palm[1],palm[2]对应这手掌的三围坐标
为了观观赏性把左右挥动加上320作为图像里的横纵,前后加上240为纵坐标,上下毫米数除以2作为半径大小。
整体代码如下:
#include <iostream>
#include <cstring>
#include "Leap.h"
#include<opencv2\highgui.hpp>
#include<opencv2\imgproc\imgproc.hpp>
#include<opencv2\core\core.hpp>
using namespace cv;
using namespace Leap;
using namespace std;Vector palm;
class SampleListener : public Listener {
public:virtual void onInit(const Controller&);virtual void onConnect(const Controller&);virtual void onDisconnect(const Controller&);virtual void onExit(const Controller&);virtual void onFrame(const Controller&);virtual void onFocusGained(const Controller&);virtual void onFocusLost(const Controller&);virtual void onDeviceChange(const Controller&);virtual void onServiceConnect(const Controller&);virtual void onServiceDisconnect(const Controller&);virtual void onServiceChange(const Controller&);virtual void onDeviceFailure(const Controller&);virtual void onLogMessage(const Controller&, MessageSeverity severity, int64_t timestamp, const char* msg);
};const std::string fingerNames[] = { "Thumb", "Index", "Middle", "Ring", "Pinky" };
const std::string boneNames[] = { "Metacarpal", "Proximal", "Middle", "Distal" };void SampleListener::onInit(const Controller& controller) {std::cout << "Initialized" << std::endl;
}void SampleListener::onConnect(const Controller& controller) {std::cout << "Connected" << std::endl;
}void SampleListener::onDisconnect(const Controller& controller) {// Note: not dispatched when running in a debugger.std::cout << "Disconnected" << std::endl;
}void SampleListener::onExit(const Controller& controller) {std::cout << "Exited" << std::endl;
}void SampleListener::onFrame(const Controller& controller) {// Get the most recent frame and report some basic informationconst Frame frame = controller.frame();std::cout << "Frame id: " << frame.id()<< ", timestamp: " << frame.timestamp()<< ", hands: " << frame.hands().count()<< ", extended fingers: " << frame.fingers().extended().count() << std::endl;HandList hands = frame.hands();for (HandList::const_iterator hl = hands.begin(); hl != hands.end(); ++hl) {// Get the first handconst Hand hand = *hl;std::string handType = hand.isLeft() ? "Left hand" : "Right hand";std::cout << std::string(2, ' ') << handType << ", id: " << hand.id()<< ", palm position: " << hand.palmPosition() << std::endl;palm = hand.palmPosition();// Get the hand's normal vector and directionconst Vector normal = hand.palmNormal();const Vector direction = hand.direction();// Calculate the hand's pitch, roll, and yaw anglesstd::cout << std::string(2, ' ') << "pitch: " << direction.pitch() * RAD_TO_DEG << " degrees, "<< "roll: " << normal.roll() * RAD_TO_DEG << " degrees, "<< "yaw: " << direction.yaw() * RAD_TO_DEG << " degrees" << std::endl;// Get the Arm boneArm arm = hand.arm();/*std::cout << std::string(2, ' ') <<  "Arm direction: " << arm.direction()<< " wrist position: " << arm.wristPosition()<< " elbow position: " << arm.elbowPosition() << std::endl;*/// Get fingersconst FingerList fingers = hand.fingers();for (FingerList::const_iterator fl = fingers.begin(); fl != fingers.end(); ++fl) {const Finger finger = *fl;/*std::cout << std::string(4, ' ') <<  fingerNames[finger.type()]<< " finger, id: " << finger.id()<< ", length: " << finger.length()<< "mm, width: " << finger.width() << std::endl;*/// Get finger bonesfor (int b = 0; b < 4; ++b) {Bone::Type boneType = static_cast<Bone::Type>(b);Bone bone = finger.bone(boneType);/*std::cout << std::string(6, ' ') <<  boneNames[boneType]<< " bone, start: " << bone.prevJoint()<< ", end: " << bone.nextJoint()<< ", direction: " << bone.direction() << std::endl;*/}}}if (!frame.hands().isEmpty()) {std::cout << std::endl;}}void SampleListener::onFocusGained(const Controller& controller) {std::cout << "Focus Gained" << std::endl;
}void SampleListener::onFocusLost(const Controller& controller) {std::cout << "Focus Lost" << std::endl;
}void SampleListener::onDeviceChange(const Controller& controller) {std::cout << "Device Changed" << std::endl;const DeviceList devices = controller.devices();for (int i = 0; i < devices.count(); ++i) {std::cout << "id: " << devices[i].toString() << std::endl;std::cout << "  isStreaming: " << (devices[i].isStreaming() ? "true" : "false") << std::endl;std::cout << "  isSmudged:" << (devices[i].isSmudged() ? "true" : "false") << std::endl;std::cout << "  isLightingBad:" << (devices[i].isLightingBad() ? "true" : "false") << std::endl;}
}void SampleListener::onServiceConnect(const Controller& controller) {std::cout << "Service Connected" << std::endl;
}void SampleListener::onServiceDisconnect(const Controller& controller) {std::cout << "Service Disconnected" << std::endl;
}void SampleListener::onServiceChange(const Controller& controller) {std::cout << "Service Changed" << std::endl;
}void SampleListener::onDeviceFailure(const Controller& controller) {std::cout << "Device Error" << std::endl;const Leap::FailedDeviceList devices = controller.failedDevices();for (FailedDeviceList::const_iterator dl = devices.begin(); dl != devices.end(); ++dl) {const FailedDevice device = *dl;std::cout << "  PNP ID:" << device.pnpId();std::cout << "    Failure type:" << device.failure();}
}void SampleListener::onLogMessage(const Controller&, MessageSeverity s, int64_t t, const char* msg) {switch (s) {case Leap::MESSAGE_CRITICAL:std::cout << "[Critical]";break;case Leap::MESSAGE_WARNING:std::cout << "[Warning]";break;case Leap::MESSAGE_INFORMATION:std::cout << "[Info]";break;case Leap::MESSAGE_UNKNOWN:std::cout << "[Unknown]";}std::cout << "[" << t << "] ";std::cout << msg << std::endl;
}int main(int argc, char** argv) {// Create a sample listener and controllerSampleListener listener;Controller controller;// Have the sample listener receive events from the controllercontroller.addListener(listener);if (argc > 1 && strcmp(argv[1], "--bg") == 0)controller.setPolicy(Leap::Controller::POLICY_BACKGROUND_FRAMES);controller.setPolicy(Leap::Controller::POLICY_ALLOW_PAUSE_RESUME);// Keep this process running until Enter is pressedstd::cout << "Press Enter to quit, or enter 'p' to pause or unpause the service..." << std::endl;bool paused = false;//圆心  Point center = Point(255, 255);//半径  int r = 100;//承载图像  //参数为:承载的图像、圆心、半径、颜色、粗细、线型  while (true) {Mat picture(500, 500, CV_8UC3, Scalar(255, 255, 255));center = Point(palm[0] + 320, palm[2] + 240);r = palm[1] / 2;circle(picture, center, r, Scalar(0, 0, 0));imshow("控制画图", picture);waitKey(30);}// Remove the sample listener when donecontroller.removeListener(listener);return 0;
}
结果如图所示:(为了看上去效果好一点加了一段调用摄像头的代码)
最后祝大家编程愉快~
这篇关于LeapMotion开发(二)--Opencv绘制手掌位置的文章就介绍到这儿,希望我们推荐的文章对编程师们有所帮助!


