本文主要是介绍CollapsingToolbarLayout结合ToolBar使用,希望对大家解决编程问题提供一定的参考价值,需要的开发者们随着小编来一起学习吧!
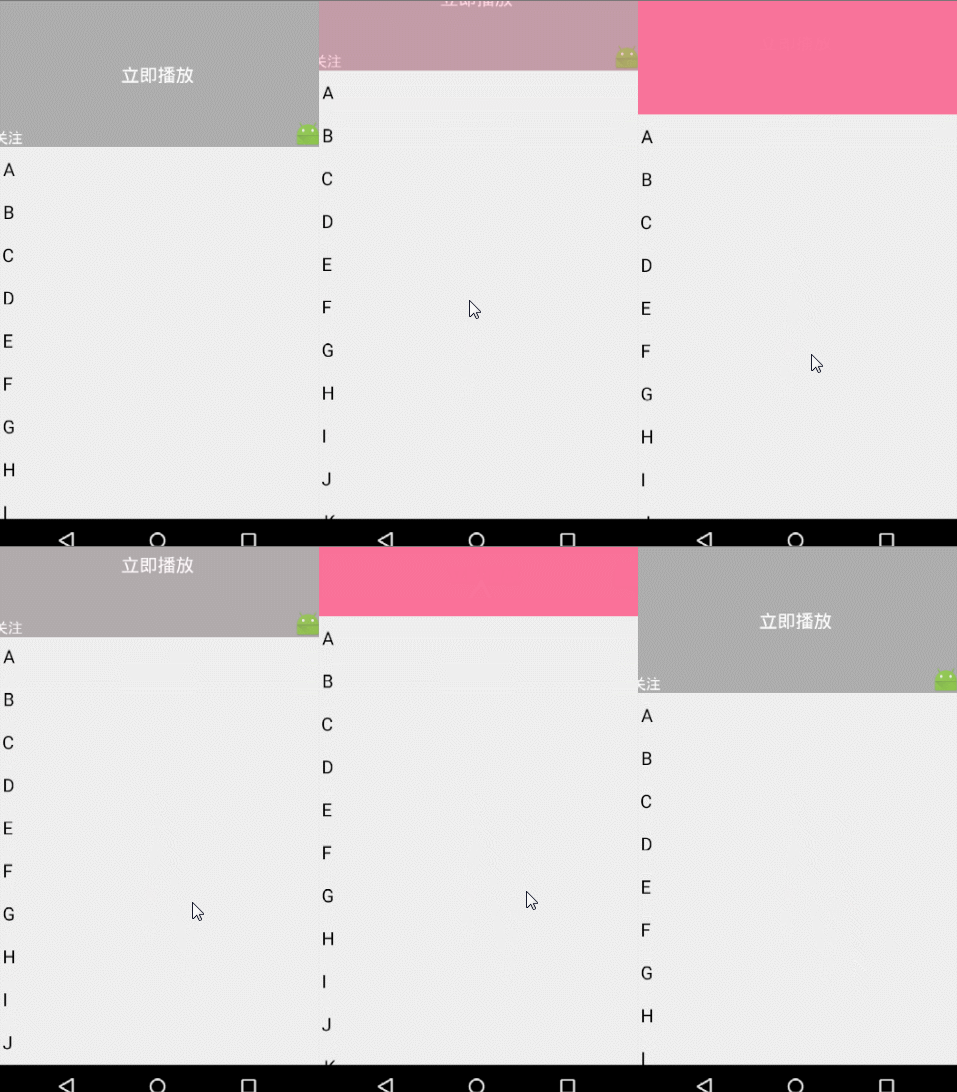
效果图
代码
<android.support.design.widget.CoordinatorLayout xmlns:android="http://schemas.android.com/apk/res/android"xmlns:app="http://schemas.android.com/apk/res-auto"android:layout_width="match_parent"android:layout_height="match_parent"><android.support.design.widget.AppBarLayoutandroid:id="@+id/appbar"android:layout_width="match_parent"android:layout_height="160dp"android:background="#00ff99"><android.support.design.widget.CollapsingToolbarLayoutandroid:layout_width="match_parent"android:layout_height="match_parent"app:contentScrim="#FA7199"app:expandedTitleMarginEnd="64dp"app:expandedTitleMarginStart="48dp"app:layout_scrollFlags="scroll|exitUntilCollapsed"app:statusBarScrim="?attr/colorPrimary"><RelativeLayoutandroid:layout_width="match_parent"android:layout_height="match_parent"android:background="#ADADAD"><TextViewandroid:id="@+id/tv_Center_title"android:layout_width="wrap_content"android:layout_height="wrap_content"android:text="立即播放"android:textSize="20sp"android:textColor="@android:color/white"android:layout_centerInParent="true"/><TextViewandroid:id="@+id/tv_left"android:layout_width="wrap_content"android:layout_height="wrap_content"android:layout_alignParentLeft="true"android:layout_alignParentBottom="true"android:text="关注"android:textSize="16sp"android:textColor="@android:color/white"/><ImageViewandroid:id="@+id/iv_right_bottom"android:layout_width="30dp"android:layout_height="30dp"android:src="@mipmap/ic_launcher"android:layout_alignParentRight="true"android:layout_alignParentBottom="true"/><TextViewandroid:id="@+id/tvnum"android:layout_width="wrap_content"android:layout_height="wrap_content"android:layout_centerHorizontal="true"android:textSize="16sp"android:text="0"android:visibility="gone"android:layout_alignParentBottom="true"/></RelativeLayout><android.support.v7.widget.Toolbarandroid:id="@+id/toolbar"android:layout_width="match_parent"android:layout_height="?attr/actionBarSize"app:layout_collapseMode="pin"android:gravity="center"app:popupTheme="@style/ThemeOverlay.AppCompat.Light"><RelativeLayoutandroid:layout_width="match_parent"android:layout_height="match_parent"><TextViewandroid:id="@+id/tv_play"android:layout_width="wrap_content"android:layout_height="wrap_content"android:textColor="#ffffff"android:text="立即播放"android:textSize="20sp"android:layout_centerInParent="true"/><ImageViewandroid:id="@+id/iv_top_right"android:layout_width="30dp"android:layout_height="30dp"android:src="@mipmap/ic_launcher"android:layout_alignParentRight="true"android:layout_centerVertical="true"android:visibility="gone"/></RelativeLayout></android.support.v7.widget.Toolbar></android.support.design.widget.CollapsingToolbarLayout></android.support.design.widget.AppBarLayout><android.support.v7.widget.RecyclerViewandroid:id="@+id/recview"android:layout_width="match_parent"android:layout_height="match_parent"app:layout_behavior="@string/appbar_scrolling_view_behavior"></android.support.v7.widget.RecyclerView></android.support.design.widget.CoordinatorLayout>
public abstract class AppBarStateChangeListener implements AppBarLayout.OnOffsetChangedListener {public enum State {EXPANDED,COLLAPSED,IDLE}private State mCurrentState = State.IDLE;@Overridepublic final void onOffsetChanged(AppBarLayout appBarLayout, int i) {System.out.println("===========i: "+i);//0--208if (i == 0) {if (mCurrentState != State.EXPANDED) {onStateChanged(appBarLayout, State.EXPANDED);}mCurrentState = State.EXPANDED;} else if (Math.abs(i) >= appBarLayout.getTotalScrollRange()) {if (mCurrentState != State.COLLAPSED) {onStateChanged(appBarLayout, State.COLLAPSED);}mCurrentState = State.COLLAPSED;} else {if (mCurrentState != State.IDLE) {onStateChanged(appBarLayout, State.IDLE);}mCurrentState = State.IDLE;}}public abstract void onStateChanged(AppBarLayout appBarLayout, State state);
}
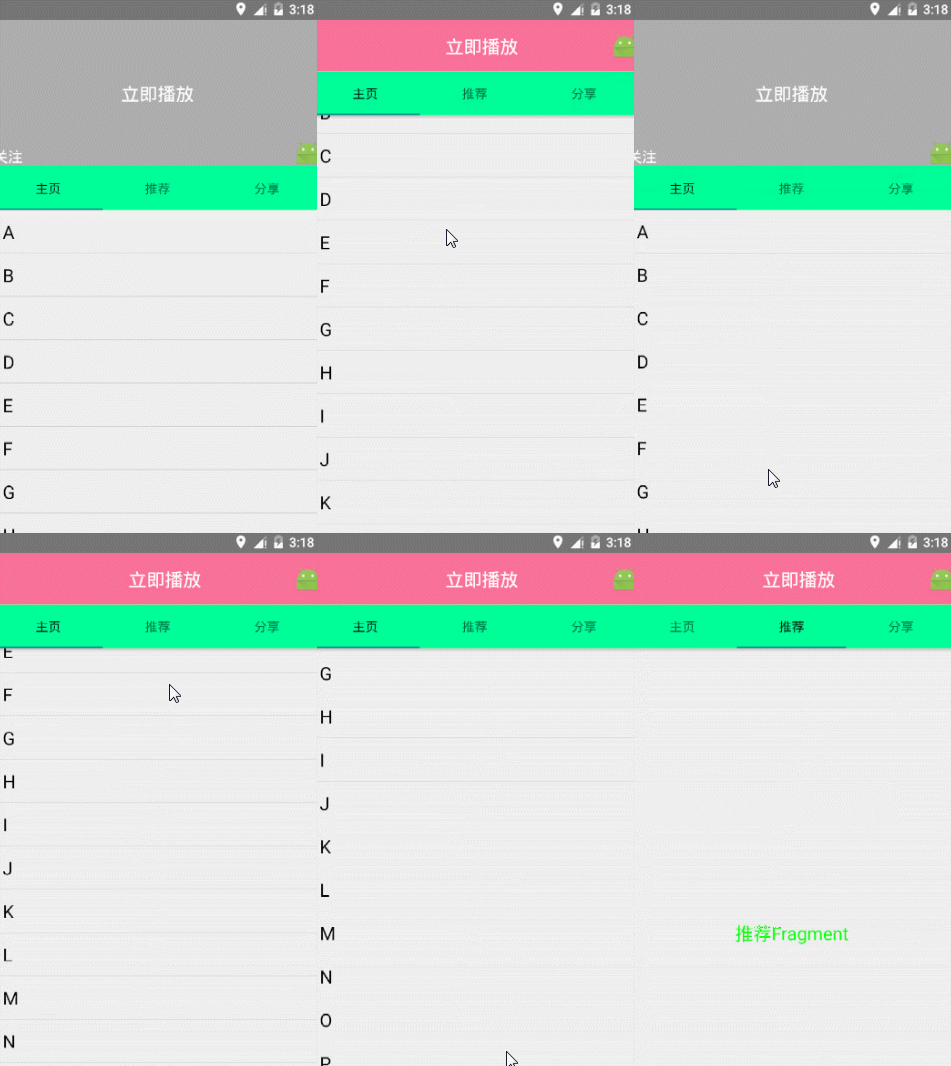
public class MainActivity extends AppCompatActivity {private List<String> datas;private RecyclerView recyclerView;private AppBarLayout appBarLayout;private TextView mTvPlay;private TextView mTvLeft;private TextView mTvName;private ImageView mIvIcon;private TextView mNumber;private ImageView mIvTop;@Overrideprotected void onCreate(Bundle savedInstanceState) {super.onCreate(savedInstanceState);setContentView(R.layout.activity_main);recyclerView = (RecyclerView) findViewById(R.id.recview);appBarLayout = (AppBarLayout) findViewById(R.id.appbar);mTvPlay = (TextView) findViewById(R.id.tv_play);Toolbar toolbar = (Toolbar) findViewById(R.id.toolbar);mTvLeft = (TextView) findViewById(R.id.tv_left);mTvName = (TextView) findViewById(R.id.tv_Center_title);mIvIcon = (ImageView) findViewById(R.id.iv_right_bottom);mIvTop = (ImageView) findViewById(R.id.iv_top_right);mNumber = (TextView) findViewById(R.id.tvnum);toolbar.setTitle("");setSupportActionBar(toolbar);initData();CustomAdapter adapter = new CustomAdapter(this,datas);RecyclerView.LayoutManager manager = new LinearLayoutManager(this);recyclerView.setLayoutManager(manager);recyclerView.setAdapter(adapter);appBarLayout.addOnOffsetChangedListener(new AppBarStateChangeListener() {@Overridepublic void onStateChanged(AppBarLayout appBarLayout, State state) {int totalScrollRange = appBarLayout.getTotalScrollRange();if(state == State.EXPANDED){mTvPlay.setText("");mTvLeft.setVisibility(View.VISIBLE);mIvIcon.setVisibility(View.VISIBLE);mIvTop.setVisibility(View.GONE);}else if(state == State.COLLAPSED){mTvPlay.setText("立即播放");mTvLeft.setVisibility(View.GONE);mIvIcon.setVisibility(View.GONE);mIvTop.setVisibility(View.VISIBLE);}else{mTvPlay.setText("");mIvTop.setVisibility(View.GONE);}}});}public void initData() {datas = new ArrayList<>();for (int i = 'A'; i < 'Z'; i++) {datas.add(""+(char)i);}}}效果图二
我们先看布局文件,
<android.support.design.widget.CoordinatorLayout xmlns:android="http://schemas.android.com/apk/res/android"xmlns:app="http://schemas.android.com/apk/res-auto"android:layout_width="match_parent"android:layout_height="match_parent"><android.support.design.widget.AppBarLayoutandroid:id="@+id/appbar"android:layout_width="match_parent"android:layout_height="wrap_content"><android.support.design.widget.CollapsingToolbarLayoutandroid:layout_width="match_parent"android:layout_height="160dp"app:contentScrim="#FA7199"app:layout_scrollFlags="scroll|exitUntilCollapsed"app:statusBarScrim="?attr/colorPrimary"><RelativeLayoutandroid:layout_width="match_parent"android:layout_height="match_parent"android:background="#ADADAD"><TextViewandroid:id="@+id/tv_Center_title"android:layout_width="wrap_content"android:layout_height="wrap_content"android:text="立即播放"android:textSize="20sp"android:textColor="@android:color/white"android:layout_centerInParent="true"/><TextViewandroid:id="@+id/tv_left"android:layout_width="wrap_content"android:layout_height="wrap_content"android:layout_alignParentLeft="true"android:layout_alignParentBottom="true"android:text="关注"android:textSize="16sp"android:textColor="@android:color/white"/><ImageViewandroid:id="@+id/iv_right_bottom"android:layout_width="30dp"android:layout_height="30dp"android:src="@mipmap/ic_launcher"android:layout_alignParentRight="true"android:layout_alignParentBottom="true"/></RelativeLayout><android.support.v7.widget.Toolbarandroid:id="@+id/toolbar"android:layout_width="match_parent"android:layout_height="?attr/actionBarSize"app:layout_collapseMode="pin"android:gravity="center"app:popupTheme="@style/ThemeOverlay.AppCompat.Light"><RelativeLayoutandroid:layout_width="match_parent"android:layout_height="wrap_content"><TextViewandroid:id="@+id/tv_play"android:layout_width="wrap_content"android:layout_height="wrap_content"android:textColor="#ffffff"android:text="立即播放"android:textSize="20sp"android:layout_centerInParent="true"/><ImageViewandroid:id="@+id/iv_top_right"android:layout_width="30dp"android:layout_height="30dp"android:src="@mipmap/ic_launcher"android:layout_alignParentRight="true"android:layout_centerVertical="true"android:visibility="gone"/></RelativeLayout></android.support.v7.widget.Toolbar></android.support.design.widget.CollapsingToolbarLayout><android.support.design.widget.TabLayoutandroid:id="@+id/tab_title"android:layout_width="match_parent"android:layout_height="wrap_content"/></android.support.design.widget.AppBarLayout><android.support.v4.widget.NestedScrollViewandroid:id="@+id/nesview"android:layout_width="match_parent"android:layout_height="match_parent"app:layout_behavior="@string/appbar_scrolling_view_behavior"><com.example.personcenter.WrapContentHeightViewPagerandroid:id="@+id/vp_content"android:layout_width="match_parent"android:layout_height="match_parent"></com.example.personcenter.WrapContentHeightViewPager></android.support.v4.widget.NestedScrollView></android.support.design.widget.CoordinatorLayout>我们的内容区域采用了NestedScrollView加ViewPager的实现方式,为什么要采用NestedScrollView而不是ScrollView呢?因为ToolBar要滑动,要满足一个条件,就是CoordinatorLayout布局下包裹一个可以滑动的布局,比如 RecyclerView,NestedScrollView(经过测试,ListView,ScrollView不支持)具有滑动效果的组件。所以这里我们采用NestedScrollView,然后我们使用了自定义的ViewPager,为什么不用原来的呢?因为此处viewpager的高度不能自适应,设置为wrap_content或者match_parent都无法显示出内容,所以这里我们采用自定义的ViewPager
public class WrapContentHeightViewPager extends ViewPager {public WrapContentHeightViewPager(Context context) {super(context);}public WrapContentHeightViewPager(Context context, AttributeSet attrs) {super(context, attrs);}@Overrideprotected void onMeasure(int widthMeasureSpec, int heightMeasureSpec) {super.onMeasure(widthMeasureSpec, heightMeasureSpec);int height = 0;for (int i = 0; i < getChildCount(); i++) {View child = getChildAt(i);child.measure(widthMeasureSpec, MeasureSpec.makeMeasureSpec(0, MeasureSpec.UNSPECIFIED));int h = child.getMeasuredHeight();if (h > height) height = h;}heightMeasureSpec = MeasureSpec.makeMeasureSpec(height, MeasureSpec.EXACTLY);super.onMeasure(widthMeasureSpec, heightMeasureSpec);}}还有一个地方要注意,当我们在fragment中编写布局文件的时候,如果使用普通的ListView,会出现数据显示不全的问题,原因可能就是因为我们外面嵌套了一个自定义的ViewPager,此时的解决办法是使用如下自定义的ListView,
public class MyListVIew extends ListView {public MyListVIew(Context context, AttributeSet attrs) {super(context, attrs);}protected void onMeasure(int widthMeasureSpec, int heightMeasureSpec) {int expandSpec = MeasureSpec.makeMeasureSpec(Integer.MAX_VALUE >> 2, MeasureSpec.AT_MOST);super.onMeasure(widthMeasureSpec, expandSpec);}
}
最后一部分,我们对Tab的样式做一下修改,以满足实际应用中更多的需求,
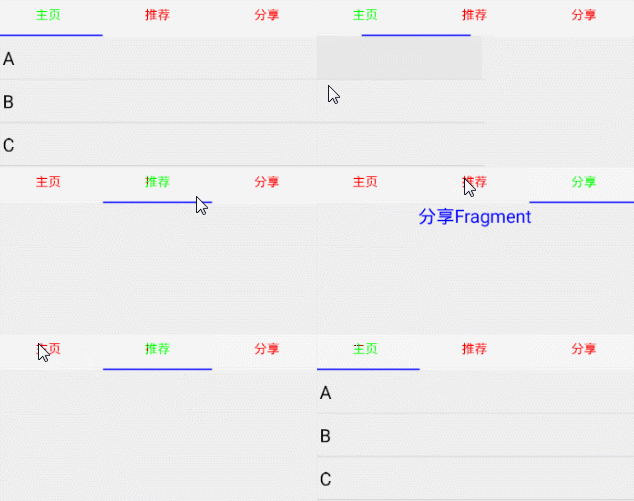
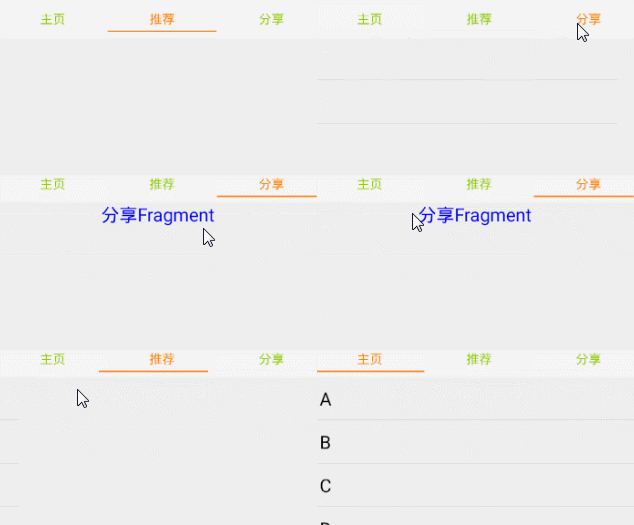
这里更改了文字选中和未选中的颜色,以及下划线的颜色,很简单,可以直接在布局文件里修改
<android.support.design.widget.TabLayoutandroid:id="@+id/tab_title"android:layout_width="match_parent"android:layout_height="wrap_content"app:tabIndicatorColor="#0000ff"app:tabSelectedTextColor="#00FF00"app:tabTextColor="#FF0000"/>还有一点需要说明:如果你需要使用setCustomView这个方法更改tablayout的样式,那么你设置的代码要放在tablayout与ViewPager关联之后,如果你不需要使用此方法,请把添加tab的代码放在与ViewPager关联之前,否则系统会设置两次tab。
<android.support.design.widget.TabLayoutandroid:id="@+id/tab_title"android:layout_width="match_parent"android:layout_height="40dp"android:padding="5dp"app:tabIndicatorColor="@android:color/holo_orange_dark"app:tabSelectedTextColor="@android:color/holo_orange_dark"app:tabTextColor="@android:color/holo_green_light"/>代码下载位置
点此下载源码
这篇关于CollapsingToolbarLayout结合ToolBar使用的文章就介绍到这儿,希望我们推荐的文章对编程师们有所帮助!


