本文主要是介绍springboot虹软人脸识别集成,希望对大家解决编程问题提供一定的参考价值,需要的开发者们随着小编来一起学习吧!
准备工作
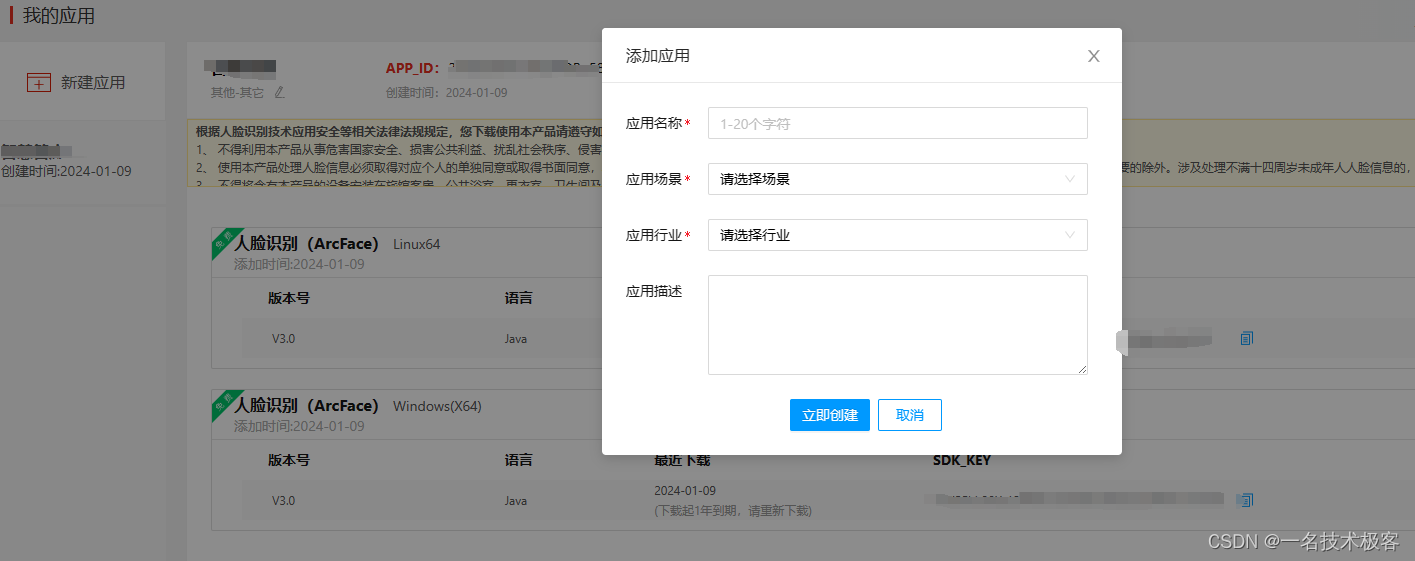
虹软开放平台中创建一个新的应用 虹软开发平台【点我跳转】
开始上代码
基本配置

将下载的jar包放到src同级目录下
<!-- 虹软--><dependency><groupId>com.arcsoft.face</groupId><artifactId>arcsoft-sdk-face</artifactId><version>3.0.0.0</version><scope>system</scope><systemPath>${basedir}/libs/arcsoft-sdk-face-3.0.0.0.jar</systemPath></dependency><plugin><groupId>org.springframework.boot</groupId><artifactId>spring-boot-maven-plugin</artifactId><configuration><!-- 加入下面这一行 --><includeSystemScope>true</includeSystemScope></configuration><version>2.3.4.RELEASE</version><executions><execution><goals><goal>repackage</goal></goals></execution></executions></plugin>
配置类初始化
@Data
@Configuration
@ConfigurationProperties(prefix = "arcsoft")
public class ArcSoftConfig {private String appid;// win平台sdk 此处为了开发时调试 生产一般linux 不需要此设置private String winsdkkey;// linux平台sdk private String linuxsdkkey;// dll/so库路径private String libpath;/*** 装载FaceEngine交给spring托管* * @return*/@Beanpublic FaceEngine faceEngine() {String sdkkey = "";String os = System.getProperty("os.name");if (os.toLowerCase().startsWith("win")) {sdkkey = winsdkkey;String projectPath = System.getProperty("user.dir");libpath = projectPath + "\\libs\\WIN64";} else {sdkkey = linuxsdkkey;}FaceEngine faceEngine = new FaceEngine(libpath);int errorCode = faceEngine.activeOnline(appid, sdkkey);if (errorCode != ErrorInfo.MOK.getValue() && errorCode != ErrorInfo.MERR_ASF_ALREADY_ACTIVATED.getValue()) {throw new RuntimeException("引擎注册失败");}EngineConfiguration engineConfiguration = getFaceEngineConfiguration();// 初始化引擎errorCode = faceEngine.init(engineConfiguration);if (errorCode != ErrorInfo.MOK.getValue()) {throw new RuntimeException("初始化引擎失败");}return faceEngine;}/*** 初始化引擎配置* * @return*/private EngineConfiguration getFaceEngineConfiguration() {EngineConfiguration engineConfiguration = new EngineConfiguration();// 配置引擎模式if ("IMAGE".equals(EngineConfigurationProperty.DETECT_MODE)) {engineConfiguration.setDetectMode(DetectMode.ASF_DETECT_MODE_IMAGE);} else {engineConfiguration.setDetectMode(DetectMode.ASF_DETECT_MODE_VIDEO);}// 配置人脸角度 全角度 ASF_OP_ALL_OUT 不够准确且检测速度慢switch (EngineConfigurationProperty.DETECT_FACE_ORIENT_PRIORITY) {case "ASF_OP_0_ONLY":engineConfiguration.setDetectFaceOrientPriority(DetectOrient.ASF_OP_0_ONLY);break;case "ASF_OP_90_ONLY":engineConfiguration.setDetectFaceOrientPriority(DetectOrient.ASF_OP_90_ONLY);break;case "ASF_OP_270_ONLY":engineConfiguration.setDetectFaceOrientPriority(DetectOrient.ASF_OP_270_ONLY);break;case "ASF_OP_180_ONLY":engineConfiguration.setDetectFaceOrientPriority(DetectOrient.ASF_OP_180_ONLY);break;case "ASF_OP_ALL_OUT":engineConfiguration.setDetectFaceOrientPriority(DetectOrient.ASF_OP_ALL_OUT);break;default:engineConfiguration.setDetectFaceOrientPriority(DetectOrient.ASF_OP_ALL_OUT);}// 设置识别的最小人脸比engineConfiguration.setDetectFaceScaleVal(EngineConfigurationProperty.DETECT_FACE_SCALE);engineConfiguration.setDetectFaceMaxNum(EngineConfigurationProperty.DETECT_FACE_MAX_NUM);// 功能配置initFuncConfiguration(engineConfiguration);return engineConfiguration;}/*** 功能配置* * @param engineConfiguration*/private void initFuncConfiguration(EngineConfiguration engineConfiguration) {FunctionConfiguration functionConfiguration = new FunctionConfiguration();// 是否支持年龄检测functionConfiguration.setSupportAge(FunConfigurationProperty.SUPPORT_AGE);// 是否支持3d 检测functionConfiguration.setSupportFace3dAngle(FunConfigurationProperty.SUPPORT_FACE_3D_ANGLE);// 是否支持人脸检测functionConfiguration.setSupportFaceDetect(FunConfigurationProperty.SUPPORT_FACE_DETECT);// 是否支持人脸识别functionConfiguration.setSupportFaceRecognition(FunConfigurationProperty.SUPPORT_FACE_RECOGNITION);// 是否支持性别检测functionConfiguration.setSupportGender(FunConfigurationProperty.SUPPORT_GENDER);// 是否支持活体检测functionConfiguration.setSupportLiveness(FunConfigurationProperty.SUPPORT_LIVENESS);// 是否支持IR活体检测functionConfiguration.setSupportIRLiveness(FunConfigurationProperty.SUPPORT_IR_LIVENESS);engineConfiguration.setFunctionConfiguration(functionConfiguration);}
}
yml配置文件

其他配置
引擎类
public class EngineConfigurationProperty {/*** 引擎模式*/public static final String DETECT_MODE = "IMAGE";/*** 配置人脸角度*/public static final String DETECT_FACE_ORIENT_PRIORITY = "ASF_OP_ALL_OUT";/*** 设置识别的最小人脸比*/public static final Integer DETECT_FACE_SCALE = 32;/*** 最大检测人脸数*/public static final Integer DETECT_FACE_MAX_NUM = 8;
}
功能类
public class FunConfigurationProperty {/*** 是否支持3d 检测*/public static final Boolean SUPPORT_FACE_3D_ANGLE = true;/*** 是否支持人脸检测*/public static final Boolean SUPPORT_FACE_DETECT = true;/*** 是否支持人脸识别*/public static final Boolean SUPPORT_FACE_RECOGNITION = true;/*** 性别检测*/public static final Boolean SUPPORT_GENDER = true;/*** 年龄检测*/public static final Boolean SUPPORT_AGE = true;/*** 是否支持活体检测*/public static final Boolean SUPPORT_LIVENESS = true;/*** 是否至此IR活体检测*/public static final Boolean SUPPORT_IR_LIVENESS = true;
}
人脸相关方法
@Component
public class ArcFaceMothodUtils {@Autowiredprivate FaceEngine faceEngine;/*** 人脸检测*/public List<FaceInfo> detectFace(ImageInfoEx imageInfoEx) {if (imageInfoEx == null) {return null;}List<FaceInfo> faceInfoList = new ArrayList<FaceInfo>();int i = faceEngine.detectFaces(imageInfoEx, DetectModel.ASF_DETECT_MODEL_RGB, faceInfoList);checkEngineResult(i, ErrorInfo.MOK.getValue(), "人脸检测失败");return faceInfoList;}/*** 特征提取*/public FaceFeature extractFaceFeature(List<FaceInfo> faceInfoList, ImageInfoEx imageInfoEx) {if (faceInfoList == null || imageInfoEx == null) {return null;}FaceFeature faceFeature = new FaceFeature();int i = faceEngine.extractFaceFeature(imageInfoEx, faceInfoList.get(0), faceFeature);checkEngineResult(i, ErrorInfo.MOK.getValue(), "人脸特征提取失败");return faceFeature;}/*** 特征比对*/public FaceSimilar compareFaceFeature(FaceFeature target, FaceFeature source, CompareModel compareModel) {FaceSimilar faceSimilar = new FaceSimilar();int i = faceEngine.compareFaceFeature(target, source, compareModel, faceSimilar);checkEngineResult(i, ErrorInfo.MOK.getValue(), "人脸特征对比失败");return faceSimilar;}/*** 错误检测*/private void checkEngineResult(int errorCode, int sourceCode, String errMsg) {if (errorCode != sourceCode) {throw new RuntimeException(errMsg);}}
}
虹软图片处理工具类
@Slf4j
public class ArcfaceUtils {/*** 处理 File 的图片流* * @param img* @return*/public static ImageInfoMeta packImageInfoEx(File img) {ImageInfo imageInfo = ImageFactory.getRGBData(img);return packImageInfoMeta(imageInfo);}/*** 处理 byte[] 的图片流* * @param img* @return*/public static ImageInfoMeta packImageInfoMeta(byte[] img) {ImageInfo imageInfo = ImageFactory.getRGBData(img);return packImageInfoMeta(imageInfo);}/*** 处理 InpuStream 的图片流* * @param img* @return*/public static ImageInfoMeta packImageInfoMeta(InputStream img) {ImageInfo imageInfo = ImageFactory.getRGBData(img);return packImageInfoMeta(imageInfo);}/*** 处理 网络图片 的图片流** @param path* @return*/public static ImageInfoMeta packImageInfoURL(String path) {try {InputStream inputStream = getImageInputStream(path);ImageInfo imageInfo = ImageFactory.getRGBData(inputStream);return packImageInfoMeta(imageInfo);} catch (Exception e) {log.error("处理网络图片处理失败", e);}return null;}/*** 处理 base图片 的图片流** @param base64* @return*/public static ImageInfoMeta packImageInfoBase64(String base64) {try {ImageInfo imageInfo = ImageFactory.getRGBData(removeBase64Prefix(base64));return packImageInfoMeta(imageInfo);} catch (Exception e) {log.error("处理网络图片处理失败", e);}return null;}public static byte[] removeBase64Prefix(String base64String) {if (base64String.startsWith("data:image/jpeg;base64,")) {base64String = base64String.replace("data:image/jpeg;base64,", "");}if (base64String.startsWith("data:image/png;base64,")) {base64String = base64String.replace("data:image/png;base64,", "");}return Base64.getDecoder().decode(base64String);}public static InputStream getImageInputStream(String imageUrl) throws Exception {URL url = new URL(imageUrl);URLConnection connection = url.openConnection();return connection.getInputStream();}/*** 打包生成 ImageInfoMeta* * @param imageInfo* @return*/private static ImageInfoMeta packImageInfoMeta(ImageInfo imageInfo) {ImageInfoMeta imageInfoMeta = new ImageInfoMeta(imageInfo);return imageInfoMeta;}/*** 对imageInfo 和 imageInfoEx 的打包对象* * @return*/@Datapublic static class ImageInfoMeta {private ImageInfo imageInfo;private ImageInfoEx imageInfoEx;public ImageInfoMeta(ImageInfo imageInfo) {this.imageInfo = imageInfo;imageInfoEx = new ImageInfoEx();imageInfoEx.setHeight(imageInfo.getHeight());imageInfoEx.setWidth(imageInfo.getWidth());imageInfoEx.setImageFormat(imageInfo.getImageFormat());imageInfoEx.setImageDataPlanes(new byte[][] { imageInfo.getImageData() });imageInfoEx.setImageStrides(new int[] { imageInfo.getWidth() * 3 });}}}
实际业务使用
// 开始使用虹软人脸识别ArcfaceUtils.ImageInfoMeta imageInfoMeta1 = ArcfaceUtils.packImageInfoURL(photo);if (null == imageInfoMeta1) {throw new ValidatorException("您的人脸信息在系统内已失效请重新录入");}// 系统的人脸库信息List<FaceInfo> faceInfo1 = arcFaceMothodUtils.detectFace(imageInfoMeta1.getImageInfoEx());FaceFeature faceFeature1 = arcFaceMothodUtils.extractFaceFeature(faceInfo1, imageInfoMeta1.getImageInfoEx());// 当前需要对比的人脸ArcfaceUtils.ImageInfoMeta imageInfoMeta2 = ArcfaceUtils.packImageInfoBase64(dto.getFacePic());if (null == imageInfoMeta2) {throw new ValidatorException("您的人脸信息人脸特征提取失败,请重试");}List<FaceInfo> faceInfo2 = arcFaceMothodUtils.detectFace(imageInfoMeta2.getImageInfoEx());FaceFeature faceFeature2 = arcFaceMothodUtils.extractFaceFeature(faceInfo2, imageInfoMeta2.getImageInfoEx());FaceSimilar faceSimilar = arcFaceMothodUtils.compareFaceFeature(faceFeature1, faceFeature2,CompareModel.LIFE_PHOTO);// 相似度float score = faceSimilar.getScore();log.info("当前匹配的身份证信息【{}】,相似度:{}", dto.getUserId(), score);
希望对大家能够有所帮助 仅作为个人笔记使用
这篇关于springboot虹软人脸识别集成的文章就介绍到这儿,希望我们推荐的文章对编程师们有所帮助!


