本文主要是介绍微信支付JSAPI模式及退款CodeIgniter集成篇,希望对大家解决编程问题提供一定的参考价值,需要的开发者们随着小编来一起学习吧!
微信支付接口文档:https://pay.weixin.qq.com/wiki/doc/api/jsapi.php?chapter=7_1
首先你得知道这个jsapi是不能离开微信进行调用支付的,明白了这个道理我们好下手,页面是在微信内显示并通过jsapi调用微信支付组件进行支付。
可以看看我们上一篇文章,主要是Native扫码支付模式二
我们仍然继续使用wechatpay.php这个支付集成类,简单方便好理解,不过如果应用jsapi的话这个类有个bug
在我们构造jsapi需要的参数时有个时间戳,我们用time()生成的,会报微信支付调用JSAPI缺少参数:timeStamp
修改如下:
| 1 2 3 4 5 6 7 8 9 10 11 12 13 14 15 | /** * 获取js支付使用的第二个参数 */ public function get_package( $prepay_id ) { $data = array (); $data [ "appId" ] = $this ->_config[ "appid" ]; //改动地方,把它变成字符串 $time =time(); $data [ "timeStamp" ] = "\"" . $time . "\"" ; $data [ "nonceStr" ] = $this ->get_nonce_string(); $data [ "package" ] = "prepay_id=$prepay_id" ; $data [ "signType" ] = "MD5" ; $data [ "paySign" ] = $this ->sign( $data ); return $data ; } |
其实这个方法就是获取jsapi的支付参数了
一、微信JSAPI支付
不能忘记配置授权目录,调用jsapi我是在http://xxx.com/index.php/home下我配置了这个
首先我们还是要调用统一下单接口,获取我们要的参数(如果此类的配置放置位置等不会的请参考上篇文章),此为pay方法,在调用统一下单接口的时候我们需要知道需要哪些参数
1、要获取openid,这个我是项目用了一个微信API的类库,https://github.com/dodgepudding/wechat-php-sdk,主要是用了这里面的方法
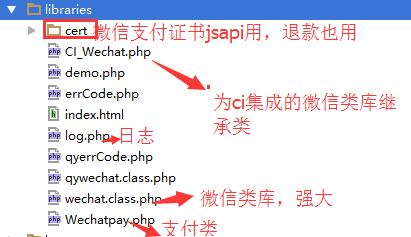
此项目有朋友专门的对接了CodeIgniter框架的扩展类库,可以直接用,目录结构,我们直接上代码吧
| 1 2 3 4 5 6 | public function __construct() { parent::__construct(); $this ->load->library( 'CI_Wechat' ); //由于我的项目是时刻都跟微信绑在一起,所以直接加载在构造函数里了,不用每个方法都加载了。 $this ->load->library( 'pagination' ); } |
CI_Model内容大家看下上面的类库源码,还有里面如何配置的,下面我们看看如何获取openid
| 1 2 3 4 5 6 7 8 9 10 11 12 13 14 15 16 17 18 19 20 21 22 23 24 25 26 | function oauthurl() { $oauth_url = $this ->ci_wechat->getOauthRedirect(base_url() . 'index.php/home/oauth' , 1); header( 'Location: ' . $oauth_url ); exit (); } function oauth() { if (!isset( $_GET [ 'code' ])) { //触发微信返回code码 $baseUrl = urlencode( 'http://' . $_SERVER [ 'HTTP_HOST' ] . $_SERVER [ 'PHP_SELF' ] . $_SERVER [ 'QUERY_STRING' ]); $url = $this ->__CreateOauthUrlForCode( $baseUrl ); Header( "Location: $url" ); exit (); } else { $json = $this ->ci_wechat->getOauthAccessToken(); $openid = $json [ 'openid' ]; //注册用户,成功后可以抢单 //return $this->_isRegistered($_SESSION['user']['openid']); return $openid ; } } |
以上两个方法就是获取openid的,获取之后我是保存在session里的,我每个页面都判断是否获取了openid如果没有获取直接
| 1 | $this ->session->set_userdata( 'openid' , $this ->oauth()); |
这样保证一直能得到openid
2、构造JSAPI支付所需参数(统一下单的参数构造)
| 1 2 3 4 5 6 7 8 9 10 11 12 13 14 15 16 17 18 19 20 21 22 23 24 25 26 27 28 29 30 31 32 33 34 35 36 37 38 39 40 41 42 43 44 45 | $this ->load->model( 'publist' ); //获取订单信息 $pub = $this ->publist->GetList( array ( 'id' => $_SESSION [ 'orderid' ])); //微信支付配置的参数配置读取 $this ->load->config( 'wxpay_config' ); $wxconfig [ 'appid' ]= $this ->config->item( 'appid' ); $wxconfig [ 'mch_id' ]= $this ->config->item( 'mch_id' ); $wxconfig [ 'apikey' ]= $this ->config->item( 'apikey' ); $wxconfig [ 'appsecret' ]= $this ->config->item( 'appsecret' ); $wxconfig [ 'sslcertPath' ]= $this ->config->item( 'sslcertPath' ); $wxconfig [ 'sslkeyPath' ]= $this ->config->item( 'sslkeyPath' ); $this ->load->library( 'Wechatpay' , $wxconfig ); //商户交易单号 $out_trade_no = $pub ->listno; $total_fee = $pub ->fee; $openid = $_SESSION [ 'openid' ]; $param [ 'body' ]= "黑人牙膏" ; $param [ 'attach' ]= $pub ->id; $param [ 'detail' ]= "黑人牙膏-" . $out_trade_no ; $param [ 'out_trade_no' ]= $out_trade_no ; $param [ 'total_fee' ]= $total_fee *100; $param [ "spbill_create_ip" ] = $_SERVER [ 'REMOTE_ADDR' ]; $param [ "time_start" ] = date ( "YmdHis" ); $param [ "time_expire" ] = date ( "YmdHis" , time() + 600); $param [ "goods_tag" ] = "黑人牙膏" ; $param [ "notify_url" ] = base_url(). "index.php/home/notify" ; $param [ "trade_type" ] = "JSAPI" ; $param [ "openid" ] = $openid ; //统一下单,获取结果,结果是为了构造jsapi调用微信支付组件所需参数 $result = $this ->wechatpay->unifiedOrder( $param ); //如果结果是成功的我们才能构造所需参数,首要判断预支付id if (isset( $result [ "prepay_id" ]) && ! empty ( $result [ "prepay_id" ])) { //调用支付类里的get_package方法,得到构造的参数 $data [ 'parameters' ]=json_encode( $this ->wechatpay->get_package( $result [ 'prepay_id' ])); $data [ 'notifyurl' ]= $param [ "notify_url" ]; $data [ 'fee' ]= $total_fee ; $data [ 'pubid' ]= $_SESSION [ 'orderid' ]; $this ->load->view( 'home/header' ); //要有个页面将以上数据传递过去并展示给用户 $this ->load->view( 'home/pay' , $data ); $this ->load->view( 'home/footer' ); } |
3、支付页面,views视图pay.php
| 1 2 3 4 5 6 7 8 9 10 11 12 13 14 15 16 17 18 19 20 21 22 23 24 25 26 27 28 29 30 31 32 33 34 35 36 37 38 39 40 41 42 43 44 45 46 47 48 49 50 51 52 53 54 55 56 57 58 59 60 61 | <?php $jsApiParameters = $parameters ; //参数赋值 ?> <script type= "text/javascript" > //调用微信JS api 支付 function jsApiCall() { WeixinJSBridge.invoke( 'getBrandWCPayRequest' , <?php echo $jsApiParameters ; ?>, function (res){ WeixinJSBridge.log(res.err_msg); if (res.err_msg == "get_brand_wcpay_request:ok" ){ $.alert( '支付成功' ); //我在这里选择了前台只要支付成功将单号传递更新数据 $.ajax({ url: '<?php echo $notifyurl.' / '.$pubid;?>' , dataType: 'json' , success : function (ret){ if (ret==1){ //成功后返回我的订单页面 location.href= "<?php echo base_url().'index.php/home/myorder';?>" ; } } }); } else { //$.alert('支付失败'); } //alert(res.err_code+res.err_desc+res.err_msg); } ); } function callpay() { if (typeof WeixinJSBridge == "undefined" ){ if ( document.addEventListener ){ document.addEventListener( 'WeixinJSBridgeReady' , jsApiCall, false); } else if (document.attachEvent){ document.attachEvent( 'WeixinJSBridgeReady' , jsApiCall); document.attachEvent( 'onWeixinJSBridgeReady' , jsApiCall); } } else { jsApiCall(); } } </script> <div class = "hd" > <h1 class = "page_title" >支付佣金</h1> <p class = "page_desc" >请认真核对佣金金额</p> </div> <div class = "weui_cells" > <div class = "weui_cell" > <div class = "weui_cell_hd weui_cell_primary" > 该笔订单支付金额为<span style= "color:#f00;font-size:50px" ><?php echo $fee ; ?></span>元钱 </div> </div> </div> <button class = "weui_btn weui_btn_primary" type= "button" onclick= "callpay()" >立即支付</button> |
以上代码可以用微信web开发者工具,使用方式自己看看吧,有了这个工具调试不再难
4、支付成功跳转页面,我们看notify方法
| 1 2 3 4 5 6 7 8 9 10 11 12 13 14 15 | function notify() { $id = $this ->uri->segment(3); if (isset( $_SESSION [ 'openid' ])) { $this ->load->model( 'publist' ); //更新业务逻辑 $rs = $this ->publist->UpdateList( array ( 'id' => $id , 'feestatus' => 1)); if ( $rs > 0) { echo 1; exit ; } else { echo 0; exit ; } } } |
这样我们的支付流程就彻底走完了。
二、当我们支付完之后,有些单子可以退单的,如何将款项也退回呢
以上场景要弄明白了
我们申请退款需要参数有哪些?我们看看支付类里的退款方法
| 1 2 3 4 5 6 7 8 9 10 11 12 13 14 15 16 17 18 19 20 21 22 23 | /** * 申请退款 - 使用商户订单号 * @param $out_trade_no 商户订单号 * @param $out_refund_no 退款单号 * @param $total_fee 总金额(单位:分) * @param $refund_fee 退款金额(单位:分) * @param $op_user_id 操作员账号 * @return array */ public function refund( $out_trade_no , $out_refund_no , $total_fee , $refund_fee , $op_user_id ){ $data = array (); $data [ "appid" ] = $this ->_config[ "appid" ]; $data [ "mch_id" ] = $this ->_config[ "mch_id" ]; $data [ "nonce_str" ] = $this ->get_nonce_string(); $data [ "out_trade_no" ] = $out_trade_no ; $data [ "out_refund_no" ] = $out_refund_no ; $data [ "total_fee" ] = $total_fee ; $data [ "refund_fee" ] = $refund_fee ; $data [ "op_user_id" ] = $op_user_id ; $result = $this ->post(self::URL_REFUND, $data ,true); return $result ; } |
商户订单号,商户提供的退单号,付款金额,退款金额(不能退的比实际付款的多),操作员(一般商户号)
控制器内写退款方法
| 1 2 3 4 5 6 7 8 9 10 11 12 13 14 15 16 17 18 19 20 21 22 23 24 25 26 27 28 29 30 31 32 33 34 35 36 37 38 39 40 41 42 43 | //申请退款 function refund( $id = "" ) { if ( $id == "" ){ //方便我手动调用退单 $id = $this ->uri->segment(3); } if (isset( $id ) && $id != "" ) { $this ->load->model( 'publist' ); //1、取消订单可以退款。2、失败订单可以退款 $pub = $this ->publist->GetList( array ( 'id' => $id )); if ( $pub ->liststatus == 3 || $pub ->liststatus == 4) { $listno = $pub ->listno; $fee = $pub ->fee * 100; $this ->load->config( 'wxpay_config' ); $wxconfig [ 'appid' ]= $this ->config->item( 'appid' ); $wxconfig [ 'mch_id' ]= $this ->config->item( 'mch_id' ); $wxconfig [ 'apikey' ]= $this ->config->item( 'apikey' ); $wxconfig [ 'appsecret' ]= $this ->config->item( 'appsecret' ); $wxconfig [ 'sslcertPath' ]= $this ->config->item( 'sslcertPath' ); $wxconfig [ 'sslkeyPath' ]= $this ->config->item( 'sslkeyPath' ); $this ->load->library( 'Wechatpay' , $wxconfig ); if (isset( $listno ) && $listno != "" ) { $out_trade_no = $listno ; $total_fee = $fee ; $refund_fee = $fee ; //自定义商户退单号 $out_refund_no = $wxconfig [ 'mch_id' ]. date ( "YmdHis" ); $result = $this ->wechatpay->refund( $out_trade_no , $out_refund_no , $total_fee , $refund_fee , $wxconfig [ 'mch_id' ]); log::DEBUG(json_encode( $result )); if (isset( $result [ "return_code" ]) && $result [ "return_code" ]= "SUCCESS" &&isset( $result [ "result_code" ]) && $result [ "result_code" ]= "SUCCESS" ) { echo "<script>$.toast('退款成功')</script>" ; } //佣金状态更改为已退款 $this ->publist->UpdateList( array ( 'id' => $id , 'liststatus' =>3, 'listoutno' => $out_refund_no )); redirect( 'home/myorder' ); } } } } |
试试就好了,很快就可以接到退款消息
以上是这几天摸索出来的东西,分享给大家。
文章来源:http://www.cnblogs.com/24la/p/wxpay-jsapi-refund.html
这篇关于微信支付JSAPI模式及退款CodeIgniter集成篇的文章就介绍到这儿,希望我们推荐的文章对编程师们有所帮助!


