本文主要是介绍qt中信号槽第五个参数,希望对大家解决编程问题提供一定的参考价值,需要的开发者们随着小编来一起学习吧!
文章目录
- connent函数第五个参数的作用
- 自动连接(Qt::AutoConnection)
- 直接连接(Qt::DirectConnection - 同步)
- 同线程
- 不同线程
- 队列连接(Qt::QueuedConnection - 异步)
- 同一线程
- 不同线程
- 锁定队列连接(Qt::BlockingQueuedConnection)
connent函数第五个参数的作用
connect(const QObject *sender, const char *signal, const QObject *receiver, const char *method, Qt::ConnectionType type = Qt::AutoConnection)
第五个参数代表槽函数在哪个线程中执行 :
-
自动连接(Qt::AutoConnection),默认的连接方式,如果信号与槽,也就是发送者与接受者在同一线程,等同于直接连接;如果发送者与接收者处在不同线程,等同于队列连接。
-
直接连接(Qt::DirectConnection),当信号发射时,槽函数立即直接调用。无论槽函数所属对象在哪个线程,槽函数总在发送者所在线程执行,即槽函数和信号发送者在同一线程。
-
队列连接(Qt::QueuedConnection),当Thread1触发信号后,信号会在处理完前面的任务后再调用相应的槽函数,槽函数在接收者线程中执行,Thread1立即会执行下面任务,无需等待接收者线程执行槽函数完毕。
-
锁定队列连接(Qt::BlockingQueuedConnection):槽函数的调用时机与Qt::QueuedConnection一致,不过发送完信号后发送者所在线程会阻塞,直到槽函数运行完。接收者和发送者绝对不能在一个线程,否则程序会死锁。在多线程间需要同步的场合可能需要这个。
自动连接(Qt::AutoConnection)
- 自动连接(Qt::AutoConnection),默认的连接方式,如果信号与槽,也就是发送者与接受者在同一线程,等同于直接连接;如果发送者与接收者处在不同线程,等同于队列连接。
直接连接(Qt::DirectConnection - 同步)
同线程
mainwindow.cpp(主线程)
#include "mainwindow.h"
#include "ui_mainwindow.h"
#include <QDebug>
#include <QThread>MainWindow::MainWindow(QWidget *parent) :QMainWindow(parent),ui(new Ui::MainWindow)
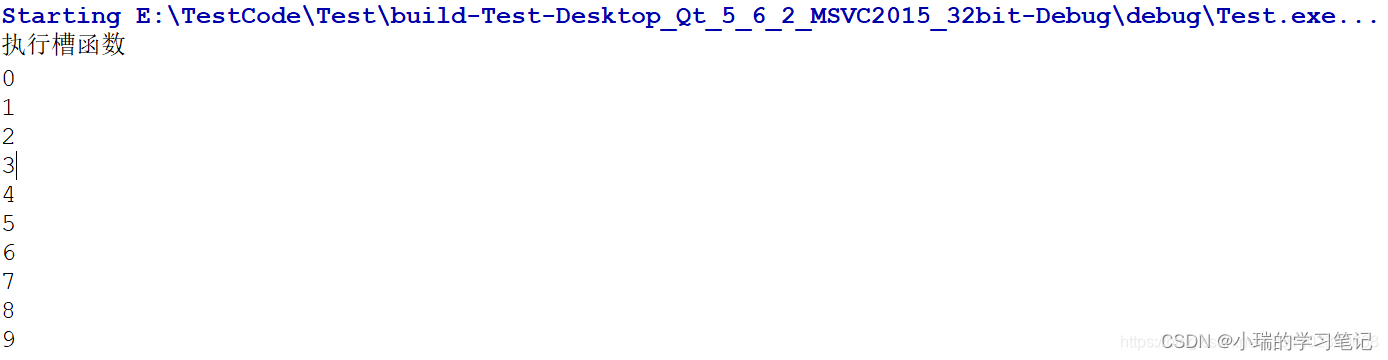
{ui->setupUi(this);connect(this,SIGNAL(sig()),this,SLOT(slot()),Qt::DirectConnection);emit sig();for(int i=0; i<10;i++){qDebug() << i;}
}MainWindow::~MainWindow()
{delete ui;
}void MainWindow::slot()
{qDebug()<<"执行槽函数";
}
mainwindow.h
#ifndef MAINWINDOW_H
#define MAINWINDOW_H#include <QMainWindow>
#include "thread1.h"namespace Ui {
class MainWindow;
}class MainWindow : public QMainWindow
{Q_OBJECTpublic:explicit MainWindow(QWidget *parent = 0);~MainWindow();private:Ui::MainWindow *ui;    private slots:void slot();
signals:void sig();
};#endif // MAINWINDOW_H
结论:
发射信号后立马执行槽函数。
不同线程
mainwindow.cpp
#include "mainwindow.h"
#include "ui_mainwindow.h"
#include <QDebug>MainWindow::MainWindow(QWidget *parent) :QMainWindow(parent),ui(new Ui::MainWindow)
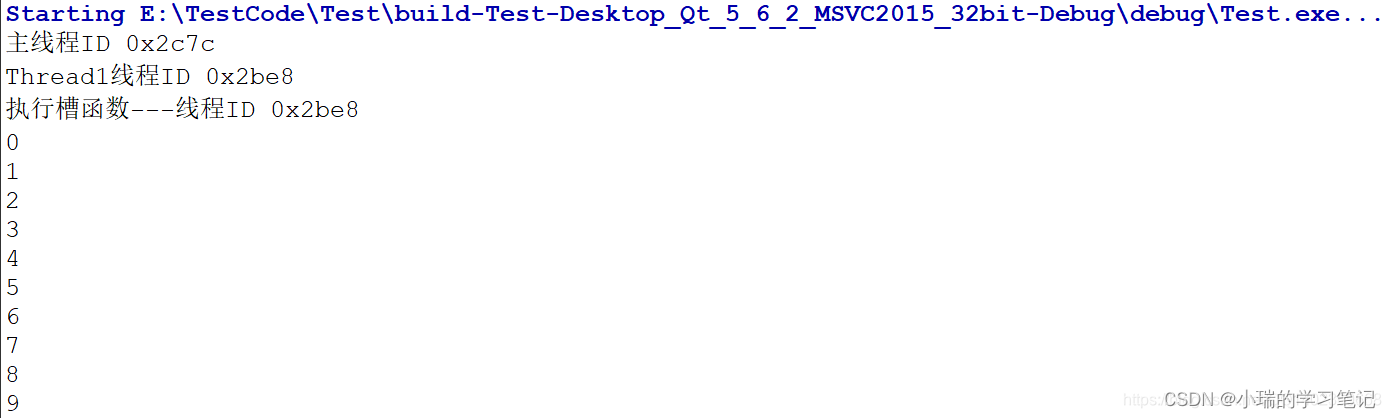
{ui->setupUi(this);qDebug()<<u8"主线程ID"<<QThread::currentThreadId();connect(&m_thread1,SIGNAL(sigThread1()),this,SLOT(slot()),Qt::DirectConnection);m_thread1.start();
}
MainWindow::~MainWindow()
{delete ui;
}
void MainWindow::slot()
{qDebug()<<u8"执行槽函数---线程ID"<<QThread::currentThreadId();
}
mainwindow.h
#ifndef MAINWINDOW_H
#define MAINWINDOW_H#include <QMainWindow>
#include <thread1.h>namespace Ui {
class MainWindow;
}class MainWindow : public QMainWindow
{Q_OBJECTpublic:explicit MainWindow(QWidget *parent = 0);~MainWindow();private:Ui::MainWindow *ui;Thread1 m_thread1;private slots:void slot();// 在主函数中定义需要调用的槽函数
};#endif // MAINWINDOW_H
thread1.cpp
#include "thread1.h"
#include <QDebug>Thread1::Thread1(QThread *parent): QThread(parent)
{}void Thread1::run()
{qDebug()<<u8"Thread1线程ID"<<QThread::currentThreadId();emit sigThread1();for(int i=0;i<10;i++){qDebug()<<i;}
}
thread1.h
#ifndef THREAD1_H
#define THREAD1_H#include <QThread>class Thread1 : public QThread
{Q_OBJECT
public:explicit Thread1(QThread *parent = 0);protected:virtual void run();signals:void sigThread1();
};
#endif // THREAD1_H
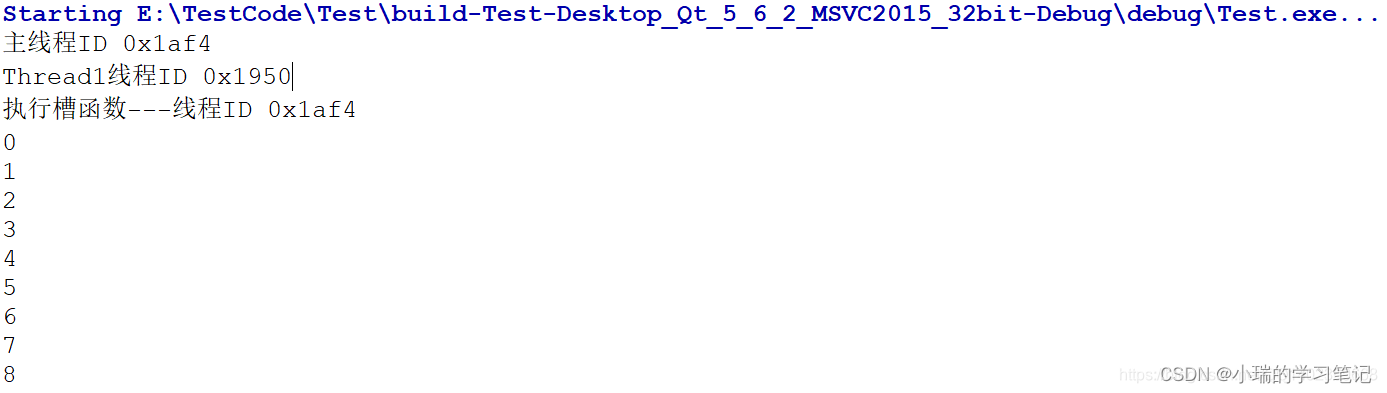
结论:
可以看出:emit发射信号后立马执行槽函数,没有任何等待;并且槽函数执行在Thread1线程中;
队列连接(Qt::QueuedConnection - 异步)
同一线程
mainwindow.cpp
#include "mainwindow.h"
#include "ui_mainwindow.h"
#include <QDebug>
#include <QThread>MainWindow::MainWindow(QWidget *parent) :QMainWindow(parent),ui(new Ui::MainWindow)
{ui->setupUi(this);connect(this,SIGNAL(sig()),this,SLOT(slot()),Qt::QueuedConnection);emit sig();for(int i=0; i<10;i++){qDebug()<<i;}
}MainWindow::~MainWindow()
{delete ui;
}void MainWindow::slot()
{qDebug()<<u8"执行槽函数";
}
mainwindow.h
#ifndef MAINWINDOW_H
#define MAINWINDOW_H#include <QMainWindow>
#include "thread1.h"namespace Ui {
class MainWindow;
}class MainWindow : public QMainWindow
{Q_OBJECTpublic:explicit MainWindow(QWidget *parent = 0);~MainWindow();private:Ui::MainWindow *ui;private slots:void slot();
signals:void sig();
};#endif // MAINWINDOW_H
结论:
可以看到:先执行完for循环(先把自己的事情处理完),当空闲后再执行槽函数。

不同线程
mainwindow.cpp
#include "mainwindow.h"
#include "ui_mainwindow.h"
#include <QDebug>MainWindow::MainWindow(QWidget *parent) :QMainWindow(parent),ui(new Ui::MainWindow)
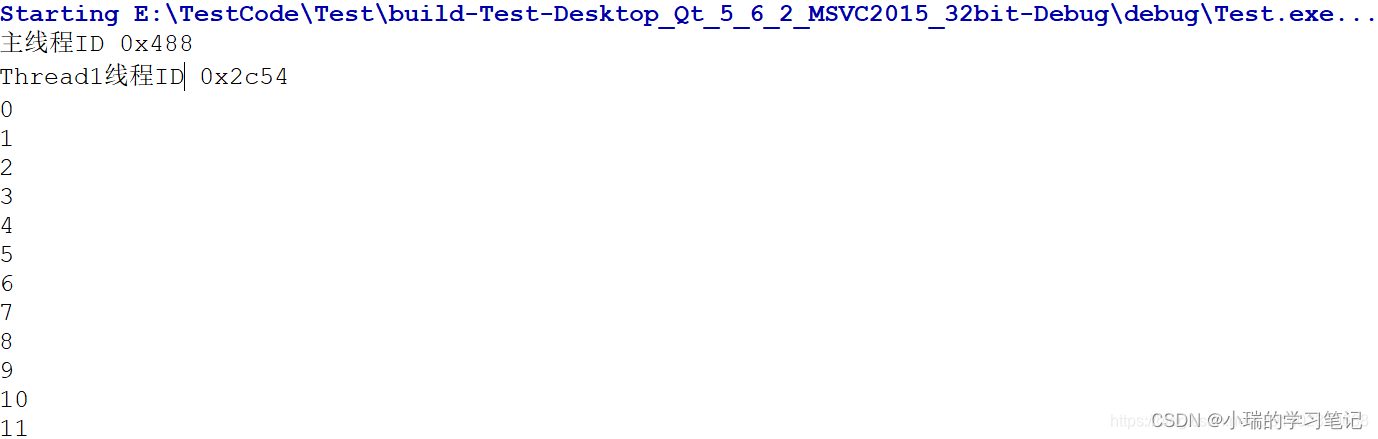
{ui->setupUi(this);qDebug()<<u8"主线程ID"<<QThread::currentThreadId();connect(&m_thread1,SIGNAL(sigThread1()),this,SLOT(slot()),Qt::QueuedConnection);m_thread1.start();
}MainWindow::~MainWindow()
{delete ui;
}void MainWindow::slot()
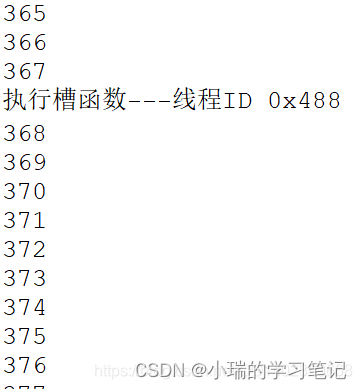
{qDebug()<<u8"执行槽函数---线程ID"<<QThread::currentThreadId();
}
mainwindow.h
#ifndef MAINWINDOW_H
#define MAINWINDOW_H#include <QMainWindow>
#include <thread1.h>namespace Ui {
class MainWindow;
}class MainWindow : public QMainWindow
{Q_OBJECTpublic:explicit MainWindow(QWidget *parent = 0);~MainWindow();private:Ui::MainWindow *ui;Thread1 m_thread1;private slots:void slot();};
#endif // MAINWINDOW_H
thread1.cpp
#include "thread1.h"
#include <QDebug>Thread1::Thread1(QThread *parent): QThread(parent)
{}
void Thread1::run()
{qDebug()<<u8"Thread1线程ID"<<QThread::currentThreadId();emit sigThread1();for(int i=0;i<10000;i++) //此处为10000次,加长时间,以便更清楚的观察现象{qDebug()<<i;}
}
thread1.h
#ifndef THREAD1_H
#define THREAD1_H#include <QThread>class Thread1 : public QThread
{Q_OBJECT
public:explicit Thread1(QThread *parent = 0);protected:virtual void run();signals:void sigThread1();
};#endif // THREAD1_H
结论:
- 可以看出:thread1线程发送信号后,thread1接着做自己的事,主线程同样接着做自己的事。
- 当主线程空闲时,再执行槽函数,槽函数运行在主线程中。
锁定队列连接(Qt::BlockingQueuedConnection)
- 代码参考上面的,将Qt::QueuedConnection改为Qt::BlockingQueuedConnection即可。
- 可以看到:规律同Qt::QueuedConnection,不过thread1线程发送完信号后,会阻塞,直到主线程的槽函数返回,thread1线程才会继续向下执行。
这篇关于qt中信号槽第五个参数的文章就介绍到这儿,希望我们推荐的文章对编程师们有所帮助!


