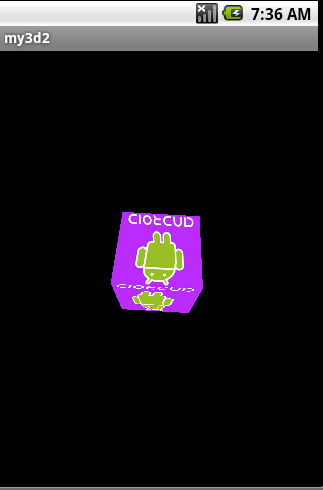
本文主要是介绍android opengl es 正方体纹理效果,希望对大家解决编程问题提供一定的参考价值,需要的开发者们随着小编来一起学习吧!
请相信我吧,把这该死的纹理贴上去真是不容易,尤其是在opengl es 资料不多的情况下,昨天搞的我头大,主要是android坐标与opengl 坐标的问题。我把代码贴上来,以后忘记了的时候可以常来温习。
(1)Activity类
package sim.feel;
import android.app.Activity;
import android.content.res.Resources;
import android.graphics.Bitmap;
import android.graphics.BitmapFactory;
import android.opengl.GLSurfaceView;
import android.opengl.GLSurfaceView.Renderer;
import android.os.Bundle;
public class My3d2 extends Activity {
/** Called when the activity is first created. */
private GLSurfaceView surfaceView;
private Renderer renderer;
@Override
public void onCreate(Bundle savedInstanceState) {
super.onCreate(savedInstanceState);
// 载入图片
BitGL.init(this.getResources());
surfaceView = new GLSurfaceView(this);
renderer = new MyRenderer(this);
surfaceView.setRenderer(renderer);
setContentView(surfaceView);
}
}
class BitGL {
public static Bitmap bitmap;
public static void init(Resources resources) {
bitmap = BitmapFactory.decodeResource(resources, R.drawable.img);
}
}
(2)Renderer类
package sim.feel;
import java.nio.ByteBuffer;
import java.nio.ByteOrder;
import java.nio.IntBuffer;
import javax.microedition.khronos.egl.EGLConfig;
import javax.microedition.khronos.opengles.GL10;
import android.content.Context;
import android.graphics.Bitmap;
import android.opengl.GLSurfaceView.Renderer;
import android.opengl.GLUtils;
public class MyRenderer implements Renderer {
public Context context;
private int one = 0x10000;
private Bitmap bitmap;
private int[] textureids;
private IntBuffer vertexBuffer;
private IntBuffer texBuffer;
// 旋转方向
private float xrot, yrot, zrot;
// 正方体顶点
private int[] vertices = {
one, one, -one,
-one, one, -one,
one, one, one,
-one, one, one,
one, -one,one,
-one, -one, one,
one, -one, -one,
-one, -one, -one,
one, one,one,
-one, one, one,
one, -one, one,
-one, -one, one,
one, -one,-one,
-one, -one, -one,
one, one, -one,
-one, one, -one,
-one, one,one,
-one, one, -one,
-one, -one, one,
-one, -one, -one,
one, one,-one,
one, one, one,
one, -one, -one,
one, -one, one
};
//纹理点
private int[] texCoords = {
0, one,
one, one,
0, 0,
one, 0
};
public MyRenderer(Context context) {
this.context = context;
// 初始化
textureids = new int[1];
// 实例化bitmap
bitmap = BitGL.bitmap;
ByteBuffer vbb = ByteBuffer.allocateDirect(vertices.length * 4);
vbb.order(ByteOrder.nativeOrder());
vertexBuffer = vbb.asIntBuffer();
vertexBuffer.put(vertices);
vertexBuffer.position(0);
ByteBuffer tbb = ByteBuffer.allocateDirect(texCoords.length * 4 * 6);
tbb.order(ByteOrder.nativeOrder());
texBuffer = tbb.asIntBuffer();
//为每一个面贴上纹理
for (int i = 0; i < 6; i++) {
texBuffer.put(texCoords);
}
texBuffer.position(0);
}
@Override
public void onDrawFrame(GL10 gl) {
// 清除深度和颜色缓存
gl.glClear(GL10.GL_DEPTH_BUFFER_BIT | GL10.GL_COLOR_BUFFER_BIT);
gl.glLoadIdentity();
gl.glEnableClientState(GL10.GL_VERTEX_ARRAY);
gl.glEnableClientState(GL10.GL_TEXTURE_COORD_ARRAY);
gl.glVertexPointer(3, GL10.GL_FIXED, 0, vertexBuffer);
gl.glTexCoordPointer(2, GL10.GL_FIXED, 0, texBuffer); // Define
//向z轴里移入6.0f
gl.glTranslatef(0.0f, 0.0f, -6.0f);
// 设置3个方向的旋转
gl.glRotatef(xrot, one, 0.0f, 0.0f);
gl.glRotatef(yrot, 0.0f, one, 0.0f);
gl.glRotatef(zrot, 0.0f, 0.0f, one);
// 绘制正方体
for (int i = 0; i < 6; i++) {
gl.glDrawArrays(GL10.GL_TRIANGLE_STRIP, i * 4, 4);
}
gl.glDisableClientState(GL10.GL_TEXTURE_COORD_ARRAY);
gl.glDisableClientState(GL10.GL_VERTEX_ARRAY);
// 设置旋转角度
xrot += 0.5f;
yrot += 0.6f;
zrot += 0.3f;
}
@Override
public void onSurfaceChanged(GL10 gl, int width, int height) {
// 视角
gl.glViewport(0, 0, width, height);
float ratio = (float) width / height;
// 观察模式
gl.glMatrixMode(GL10.GL_PROJECTION);
// 重置观察布局
gl.glLoadIdentity();
gl.glFrustumf(-ratio, ratio, -1, 1, 1, 10);
gl.glMatrixMode(GL10.GL_MODELVIEW);
gl.glLoadIdentity();
}
@Override
public void onSurfaceCreated(GL10 gl, EGLConfig config) {
// 告诉系统对透视进行修正
gl.glHint(GL10.GL_PERSPECTIVE_CORRECTION_HINT, GL10.GL_FASTEST);
// 黑色背景
gl.glClearColor(0, 0, 0, 0);
// 启用阴影平滑
gl.glShadeModel(GL10.GL_SMOOTH);
// 清除深度缓存
gl.glClearDepthf(one);
// 启用深度测试
gl.glEnable(GL10.GL_DEPTH_TEST);
// 所做深度测试的类型
gl.glDepthFunc(GL10.GL_LEQUAL);
gl.glEnable(GL10.GL_TEXTURE_2D);
// 创建纹理
gl.glGenTextures(1, textureids, 0);
// 绑定要使用的纹理
gl.glBindTexture(GL10.GL_TEXTURE_2D, textureids[0]);
// 生成纹理
GLUtils.texImage2D(GL10.GL_TEXTURE_2D, 0, bitmap, 0);
// 线性滤波
gl.glTexParameterx(GL10.GL_TEXTURE_2D, GL10.GL_TEXTURE_MIN_FILTER,
GL10.GL_LINEAR);
gl.glTexParameterx(GL10.GL_TEXTURE_2D, GL10.GL_TEXTURE_MAG_FILTER,
GL10.GL_LINEAR);
}
}
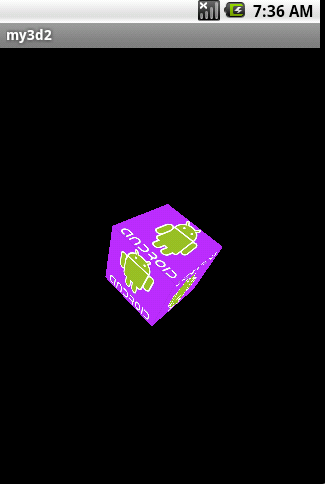
效果图如下:

这篇关于android opengl es 正方体纹理效果的文章就介绍到这儿,希望我们推荐的文章对编程师们有所帮助!


