本文主要是介绍vue中多页面项目配置详解。【cli2和cli3版本配置】,希望对大家解决编程问题提供一定的参考价值,需要的开发者们随着小编来一起学习吧!
前言:最近总结了一下自己以前写过的一些项目,发现项目分散的比较杂乱,因此想通过一个多页面应用来统一管理,正好借此机会实战一下多页面应用。结合网上查阅的一些资料,整理了一下vue部署多页面应用的配置详情。如有错误,欢迎指正。
git地址: https://github.com/Silent-Jude/multi-project
文章目录
- 版本一:vue2.5.2 + webpack3.6.0 + vue/cli 2
- 1. 新建 vue 项目
- 2.安装glob
- 3.配置文件修改
- 3.1、utils.js——增加2处代码
- 3.2、webpack.base.conf.js——修改1处
- 3.3、webpack.dev.conf.js——修改2处
- 3.4、webpack.prod.conf.js——修改2处
- 4、页面结构修改
- 5、访问和跳转方式
- 版本二:vue2.5.2 + webpack3.6.0 + vue/cli 3
- 1、首先新建一个cli3的项目
- 2、页面结构修改
- 3、vue.config.js配置
版本一:vue2.5.2 + webpack3.6.0 + vue/cli 2
1. 新建 vue 项目
vue init webpack multiple
cd multiple
2.安装glob
glob是webpack安装时依赖的一个第三方模块,该模块允许你使用 *等符号, 例如lib/*.js就是获取lib文件夹下的所有js后缀名的文件。
npm i glob --save-dev
3.配置文件修改
需要修改的配置文件如下。
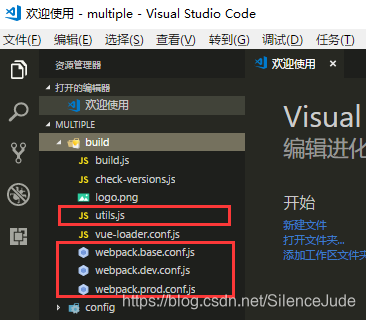
下面就按照顺序贴出完整的代码内容,在做修改或者添加代码的位置做了中文注释。
3.1、utils.js——增加2处代码
第一处在开头增加如下变量。
/*增加的第一处,开始 */
// 页面模板
const HtmlWebpackPlugin = require('html-webpack-plugin')
// glob是webpack安装时依赖的一个第三方模块,还模块允许你使用*等符号, 例如lib/*.js就是获取lib文件夹下的所有js后缀名的文件
const glob = require('glob')
// 取得相应的页面路径,因为之前的配置,所以是src文件夹下的pages文件夹
const PAGE_PATH = path.resolve(__dirname, '../src/pages')
// 用于做相应的merge处理
const merge = require('webpack-merge')/**增加的第一处,结束。*/
第二处在结尾增加如下代码:
/* 这里是添加的部分二 ---------------------------- 开始 */
//多入口配置
// 通过glob模块读取pages文件夹下的所有对应文件夹下的js后缀文件,如果该文件存在那么就作为入口处理
exports.entries = function () {var entryFiles = glob.sync(PAGE_PATH + '/*/*.js') // 此处可以配置成/*/index.js,对应的是每个子应用的入口文件名。var map = {}entryFiles.forEach((filePath) => {var filename = filePath.substring(filePath.lastIndexOf('\/') + 1, filePath.lastIndexOf('.'))map[filename] = filePath})return map
}//多页面输出配置
// 与上面的多页面入口配置相同,读取pages文件夹下的对应的html后缀文件,然后放入数组中
exports.htmlPlugin = function () {let entryHtml = glob.sync(PAGE_PATH + '/*/*.html')// 此处可以配置成/*/index.html,对应的是每个子应用的html注入文件。let arr = []entryHtml.forEach((filePath) => {let filename = filePath.substring(filePath.lastIndexOf('\/') + 1, filePath.lastIndexOf('.'))console.log('filename:', filename)console.log('filePath:', filePath)let conf = {// 模板来源template: filePath,// 文件名称filename: filename + '.html',// 页面模板需要加对应的js脚本,如果不加这行则每个页面都会引入所有的js脚本chunks: ['manifest', 'vendor', filename],inject: true}if (process.env.NODE_ENV === 'production') {conf = merge(conf, {minify: {removeComments: true,collapseWhitespace: true,removeAttributeQuotes: true},chunksSortMode: 'dependency'})}arr.push(new HtmlWebpackPlugin(conf))})return arr
}
/* 这里是添加的部分二 ---------------------------- 结束 */
3.2、webpack.base.conf.js——修改1处
找到第24行需要修改的地方:
entry: {app: './src/main.js'},
将其修改为:
entry: utils.entries(),
3.3、webpack.dev.conf.js——修改2处
找到第47行的plugins,然后注释第56行附近的new HtmlWebpackPlugin(),并在plugins数组结尾增加.concat(utils.htmlPlugin())
plugins: [new webpack.DefinePlugin({'process.env': require('../config/dev.env')}),new webpack.HotModuleReplacementPlugin(),new webpack.NamedModulesPlugin(), // HMR shows correct file names in console on update.new webpack.NoEmitOnErrorsPlugin(),// https://github.com/ampedandwired/html-webpack-plugin/* 注释这个区域的文件 ------------- 开始 */// new HtmlWebpackPlugin({// filename: 'index.html',// template: 'index.html',// inject: true// }),/* 注释这个区域的文件 ------------- 结束 */// copy custom static assetsnew CopyWebpackPlugin([{from: path.resolve(__dirname, '../static'),to: config.dev.assetsSubDirectory,ignore: ['.*']}])].concat(utils.htmlPlugin())/* 添加 .concat(utils.htmlPlugin()) ------------------ */
3.4、webpack.prod.conf.js——修改2处
找到第32行附近的plugins,然后将第64行附近的new HtmlWebpackPlugin()此段代码全部注释,并在plugins数组结尾增加.concat(utils.htmlPlugin())
plugins: [// http://vuejs.github.io/vue-loader/en/workflow/production.htmlnew webpack.DefinePlugin({'process.env': env}),new UglifyJsPlugin({uglifyOptions: {compress: {warnings: false}},sourceMap: config.build.productionSourceMap,parallel: true}),// extract css into its own filenew ExtractTextPlugin({filename: utils.assetsPath('css/[name].[contenthash].css'),// Setting the following option to `false` will not extract CSS from codesplit chunks.// Their CSS will instead be inserted dynamically with style-loader when the codesplit chunk has been loaded by webpack.// It's currently set to `true` because we are seeing that sourcemaps are included in the codesplit bundle as well when it's `false`, // increasing file size: https://github.com/vuejs-templates/webpack/issues/1110allChunks: true,}),// Compress extracted CSS. We are using this plugin so that possible// duplicated CSS from different components can be deduped.new OptimizeCSSPlugin({cssProcessorOptions: config.build.productionSourceMap? { safe: true, map: { inline: false } }: { safe: true }}),// generate dist index.html with correct asset hash for caching.// you can customize output by editing /index.html// see https://github.com/ampedandwired/html-webpack-plugin/* 注释这个区域的内容 ---------------------- 开始 */// new HtmlWebpackPlugin({// filename: process.env.NODE_ENV === 'testing'// ? 'index.html'// : config.build.index,// template: 'index.html',// inject: true,// minify: {// removeComments: true,// collapseWhitespace: true,// removeAttributeQuotes: true// // more options:// // https://github.com/kangax/html-minifier#options-quick-reference// },// // necessary to consistently work with multiple chunks via CommonsChunkPlugin// chunksSortMode: 'dependency'// }),/* 注释这个区域的内容 ---------------------- 结束 */// keep module.id stable when vendor modules does not changenew webpack.HashedModuleIdsPlugin(),// enable scope hoistingnew webpack.optimize.ModuleConcatenationPlugin(),// split vendor js into its own filenew webpack.optimize.CommonsChunkPlugin({name: 'vendor',minChunks (module) {// any required modules inside node_modules are extracted to vendorreturn (module.resource &&/\.js$/.test(module.resource) &&module.resource.indexOf(path.join(__dirname, '../node_modules')) === 0)}}),// extract webpack runtime and module manifest to its own file in order to// prevent vendor hash from being updated whenever app bundle is updatednew webpack.optimize.CommonsChunkPlugin({name: 'manifest',minChunks: Infinity}),// This instance extracts shared chunks from code splitted chunks and bundles them// in a separate chunk, similar to the vendor chunk// see: https://webpack.js.org/plugins/commons-chunk-plugin/#extra-async-commons-chunknew webpack.optimize.CommonsChunkPlugin({name: 'app',async: 'vendor-async',children: true,minChunks: 3}),// copy custom static assetsnew CopyWebpackPlugin([{from: path.resolve(__dirname, '../static'),to: config.build.assetsSubDirectory,ignore: ['.*']}])].concat(utils.htmlPlugin())/* 增加 .concat(utils.htmlPlugin()) */
4、页面结构修改

最终的页面构建结构如上图所示 ,这里我增加了router和store,相当于将多页应用中的路由和vuex数据都集中存放在项目所属文件夹内,便于分别管理。
app.vue的代码和以前一样,注意修改一下图片引用路径即可。
<template><div id="app"><img src="../../assets/logo.png"><router-view></router-view></div>
</template><script>
export default {name: 'app'
}
</script><style>
#app {font-family: 'Avenir', Helvetica, Arial, sans-serif;-webkit-font-smoothing: antialiased;-moz-osx-font-smoothing: grayscale;text-align: center;color: #2c3e50;margin-top: 60px;
}
</style>
html文件的内容也和以前的index.html一样,
<!DOCTYPE html>
<html><head><meta charset="utf-8"><title>onekey_page</title></head><body><div id="app"></div><!-- built files will be auto injected --></body>
</html>
js入口文件内容也和以前的main.js一致,
// The Vue build version to load with the `import` command
// (runtime-only or standalone) has been set in webpack.base.conf with an alias.
import Vue from 'vue'
import Vuex from 'vuex'
import App from './app.vue'
import { onekeySaveRouter } from '@/pages/onekeySave/router'Vue.config.productionTip = falseVue.use(Vuex)/* eslint-disable no-new */
new Vue({el: '#app',router: onekeySaveRouter,template: '<App/>',components: { App }
})
5、访问和跳转方式
至此,一个简单的多页面应用框架已经搭建完成。pages下的每个文件夹都相当于是一个项目。
需要注意的是,访问的时候和以前有点区别:
http://127.0.0.1:8080/miniCloud.html
http://127.0.0.1:8080/onekeySave.html
如果是index文件夹下的index.html,则可以直接访问:
http://127.0.0.1:8080/
而页面间的跳转则需要通过a标签来实现。
加不加./ ,/ ,都不影响。

使用npm run build ,也可以发现生成了多个html文件。

git地址: https://github.com/Silent-Jude/multi-project
版本二:vue2.5.2 + webpack3.6.0 + vue/cli 3
vue/cli3中有multi-page模式,所以进行多页面设置非常简便。
参考官方文档。
1、首先新建一个cli3的项目
vue create multi-cli3
2、页面结构修改
由于cli3下的配置都简化了,所以这里我们先把页面结构配置修改好。

app.vue的文件内容还是和以前一样:
<template><div id="app"><h1>onekeySave</h1><h1>onekeySave</h1><h1>onekeySave</h1><router-view/></div>
</template><style lang="less">
#app {font-family: 'Avenir', Helvetica, Arial, sans-serif;-webkit-font-smoothing: antialiased;-moz-osx-font-smoothing: grayscale;text-align: center;color: #2c3e50;
}
</style>
html页面中的内容同public/index.html中的内容:
<!DOCTYPE html>
<html lang="en"><head><meta charset="utf-8"><meta http-equiv="X-UA-Compatible" content="IE=edge"><meta name="viewport" content="width=device-width,initial-scale=1.0"><link rel="icon" href="<%= BASE_URL %>favicon.ico"><title>multi-cli3</title></head><body><noscript><strong>We're sorry but multi-cli3 doesn't work properly without JavaScript enabled. Please enable it to continue.</strong></noscript><div id="app"></div><!-- built files will be auto injected --></body>
</html>
js入口文件中的内容同main.js中的内容:
import Vue from 'vue'
import App from './App.vue'
import router from '@/router'
import store from '@/store'Vue.config.productionTip = falsenew Vue({router,store,render: h => h(App)
}).$mount('#app')
其他的如router,vuex ,也都可以放到对应项目页面中去。
3、vue.config.js配置
vue/cli3中的配置都是在vue.config.js中进行配置的,默认是非多页应用模式,所以这里我们需要配置一下多页应用。
在src文件夹同级的根目录下,新建vue.config.js文件,文件内容如下:
// vue.config.js
module.exports = {pages: {// 多页配置index: {// page 的入口entry: './src/pages/index/index.js',// 模板来源template: './src/pages/index/index.html',// 在 dist/index.html 的输出,打包后的html文件名称filename: 'index.html',// 当使用 title 选项时,// template 中的 title 标签需要是 <title><%= htmlWebpackPlugin.options.title %></title>title: '首页', // 打包后的.html中<title>标签的文本内容// 在这个页面中包含的块,默认情况下会包含// 提取出来的通用 chunk 和 vendor chunk。chunks: ['chunk-vendors', 'chunk-common', 'index']},miniCloud: { // 配置规则同上entry: './src/pages/miniCloud/miniCloud.js',template: './src/pages/miniCloud/miniCloud.html',filename: 'miniCloud.html',title: '微云',chunks: ['chunk-vendors', 'chunk-common', 'miniCloud']},onekeySave: { // 配置规则同上entry: './src/pages/onekeySave/onekeySave.js',template: './src/pages/onekeySave/onekeySave.html',filename: 'onekeySave.html',title: '一键省钱',chunks: ['chunk-vendors', 'chunk-common', 'onekeySave']}// 当使用只有入口的字符串格式时,// 模板会被推导为 `public/subpage.html`// 并且如果找不到的话,就回退到 `public/index.html`。// 输出文件名会被推导为 `subpage.html`。// subpage: 'src/subpage/main.js'},devServer: {index: 'index.html', // 默认启动serve 打开index页面port: 8080, // 端口号open: true // 配置自动启动浏览器}
}
更多关于vue.config.js的配置请查看官网文档
至此,vue/cli3下的多页面配置工作就基本完成了,其他的如页面跳转,和cli2下的方式一样,通过a标签跳转即可。
这篇关于vue中多页面项目配置详解。【cli2和cli3版本配置】的文章就介绍到这儿,希望我们推荐的文章对编程师们有所帮助!


