本文主要是介绍vue实战——登录【详解】(含自适配全屏背景,记住账号--支持多账号,显隐密码切换,登录状态保持),希望对大家解决编程问题提供一定的参考价值,需要的开发者们随着小编来一起学习吧!
效果预览
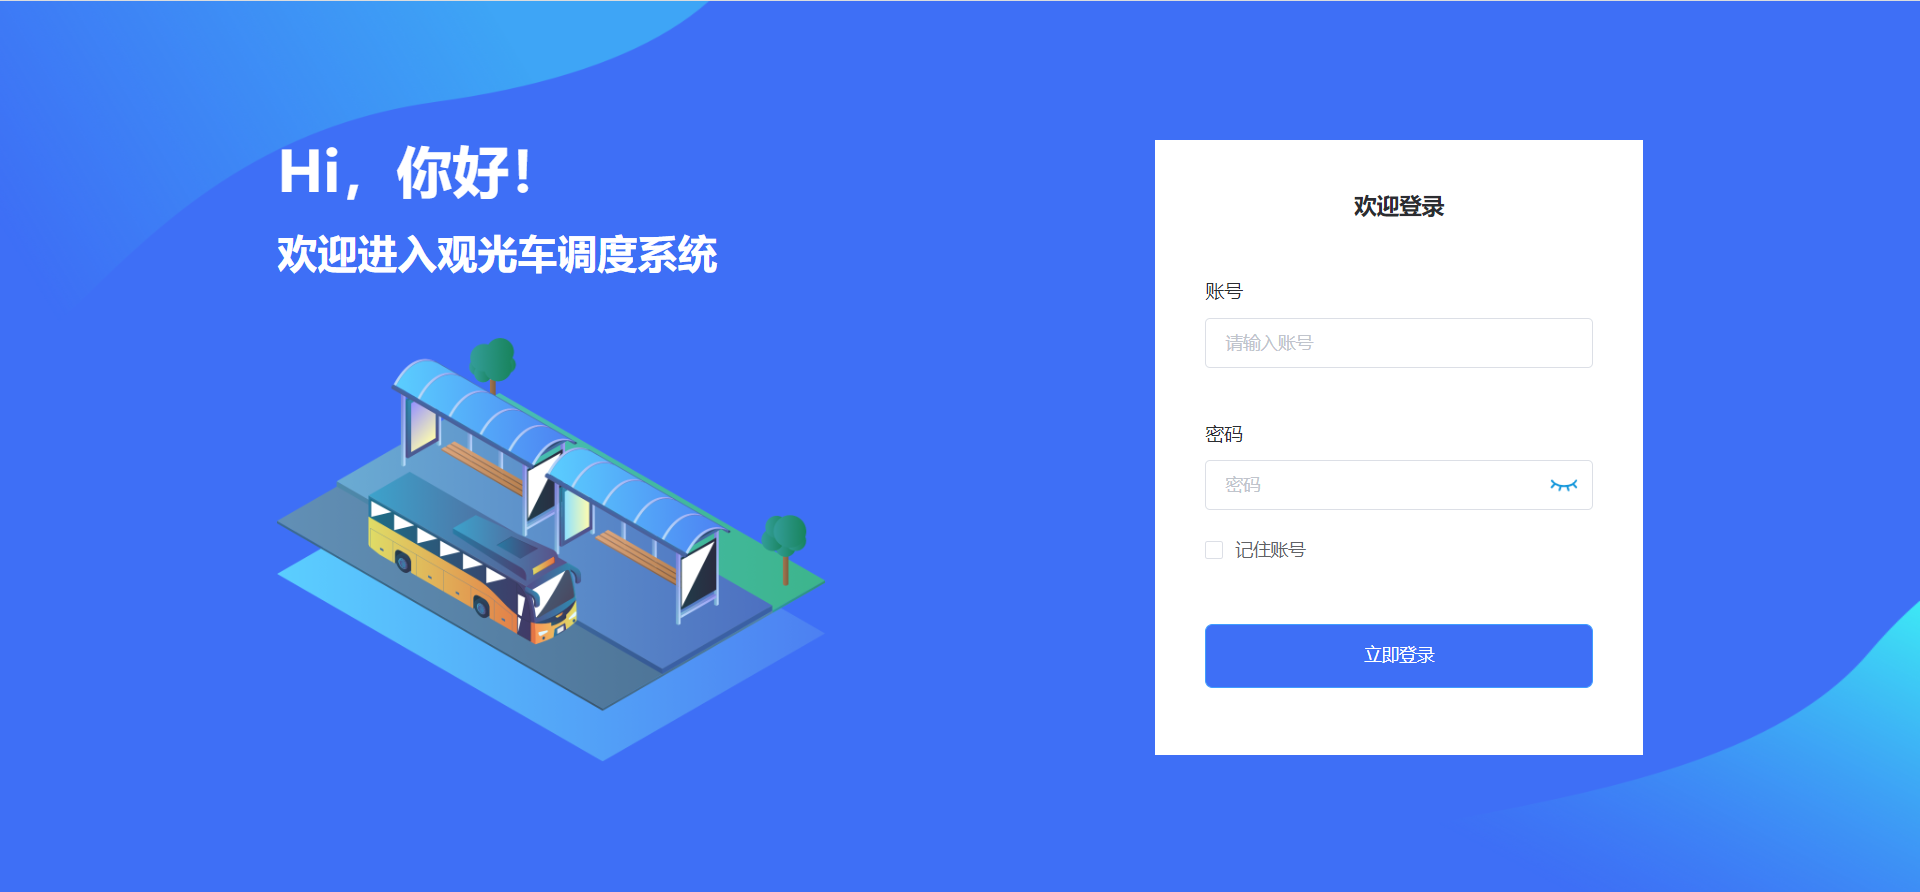
技术要点——自适配全屏背景
https://blog.csdn.net/weixin_41192489/article/details/119992992
技术要点——密码输入框
自定义图标切换显示隐藏
https://blog.csdn.net/weixin_41192489/article/details/133940676
技术要点——记住账号(支持多账号)
核心需求和逻辑
- 勾选“记住账号”,一旦登录成功过,下次登录能在账号输入框的输入推荐建议列表中,选择该账号
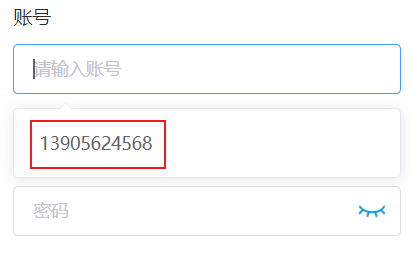
- 未勾选“记住账号”,登录成功后,清除对该账号的存储
相关代码
页面加载时,获取记住的账号
mounted() {this.accountList = JSON.parse(localStorage.getItem("accountList")) || [];},
使用带输入建议的输入框
<el-autocompleteclearableclass="inputStyle"v-model="formData.account":fetch-suggestions="queryAccount"placeholder="请输入账号"@select="chooseAccount"></el-autocomplete>
根据输入内容,从记住的账号中,过滤出最接近的已记住的账号
queryAccount(queryString, cb) {let accountList = JSON.parse(JSON.stringify(this.accountList));accountList = accountList.map((item) => {return {value: item,};});var results = queryString? accountList.filter(this.createFilter(queryString)): accountList;cb(results);},createFilter(queryString) {return (restaurant) => {return (restaurant.value.toLowerCase().indexOf(queryString.toLowerCase()) ===0);};},
根据输入建议下拉选择中,选择已记住的账号时,自动勾选记住账号,并清空表单校验
chooseAccount(newAccount) {if (this.accountList.includes(newAccount.value)) {this.remember = true;}this.$nextTick(() => {this.$refs.formRef.clearValidate();});},
登录成功后,根据是否勾选记住账号,存入新账号或移除已记住的账号。
this.$message({offset: 150,message: "登录成功!",type: "success",});let account = this.formData.account;// 勾选-记住账号if (this.remember) {// 没记住过if (!this.accountList.includes(account)) {// 存入localStoragethis.accountList.push(account);localStorage.setItem("accountList",JSON.stringify(this.accountList));}} else {// 未勾选-记住账号removeItem(this.accountList, account);localStorage.setItem("accountList",JSON.stringify(this.accountList));}
用到的工具函数
// 普通数组移除指定元素
function removeItem(arr, item) {let targetIndex = arr.findIndex((itemTemp) => itemTemp === item);if (targetIndex !== -1) {arr.splice(targetIndex, 1);}
}
技术要点——登录后维持登录状态
this.$store.commit("set_token", res.data.data.token);
this.$store.commit("set_isLogin", true);
this.$store.commit("set_userInfo", res.data.data);
完整范例代码
<template><div class="bg loginPage"><div><div><div class="hello">Hi,你好!</div><div class="hello2">欢迎进入观光车调度系统</div></div><div class="logoBox"><imgclass="logoBox"src="@/assets/images/login/login_logo.png"alt=""/></div></div><div class="loginBox"><div class="welcomeLogin">欢迎登录</div><el-form ref="formRef" :model="formData" label-width="0px"><el-form-itemprop="account":rules="{ required: true, message: '请输入账号' }"><div class="formLabel">账号</div><el-autocompleteclearableclass="inputStyle"v-model="formData.account":fetch-suggestions="queryAccount"placeholder="请输入账号"@select="chooseAccount"></el-autocomplete></el-form-item><el-form-itemprop="password":rules="{ required: true, message: '请输入密码' }"><div class="formLabel">密码</div><el-inputplaceholder="密码"v-model="formData.password":type="showPassword ? 'text' : 'password'"><i slot="suffix" @click="switchPassword"><imgv-if="showPassword"class="input_icon"src="@/assets/icons/password_show.png"/><imgv-elseclass="input_icon"src="@/assets/icons/password_hide.png"/></i></el-input></el-form-item></el-form><el-checkbox v-model="remember">记住账号</el-checkbox><el-button class="loginBtn" type="primary" @click="login">立即登录</el-button></div></div>
</template><script>
import { api_login } from "@/APIs/login.js";export default {data() {return {accountList: [],remember: false,// 是否显示密码showPassword: false,formData: {},};},mounted() {this.accountList = JSON.parse(localStorage.getItem("accountList")) || [];},methods: {chooseAccount(newAccount) {if (this.accountList.includes(newAccount.value)) {this.remember = true;}this.$nextTick(() => {this.$refs.formRef.clearValidate();});},queryAccount(queryString, cb) {let accountList = JSON.parse(JSON.stringify(this.accountList));accountList = accountList.map((item) => {return {value: item,};});var results = queryString? accountList.filter(this.createFilter(queryString)): accountList;cb(results);},createFilter(queryString) {return (restaurant) => {return (restaurant.value.toLowerCase().indexOf(queryString.toLowerCase()) ===0);};},switchPassword() {this.showPassword = !this.showPassword;},gotoIndex() {this.$router.push("/");},login() {this.$refs.formRef.validate((valid) => {if (valid) {this.loading = this.$loading({text: "登录中",spinner: "el-icon-loading",background: "rgba(0, 0, 0, 0.7)",lock: true,});api_login({...this.formData,}).then((res) => {if (res.data.code === 200) {this.$store.commit("set_token", res.data.data.token);this.$store.commit("set_isLogin", true);delete res.data.data["token"];this.$store.commit("set_userInfo", res.data.data);this.$message({offset: 150,message: "登录成功!",type: "success",});let account = this.formData.account;// 勾选-记住账号if (this.remember) {// 没记住过if (!this.accountList.includes(account)) {// 存入localStoragethis.accountList.push(account);localStorage.setItem("accountList",JSON.stringify(this.accountList));}} else {// 未勾选-记住账号removeItem(this.accountList, account);localStorage.setItem("accountList",JSON.stringify(this.accountList));}this.gotoIndex();} else {this.$message({offset: 150,message: res.data.msg,type: "warning",});}this.loading.close();}).catch(() => {this.loading.close();});}});},},
};// 普通数组移除指定元素
function removeItem(arr, item) {let targetIndex = arr.findIndex((itemTemp) => itemTemp === item);if (targetIndex !== -1) {arr.splice(targetIndex, 1);}
}
</script><style scoped>
.input_icon {cursor: pointer;width: 24px;padding-top: 8px;padding-right: 6px;
}.bg {background-image: url("~@/assets/images/login/login_bg.png");background-size: 100% 100%;position: fixed;top: 0px;width: 100%;height: 100%;
}.loginBox {width: 390px;height: 492px;background: #ffffff;padding: 40px;box-sizing: border-box;
}
.loginPage {display: flex;justify-content: space-around;align-items: center;padding: 0px 90px;box-sizing: border-box;
}
.logoBox {width: 439px;height: 341px;
}
.hello {height: 63px;font-size: 45px;font-family: PingFangSC, PingFang SC;font-weight: 600;color: #ffffff;line-height: 63px;
}
.hello2 {height: 44px;font-size: 32px;font-family: PingFangSC, PingFang SC;font-weight: 600;color: #ffffff;line-height: 44px;margin-bottom: 46px;margin-top: 12px;
}
.welcomeLogin {height: 25px;font-size: 18px;font-family: PingFangSC, PingFang SC;font-weight: 600;color: #2b2d31;line-height: 25px;text-align: center;margin-bottom: 26px;
}
.formLabel {margin-top: 20px;height: 21px;font-size: 15px;font-family: PingFangSC, PingFang SC;font-weight: 400;color: #2b2d31;line-height: 21px;margin-bottom: 10px;
}.loginBtn {height: 51px;background: #3e6ff6;border-radius: 6px;width: 100%;margin-top: 50px;
}
.inputStyle {width: 100%;
}
</style>
配图素材

这篇关于vue实战——登录【详解】(含自适配全屏背景,记住账号--支持多账号,显隐密码切换,登录状态保持)的文章就介绍到这儿,希望我们推荐的文章对编程师们有所帮助!


