本文主要是介绍SpringCache使用详解,希望对大家解决编程问题提供一定的参考价值,需要的开发者们随着小编来一起学习吧!
SpringCache
- 1.新建测试项目SpringCache
- 2.SpringCache整合redis
- 2.1.@Cacheable
- 2.2.@CacheEvict
- 2.3.@Cacheput
- 2.4.@Caching
- 2.5.@CacheConfig
- 3.SpringCache问题
- 4.SpringCache实现多级缓存
1.新建测试项目SpringCache
引入依赖
<dependencies><dependency><groupId>org.springframework.boot</groupId><artifactId>spring-boot-starter-web</artifactId></dependency><dependency><groupId>org.projectlombok</groupId><artifactId>lombok</artifactId></dependency><!--Mysql数据库驱动--><dependency><groupId>mysql</groupId><artifactId>mysql-connector-java</artifactId></dependency><!-- MyBatis--><dependency><groupId>com.baomidou</groupId><artifactId>mybatis-plus-boot-starter</artifactId><version>3.4.0</version></dependency><dependency><groupId>org.springframework.boot</groupId><artifactId>spring-boot-starter-test</artifactId><scope>test</scope></dependency>
</dependencies>
实体类
@Data
public class User {private Long id;private String name;private Integer age;}
mapper
@Mapper
public interface UserMapper extends BaseMapper<User> {}
application.yml
spring:datasource:url: jdbc:mysql://127.0.0.1:3306/test?useUnicode=true&characterEncoding=UTF-8&serverTimezone=Asia/Shanghaiusername: rootpassword: 123456driver-class-name: com.mysql.cj.jdbc.Driver
mybatis-plus:configuration:log-impl: org.apache.ibatis.logging.stdout.StdOutImpl
测试下没问题就搭建完成,开始springcache的测试
2.SpringCache整合redis
spring cache官方文档
spEl语法说明官方文档
下面是以redis为例,其他缓存也是下面这些步骤,一般来说要把cache抽出成一个类,下面为了测试方便直接在controller里做
1.引入依赖
<!-- redis -->
<dependency><groupId>org.springframework.boot</groupId><artifactId>spring-boot-starter-data-redis</artifactId>
</dependency>
2.配置类
@EnableCaching //开启缓存
@Configuration
public class CacheConfig {@Beanpublic CacheManager redisCacheManager(RedisConnectionFactory factory) {// 配置序列化(解决乱码的问题),过期时间600秒RedisCacheConfiguration config = RedisCacheConfiguration.defaultCacheConfig()//过期时间.entryTtl(Duration.ofSeconds(600))//缓存key.serializeKeysWith(RedisSerializationContext.SerializationPair.fromSerializer(new StringRedisSerializer()))//缓存组件value.serializeValuesWith(RedisSerializationContext.SerializationPair.fromSerializer(new GenericJackson2JsonRedisSerializer()))//value不为空,为空报错.disableCachingNullValues().computePrefixWith(cacheName -> cacheName + ":");RedisCacheManager cacheManager = RedisCacheManager.builder(factory).cacheDefaults(config).build();return cacheManager;}
}
3.application.yml
spring:datasource:url: jdbc:mysql://127.0.0.1:3306/test?useUnicode=true&characterEncoding=UTF-8&serverTimezone=Asia/Shanghaiusername: rootpassword: 123456driver-class-name: com.mysql.cj.jdbc.Driverredis:host: 127.0.0.1port: 6379password: 123456
mybatis-plus:configuration:log-impl: org.apache.ibatis.logging.stdout.StdOutImpl
4.controller
@RestController
@CacheConfig(cacheNames = "user", cacheManager = "redisCacheManager")
public class UserController {@AutowiredUserMapper userMapper;@GetMapping("/list")@Cacheable(key = "#root.method.name")public List<User> list() {return userMapper.selectList(null);}
}
5.访问http://localhost:8080/list测试,数据被缓存到redis中了
2.1.@Cacheable
@Cacheable:触发缓存填充。
注解属性
| 注解属性 | 作用 |
|---|---|
| value / cacheNames | 用于指定缓存的名称,可以指定一个或多个缓存名称 |
| key | 用于指定缓存的键,可以使用 SpEL 表达式 |
| condition | 用于指定一个条件,如果条件成立,则执行缓存 |
| unless | 用于指定一个条件,如果条件不成立,则执行缓存 |
| keyGenerator | 用于指定自定义的缓存键生成器 |
| cacheManager | 用于指定自定义的缓存管理器 |
| sync | 用于指定是否使用同步模式,当设置为 true 时,表示在方法执行时,阻塞其他请求,直到缓存更新完成 |
SpEL上下文数据
| 属性名称 | 描述 | 示例 |
|---|---|---|
| methodName | 正在调用的方法的名称 | #root.methodName |
| method | 正在调用的方法 | #root.method.name |
| target | 正在调用的目标对象 | #root.target |
| targetClass | 被调用目标的class | #root.targetClass |
| args | 用于调用目标的参数 | #root.args[0] |
| caches | 当前被调用的方法使用的Cache | #root.caches[0].name |
| result | 方法调用的结果 | #result |
/*** 生成的缓存:myCache:qwer  value:"9999"* condition = "#param.length() > 3" 参数长度大于3进行缓存* unless = "#result == null"        结果等于null不进行缓存*/
@GetMapping("/getCachedValue")
@Cacheable(value = "myCache", key = "#param", condition = "#param.length() > 3", unless = "#result == null")
public String getCachedValue(@RequestParam("param") String param) {return "9999";
}
访问:http://localhost:8080/getCachedValue?param=qwer测试,成功缓存,修改代码return null;再测试,就不会进行缓存
/*** 可以缓存null值,但会乱码,不影响使用* 缓存null值有两种情况:* 1.return null;* 2.方法返回值为void*/
@GetMapping("/getUser")
@Cacheable(key = "#uid")
public User getUser(@RequestParam("uid") Long uid) {return userMapper.selectById(uid);
}
2.2.@CacheEvict
@CacheEvict:触发缓存逐出。
@GetMapping("/cacheEvict")
@CacheEvict(key = "'list'")//清除键为key的缓存
public void cacheEvict(){
}@GetMapping("/cacheEvictAll")
@CacheEvict(key = "'user'", allEntries = true)//清除user分区下的所有缓存
public void cacheEvictAll() {
}
2.3.@Cacheput
@CachePut:在不干扰方法执行的情况下更新缓存。
@GetMapping("/getUser")
@Cacheable(key = "#uid")
public User getUser(@RequestParam("uid") Long uid) {return userMapper.selectById(uid);
}@GetMapping("/update")
@CachePut(key = "#uid")
public User update(@RequestParam("uid") Long uid) {User user = new User();user.setId(uid);user.setName("lisi9999");userMapper.updateById(user);return user;
}
1.先http://localhost:8080/getUser?uid=2进行缓存
2.再http://localhost:8080/update?uid=2刷新缓存
3.再http://localhost:8080/getUser?uid=2查缓存
可以看到缓存被正确更新
注意:update方法返回值不能写void,否则会触发缓存空值的情况,缓存被刷新成乱码了
2.4.@Caching
@Caching:重新组合要应用于方法的多个缓存操作。
/*** @Cacheable(key = "'allBooks'"):表示方法的返回值应该被缓存,使用 allBooks 作为缓存的键。* @CacheEvict(key = "#isbn"):表示在调用这个方法时,会清除缓存中键为 #isbn 的缓存项。* @CacheEvict(key = "'popularBooks'"):表示在调用这个方法时,会清除缓存中键为 'popularBooks' 的缓存项。*/
@Caching(cacheable = @Cacheable(key = "'allBooks'"),evict = {@CacheEvict(key = "#isbn"),@CacheEvict(key = "'popularBooks'")}
)
public String updateBookByIsbn(String isbn, String newTitle) {System.out.println("Updating book in the database for ISBN: " + isbn);// Simulate updating data in a databasereturn newTitle;
}
2.5.@CacheConfig
@CacheConfig:在类级别共享一些常见的缓存相关设置。
@CacheConfig(cacheNames = "user", cacheManager = "redisCacheManager")
public class UserCache {}
3.SpringCache问题
springCache的这些注解也受@Transactional的事务控制
@Transactional
@Cacheable(value = "myCache", key = "#id")
public String getCachedValueById(long id) {// 查询底层数据源,如果缓存中没有数据return fetchDataFromDataSource(id);
}
@Cacheable 注解被用于方法 getCachedValueById 上,而该方法也被 @Transactional 注解标记。这意味着当方法被调用时,缓存的操作和底层数据源的查询将在同一个事务中进行。如果事务回滚(例如,由于异常的发生),缓存的操作也会被回滚,确保数据的一致性。
springcache的读模式和写模式什么意思,为什么说springcache解决了读模式的缓存击穿,缓存穿透,缓存雪崩问题,没有解决写模式的这些问题
读模式和写模式是缓存中常用的两种操作方式,分别涉及到对缓存的读取和写入。
- 读模式(Read-Through)
读模式是指在读取数据时,首先尝试从缓存中获取数据。如果缓存中存在数据,则直接返回缓存的值,避免了对底层数据源(例如数据库)的直接访问。如果缓存中不存在数据,系统会查询底层数据源,将查询到的数据加载到缓存中,并返回给调用方。
Spring Cache 中的 @Cacheable 注解是典型的读模式的代表。这样的模式可以有效减轻对底层数据源的访问压力,提高系统性能。
- 写模式(Write-Through)
写模式是指在对数据进行写入或修改时,首先对底层数据源进行相应的操作,然后再更新或清空缓存。这样确保了缓存和底层数据源的一致性。
Spring Cache 中的 @CachePut 和 @CacheEvict 注解是写模式的代表。@CachePut 用于更新缓存,@CacheEvict 用于清除缓存。
关于 Spring Cache 解决问题的说法
关于 Spring Cache 解决了读模式的缓存击穿、缓存穿透、缓存雪崩问题的说法,主要是因为 Spring Cache 提供了对这些问题的解决方案:
-
缓存击穿: 通过 @Cacheable 注解的 sync 属性,可以控制是否使用同步模式,以避免在高并发情况下多个线程同时查询缓存失效的情况。
-
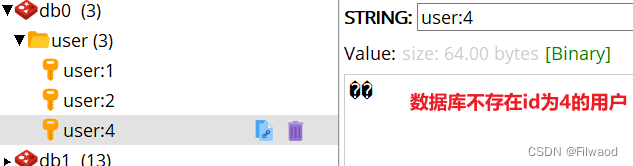
缓存穿透: 通过 @Cacheable 注解的 cache-null-values 属性,可以缓存空值,防止对于一些不存在的 key,频繁查询底层数据源。
-
缓存雪崩: 通过设置缓存项的过期时间,以及使用随机时间避免同时失效大量缓存项,可以减缓缓存雪崩问题的发生。
然而,写模式中可能存在一些问题,比如缓存和底层数据源的一致性问题,因为在更新底层数据源和更新缓存之间存在一定的时间差。Spring Cache 没有提供对写模式问题的直接解决方案。在一些对数据一致性要求较高的场景中,可能需要结合其他手段(如数据库事务、消息队列等)来保证写操作的一致性。
4.SpringCache实现多级缓存
这篇关于SpringCache使用详解的文章就介绍到这儿,希望我们推荐的文章对编程师们有所帮助!