本文主要是介绍CentOS7.7离线安装驱动、docker、CUDA和cudnn,希望对大家解决编程问题提供一定的参考价值,需要的开发者们随着小编来一起学习吧!
第一步:驱动安装
1.预、查询命令
1、Linux查看显卡信息:(ps:若找不到lspci命令,可以安装 yum install pciutils)
lspci | grep -i vga
2、使用nvidia GPU可以:
lspci | grep -i nvidia
3、查看显卡驱动
cat /proc/driver/nvidia/version
一、前提准备(参考:https://www.cnblogs.com/gollong/p/12655424.html)
1.安装依赖环境:
yum install kernel-devel gcc -y #离线下无法安装用命令行,所以下面选择手动安装,由于本机已经安装了kernel-devel,所以这里只安装gcc就行了。
2.离线安装gcc
https://blog.csdn.net/m0_37954663/article/details/108720458(参考链接)
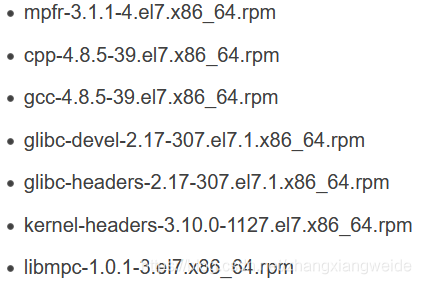
首先下载gcc的rpm压缩包
安装包有如下文件
下载完成开始安装
1、上传gcc.tar.gz到 目标服务器 /usr/local/
2、安装
#解压gcc
tar -zxf gcc.tar.gz
cd gcc
#rpm安装gcc
rpm -Uvh *.rpm --nodeps --force
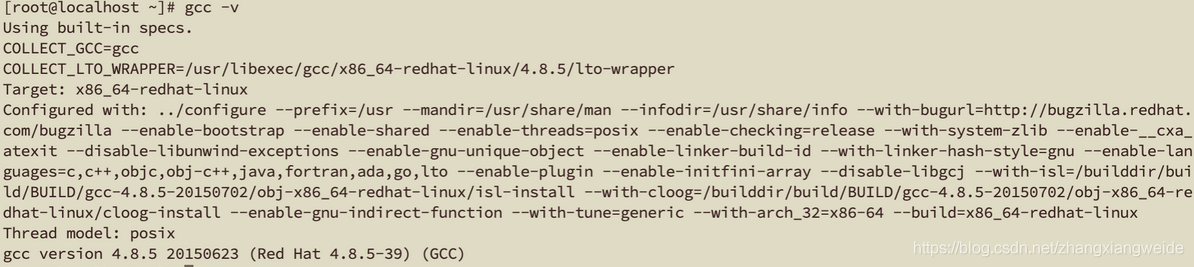
#检测gcc是否安装成功
gcc -v
看到如下信息那么就安装成功了
2.检查内核版本和源码版本,保证一致(安装完gcc之后,继续安装驱动)
ls /boot | grep vmlinurpm -aq | grep kernel-devel
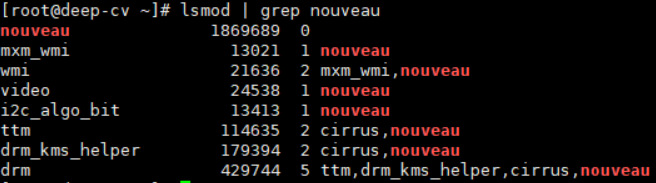
3.屏蔽系统自带的nouveau
查看命令:
lsmod | grep nouveau修改dist-blacklist.conf文件:
vim /lib/modprobe.d/dist-blacklist.conf将nvidiafb注释掉:
#blacklist nvidiafb 然后添加以下语句:
blacklist nouveau
options nouveau modeset=0
屏蔽前
屏蔽后

4.重建initramfs image步骤
mv /boot/initramfs-$(uname -r).img /boot/initramfs-$(uname -r).img.bakdracut /boot/initramfs-$(uname -r).img $(uname -r)
5.修改运行级别为文本模式
systemctl set-default multi-user.target
6.重新启动
reboot
二、本地安装
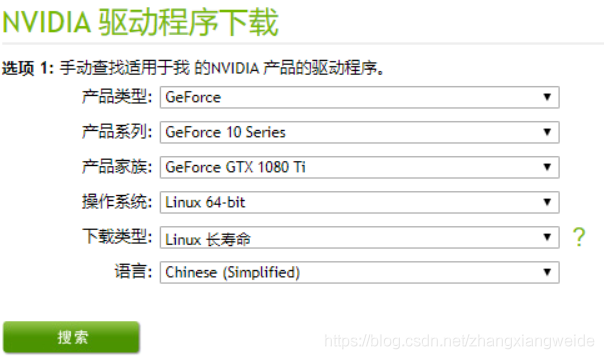
1.在NVIDIA官网下载驱动
2.安装过程
chmod +x NVIDIA-Linux-x86_64-440.64.run./NVIDIA-Linux-x86_64-440.64.run
3.安装成功
nvidia-smi
第二步:docker安装(docker离线安装参考链接:(6条消息) linux通过tar包安装docker_学亮编程手记-CSDN博客)
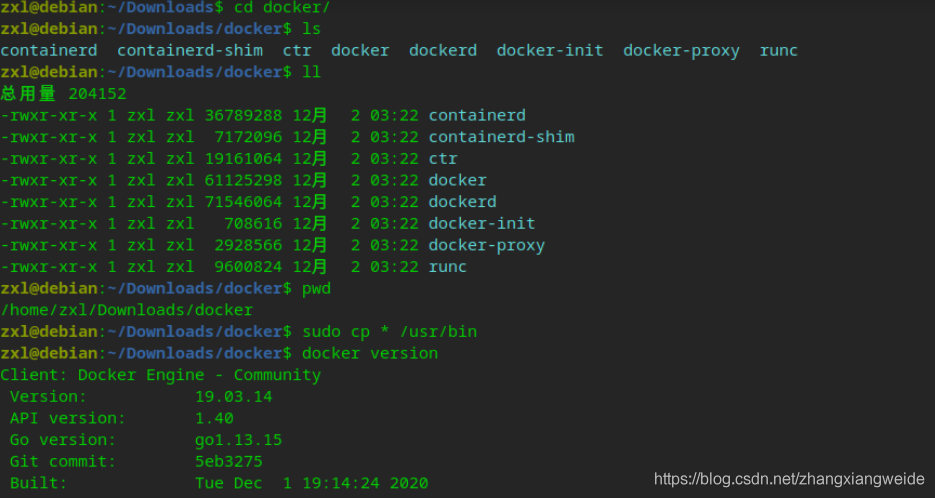
下载地址
各个版本Docker地址:https://download.docker.com/linux/static/stable/x86_64/
解压拷贝
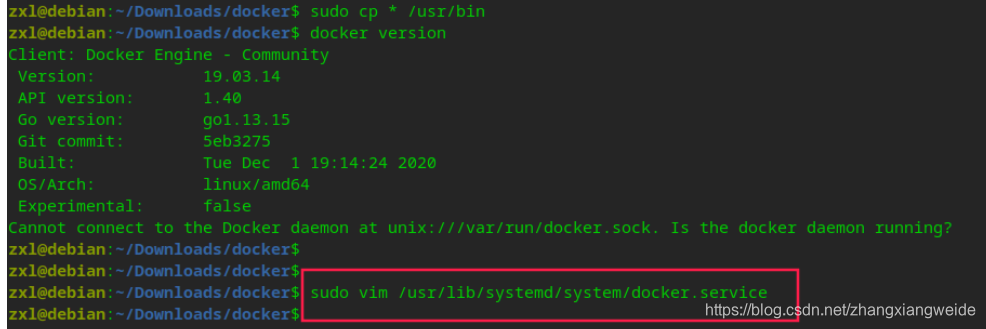
添加服务
[Unit]
Description=Docker Application Container Engine
Documentation=https://docs.docker.com
After=network-online.target firewalld.service
Wants=network-online.target[Service]
Type=notify
ExecStart=/usr/bin/dockerd
ExecReload=/bin/kill -s HUP $MAINPID
LimitNOFILE=infinity
LimitNPROC=infinity
TimeoutStartSec=0
Delegate=yes
KillMode=process
Restart=on-failure
StartLimitBurst=3
StartLimitInterval=60s[Install]
WantedBy=multi-user.target
启动
systemctl daemon-reload
systemctl start docker
ps aux | grep docker
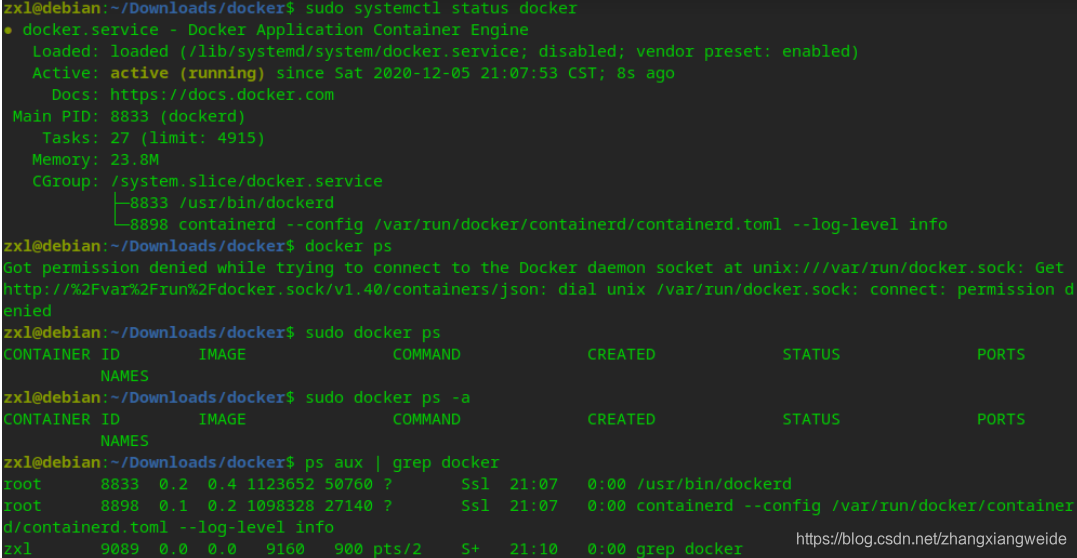
至此,docker安装完毕。
第三步:安装CUDA(参考链接https://blog.csdn.net/qq_40263477/article/details/105132822)
1.下载.run安装包(经测试只有这个离线安装成功了)
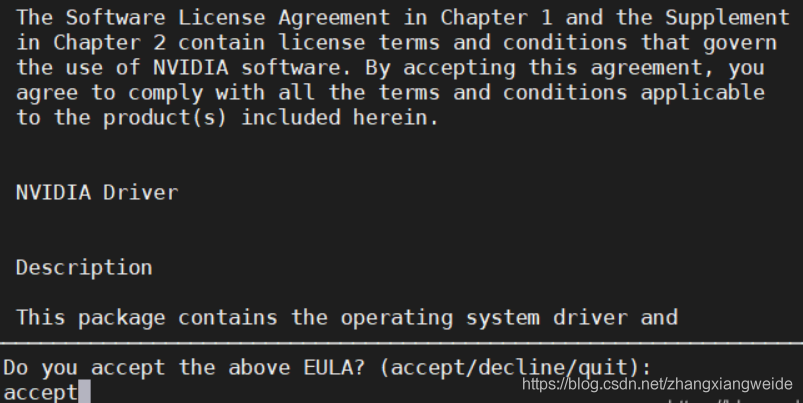
sudo sh cuda_10.0.130_410.48_linux.run2.接受安装协议
由于驱动已经安装好了,不需要重新安装,安装的时候把Driver前面的X去掉
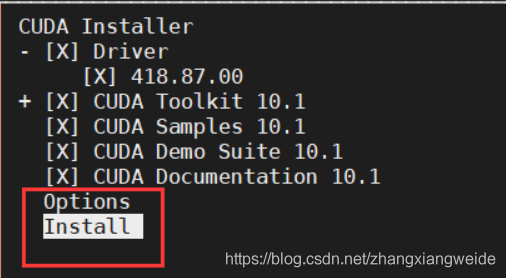
自定义配置好了以后,等待安装成功即可
#包括了:1、成功安装的和未选择安装的;2、如何卸载等信息#整体说明,除了驱动外,Toolkit和Samples已经安装了
Driver:   Not Selected
Toolkit:  Installed in /home/John/Softwares/cuda-10.2/
Samples:  Installed in /home/John/Softwares/cuda-samples/#去核实一遍,刚指定的安装目录下是否存在以下文件
Please make sure that-   PATH includes /home/John/Softwares/cuda-10.2/bin-   LD_LIBRARY_PATH includes /home/John/Softwares/cuda-10.2/lib64, or, add /home/John/Softwares/cuda-10.2/lib64 to /etc/ld.so.conf and run ldconfig as root#若先想要卸载cuda,执行该命令即可
To uninstall the CUDA Toolkit, run cuda-uninstaller in /home/John/Softwares/cuda-10.2/bin#有一个pdf安装指导文件
Please see CUDA_Installation_Guide_Linux.pdf in /home/John/Softwares/cuda-10.2/doc/pdf for detailed information on setting up CUDA.#因为驱动已经满足要求,所以cuda安装过程中选择了no,并说明了版本至少是440.00
***WARNING: Incomplete installation! This installation did not install the CUDA Driver. A drriver of version at least 440.00 is required for CUDA 10.2 functionality to work.#若还是想要安装驱动,可以再安装一次.run文件,但加了参数说明只安装驱动
To install the driver using this installer, run the following command, replacing <CudaInstaller> with the name of this run file:sudo <CudaInstaller>.run --silent --driver#安装过程的日志写在了这个.log文件中,若出现安装错误可以看日志,查看出错的步骤在哪
Logfile is /var/log/cuda-installer.log
配置环境变量
进入当前用户的~/.bashrc文件进行路径配置
# vim ~/.bashrc
export PATH=/your_install_path/cuda-10.0/bin:$PATH
export LD_LIBRARY_PATH=/your_install_path/cuda-10.0/lib64$LD_LIBRARY_PATH
验证安装
nvcc -v
第四步:cudnn安装
cudnn的安装
cudnn的安装非常简单,
(1)下载安装文件
按需求下载cudnn的安装文件:https://developer.nvidia.com/rdp/cudnn-archive
(2)安装cudnn
解压下载的文件,可以看到cuda文件夹,在当前目录打开终端,执行如下命令:
sudo cp cuda/include/cudnn.h /usr/local/cuda/include/sudo cp cuda/lib64/libcudnn* /usr/local/cuda/lib64/sudo chmod a+r /usr/local/cuda/include/cudnn.hsudo chmod a+r /usr/local/cuda/lib64/libcudnn*这篇关于CentOS7.7离线安装驱动、docker、CUDA和cudnn的文章就介绍到这儿,希望我们推荐的文章对编程师们有所帮助!


