本文主要是介绍ky10 server x86 auditd安装(日志审计系统),希望对大家解决编程问题提供一定的参考价值,需要的开发者们随着小编来一起学习吧!
概述
Auditd工具可以帮助运维人员审计Linux,分析发生在系统中的发生的事情。Linux 内核有用日志记录事件的能力,包括记录系统调用和文件访问。管理员可以检查这些日志,确定是否存在安全漏洞(如多次失败的登录尝试,或者用户对系统文件不成功的访问)。
前置条件
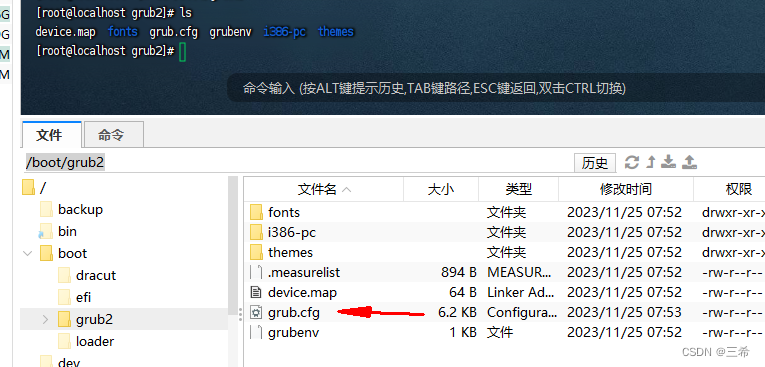
cd /boot/grub2编辑这个文件
#
# DO NOT EDIT THIS FILE
#
# It is automatically generated by grub2-mkconfig using templates
# from /etc/grub.d and settings from /etc/default/grub
#### BEGIN /etc/grub.d/00_header ###
set pager=1if [ -f ${config_directory}/grubenv ]; thenload_env -f ${config_directory}/grubenv
elif [ -s $prefix/grubenv ]; thenload_env
fi
if [ "${next_entry}" ] ; thenset default="${next_entry}"set next_entry=save_env next_entryset boot_once=true
elseset default="${saved_entry}"
fiif [ x"${feature_menuentry_id}" = xy ]; thenmenuentry_id_option="--id"
elsemenuentry_id_option=""
fiexport menuentry_id_optionif [ "${prev_saved_entry}" ]; thenset saved_entry="${prev_saved_entry}"save_env saved_entryset prev_saved_entry=save_env prev_saved_entryset boot_once=true
fifunction savedefault {if [ -z "${boot_once}" ]; thensaved_entry="${chosen}"save_env saved_entryfi
}function load_video {if [ x$feature_all_video_module = xy ]; theninsmod all_videoelseinsmod efi_gopinsmod efi_ugainsmod ieee1275_fbinsmod vbeinsmod vgainsmod video_bochsinsmod video_cirrusfi
}terminal_output console
if [ x$feature_timeout_style = xy ] ; thenset timeout_style=menuset timeout=5
# Fallback normal timeout code in case the timeout_style feature is
# unavailable.
elseset timeout=5
fi
set superusers=root
password_pbkdf2 root grub.pbkdf2.sha512.10000.5F635C22DDED2C2B461358B9438CED69BD916474219EA9C30024FC2F7D5D0EDE0226C221E0F0693E99A0BCE3CCA338EFF600DAAD7D6D63A5F21E5B4E88DD7A76.89AB83B39D775965D42706B71D4D9A80DE6224DFC3DC214E3B55450F5ABB3E9B94CE8408090725BF2E6D3E078F4C2CB9D73FF75BEECE545A589E4FE586E82BC0
### END /etc/grub.d/00_header ###### BEGIN /etc/grub.d/00_tuned ###
set tuned_params=""
set tuned_initrd=""
### END /etc/grub.d/00_tuned ###### BEGIN /etc/grub.d/01_users ###
if [ -f ${prefix}/user.cfg ]; thensource ${prefix}/user.cfgif [ -n "${GRUB2_PASSWORD}" ]; thenset superusers="root"export superuserspassword_pbkdf2 root ${GRUB2_PASSWORD}fi
fi
### END /etc/grub.d/01_users ###### BEGIN /etc/grub.d/10_linux ###
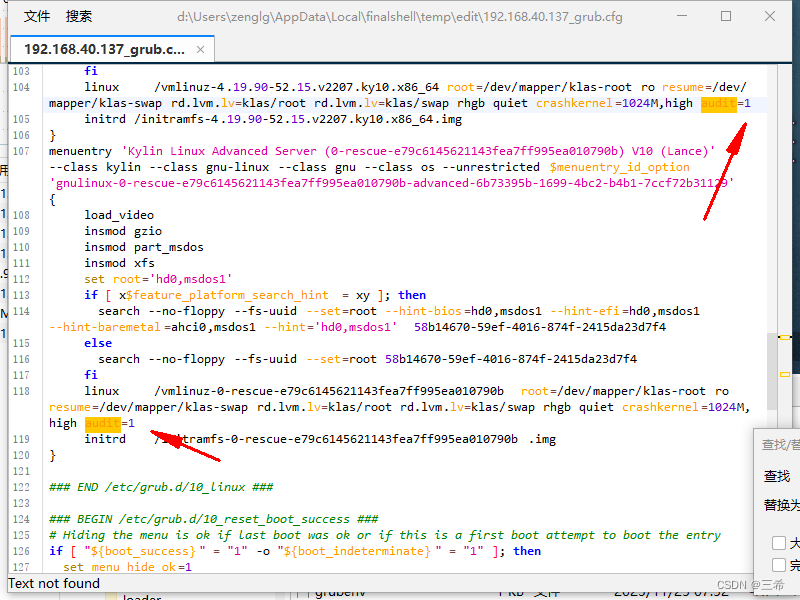
menuentry 'Kylin Linux Advanced Server (4.19.90-52.15.v2207.ky10.x86_64) V10 (Lance)' --class kylin --class gnu-linux --class gnu --class os --unrestricted $menuentry_id_option 'gnulinux-4.19.90-52.15.v2207.ky10.x86_64-advanced-6b73395b-1699-4bc2-b4b1-7ccf72b31129' {load_videoset gfxpayload=keepinsmod gzioinsmod part_msdosinsmod xfsset root='hd0,msdos1'if [ x$feature_platform_search_hint = xy ]; thensearch --no-floppy --fs-uuid --set=root --hint-bios=hd0,msdos1 --hint-efi=hd0,msdos1 --hint-baremetal=ahci0,msdos1 --hint='hd0,msdos1' 58b14670-59ef-4016-874f-2415da23d7f4elsesearch --no-floppy --fs-uuid --set=root 58b14670-59ef-4016-874f-2415da23d7f4filinux /vmlinuz-4.19.90-52.15.v2207.ky10.x86_64 root=/dev/mapper/klas-root ro resume=/dev/mapper/klas-swap rd.lvm.lv=klas/root rd.lvm.lv=klas/swap rhgb quiet crashkernel=1024M,high audit=0initrd /initramfs-4.19.90-52.15.v2207.ky10.x86_64.img
}
menuentry 'Kylin Linux Advanced Server (0-rescue-e79c6145621143fea7ff995ea010790b) V10 (Lance)' --class kylin --class gnu-linux --class gnu --class os --unrestricted $menuentry_id_option 'gnulinux-0-rescue-e79c6145621143fea7ff995ea010790b-advanced-6b73395b-1699-4bc2-b4b1-7ccf72b31129' {load_videoinsmod gzioinsmod part_msdosinsmod xfsset root='hd0,msdos1'if [ x$feature_platform_search_hint = xy ]; thensearch --no-floppy --fs-uuid --set=root --hint-bios=hd0,msdos1 --hint-efi=hd0,msdos1 --hint-baremetal=ahci0,msdos1 --hint='hd0,msdos1' 58b14670-59ef-4016-874f-2415da23d7f4elsesearch --no-floppy --fs-uuid --set=root 58b14670-59ef-4016-874f-2415da23d7f4filinux /vmlinuz-0-rescue-e79c6145621143fea7ff995ea010790b root=/dev/mapper/klas-root ro resume=/dev/mapper/klas-swap rd.lvm.lv=klas/root rd.lvm.lv=klas/swap rhgb quiet crashkernel=1024M,high audit=0initrd /initramfs-0-rescue-e79c6145621143fea7ff995ea010790b.img
}### END /etc/grub.d/10_linux ###### BEGIN /etc/grub.d/10_reset_boot_success ###
# Hiding the menu is ok if last boot was ok or if this is a first boot attempt to boot the entry
if [ "${boot_success}" = "1" -o "${boot_indeterminate}" = "1" ]; thenset menu_hide_ok=1
elseset menu_hide_ok=0
fi
# Reset boot_indeterminate after a successful boot
if [ "${boot_success}" = "1" ] ; thenset boot_indeterminate=0
# Avoid boot_indeterminate causing the menu to be hidden more then once
elif [ "${boot_indeterminate}" = "1" ]; thenset boot_indeterminate=2
fi
# Reset boot_success for current boot
set boot_success=0
save_env boot_success boot_indeterminate
### END /etc/grub.d/10_reset_boot_success ###### BEGIN /etc/grub.d/12_menu_auto_hide ###
if [ x$feature_timeout_style = xy ] ; thenif [ "${menu_show_once}" ]; thenunset menu_show_oncesave_env menu_show_onceset timeout_style=menuset timeout=60elif [ "${menu_auto_hide}" -a "${menu_hide_ok}" = "1" ]; thenset orig_timeout_style=${timeout_style}set orig_timeout=${timeout}if [ "${fastboot}" = "1" ]; then# timeout_style=menu + timeout=0 avoids the countdown code keypress checkset timeout_style=menuset timeout=0elseset timeout_style=hiddenset timeout=1fifi
fi
### END /etc/grub.d/12_menu_auto_hide ###### BEGIN /etc/grub.d/15_ostree ###
### END /etc/grub.d/15_ostree ###### BEGIN /etc/grub.d/20_linux_xen ###
### END /etc/grub.d/20_linux_xen ###### BEGIN /etc/grub.d/20_ppc_terminfo ###
### END /etc/grub.d/20_ppc_terminfo ###### BEGIN /etc/grub.d/30_os-prober ###
### END /etc/grub.d/30_os-prober ###### BEGIN /etc/grub.d/30_uefi-firmware ###
### END /etc/grub.d/30_uefi-firmware ###### BEGIN /etc/grub.d/40_custom ###
# This file provides an easy way to add custom menu entries. Simply type the
# menu entries you want to add after this comment. Be careful not to change
# the 'exec tail' line above.
### END /etc/grub.d/40_custom ###### BEGIN /etc/grub.d/41_custom ###
if [ -f ${config_directory}/custom.cfg ]; thensource ${config_directory}/custom.cfg
elif [ -z "${config_directory}" -a -f $prefix/custom.cfg ]; thensource $prefix/custom.cfg;
fi
### END /etc/grub.d/41_custom ###
将下面中的0改成1

修改之后的效果
保存,重启系统
安装脚本
yum install audit -y
systemctl start auditd
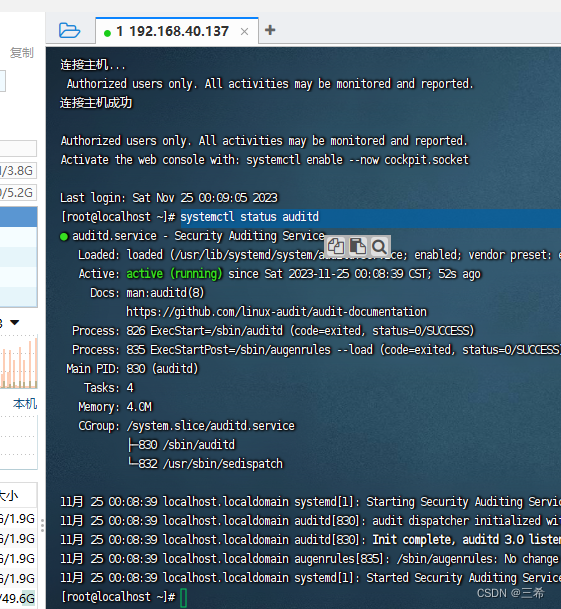
查看状态
systemctl status auditd
这篇关于ky10 server x86 auditd安装(日志审计系统)的文章就介绍到这儿,希望我们推荐的文章对编程师们有所帮助!


