本文主要是介绍【三维几何学习】自制简单的网格可视化软件 — Mesh Visualization,希望对大家解决编程问题提供一定的参考价值,需要的开发者们随着小编来一起学习吧!
自制简单的网格可视化软件 — Mesh Visualization
- 引言
- 一、整体框架
- 1.1 三角形网格
- 1.2 界面管理
- 1.3 VTK可视化界面
- 二、核心源码
- 2.1 三角形网格:TriMesh类
- 2.2 界面Widget_Mesh_Manager
- 2.3 VTK可视化
- 2.4 main
引言
使用PyQt自制简单的网格可视化软件 - 视频展示
本是为了方便输入模型分析、网格分割结果可视化,使用PyQt做的一款小软件,后续通过增删变成了Mesh Visualization,主要针对三角形网格。主要功能包括:读取网格(目前仅支持.obj),关于网格顶点、边、面的一些可视化小操作(是否显示、更改颜色等)、比较简单的灯光以及背景设置、一些基本功能(模型列表、操作日志等)。
一、整体框架
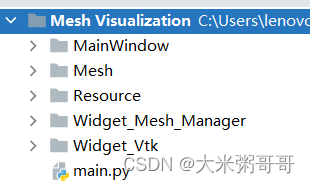
- MainWindow:主窗体。包含缩小、放大、关闭、菜单栏等
- Mesh:三角网格,包含网格的读取、保存、网格的一些基本属性
- Resource:资源文件夹。包含界面样式和图片
- Widget_Mesh_Manager:界面管理,内含多个子控件。包含模型列表、网格信息显示界面、日志界面
- Widget_Vtk:模型渲染界面,就是VTK渲染窗口。包含VTK显示代码actor、mapper、light等
关于界面 统一采用一个界面三个文件:
- xxx.ui (可编辑的界面,pyqt插件可打开)
- ui_xxx.py (ui界面转的py界面文件) 参数设置
$FileName$ -o ui_$FileNameWithoutExtension$.py -x - xxx.py (主要在这里写代码)
1.1 三角形网格
三角形网格Mesh文件夹中含有两个文件:
- load_and_save.py 读取保存三角形网格,目前只支持obj文件,可用现有的库代替
/todo - TriMesh.py 三角形网格类,保存三角形网格的文件名、格式、顶点、面片等信息,
每个网格都有一个独立vtk actor,方便操作以及显示
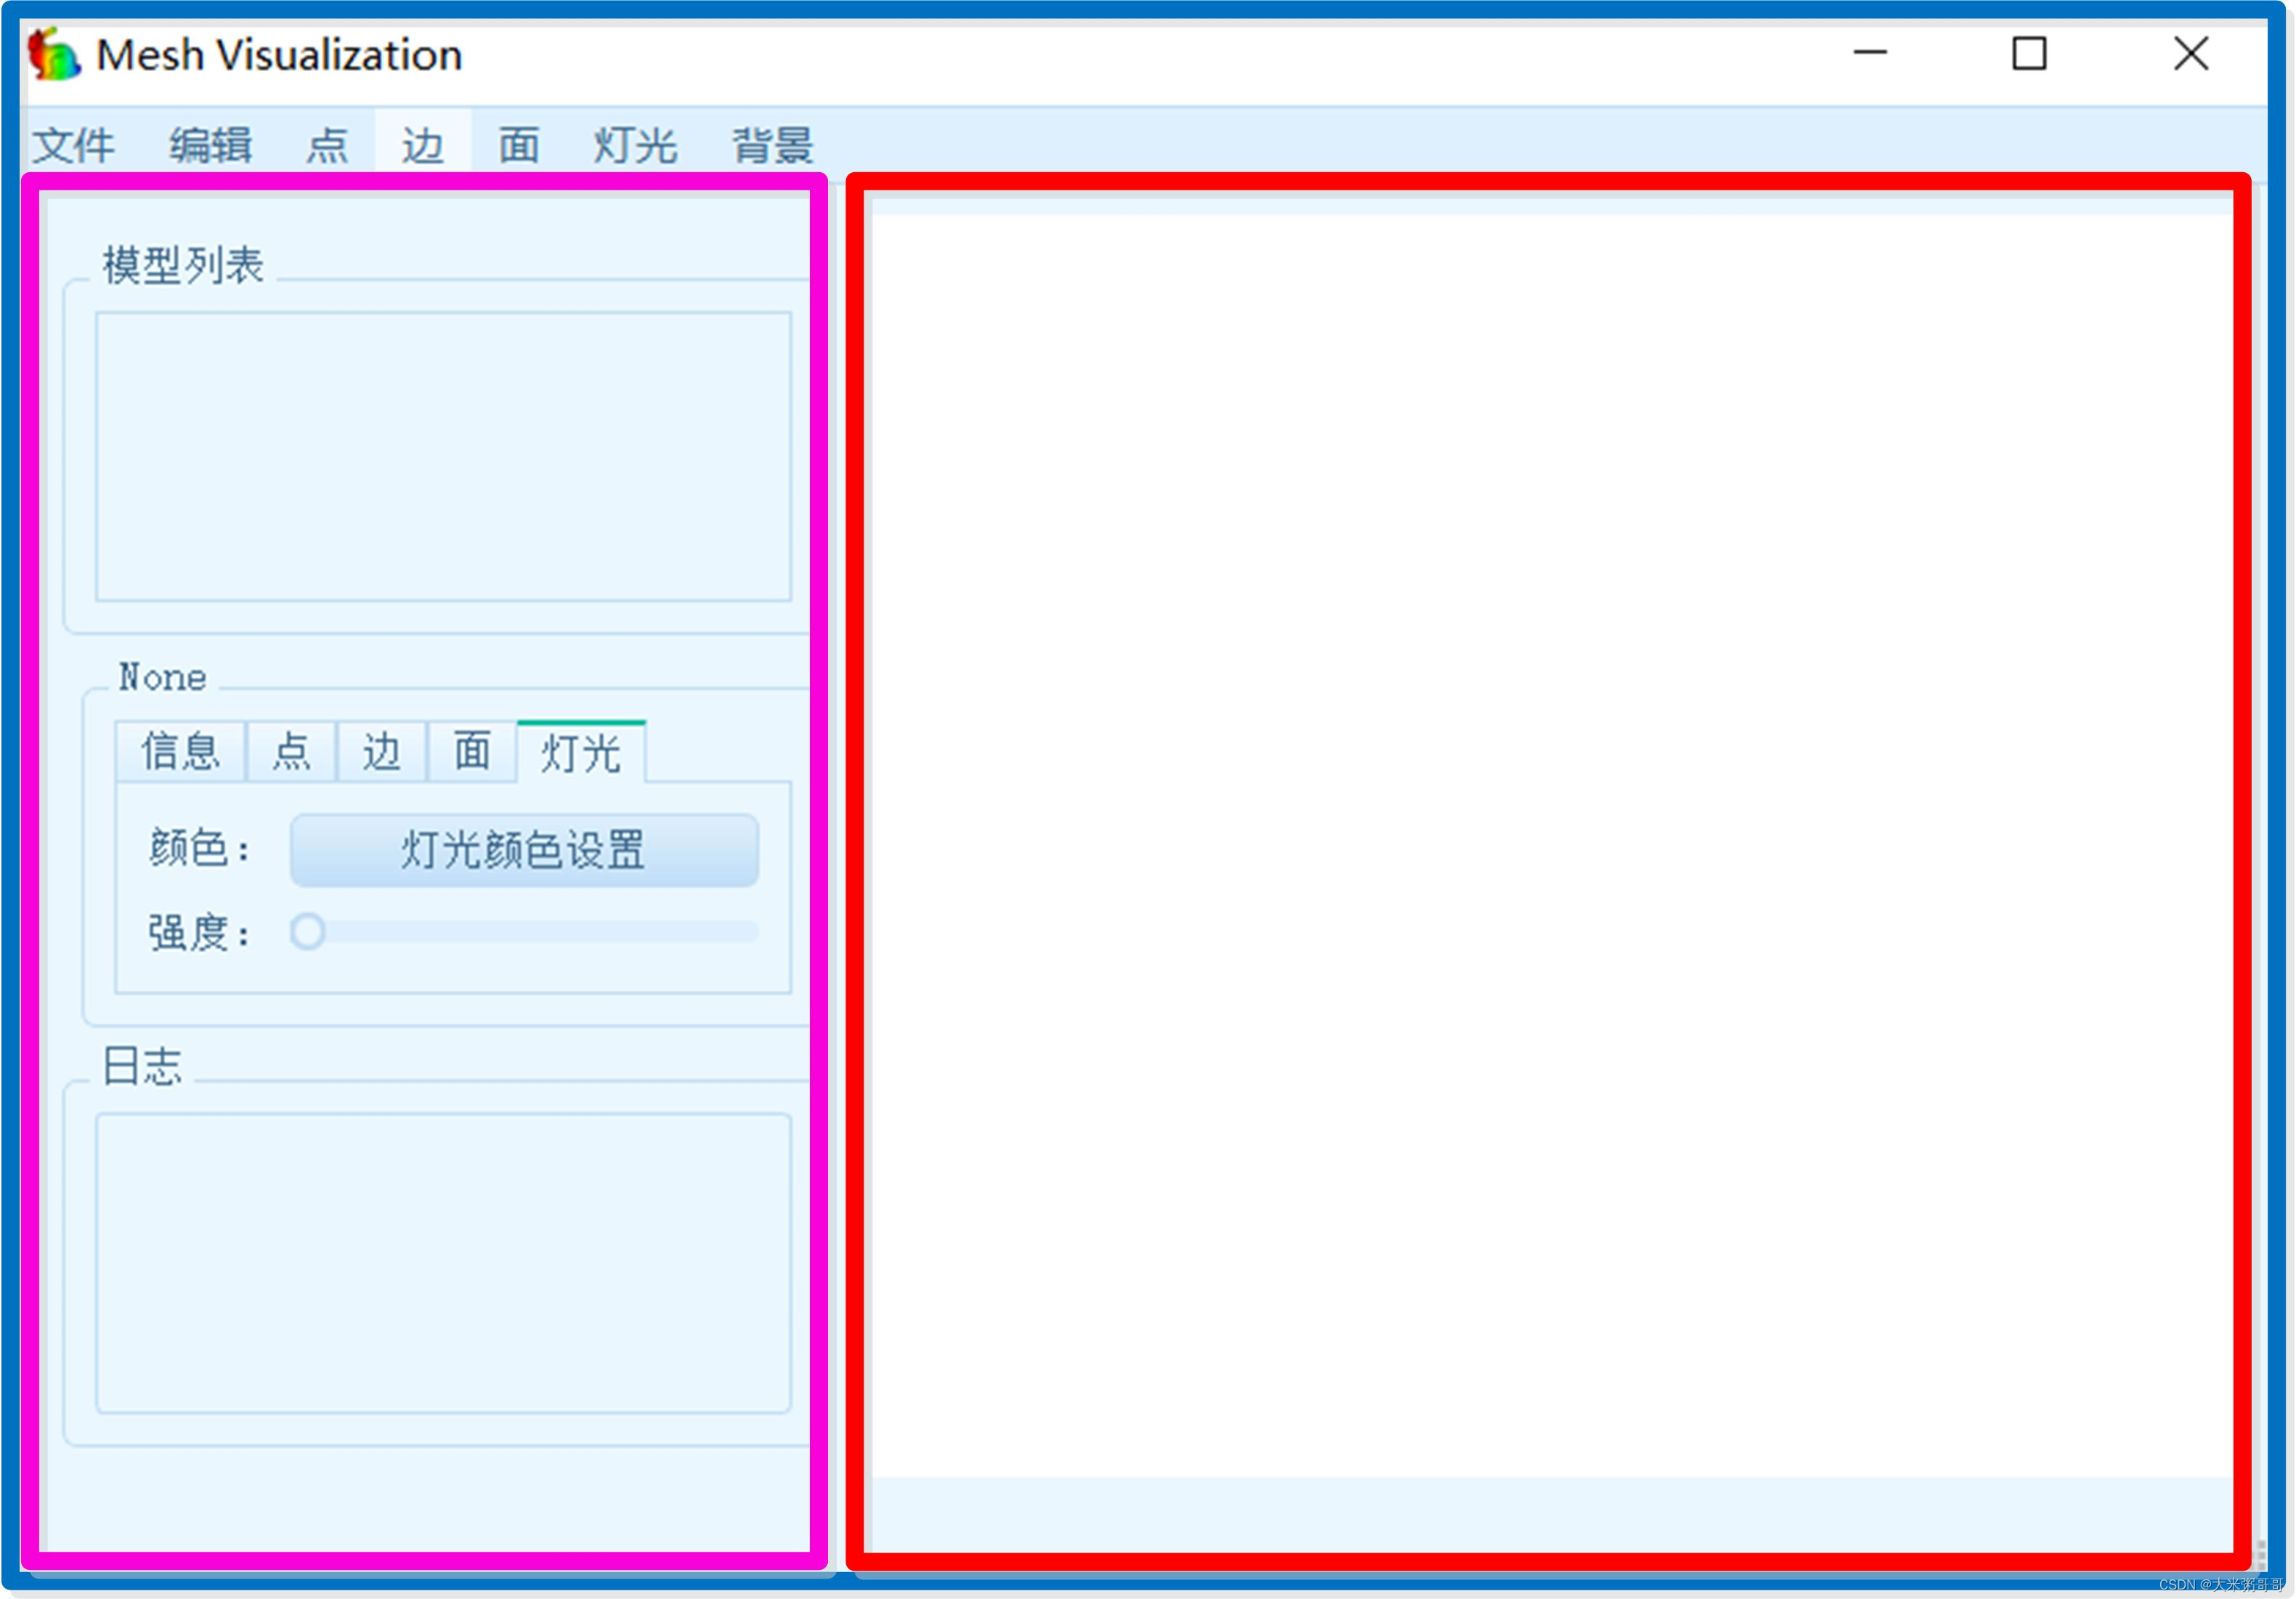
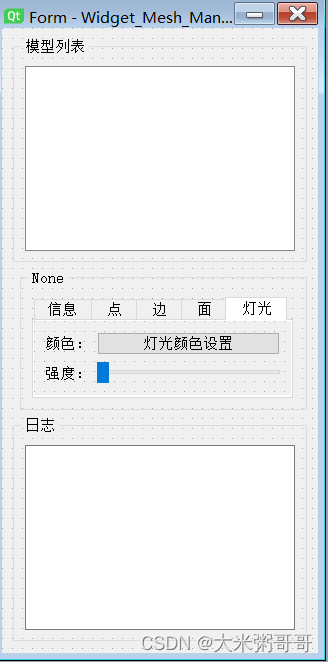
1.2 界面管理
- 模型列表:显示打开的每一个模型,可以进行模型间的切换显示
- 模型信息:包括顶点和面片数量,可修改点、边、面以及灯光颜色
- 日志显示:记录每一步操作,但目前只显示部分操作
/todo
1.3 VTK可视化界面
主要用于模型渲染显示 (self.vtk_widget = QVTKRenderWindowInteractor(self)):
- mapper 映射器,将数据转为图形数据
- renderer 渲染器,将三维图形转为二维图片
- light 灯光,只设置了一个灯光
/todo - 交互方式
vtk.vtkInteractorStyleTrackballCamera()
其中actor每个三角形网格一个,方便单独操作
二、核心源码
2.1 三角形网格:TriMesh类
import ntpath
import numpy as np
from scipy.sparse import csr_matrix
from Mesh.load_and_save import load_obj, load_obj_with_edges
import vtkmodules.all as vtkclass TriMesh:# 0.文件filename = None  # 文件名path = None  # 路径file = None  # 完整路径format = None  # 格式# 1.基本属性vs = None     # 顶点faces = None  # 面片name = None   # 自定义名称actor = None  # 保存可视化的数据# 2.进阶属性point_adjacency_matrix = None  # 点的邻接矩阵edges = Noneedge_labels = Noneedge_actor = Nonedef __init__(self, file=None, mode=None):# 赋值self.path = ntpath.split(file)[0]self.filename = ntpath.split(file)[1]self.file = fileself.format = self.filename.split('.')[-1]self.actor = vtk.vtkActor()self.edge_actor = vtk.vtkActor()# 读取if self.format == 'obj':if mode == 1:self.vs, self.faces, self.edges, self.edge_labels = load_obj_with_edges(file)else:self.vs, self.faces = load_obj(file)else:print('Unsupported format')return# 计算点邻接矩阵self.point_adjacency_matrix = self.computer_point_adjacency_matrix()def computer_point_adjacency_matrix(self):num = len(self.vs)row = np.hstack([self.faces[:, 0], self.faces[:, 1], self.faces[:, 2]])col = np.hstack([self.faces[:, 1], self.faces[:, 2], self.faces[:, 0]])value = 0 * row + 1point_adjacency_matrix = csr_matrix((value, (row, col)), shape=(num, num)).toarray()return point_adjacency_matrixdef boundary_edge(self):edge_cnt = self.point_adjacency_matrix + self.point_adjacency_matrix.Ttwo_point = np.where(edge_cnt == 1)return two_pointdef creat_edges(self):edge2key = dict()edges = []for face_id, face in enumerate(self.faces):faces_edges = []for i in range(3):cur_edge = (face[i], face[(i + 1) % 3])faces_edges.append(cur_edge)for idx, edge in enumerate(faces_edges):edge = tuple(sorted(list(edge)))faces_edges[idx] = edgeif edge not in edge2key:edge2key[edge] = 1edges.append(list(edge))self.edges = np.array(edges, dtype=np.int32)if __name__ == '__main__':cs = TriMesh('../00ceshi/1.obj')# print(cs.point_adjacency_matrix)point = cs.boundary_edge()print(1)
2.2 界面Widget_Mesh_Manager
from PyQt5.QtCore import *
from PyQt5.QtWidgets import *
from Widget_Mesh_Manager.ui_Widget_Mesh_Manager import Ui_Widget_Mesh_Manager
import datetime
from Mesh.TriMesh import TriMesh
import numpy as npclass Widget_Mesh_Manager(QWidget, Ui_Widget_Mesh_Manager):TriMesh_list = []mesh_show = pyqtSignal(int)def __init__(self, parent=None):super(Widget_Mesh_Manager, self).__init__(parent)self.setupUi(self)# 滚动条设置self.hSlider_pointSize.setMinimum(1)       # 点self.hSlider_pointSize.setMaximum(9)self.hSlider_pointSize.setSingleStep(1)# self.hSlider_pointSize.setTickInterval(2)     # 带有样式 不显示刻度# self.hSlider_pointSize.setTickPosition(QSlider.TicksBelow)self.hSlider_edgeSize.setMinimum(1)        # 边self.hSlider_edgeSize.setMaximum(9)self.hSlider_edgeSize.setSingleStep(1)self.hSlider_lightIntensity.setMinimum(0)  # 灯光self.hSlider_lightIntensity.setMaximum(10)self.hSlider_lightIntensity.setSingleStep(1)# 按钮点击函数self.initBtn()# UI布局self.initUI()def initBtn(self):passdef initUI(self):# tableWidgetself.tableWidget.setColumnCount(1)  # 列数self.tableWidget.horizontalHeader().setSectionResizeMode(QHeaderView.Stretch)  # 所有列自动拉伸,充满界面self.tableWidget.setSelectionMode(QAbstractItemView.SingleSelection)           # 设置只能选中一行self.tableWidget.setEditTriggers(QTableView.NoEditTriggers)                    # 不可编辑self.tableWidget.setSelectionBehavior(QAbstractItemView.SelectRows)            # 设置只有行选中self.tableWidget.verticalHeader().setVisible(False)         # 隐藏列表头self.tableWidget.horizontalHeader().setVisible(False)       # 隐藏行def addMesh(self, mesh: TriMesh):# 添加到listself.TriMesh_list.append(mesh)# 添加到uirow = self.tableWidget.rowCount()self.tableWidget.insertRow(row)item = QTableWidgetItem(mesh.filename)self.tableWidget.setItem(row, 0, item)self.tableWidget.clearFocus()self.tableWidget.selectRow(row)     # 新加入的行被选中# item.setSelected(True)# 刷新Infoself.showMesh_Info(row)def addLog(self, info):time = datetime.datetime.now().strftime("%Y-%m-%d %H:%M:%S: ")self.textEdit.append(time + info)def showMesh_Info(self, mesh_id):mesh = self.TriMesh_list[mesh_id]self.groupBox.setTitle(mesh.filename)self.label_vs_num.setText('顶点个数:' + str(len(mesh.vs)))self.label_face_num.setText('面片个数:' + str(len(mesh.faces)))self.mesh_show.emit(mesh_id)# 重写tableWidget的点击事件def on_tableWidget_cellClicked(self, row, col):self.showMesh_Info(row)pass
2.3 VTK可视化
from PyQt5.QtWidgets import *
from Widget_Vtk.ui_Widget_Vtk import Ui_Widget_Vtk
from Mesh.TriMesh import TriMesh
import numpy as np
from vtkmodules.qt.QVTKRenderWindowInteractor import QVTKRenderWindowInteractor
import vtkmodules.all as vtkclass Widget_Vtk(QWidget, Ui_Widget_Vtk):mapper = None    # 映射器 数据actor = None     # 演员 get mapperrenderer = None  # 渲染light = None     # 灯光 只有一个def __init__(self, parent=None):super(Widget_Vtk, self).__init__(parent)self.setupUi(self)#self.vtk_widget = QVTKRenderWindowInteractor(self)self.colors = np.array([[0, 0, 255], [0, 255, 255], [255, 0, 255], [0, 255, 0],[255, 255, 0], [255, 0, 0], [100, 180, 51], [255, 150, 51]])self.colors = np.array([[80, 136, 240], [0, 255, 255], [255, 0, 255], [0, 255, 0],[255, 255, 0], [255, 0, 0], [70, 70, 220], [255, 150, 51], [0,0,0]])self.colors1 = np.array([[180, 90, 90], [121, 185, 128], [90, 90, 180], [180, 180, 0],[255, 255, 0], [255, 0, 0], [100, 255, 51], [255, 150, 51]])# 初始化renderself.renderer = vtk.vtkRenderer()self.renderer.SetBackground(1, 1, 1)self.vtk_widget.GetRenderWindow().AddRenderer(self.renderer)self.interactor = self.vtk_widget.GetRenderWindow().GetInteractor()interactor_style = vtk.vtkInteractorStyleTrackballCamera()self.interactor.SetInteractorStyle(interactor_style)self.interactor.Initialize()# 初始化lightself.light = vtk.vtkLight()self.light.SwitchOff()      # 默认关闭self.renderer.AddLight(self.light)self.vtk_widget.Render()self.vtk_widget.Start()self.renderer.ResetCamera()self.vtk_widget.update()def resizeEvent(self, e):"""重写窗口移动事件"""self.vtk_widget.resize(self.size())def removeAllActors(self):al = self.renderer.GetActors()n = al.GetNumberOfItems()al.InitTraversal()for i in range(n):actor = al.GetNextActor()self.renderer.RemoveActor(actor)self.vtk_widget.update()def showTrimesh(self, mesh: TriMesh):# 添加点points = vtk.vtkPoints()for v in mesh.vs:points.InsertNextPoint(v)# 添加面片polys = vtk.vtkCellArray()for f in mesh.faces:polys.InsertNextCell(len(f), f)# 创建PolyDatacube = vtk.vtkPolyData()cube.SetPoints(points)cube.SetPolys(polys)# 创建 mapper 和 actormapper = vtk.vtkPolyDataMapper()mapper.ScalarVisibilityOff()mapper.SetInputData(cube)mesh.actor.SetMapper(mapper)mesh.actor.GetProperty().SetColor([0.5, 0.5, 0.5])self.renderer.AddActor(mesh.actor)self.renderer.ResetCamera()self.vtk_widget.update()def show_boundary_edge(self, mesh: TriMesh):# 添加点points = vtk.vtkPoints()for v in mesh.vs:points.InsertNextPoint(v)pa, pb = mesh.boundary_edge()# 添加边edges = vtk.vtkCellArray()for i in range(len(pa)):edges.InsertNextCell(2, np.array([pa[i], pb[i]]))# 添加边界mapper2 = vtk.vtkPolyDataMapper()cube1 = vtk.vtkPolyData()cube1.SetPoints(points)cube1.SetLines(edges)mapper2.SetInputData(cube1)mesh.edge_actor.SetMapper(mapper2)# mesh.edge_actor.GetProperty().SetEdgeColor(0, 0, 1)# mesh.edge_actor.GetProperty().SetEdgeVisibility(1)mesh.edge_actor.GetProperty().SetLineWidth(2)self.renderer.AddActor(mesh.edge_actor)self.vtk_widget.update()def show_mesh_color(self, mesh: TriMesh):# 添加点points = vtk.vtkPoints()for v in mesh.vs:points.InsertNextPoint(v)# 添加面片polys = vtk.vtkCellArray()cellColor = vtk.vtkFloatArray()for f in mesh.faces:polys.InsertNextCell(len(f), f)cellColor.InsertNextValue(mesh.vs[f[0]][0])# 创建PolyDatacube = vtk.vtkPolyData()cube.SetPoints(points)cube.SetPolys(polys)cube.GetCellData().SetScalars(cellColor)# 创建 mapper 和 actorself.mapper = vtk.vtkPolyDataMapper()self.mapper.SetScalarRange(min(mesh.vs[:, 0]), max(mesh.vs[:, 0]))self.mapper.SetInputData(cube)mesh.actor.SetMapper(self.mapper)mesh.actor.GetProperty().SetEdgeVisibility(1)self.vtk_widget.update()def show_point_color(self, mesh: TriMesh, seg=[]):# 添加点points = vtk.vtkPoints()pColor = vtk.vtkFloatArray()for v in mesh.vs:points.InsertNextPoint(v)# id = np.random.randint(0, 2)pColor.InsertNextValue(v[0])if len(seg) > 0:pColor = vtk.vtkFloatArray()for s in seg:pColor.InsertNextValue(s)# 添加面片polys = vtk.vtkCellArray()for f in mesh.faces:polys.InsertNextCell(len(f), f)# 创建PolyDatacube = vtk.vtkPolyData()cube.SetPoints(points)cube.SetPolys(polys)cube.GetPointData().SetScalars(pColor)mapper = vtk.vtkPolyDataMapper()mapper.SetScalarRange(min(mesh.vs[:, 2]), max(mesh.vs[:, 2]))mapper.SetInputData(cube)mesh.actor.SetMapper(mapper)mesh.actor.GetProperty().SetColor([0.5, 0.5, 0.5])self.vtk_widget.update()def show_mesh_seg(self, mesh: TriMesh, seg):# 添加点points = vtk.vtkPoints()for v in mesh.vs:points.InsertNextPoint(v)# 添加面片polys = vtk.vtkCellArray()cellColor = vtk.vtkUnsignedCharArray()cellColor.SetNumberOfComponents(3)for f in mesh.faces:polys.InsertNextCell(len(f), f)for s in seg:c = self.colors[s]cellColor.InsertNextTuple(c)# 创建PolyDatacube = vtk.vtkPolyData()cube.SetPoints(points)cube.SetPolys(polys)cube.GetCellData().SetScalars(cellColor)# 创建 mappermapper = vtk.vtkPolyDataMapper()mapper.SetColorModeToDefault()  # 需要设置为默认颜色Modemapper.SetInputData(cube)mesh.actor.SetMapper(mapper)self.vtk_widget.update()def show_points(self, mesh: TriMesh):# 添加点points = vtk.vtkPoints()for v in mesh.vs:points.InsertNextPoint(v)vs = vtk.vtkPolyData()vs.SetPoints(points)# 生成顶点vertex = vtk.vtkVertexGlyphFilter()vertex.SetInputData(vs)# 创建 mapper 和 actormapper = vtk.vtkPolyDataMapper()mapper.SetInputConnection(vertex.GetOutputPort())mesh.actor.SetMapper(mapper)mesh.actor.GetProperty().SetColor([0, 0, 0])mesh.actor.GetProperty().SetPointSize(5)self.vtk_widget.update()def saveToimage(self):from vtkmodules.vtkRenderingCore import vtkWindowToImageFilterfrom vtkmodules.vtkIOImage import (vtkBMPWriter,vtkJPEGWriter,vtkPNGWriter,vtkPNMWriter,vtkPostScriptWriter,vtkTIFFWriter)im_filter = vtkWindowToImageFilter()                   #im_filter.SetInput(self.vtk_widget.GetRenderWindow())  # QVTKRenderWindowInteractorim_filter.SetScale(3)                                  #im_filter.SetInputBufferTypeToRGBA()writer = vtkBMPWriter()#writer = vtkPostScriptWriter()writer.SetFileName('cs.bmp')#writer.SetFileName('cs.ps')writer.SetInputConnection(im_filter.GetOutputPort())writer.Write()def showTrimesh_with_edge(self, mesh: TriMesh):# 添加点points = vtk.vtkPoints()for v in mesh.vs:points.InsertNextPoint(v)# 添加面片c = 255face_color = [c, c, c]polys = vtk.vtkCellArray()cellColor = vtk.vtkUnsignedCharArray()cellColor.SetNumberOfComponents(3)for f in mesh.faces:polys.InsertNextCell(len(f), f)cellColor.InsertNextTuple(face_color)# 添加边 和 边的颜色edges = vtk.vtkCellArray()edge_colors = vtk.vtkUnsignedCharArray()edge_colors.SetNumberOfComponents(3)for e in mesh.edges:edges.InsertNextCell(2, e)for edge_labels in mesh.edge_labels:# edge_colors.InsertNextTuple(self.colors[edge_labels])  # colors1edge_colors.InsertNextTuple(self.colors[edge_labels])# 创建PolyDatacube = vtk.vtkPolyData()cube.SetPoints(points)cube.SetPolys(polys)# cube.SetLines(edges)cube.GetCellData().SetScalars(cellColor)# 细分loop = vtk.vtkLoopSubdivisionFilter()# loop = vtk.vtkButterflySubdivisionFilter()# loop = vtk.vtkLinearSubdivisionFilter()loop.SetInputData(cube)loop.SetNumberOfSubdivisions(0)loop.Update()print(loop.GetOutput().GetNumberOfPolys())# 平滑smoothFilter = vtk.vtkSmoothPolyDataFilter()# smoothFilter = vtk.vtkWindowedSincPolyDataFilter()smoothFilter.SetInputConnection(loop.GetOutputPort())# smoothFilter.SetInputData(cube)smoothFilter.SetNumberOfIterations(1)  # 控制平滑次数,次数越大平滑越厉害smoothFilter.Update()# 创建 mapper 和 actorself.mapper = vtk.vtkPolyDataMapper()self.mapper.SetColorModeToDefault()     # 需要设置为默认颜色Mode# self.mapper.SetInputData(cube)# self.mapper.SetInputConnection(loop.GetOutputPort())self.mapper.SetInputConnection(smoothFilter.GetOutputPort())print(smoothFilter.GetOutput().GetNumberOfPolys())self.actor = vtk.vtkActor()self.actor.SetMapper(self.mapper)# 添加边self.mapper2 = vtk.vtkPolyDataMapper()cube1 = vtk.vtkPolyData()cube1.SetPoints(points)# cube1.SetPolys(edges)cube1.SetLines(edges)cube1.GetCellData().SetScalars(edge_colors)self.mapper2.SetInputData(cube1)self.actor2 = vtk.vtkActor()self.actor2.SetMapper(self.mapper2)# self.actor2.GetProperty().SetEdgeColor(0, 0, 1)self.actor2.GetProperty().SetEdgeVisibility(1)self.actor2.GetProperty().SetLineWidth(4)# 显示self.vtk_widget.Render()self.vtk_widget.Start()# self.renderer.self.renderer = vtk.vtkRenderer()self.renderer.SetBackground(0.7, 0.7, 0.7)self.renderer.SetBackground2(1, 1, 1)self.renderer.SetGradientBackground(1)# 灯光myLight = vtk.vtkLight()# myLight.SetColor(1, 1, 1)  # 设置灯光的颜色,以RGB的形式指定颜色# myLight.SetPosition(100, 100, 100)  # 设灯光照位置myLight.SetLightType(vtk.VTK_LIGHT_TYPE_HEADLIGHT)#vtk.VTK_LIGHT_TYPE_SCENE_LIGHT#vtk.VTK_LIGHT_TYPE_CAMERA_LIGHT# myLight.SetFocalPoint(self.renderer.GetActiveCamera().GetFocalPoint())  # 设置灯光焦点myLight.SetIntensity(1)      # 可视化边的时候设置为0.9# myLight.SwitchOff()self.renderer.AddLight(myLight)  # 因为renderer里可以有多个灯光,所以是AddLight() 而不是 SetLight()# self.renderer.Setself.vtk_widget.GetRenderWindow().AddRenderer(self.renderer)self.renderer.AddActor(self.actor)self.renderer.AddActor(self.actor2)self.renderer.ResetCamera()self.vtk_widget.update()def cs(self):# 三角网格vs = np.array([[-1, 1, -0.5],[-1, 0, 0],[-1, -1, -0.5],[0, 0.3, 0],[0, -0.3, 0],[0.5, 0, 0.5]], dtype=np.float32)  # 0.5 -0.5faces = np.array([[4, 1, 3], [4, 1, 2], [0, 3, 1], [3, 5, 4]], dtype=np.int16)# 颜色c = np.array([[0, 1, 1], [0.5, 1, 0.5], [0.5, 1, 0.5], [1, 1, 0.5]]) * 255# 添加点points = vtk.vtkPoints()for v in vs:points.InsertNextPoint(v)# 添加面片polys = vtk.vtkCellArray()for f in faces:polys.InsertNextCell(3, f)cellColor = vtk.vtkUnsignedCharArray()cellColor.SetNumberOfComponents(3)for tmp in c:cellColor.InsertNextTuple(tmp)# 创建PolyDatacube = vtk.vtkPolyData()cube.SetPoints(points)cube.SetPolys(polys)cube.GetCellData().SetScalars(cellColor)# 细分l = vtk.vtkLinearSubdivisionFilter()l.SetInputData(cube)l.SetNumberOfSubdivisions(1)l.Update()loop = vtk.vtkLoopSubdivisionFilter()#loop.SetInputData(l.GetOutputPort())loop.SetInputConnection(l.GetOutputPort())loop.SetNumberOfSubdivisions(5)loop.Update()# 创建Mappermapper = vtk.vtkPolyDataMapper()mapper.SetColorModeToDefault()mapper.SetInputData(cube)mapper.SetInputConnection(loop.GetOutputPort())# 创建actoractor = vtk.vtkActor()actor.SetMapper(mapper)# actor.GetProperty().SetColor([1, 1, 1])# actor.GetProperty().SetEdgeColor(0, 0, 0)actor.GetProperty().SetEdgeVisibility(0)# 灯光myLight = vtk.vtkLight()myLight.SetColor(1, 1, 1)  # 设置灯光的颜色,以RGB的形式指定颜色myLight.SetPosition(0, 0, 1)myLight.SetLightType(vtk.VTK_LIGHT_TYPE_SCENE_LIGHT)# vtk.VTK_LIGHT_TYPE_SCENE_LIGHT# vtk.VTK_LIGHT_TYPE_CAMERA_LIGHTmyLight.SetFocalPoint(self.renderer.GetActiveCamera().GetFocalPoint())  # 设置灯光焦点myLight.SetIntensity(0.5)  # 可视化边的时候设置为0.9# myLight.SwitchOff()self.renderer.AddLight(myLight)  # 因为renderer里可以有多个灯光,所以是AddLight() 而不是 SetLight()self.renderer.AddActor(actor)self.renderer.ResetCamera()self.vtk_widget.update()
2.4 main
from PyQt5.QtGui import *
from PyQt5.QtWidgets import *
from MainWindow.MainWindow import MainWindow
import sysif __name__ == '__main__':app = QApplication(sys.argv)# 加载图标app.setWindowIcon(QIcon('./Resource/rabbit.ico'))# 加载样式s = './Resource/blue.css'with open(s, "r") as f:app.setPalette(QPalette(QColor('#EAF7FF')))app.setStyleSheet(f.read())# 显示mainWindow = MainWindow()mainWindow.show()sys.exit(app.exec_())
这篇关于【三维几何学习】自制简单的网格可视化软件 — Mesh Visualization的文章就介绍到这儿,希望我们推荐的文章对编程师们有所帮助!


