本文主要是介绍Webots中使用大疆“御”2专业版-DJI-Mavic 2 Pro进行无人机仿真实践,希望对大家解决编程问题提供一定的参考价值,需要的开发者们随着小编来一起学习吧!
兼顾体积和性能的超强无人机大疆-“御”-DJI-Mavic现在有了Webots仿真版,可以零成本愉快玩耍了。

控制器支持C++、Python,并全面支持ROS。
DJI-Tello:https://blog.csdn.net/ZhangRelay/article/details/99291395
Webots-ROS:https://blog.csdn.net/ZhangRelay/article/details/85247284
将demo下载到对应文件下:

第一次使用时,控制器需要编译,否则会出现无控制器报错~
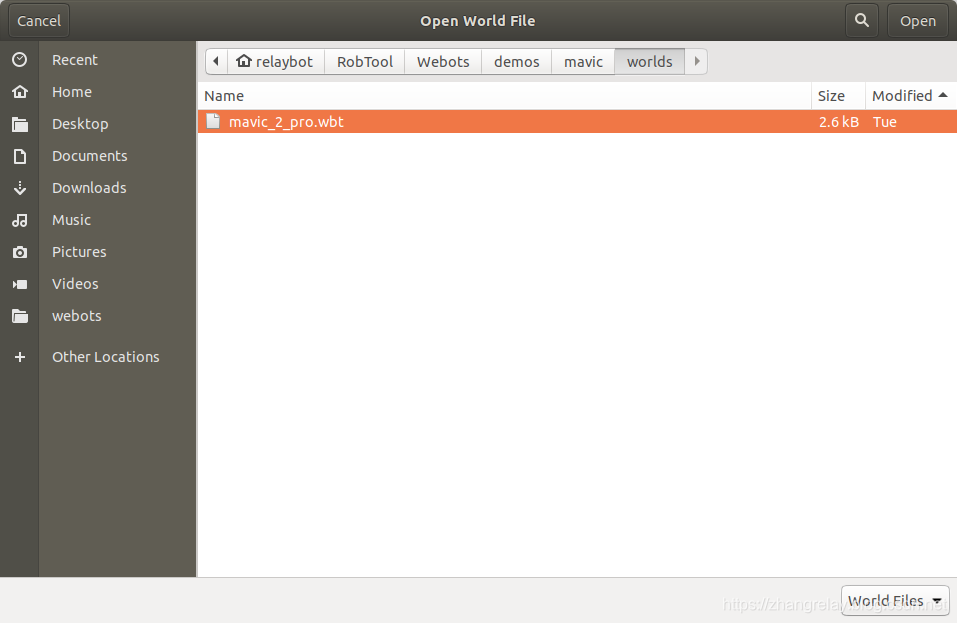
使用Mavic:
打开Webots,单击File->Open World->mavic_2_pro.wbt。
这时候会加载如下环境:

如果报错~请在右侧程序编辑部分,编译代码,生成控制器即可。
使用键盘就可以控制Mavic 2 pro了。

// Constants, empirically found.const double k_vertical_thrust = 68.5; // with this thrust, the drone lifts.const double k_vertical_offset = 0.6; // Vertical offset where the robot actually targets to stabilize itself.const double k_vertical_p = 3.0; // P constant of the vertical PID.const double k_roll_p = 50.0; // P constant of the roll PID.const double k_pitch_p = 30.0; // P constant of the pitch PID.// Variables.double target_altitude = 1.0; // The target altitude. Can be changed by the user.初始参数和配置,可以修改。如果使用键盘控制而非手柄,键盘控制的指令需要调整,修改如下代码:
switch (key) {case WB_KEYBOARD_UP:pitch_disturbance = 2.0;break;case WB_KEYBOARD_DOWN:pitch_disturbance = -2.0;break;case WB_KEYBOARD_RIGHT:yaw_disturbance = 1.3;break;case WB_KEYBOARD_LEFT:yaw_disturbance = -1.3;break;case (WB_KEYBOARD_SHIFT + WB_KEYBOARD_RIGHT):roll_disturbance = -1.0;break;case (WB_KEYBOARD_SHIFT + WB_KEYBOARD_LEFT):roll_disturbance = 1.0;break;case (WB_KEYBOARD_SHIFT + WB_KEYBOARD_UP):target_altitude += 0.05;printf("target altitude: %f [m]\n", target_altitude);break;case (WB_KEYBOARD_SHIFT + WB_KEYBOARD_DOWN):target_altitude -= 0.05;printf("target altitude: %f [m]\n", target_altitude);break;}默认,每次点击按键给出的控制量如上所示,需要修改可以适当调整数值。
当然啦,可以使用OpenCV和OpenAI等进行编程,实现自主飞行。
参考文献,使用ROS加入更多复杂功能,比如SLAM等。留作思考题吧。
https://github.com/omichel/webots/tree/revision/projects/robots/dji/mavic
/** Copyright 1996-2019 Cyberbotics Ltd.** Licensed under the Apache License, Version 2.0 (the "License");* you may not use this file except in compliance with the License.* You may obtain a copy of the License at**     http://www.apache.org/licenses/LICENSE-2.0** Unless required by applicable law or agreed to in writing, software* distributed under the License is distributed on an "AS IS" BASIS,* WITHOUT WARRANTIES OR CONDITIONS OF ANY KIND, either express or implied.* See the License for the specific language governing permissions and* limitations under the License.*//** Description:  Simplistic drone control:* - Stabilize the robot using the embedded sensors.* - Use PID technique to stabilize the drone roll/pitch/yaw.* - Use a cubic function applied on the vertical difference to stabilize the robot vertically.* - Stabilize the camera.* - Control the robot using the computer keyboard.*/#include <math.h>
#include <stdio.h>
#include <stdlib.h>#include <webots/robot.h>#include <webots/camera.h>
#include <webots/compass.h>
#include <webots/gps.h>
#include <webots/gyro.h>
#include <webots/inertial_unit.h>
#include <webots/keyboard.h>
#include <webots/led.h>
#include <webots/motor.h>#define SIGN(x) ((x) > 0) - ((x) < 0)
#define CLAMP(value, low, high) ((value) < (low) ? (low) : ((value) > (high) ? (high) : (value)))int main(int argc, char **argv) {wb_robot_init();int timestep = (int)wb_robot_get_basic_time_step();// Get and enable devices.WbDeviceTag camera = wb_robot_get_device("camera");wb_camera_enable(camera, timestep);WbDeviceTag front_left_led = wb_robot_get_device("front left led");WbDeviceTag front_right_led = wb_robot_get_device("front right led");WbDeviceTag imu = wb_robot_get_device("inertial unit");wb_inertial_unit_enable(imu, timestep);WbDeviceTag gps = wb_robot_get_device("gps");wb_gps_enable(gps, timestep);WbDeviceTag compass = wb_robot_get_device("compass");wb_compass_enable(compass, timestep);WbDeviceTag gyro = wb_robot_get_device("gyro");wb_gyro_enable(gyro, timestep);wb_keyboard_enable(timestep);WbDeviceTag camera_roll_motor = wb_robot_get_device("camera roll");WbDeviceTag camera_pitch_motor = wb_robot_get_device("camera pitch");// WbDeviceTag camera_yaw_motor = wb_robot_get_device("camera yaw");  // Not used in this example.// Get propeller motors and set them to velocity mode.WbDeviceTag front_left_motor = wb_robot_get_device("front left propeller");WbDeviceTag front_right_motor = wb_robot_get_device("front right propeller");WbDeviceTag rear_left_motor = wb_robot_get_device("rear left propeller");WbDeviceTag rear_right_motor = wb_robot_get_device("rear right propeller");WbDeviceTag motors[4] = {front_left_motor, front_right_motor, rear_left_motor, rear_right_motor};int m;for (m = 0; m < 4; ++m) {wb_motor_set_position(motors[m], INFINITY);wb_motor_set_velocity(motors[m], 1.0);}// Display the welcome message.printf("Start the drone...\n");// Wait one second.while (wb_robot_step(timestep) != -1) {if (wb_robot_get_time() > 1.0)break;}// Display manual control message.printf("You can control the drone with your computer keyboard:\n");printf("- 'up': move forward.\n");printf("- 'down': move backward.\n");printf("- 'right': turn right.\n");printf("- 'left': turn left.\n");printf("- 'shift + up': increase the target altitude.\n");printf("- 'shift + down': decrease the target altitude.\n");printf("- 'shift + right': strafe right.\n");printf("- 'shift + left': strafe left.\n");// Constants, empirically found.const double k_vertical_thrust = 68.5;  // with this thrust, the drone lifts.const double k_vertical_offset = 0.6;   // Vertical offset where the robot actually targets to stabilize itself.const double k_vertical_p = 3.0;        // P constant of the vertical PID.const double k_roll_p = 50.0;           // P constant of the roll PID.const double k_pitch_p = 30.0;          // P constant of the pitch PID.// Variables.double target_altitude = 1.0;  // The target altitude. Can be changed by the user.// Main loopwhile (wb_robot_step(timestep) != -1) {const double time = wb_robot_get_time();  // in seconds.// Retrieve robot position using the sensors.const double roll = wb_inertial_unit_get_roll_pitch_yaw(imu)[0] + M_PI / 2.0;const double pitch = wb_inertial_unit_get_roll_pitch_yaw(imu)[1];const double altitude = wb_gps_get_values(gps)[1];const double roll_acceleration = wb_gyro_get_values(gyro)[0];const double pitch_acceleration = wb_gyro_get_values(gyro)[1];// Blink the front LEDs alternatively with a 1 second rate.const bool led_state = ((int)time) % 2;wb_led_set(front_left_led, led_state);wb_led_set(front_right_led, !led_state);// Stabilize the Camera by actuating the camera motors according to the gyro feedback.wb_motor_set_position(camera_roll_motor, -0.115 * roll_acceleration);wb_motor_set_position(camera_pitch_motor, -0.1 * pitch_acceleration);// Transform the keyboard input to disturbances on the stabilization algorithm.double roll_disturbance = 0.0;double pitch_disturbance = 0.0;double yaw_disturbance = 0.0;int key = wb_keyboard_get_key();while (key > 0) {switch (key) {case WB_KEYBOARD_UP:pitch_disturbance = 2.0;break;case WB_KEYBOARD_DOWN:pitch_disturbance = -2.0;break;case WB_KEYBOARD_RIGHT:yaw_disturbance = 1.3;break;case WB_KEYBOARD_LEFT:yaw_disturbance = -1.3;break;case (WB_KEYBOARD_SHIFT + WB_KEYBOARD_RIGHT):roll_disturbance = -1.0;break;case (WB_KEYBOARD_SHIFT + WB_KEYBOARD_LEFT):roll_disturbance = 1.0;break;case (WB_KEYBOARD_SHIFT + WB_KEYBOARD_UP):target_altitude += 0.05;printf("target altitude: %f [m]\n", target_altitude);break;case (WB_KEYBOARD_SHIFT + WB_KEYBOARD_DOWN):target_altitude -= 0.05;printf("target altitude: %f [m]\n", target_altitude);break;}key = wb_keyboard_get_key();}// Compute the roll, pitch, yaw and vertical inputs.const double roll_input = k_roll_p * CLAMP(roll, -1.0, 1.0) + roll_acceleration + roll_disturbance;const double pitch_input = k_pitch_p * CLAMP(pitch, -1.0, 1.0) - pitch_acceleration + pitch_disturbance;const double yaw_input = yaw_disturbance;const double clamped_difference_altitude = CLAMP(target_altitude - altitude + k_vertical_offset, -1.0, 1.0);const double vertical_input = k_vertical_p * pow(clamped_difference_altitude, 3.0);// Actuate the motors taking into consideration all the computed inputs.const double front_left_motor_input = k_vertical_thrust + vertical_input - roll_input - pitch_input + yaw_input;const double front_right_motor_input = k_vertical_thrust + vertical_input + roll_input - pitch_input - yaw_input;const double rear_left_motor_input = k_vertical_thrust + vertical_input - roll_input + pitch_input - yaw_input;const double rear_right_motor_input = k_vertical_thrust + vertical_input + roll_input + pitch_input + yaw_input;wb_motor_set_velocity(front_left_motor, front_left_motor_input);wb_motor_set_velocity(front_right_motor, -front_right_motor_input);wb_motor_set_velocity(rear_left_motor, -rear_left_motor_input);wb_motor_set_velocity(rear_right_motor, rear_right_motor_input);};wb_robot_cleanup();return EXIT_SUCCESS;
}
这篇关于Webots中使用大疆“御”2专业版-DJI-Mavic 2 Pro进行无人机仿真实践的文章就介绍到这儿,希望我们推荐的文章对编程师们有所帮助!


